Question
How can I add content to the Help Center Request list page activities?
Answer
End users can track their support requests in their user profiles under My activities > Requests. You display additional ticket properties on this page using the Zendesk Guide templating language, Curlybars.
By default, end-users see the Subject, Ticket ID, Created, Last activity, and Status of a ticket when viewing their requests: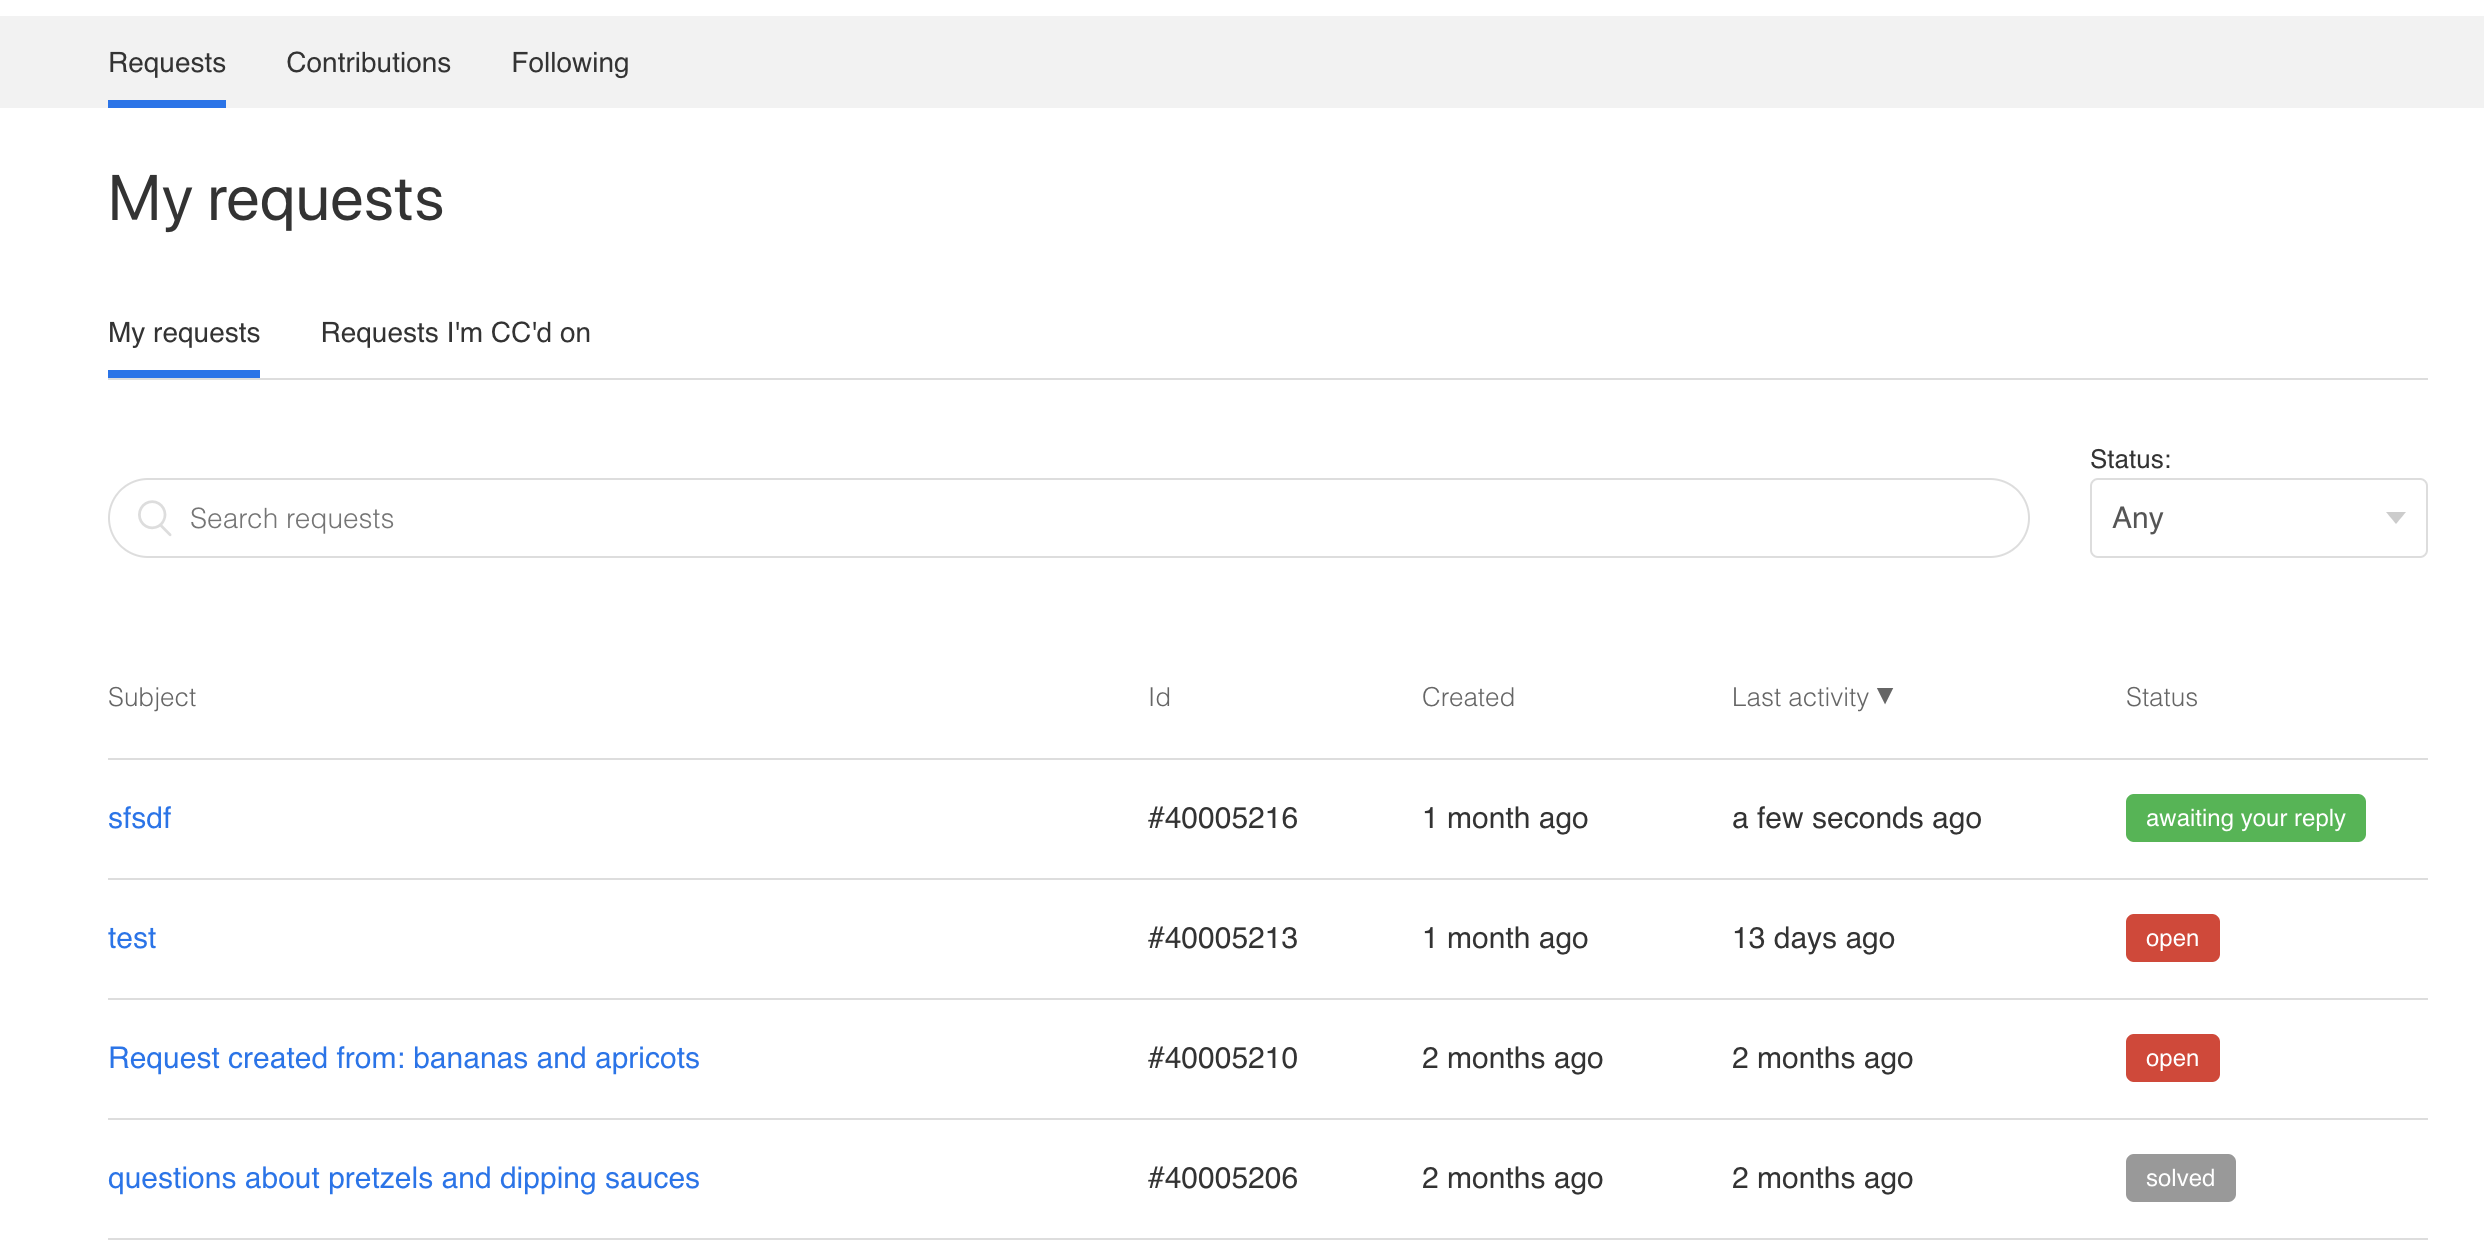
Selecting properties to display
Since the table we're modifying is created with the request object, you can use any of the request object properties to add to the table. A list of the properties and their descriptions is available in our API documentation. Currently, you are not able to update the Activities List table with custom fields.
If you want to add Priority or Type, make sure they're set to be visible to end-users.
Editing the Help Center code
Once you decided on which request object properties you want to display, edit the Help Center code. In this example, we're going to use Priority.
Note: You might notice that existing table data uses translation helpers, such as {{t 'status'}}. For simplicity's sake, we're not going to use them in this example. You can learn more about them in our developer documentation.
- In the Help Center, edit your theme code. For more information on how to edit a Help Center theme, visit Customizing your Help Center theme.
- Select the requests_page.hbs template to modify.
- Locate the activities table in the HTML. Each column has a table header (<th>) and also a corresponding data row (<td>) to display the actual content.
Table Header:
Table Data: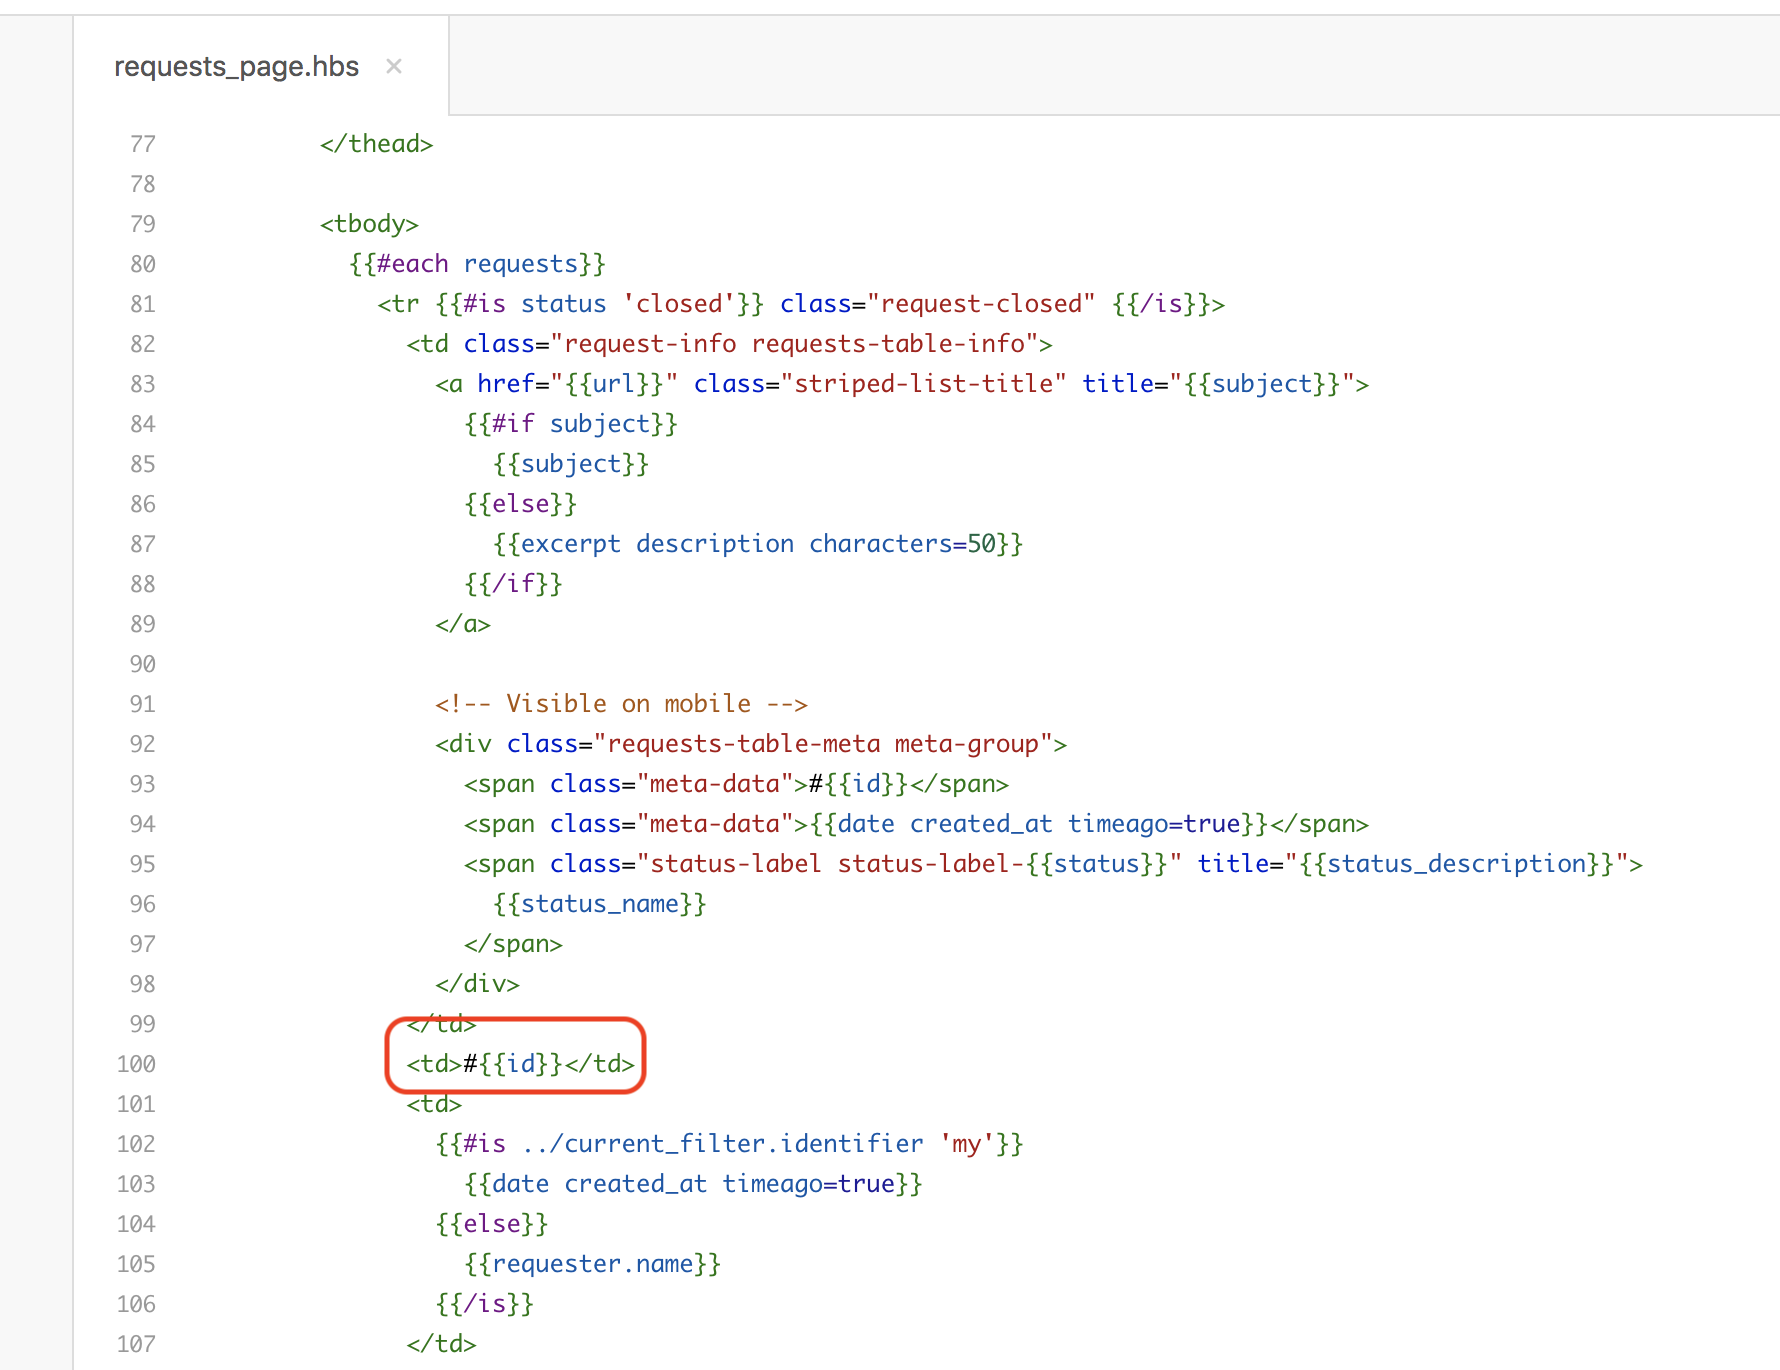
- Add a header row in the appropriate place. I've decided to put the new column last, so I added the header tag and column name after the Status header:
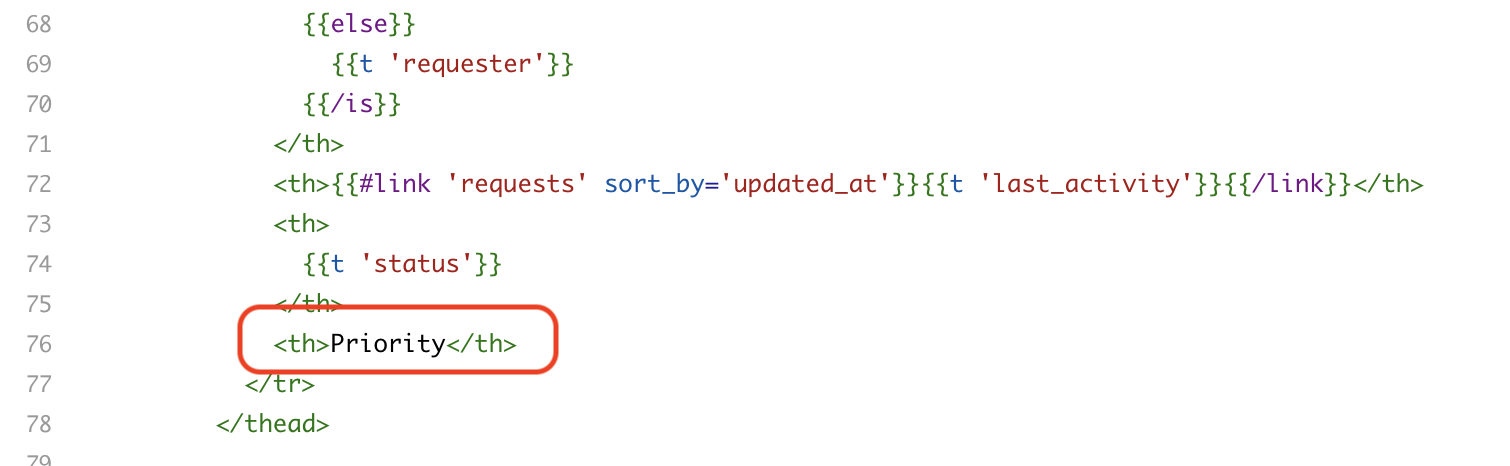
Which then adds the header (without content) to the Activity List table:
-
Add a data row to display the data. Make sure to place the table data in the correct order -- in this case, following the existing Status column.
-
Enter your request object property in the data row you created. In this case, we're using priority_name.
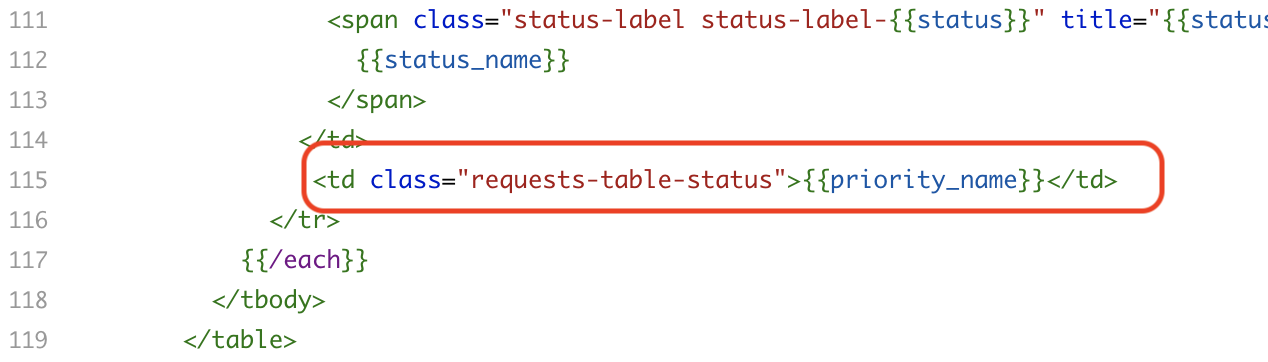
Which then shows the applicable Priority if it exists in the ticket:
- To apply and view your changes, click Publish.
For more information, see the article: Submitting and tracking requests in the help center Customer Portal.