


Answers tell an AI agent how to respond to customer questions. Each answer addresses a single question your customers might ask. Answers are comprised of steps that determine how the AI agent responds to customer input.
This article contains the following sections:
Creating an answer
Creating your own answer
You can build an answer from scratch, starting with an empty answer flow. Answers are comprised of steps that determine how the AI agent responds to customer input. An answer can have multiple steps or a single step, but each answer must have at least one step. When the AI agent matches a customer’s query to an answer, the AI agent displays the behavior defined by the steps in the answer.
An AI agent for messaging can include up to 2,000 steps and 500 answers.
To create an answer for your AI agent
- In Admin Center, click
 Channels in the sidebar, then select AI agents and automation > AI
agents.
Channels in the sidebar, then select AI agents and automation > AI
agents. - Click Manage AI agents for messaging.
- Click the name of the AI agent you want to edit.
- Click the Answers tab, then click Create answer.
- Click Build your own answer, then click Next.

- Enter the Answer name, then click Next.
The name should be a brief, clear description of the issue addressed by the answer. For example, “Password reset,” “Request a refund,” or “Talk to a human."
- Enter Training phrases in the available fields, then click Add phrase if you need
to add more.
Training phrases teach the AI agent how to interpret questions so it can match the most relevant answer. You can add up to 100 additional phrases. See best practices for training phrases.
Alternatively, if you have an intent model assigned to your account, you might see up to three AI-powered suggested intents to use instead of training phrases. You can select one or more intents. If none of the intents work, click Train the AI agent yourself to add training phrases.

- Click Next.
The answer opens in bot builder where you can build out the AI agent’s response.
- Click Add step to create the first step in the answer.
Each answer needs at least one step only.
- Under Choose step in the configuration panel, select a step type, then enter options to
Configure the step.
For information on the available step types, see Understanding answer step types. Click Preview to view the step as a user.
- Add additional steps to the answer as needed.
For more information, see Adding and removing steps in an answer.
- Click Done when you’re finished.
The answer appears as Ready to publish status.
At this point, you can click Create answer to create another answer or you can click Publish AI agent to make your new answer available in the AI agent. Before new or edited answers are available to customers, you must publish the AI agent they’re attached to. When you publish the AI agent, all answers in the Ready to publish state are published.
Creating an answer from a template
You can choose from a number of templates to use as a starting point for an answer. These templates provide examples of common answer topics and construction. While each template has a complete answer framework, most will require you to add information before you publish.
To create an answer from a template
- In Admin Center, click
Channels in the sidebar, then select AI agents and automation > AI
agents.
- Click Manage AI agents for messaging.
- Click the name of the AI agent you want to edit.
- Click the Answers tab, then click Create answer.
- Click the answer template you want to use, then click Next.
The answer opens in bot builder.
- Update the Name and Training phrases for the answer, if
you'd like.

- Click each step in the answer and make changes as needed.
It's a good idea to check each step in the answer to make sure it is complete and has been personalized for your business.
- Click Done when you are finished.
Or, if you are just viewing the answer structure without making any changes, you can click your browser's Back button to return to the Create answer page.
At this point, you can click Create answer to create another answer or you can click Publish AI agent to make your new answer available in the AI agent. Before new or edited answers are available to customers, you must publish the AI agent they’re attached to. When you publish the AI agent, all answers in the Ready to publish state are published.
Adding and removing steps in an answer
Inserting new steps to an answer
In addition to copying and pasting steps into an answer, you can also insert a step between two existing steps in an answer.
When you add a branching step, such as a Present options or Add business hours conditions step, the subsequent, pre-existing steps will be included under the new step's initial branch.
- Present options: Existing steps are included under Option 1.
- Add business hours conditions: Existing steps are included under the When openbranch.
You can't add the Transfer to agent step to an answer before another step. It can be the final step in an answer only.
To add a step into an answer
- Open an answer for editing.
- In bot builder, hover over the line connecting two steps and click the
Add new icon (
 ).
). 
- In the Configuration panel, select the message type to insert into the answer and configure the step as needed.
- Repeat as needed, then click Done when you're ready.
Remember to publish the AI agent to make the updated answer available.
Copying and pasting steps in an answer
You can copy one or more consecutive steps and use them elsewhere within the same answer. You can't copy a step from one answer to another answer. You can paste copied steps only at the end of a branch in the answer, and that branch can't currently end with a Transfer to agent step.
To copy a step (or multiple steps) and paste it elsewhere in an answer
- Open an answer for editing.
- Click the step you want to copy.
- In the configuration panel, click the Options (
 ) menu, then select an option:
- Select Copy this step to copy only the selected step
- Select Copy this and following steps to copy the selected step and all subsequent steps

- Click the Add new icon ( ) or the Add a step icon (
) at the end of the branch.
- Click the Options ( ) menu again, then select
Paste step.

- Click Done when you're finished.
Remember to publish the AI agent to make the updated answer available.
Removing steps from an answer
Deleting a step removes all subsequent steps from the answer. If you want to delete a step but retain the subsequent steps, you can copy and paste the subsequent steps later in the answer.
To delete a step in an answer
- Open an answer for editing.
- In the configuration panel, click the Options () menu.
- Select Delete this step or Delete this and following steps. If there are subsequent steps, click Delete steps in the warning box.
- Click Done when you've finished making your changes.
Remember to publish the AI agent to make the updated answer available.
71 comments
Jonathan
Hello!
I want to ask about the feedback flow question : "Was this helpful?" which previously available in the flow builder is now missing.
How can I enable the feedback flow again in the flow builder?
Thanks!
0
Lisa Tam
Hey Jonathan. We are making changes to the feedback step, making it configurable. This will be implemented in 2 phases:
You can find more information on what's changed in this Help Centre article
0
James Molina
I don't see the option to configure intents anywhere on my existing bot/ flow or if I create a new one. I see the note that it is not available for previous bots but I also don't see the option if I create a new bot.
0
Dane
As discussed on your submitted ticket, and based on the launch date and duration on this article, please wait for two weeks if it's still not available on your account. Don't hesitate to contact us directly if the same issue persisted after two weeks.
0
Luiz Henrique
Hello, I would like to know how to end a flow, before I had at the end of each branch a "Was this helpful?" but now it doesn't show up and I can't publish my bot. thanks
0
Dane
It seems that every blank step now will automatically have that option.
Can you try it on your end, if in case you are still not able to save it, feel free to contact our support directly.
0
Lisa Tam
Hi Luiz,
The feedback flow has been removed as we will be replacing this with a configurable feedback step in the near future. If you wish to replicate this step, you can manually add a Present options step type and configure which options are available to them depending on their feedback.
You can find more information on this and what else has changed in this Help Centre article
0
Shayan Moussawi
Unfortunately the new bot building experience is lacking substantial functionality to work with multiple languages.
Even when automatic translations are enabled, Greeting messages are not translated, intent options are not translated either.
This causes a really inconsistent experience for multi-lingual customers.
1
Lisa Tam
Hi Shayan Moussawi
Greetings messages should be translated if you have auto-translation enabled. What you're describing there sounds like there could be a bug. Please raise a ticket with our Advocate team so we can investigate and get that resolved.
Thanks
0
Daniel V
Hello Team Zendesk.
It would be very, very good if you consider allowing rich text in the Message step, as requested by a colleague in the community (https://support.zendesk.com/hc/en-us/community/posts/4672750330778-Request-for -Enrich-text-on-chat-bot-messages-like-bold-underline-highlight-or-the-possibility-of-including-images-hyperlinks-videos-etc-for-all-suites?page=1#community_comment_4685841766810 )
Today it is not possible to bold or underline words, or put a hyperlink instead of a literal link.
It would be a great improvement that today the competition has it, but Zendezk does not.
Cheers!
Daniel.
3
Milton Lobo
One thing that's a little unclear is if the phrase used for intent is purely used for classification only or if it's also recognised by the bot when an end-user searches.
e.g. In the example you give where you'd use "Request a refund" as the intent, would you also need the same phrase to be included in the "Other ways to ask" list?
1
Gladys Gonzalez
Deseo cambiar el orden de la respuesta. No hay manera hay un criterio que desconozco. Quisiéramos este orden: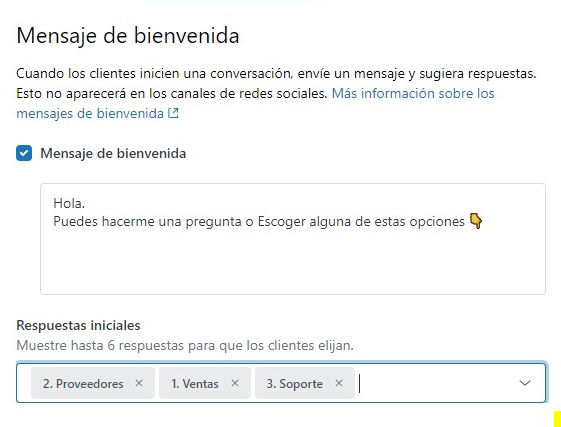
No hay manera de colocar el orden de aparición que uno desea. Cual es el criterio? Puedes agregar la funcionalidad para poder ordenar las respuestas.
0
Dane
The phrase used for the intent is not only for classification but it's also being used by the bot for the actual search.
Hope this helps!
1
Luhung
hi team.. I'm very happy with this answer bot update because it can handle more complex questions when the user writes a question even though it depends on the question we set in each intent..
but I'm a bit confused by the response from the answer bot when the question written by the user is not understood by the answer bot because I found 3 different answers when I tried it..
1. the answer from the bot will display the answer "I didn't get that. Try rephrasing your question or start over."
2. the bot will enter one of the question flows (strange)
3. the bot will try to contact the agent
why bots can display 3 different answers when a user writes something the bot doesn't understand?
4
Shayan Moussawi
I really do like the new bot building experience. However the bot still needs to improve with recognizing intent, especially for longer messages.
It seems that when the bot recognizes a match for two different intent options, the bot falls back to the article recommendation flow because it seems to have trouble deciding which intent is the better match.
In my opinion there are two potential ways to solve this:
1. Give customers the option between deciding which intent option to pick when there’s a conflict with a standard „differentiation flow“.
2. Give Admins the option to configure ‚hard‘ words. Which should always take priority.
For example if „XML“ is defined as a ‚hard word‘ for a certain intent. And the customer mentions this word in his message without any other hard words (but with words that could apply to different intents) the intent with the ‚hard word‘ being mentioned should take priority.
Just allowing admins more control over how to train the bot would help a great deal
3
Jessica Fong
I wonder how auto-translate works for answers.
The above article mentioned "You do not need to add training phrases in multiple languages." So even if customers reach out using traditional Chinese, will the bot still be able to translate it and provide "answers" accordingly? Thanks
0
Diogo Lessa
Hi! I got curious if is there a limit of characters for the Displayed message and for an option in a step? I believe options ideally should be short. What are those limits?
Thanks!
0
Dane
The limit is 128 characters.
1
Daniel Aron
Hi Ashley, yes if automatic translations is enabled, the bot should still be able to provide answers when a user is speaking a language other than the language the flow is built in, provided it is one of the Answer Bot supported languages.
0
Diogo Lessa
Hi Dane
Is it for both, displayed messages and options? Thanks!
0
Dane
I have updated the information previously provided and tested it directly.
For the message it is 4095 characters. While for the option, it is 60 characters. The 128 that I have previously provided was for the text field when transferring to agents.
0
Jen
Hello, my apologies if this has been addressed. Just recently published our chat bot for the first time with separate intents created. We have an issue where it is triggering properly to live chat if we type "Agent" as set up but "agent" with the lower case sensitivity, the bot does not seem to recognize and trigger properly. It keeps starting from the chat tree on an unrelated issue.
I have even created two separate intents/ answers, one for "Agent" and one for "agent" but the "agent" one never seems to work.
Is there a resolution for this?
0
Dane
You can try to use "agent" or other words like "Live person" etc. on the Other Ways to Ask section of the intent.
0
Hiroo Japan
Hi ZD Team,
Sorry if I had missed out, is there any reporting tool in Explore to measure the performance of this function in specific?
So far, the default "Zendesk Answer Bot" report is more or less able track the Flow Builder Bot performance, so is there any reporting tools to track "Answer for a Bot" function?
Please advice, TQ
1
Lauren Stables
Hi, is there an upload feature for ChatBot?
0
Tatjana Kümmerle
Hi,
I am using the chatbot for instagram. But he has many problem with the chatting/blablabla.
So the chatbot answers on "Story Markings" always with "I didn't get that. Try rephrasing your question or start over." - This is so confusing for the people.
Is it possible to configurate the "I didn't get that. Try rephrasing your question or start over."?
So when the chatbot can not answer he should not write a message, just create a ticket?
Is this possible? Or can we change the "I didn't get that. Try rephrasing your question or start over." message and personalize it?
We would love to use the chatbot for "real cases" - but we do not confuse the people...
Best regards,
Tatjana
1
Hiedi Kysther
Hey Hiroo Japan,
Currently the reporting tools available for Flow builder bot is in here: Analyzing your Flow Builder Activity . Our Developers are already aware of the demand for a more custom way of reporting with Flow Builder specifically the bot answers. We don't have an estimated date when it will be launch but it will be available soon! I strongly suggest following, Zendesk Updates, to get a real-time update on new features we are launching. Thanks!
0
Oscar Martinez
Hola, es posible configurar una respuesta "regresar al inicio" en chatbot y poder regresar al "incio" nuevamente ?
0
Beto
¡Hola Iván, muchas gracias por tu pregunta!
Desafortunadamente, me temo que de momento no es posible agregar un botón o respuesta de "regresar al inicio". Pero esta funcionalidad se puede encontrar como una de las respuestas automáticas, cuando el Bot no comprende completamente lo que ha escrito el usuario. Como puede ver en este artículo: Comprender los comportamientos automatizados de la respuesta del bot.
Además a esto, puedo recomendarle agregar su apoyo al siguiente Feedback Post en nuestra Comunidad: Add "Back" step in "Flow Builder". Puede explicar su escenario y mientras más tracción tenga este post, más oportunidades existe de que nuestro equipo de Desarrollo decida implementarlo en el futuro.
¡Espero que esto haya sido de ayuda!
1
Raphaël Péguet - Officers.fr
Hi as a feedback, currently it is impossible to order initials greetings:
1