Recent searches
No recent searches
Creating content filter buttons for your Guide articles

Posted Feb 04, 2021
So how can you set these up for yourself?
Filter buttons like these are not included in Guide. However, you can add them using a little HTML trickery. In the rest of this tip, you'll work through an example.
Step 1: Set up the buttons
- First, you'll add some buttons. Switch to the HTML view of your article (that's the button at the end of the toolbar ).
- Next, add the following HTML code at the position you want to see the buttons (usually near the beginning of the article):
<div id="plan-filter">
Notice that for each button you want, you include the following HTML:
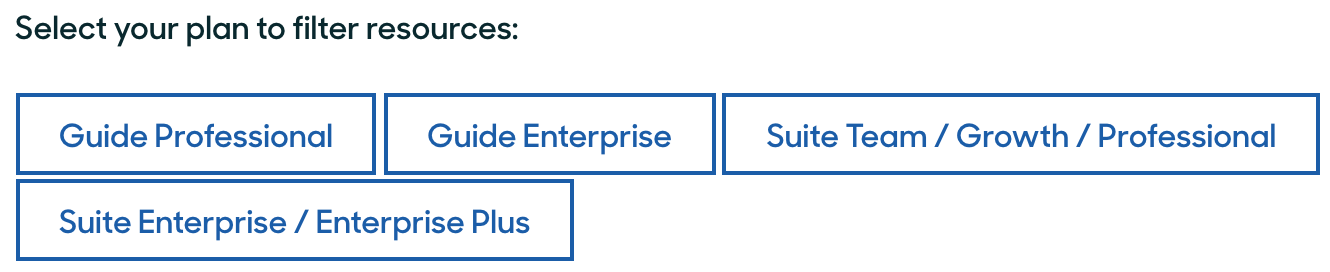
<h4>Select your plan to filter resources: </h4>
<h4>
<span style="vertical-align:text-bottom"><button class="button plan-name" name="plan1" type="button">Plan 1</button> <button class="button plan-name" name="plan2" type="button">Plan 2</button></span>
</h4>
</div><button class="button plan-name" name="button ID" type="button">button label
Where button ID is a unique name for the button (you'll need that in the next section) and button label is the actual text to be displayed on the button. You can include as many buttons as you want. - You'll now be looking at a set of buttons like this:

You can click them, but not much will happen just yet. In the next section, you'll learn how to "wire up" the buttons to make them display only the content you want.
Step 2: Wire up the buttons
Now, wire up the buttons so that they do something useful. For this example, you'll use the following logic:
If the Plan 1 button is clicked, display "You clicked Plan 1".
If the Plan 2 button is clicked, display "You clicked Plan 2".
To wire up the buttons
- Add a HTML class to each element that contains content specific to each plan. The class consists of the text "plan-" and the button ID you created earlier. Using the example code you used for the buttons, if you want to display content only when "Plan 2" is clicked, use the following code:
<p class="plan-plan1" style="display:none">You clicked Plan 1</p>
<p class="plan-plan2" style="display:none">You clicked Plan 2</p>
The style="display:none" setting ensures the text is not displayed by default until you click the button.
Step 3: Test your buttons
At this point, save your article and open a preview or published version of it. Then, click away!
If you have any similar tricks or tips, please let us know. We'd love to hear them.
0
16 comments
Christopher Boerger
Super Cool Thanks Rob! :)
1
Christopher Boerger
Could you add the complete code of an example that works here?
0
Rob Stack
Hi Chris Boerger, here's an example that I just tested in my lab. Hopefully, this gives you a good starting point!
<div class="p">
<div class="note tip">
<span style="font-family:-apple-system, BlinkMacSystemFont, 'Segoe UI', Helvetica, Arial, sans-serif">Click one of the plan buttons below to see resources for each Explore plan level.</span>
</div>
</div>
<div id="plan-filter">
<h4 class="wysiwyg-text-align-left">Choose your Explore plan </h4>
<h4 class="wysiwyg-text-align-left">
<span style="vertical-align:text-bottom"> <button class="button plan-name" name="Lite" type="button">Lite</button> <button class="button plan-name" name="Professional" type="button">Professional</button> <button class="button plan-name" name="Enterprise" type="button">Enterprise</button></span>
</h4>
<hr>
<p class="plan-lite" style="display:none">
The Explore Lite resources are sorted into the following categories:
</p>
<p class="plan-professional">
The Explore Professional resources are sorted into the following categories:
</p>
<p class="plan-enterprise" style="display:none">
The Explore Enterprise resources are sorted into the following categories:
</p>
<hr>
</div>
0
Gonçalo Ventura Martins
Hello Rob Stack! Thanks for your explanation and examples. :)
Is there a way to add links to these kinds of buttons? For example, to open a new article page, or to open a web form?
Thanks!
0
Katerina Papaefthymiou
Hi Rob Stack! Thanks for this resource. I have the same question as Gonçalo. What if we want to have a dedicated page for each plan (like a hub) and redirect users to this page when they click the plan button? Is this possible?
0
Rob Stack
Hi Gonçalo Ventura Martins and Katerina Papaefthymiou thanks for the kind words!

Here's one way I found to do what you want. In this example, you have two buttons, one for the BBC website and one for the CNN site:
Here's the HTML code I used to add links to the buttons:
<p>
<a href="https://www.bbc.co.uk/"><button>BBC website</button></a>
<a href="https://www.cnn.com/"><button>CNN website</button></a>
</p>
I hope this helps!
1
Gonçalo Ventura Martins
Thanks, Rob Stack! :)
Indeed it works.
0
Rebeca
Hi Rob Stack I have read your post and I have tested the HTML code on a tester website where it shows exactly what you describe.
I test on our Guide but it doesn't really work, I just get plain text when I publish the article.
I copied and pasted the code on the HTML editor but after I save it, it deletes the button tags - and hence never becomes buttons. Have you heard of such issue before?
Or could it be because we have some custom-made code for the design and layout of our Help center?
I'm very new to this so I really appreciate any input you can offer, thanks!!
0
Brett Bowser
This is most likely due to some custom code in your own Guide theme as you mentioned so you may want to get your developers involved to narrow down where the issue is.
You could also try switching back to the default Copenhagen theme to see if the code works properly to see if that is the case.
I hope this points you in the right direction!
1
Sabena Miller
Rob Stack
I am having the same issue as Rebecca and I am using the trial version to create a prototype for our company. I am using the Copenhagen theme. Do I need to add the code in the css file or just the html in the article?
0
Tony
so, if you are experiencing the same situation as Rebecca, then you may want to get your developers involved to better get where the issue is located.
By having a look at the code, everything you see in <html> tags, should be used in the HTML docs, not in the CSS one. CSS is a style sheet language used for describing the presentation of the document.
If you are not too sure about it, your developer will surely know what to do.
I hope this helps!
0
Bubble Support Agent
Hi Tony
None of my buttons work in the article using <button> Ive just used basic Copenhagen theme and not changed anything.
can you advise?
0
Molly Exten
I encountered the exact same issue with the button tag that people are describing above.
In the article Editing the source code of help center articles, it says that the button element is considered an unsafe element. When I enabled the "Display Unsafe Content" option in Guide settings, the buttons stopped disappearing.
Unfortunately, the buttons still don't work as expected. I'll keep investigating this, but I'm surprised the first one bringing this up.
Rob Stack, can you help me understand how clicking on the button makes the text appear? Perhaps with more examples?
0
Oliver Mottram
Rob Stack the buttons don't work for me either, I've used the default Copenhagen theme and enabled unsafe content, but still no luck. Once I click the buttons, nothing happens...
0
Victoria Thrash
Molly Exten did you find a fix that worked for you?
0
Molly Exten
Victoria Thrash - I ended up abandoning this, unfortunately.
0