Custom pages is a feature addition for Guide Enterprise plans. This feature allows you to add unique functionality and personalized web pages to your help center and is an extension of custom themes.
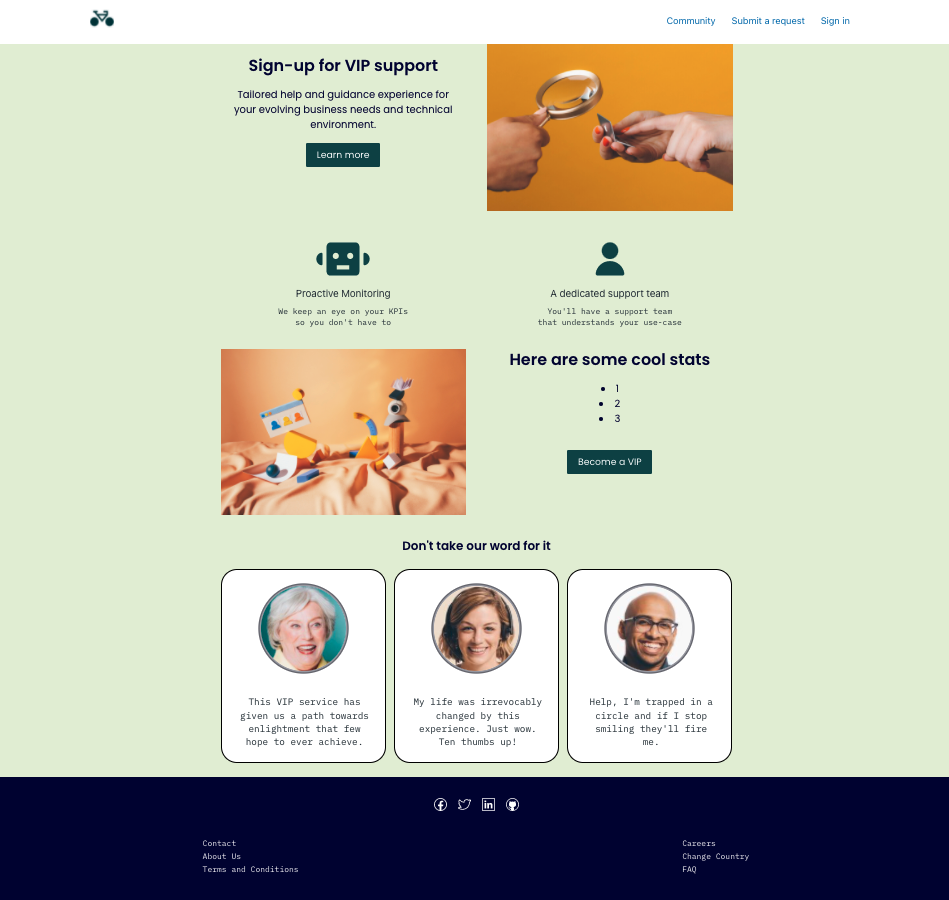
In this feature demonstration, find a developed single-page app that end users can use to sign up to become VIP members and receive tailored support for their organization.
This single-page app example was developed using React with Typescript for the frontend and Node.js for the backend. Tailwind CSS was also used for styling purposes along with Nodemailer to configure the process to send an email confirmation to users who successfully sign up.
Because this is a React application, the example goes through the Webpack steps necessary to compile it into a single file. Then, embed the file in your help center theme and upload it. See the sections below for each set of steps:
- Develop - How to develop the custom page using React with Typescript and Node.js
- Bundle - How to configure Webpack to bundle the custom page
- Embed - How to embed the project into your theme and publish it to the help center
Develop
Custom pages allow you to develop the page with any preferred web tech stack. A popular tech stack preference is the use of React.js with Node.js for backend development. As with any chosen technology, each code has its own nuances and specifications to implement. See below for an outline of these technical considerations.
React
Because custom pages are built with your own functionality, the Create React app is a great development choice that uses a single-page application framework.
The VIP Support sign-up page demonstration above makes two requests. One request generates a secure token for authentication to our backend. The other request is to make the actual submission data request.
The example custom page creates changes to user profiles and organizations within Zendesk. If your custom page will also make these sorts of requests, implement a way to validate that data from the frontend prior to the request. Although there should be data validation handling the request within the backend, by running validation from the frontend, especially when this data comes from user inputs such as a form, you’ll be able to ensure that only clean and consumable data reaches your Zendesk instance.
It is also important to recognize that a custom page is only one part of your help center. Any functionality, branding, or styling that is used for your custom page should be cohesive with your help center as a whole.
Some design aspects to consider include the points below.
- Authentication: Which types of users can access this page? Agents, all authenticated users, or every user?
- Navigation:
- There is no need to develop a header or navigation on your custom page. The Guide team of your account sets the navigation and header. Because the custom page is embedded in your theme, the current theme's header and navigation are applied to this page as well.
- Consider where this page will be located in the help center. Similar to how functionality is abstracted from the help center, the custom page itself also lives outside of the default help center schema. Users can access these pages through a link embedded in any help center template or pre-defined page included with your help center such as your home page. The URL for your custom pages will be in this format:
https://{domain_name}/hc[/{locale}]/p/{page_name}
- Page styling:Consider the styling libraries you are using and if the style aligns with the rest of the help center theme. Make sure the your font and color palette selections match the theme in place.
- Image handling:Since you will need to configure and bundle your custom page manually, storing images or assets locally will not work. Upload them to your help center theme prior to embedding. For a step by step guide on uploading assets to your theme, see the article: Using your own theme assets for help center.
Node.js
Custom pages give you a blank canvas to build a more personalized experience for your visitors. The ability to interact with a backend server built with tools such as Node.js and Express allows you to directly connect with systems and databases you already have in place. You can also build completely new services with your preferred tech stack that integrate with your help center for a seamless user experience.
The example app uses the functions below.
- A developped Express API that receives the user and organization information submitted by the user in the frontend form.
-
Send API requests to Zendesk Support to create and update the relevant user and organization with node-fetch.
- Validate the form submission data using validator.js.
-
Send a confirmation email notification to the user on successful form submission with Nodemailer.
Be mindful of security and protect your API routes when building server-side custom pages services. Consider building request authentication with tools such as JWT to secure your application. To read more about JWT, see this article from JWT website: JSON Web Token Introduction.
The example app uses the authentication below.
- An authentication endpoint for the frontend to request a JWT token to authorize requests to the form submission API.
- Authentication modules that generate and verify JWT tokens using jsonwebtoken.
Depending on the application you build, another consideration should be your CORS (Cross-Origin Resource Sharing) policy. Ensure that the routes which receive requests from the client side have enabled CORS. If you know which domains send the requests, specify these domains explicitly. Otherwise, use the wildcard “*”. For more information on CORS, see this article from Mozilla's website: Cross-Origin Resource Sharing (CORS).
Bundle
Once the development of your custom page is complete, bundle your React app using webpack. Because all custom pages need to be embedded within your theme, compile the custom page into a single html file. The Create React app comes with its own bundling and optimization. However, since the goal is to return a single index.html file, the example has its own webpack configuration which will streamline this process.
Embed
After building your application, embed it into your help center. Navigate to the newly created build directory. Here you will find a few files that are necessary to create the new custom page.
index.html- static/css/bundle.min.css
- static/bundle.min.js
The index.html file is the code to put into the custom page. Access the JavaScript and CSS created for the project. First, upload the JavaScript and CSS file as assets into your help center. Then, copy the code from your index.html file into the custom page and adjust the file paths to the assets.
Find an example below of how this appears in the code editor.
Once finished, publish your custom page. For additional resources about managing content in your help center, see the article: Guide resources.