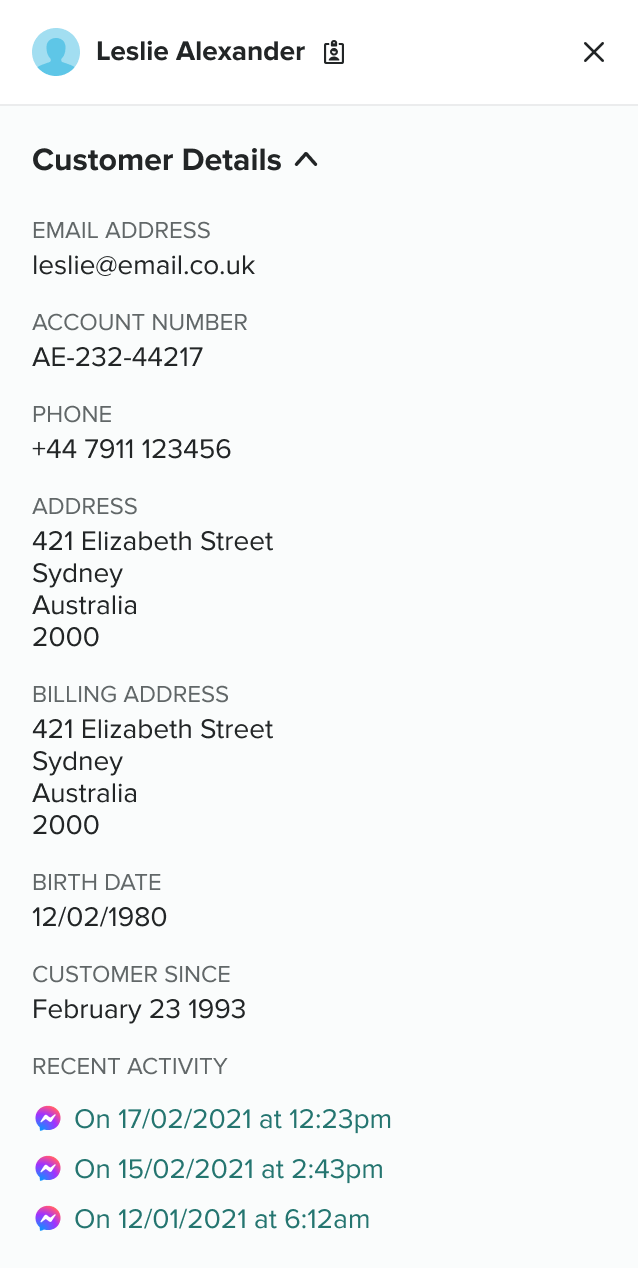
Customer profiles appear in the Customer details panel in Contact Center. Incoming contacts are matched to an existing profile, if one exists, or a new contact is created. The contact name is based on specific attributes, and there are fallback values if the attributes are unavailable.
Contact attributes appear in the conversation block (middle panel), depending on display rules. Standard attributes, such as queue, might be present. If you want other attributes to appear, attach the prefix "agt_ " to the attribute.
This article contains the following topics:
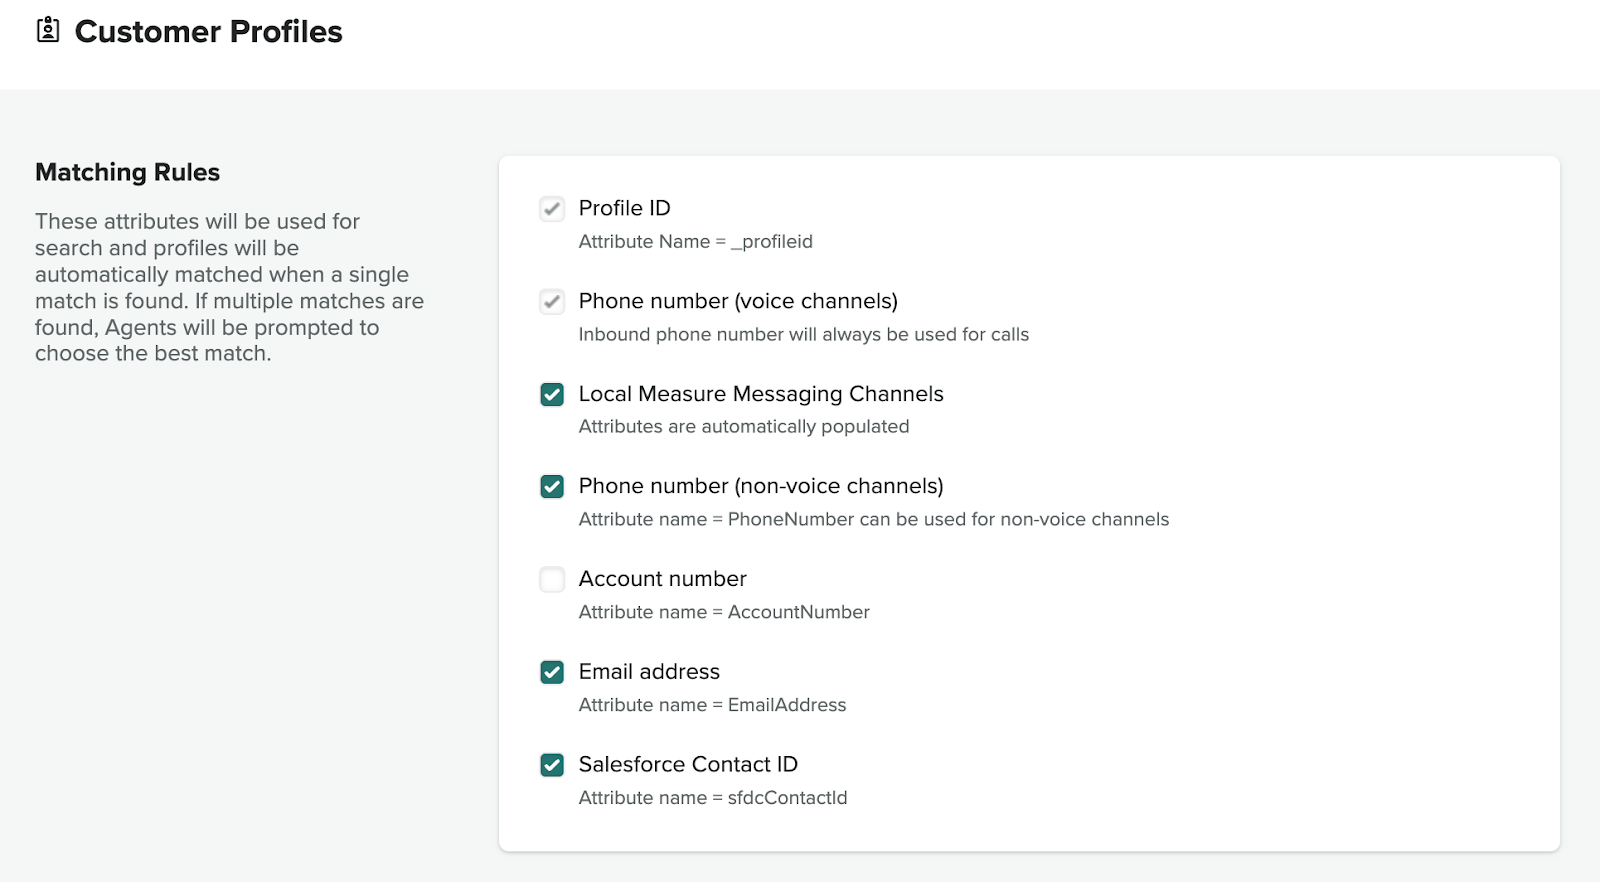
Matching incoming contacts to customer profiles
- If a single match is found, the contact is automatically associated with that profile.
- If multiple matches are found, the agent can select the correct profile.
- If no profile matches are found, a new profile is automatically created or the agent is prompted to create one.
- Select General Settings > Customer Profiles > Matching Rules.
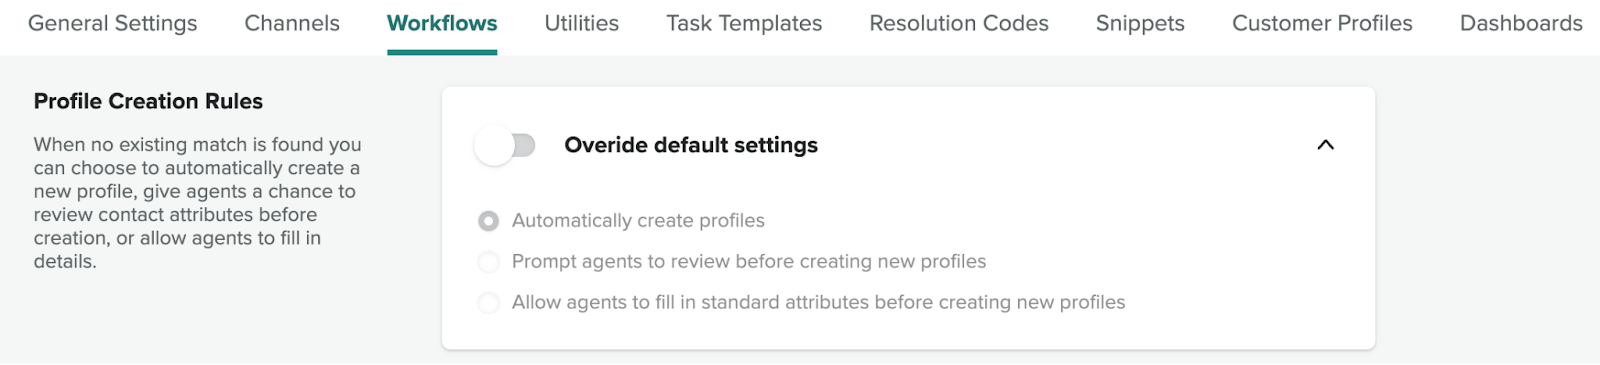
Configuring customer profile creation
When creating a new customer profile, agents can update standard profile attributes only, they cannot add customer profile attributes. After a profile is created, it cannot be edited. When creating profiles, any contact attributes with the same name are mapped to the customer profile. See the list of available profile attributes.
Contact Center doesn't update profile attributes for existing profiles, rather it associates the current ContactID to make the history accessible. Agents cannot alter attributes. Any updates should be made in Lambdas in contact flows, either before the agent receives the contact or as a task (possibly with an approval step).
- Select General Settings > Workflows > Profile creation.
Preventing duplicate customer profiles
You can prevent duplicate customer profiles by using the CTR-NoInferred template for profile creation. See Contact record templates in Amazon Connect Customer Profiles in the AWS documentation.
- In Profile creation and auto association, select Create limited profiles
and auto-associate
profiles.

Click Save.
In the case of duplicate profiles, Amazon Connect provides tools to consolidate profiles automatically. SeeUse Identity Resolution to consolidate similar profiles in Amazon Connect in the AWS documentation.
About the display name for contacts
The customer name is displayed in several places in Contact Center.
The display name uses the FirstName and LastName attributes in the customer profile. If that the first name and last name are not available, other attributes are used.
The following profile attributes are used as the display name, in this order:
- FirstName + LastName
- EmailAddress
- PhoneNumber
- AccountNumber
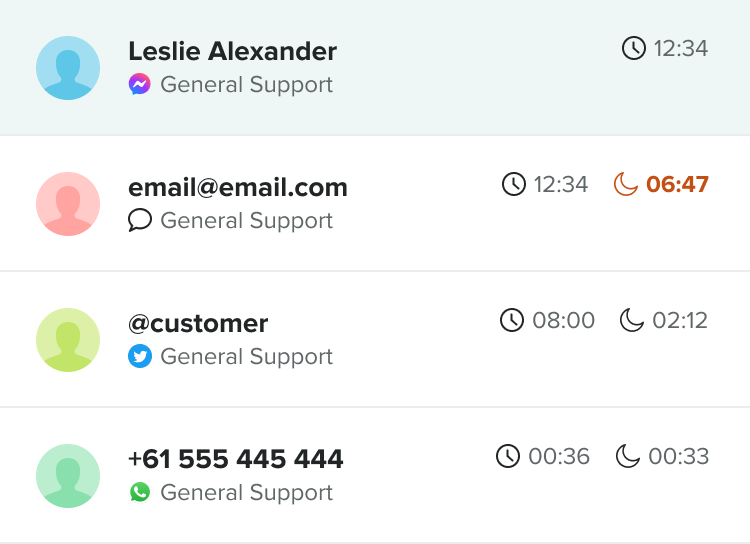
If none of the profile attributes are available, contact attributes are used, in this order:
- FullName
- EmailAddress
- PhoneNumber
- AccountNumber
- Contacts Phone Number (for calls only)