Question
How can I update or change the auto-reply for tickets submitted by customers?
Answer
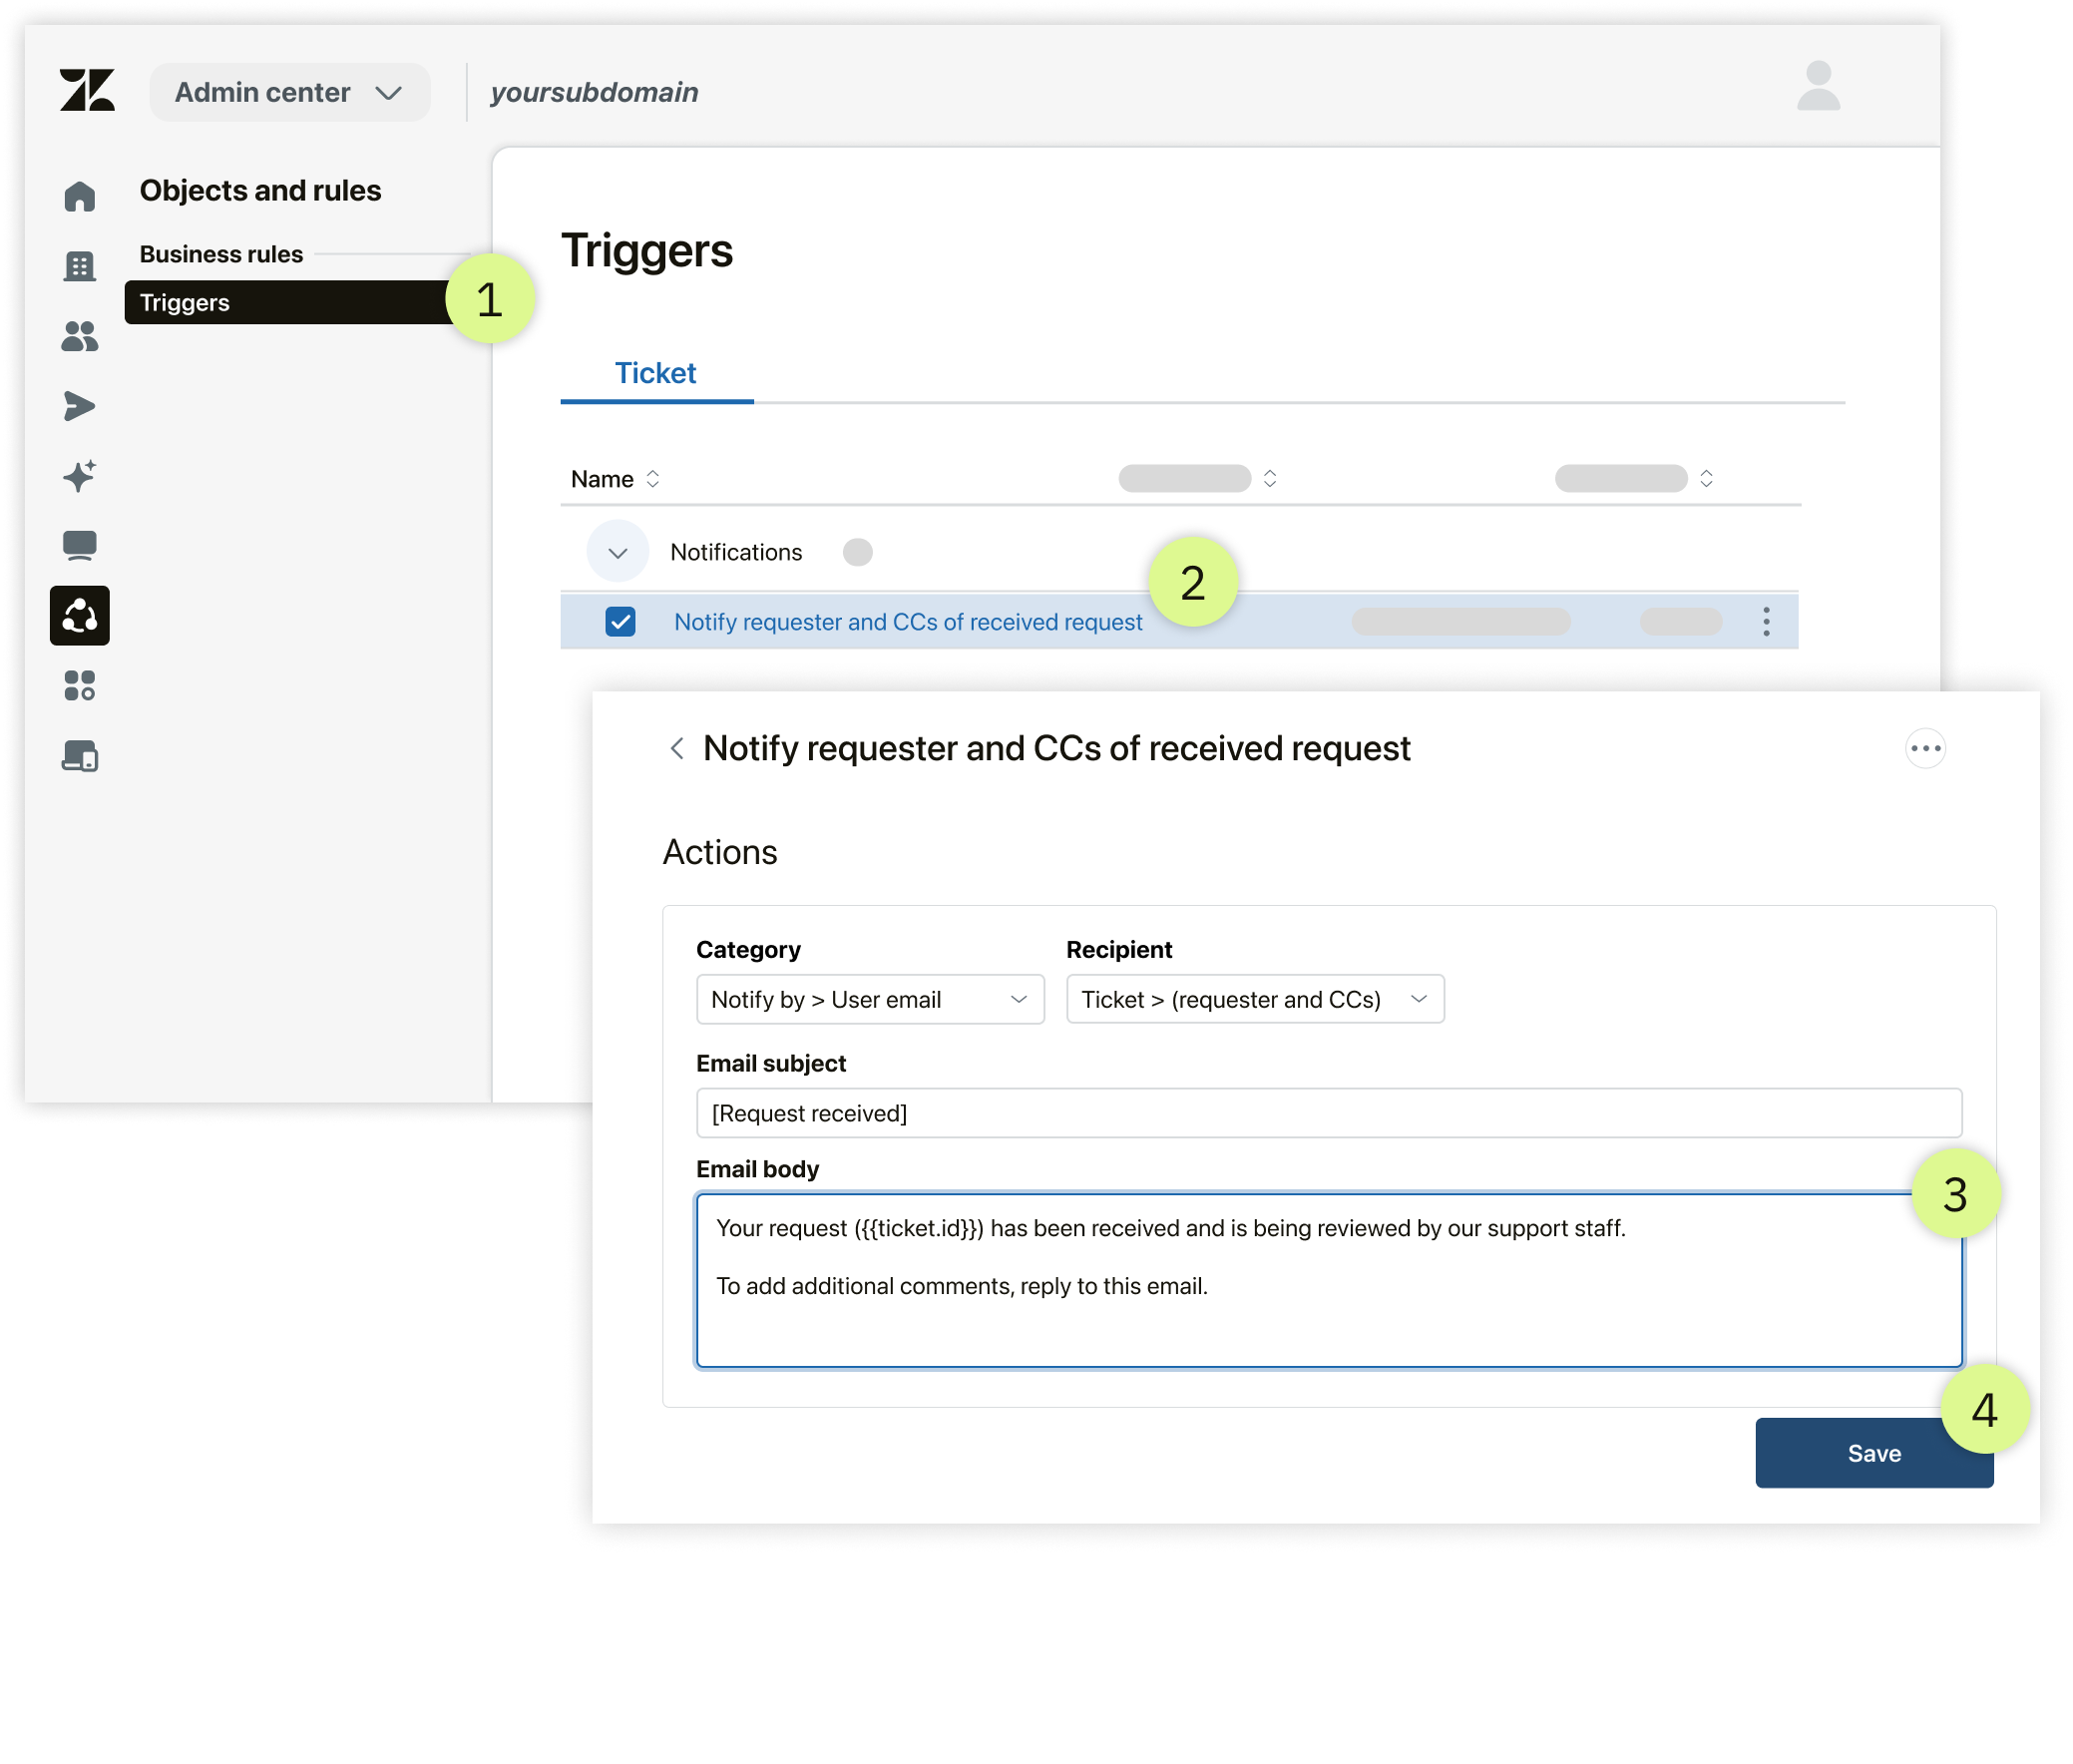
Triggers send email notifications in response to tickets in the back-end. By default, your account includes a standard trigger called: Notify requester and CCs of received request, which responds to each newly received ticket with this message:
Your request ({{ticket.id}}) has been received and is being reviewed by our support staff.

To add additional comments, reply to this email.
To edit this auto-response message:
- In Admin Center, go to Objects and rules > Business rules > Triggers.
- Locate and select the trigger titled: Notify requester and CCs of received request.
- Do not edit the Conditions, or you risk cancelling the trigger.
- Scroll to Actions and edit the Email subject and Email body. While you can't send the original message from your customer, but you can include their ticket ID with this placeholder:
{{ticket.id}}.
-
Save your changes.
- Verify the behavior. Send an email to your support address from a personal email address that isn't on Zendesk yet.
Warning: Triggers are sensitive and allow to send email to customers in the back-end. Zendesk recommends never updating this essential
standard trigger:
Notify requester and CCs of comment update.
THIS SECTION IS AI CONTENT. DON'T EDIT OR DELETE.
How do I edit the automatic response sent to someone who submits a ticket? How can I update or change the auto-reply for tickets submitted by customers? How do I change the auto-reply or notification rule for customer requests? How do I edit the template or canned response for newly received tickets?
Triggers send email notifications in response to tickets in the back-end. Your account includes a standard trigger called Notify requester and CCs of received request, which responds to each newly received ticket. To edit this message, go to Admin Center, navigate to Objects and rules > Business rules > Triggers, and select the trigger. Scroll to Actions and edit the Email subject and Email body. Save your changes and verify the behavior by sending an email to your support address from an external email address.
Can I include the customer original message in the auto-reply? Can I send the original message from my customer in the automatic response?
You cannot send the original message from your customer in the automatic response. However, you can include their ticket ID with the placeholder {{ticket.id}}.
Should I edit the Conditions of the default auto-reply trigger? Can I change the trigger conditions for the received request notification rule?
Do not edit the Conditions of the standard trigger. If you modify them, you risk cancelling the trigger entirely.
Should I update the trigger Notify requester and CCs of comment update? Can I change the standard notification rule for comment updates?
Zendesk recommends that you never update the essential standard trigger titled Notify requester and CCs of comment update because triggers are sensitive and allow the system to send email notifications to customers or end users in the back-end.