The welcome reply is a system reply for advanced messaging AI agents. It greets the customer when they reach out and sets the tone for the conversation.
For Zendesk Chat, you must take an extra step to add a trigger reply action to trigger the welcome reply. For Zendesk Chat with language detection, you must create a template block as well.
Adding the welcome reply
Add a welcome reply to greet customers when they reach out via messaging.
For instructions, see Editing system replies.
If you use Zendesk Chat, also perform the applicable steps below.
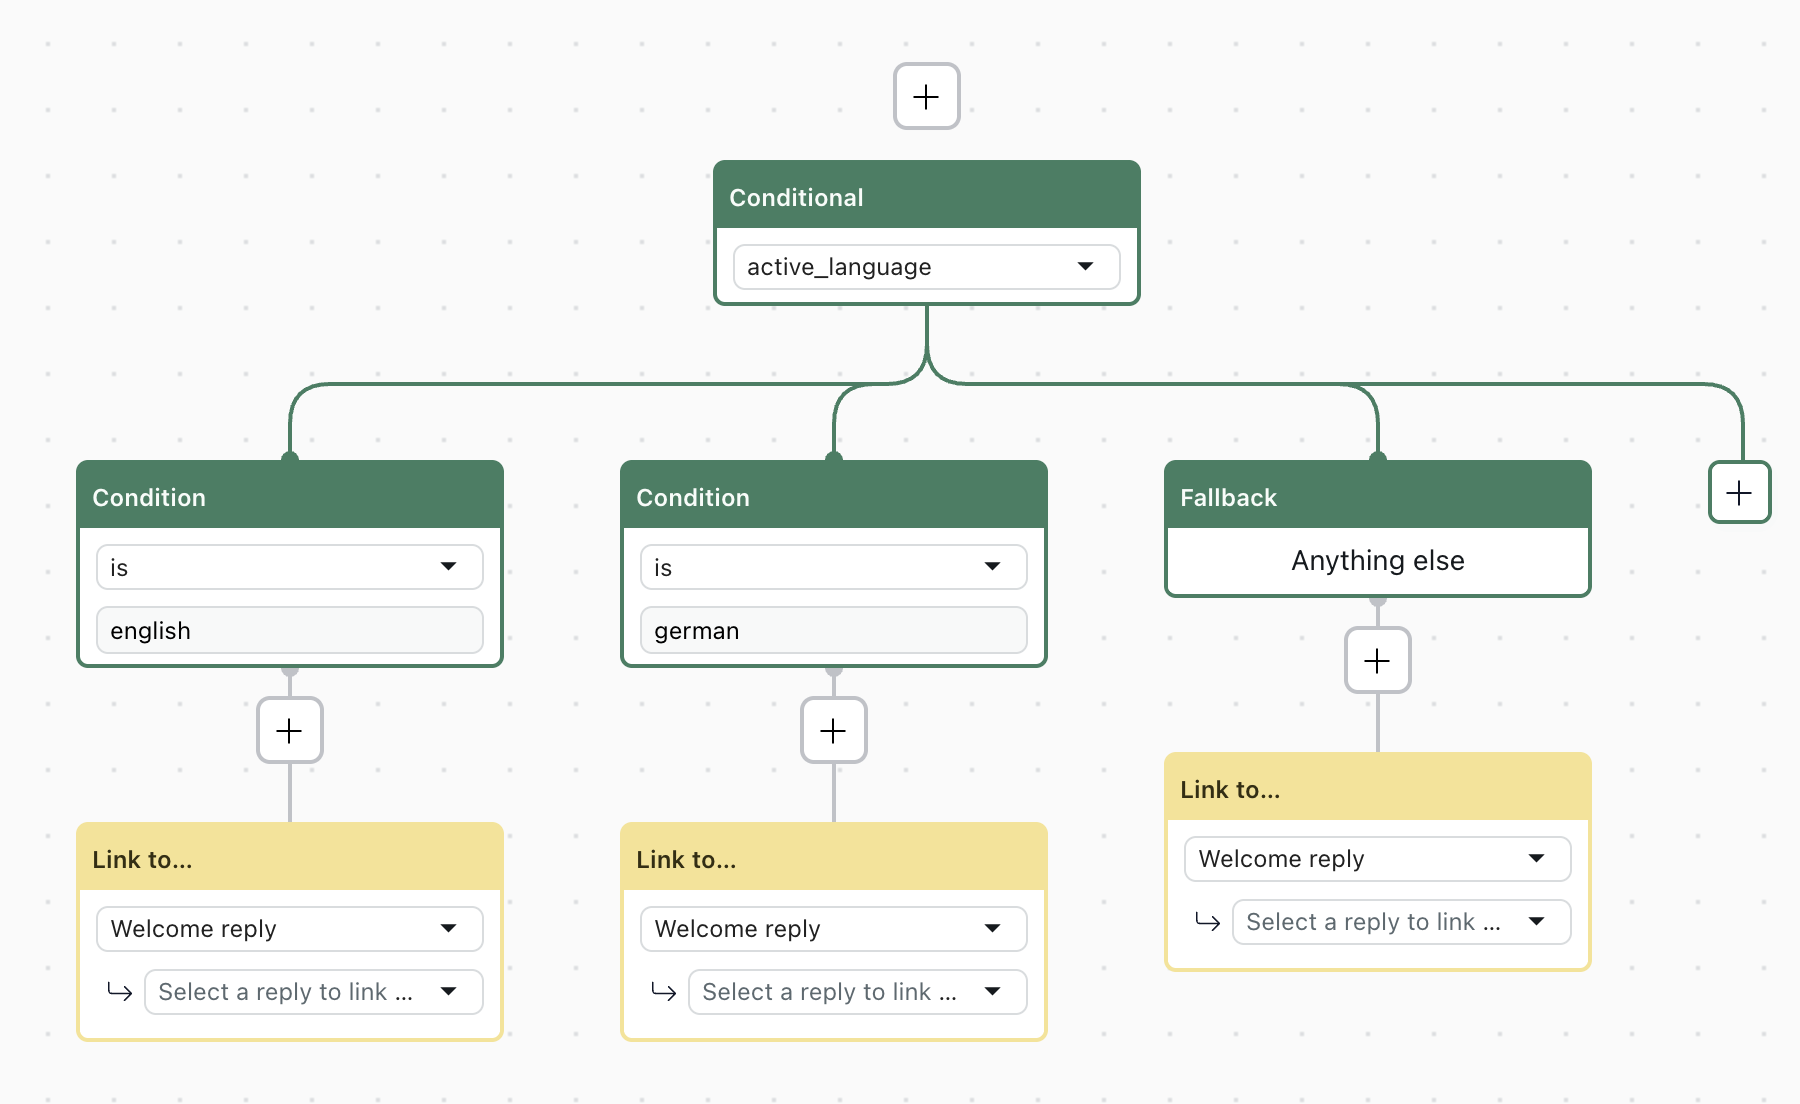
Adding a conditional block before the welcome reply (Zendesk Chat only)
If you use Zendesk Chat with an expression-based AI agent, you need to create a conditional block to ensure language detection works seamlessly.
- In the dialogue builder, click the plus (+) icon to
add a conditional block.
The conditional block appears along with the first condition block and the fallback block.
- In the conditional block, select the
active_languageparameter. - Create condition blocks for each language.
- For each condition block and the fallback block, click the plus (+) icon and select Link to.
- Select Welcome reply.
Adding a trigger reply action (Zendesk Chat only)
If you use Zendesk Chat, after you set up the welcome reply, you also need to add a trigger reply action to trigger the welcome reply.
- In AI agents - Advanced, select the advanced AI agent you want to work with.
- Click
 Settings in the sidebar, then select Events and actions.
 - Click the options menu icon (
 ) next to the Add action button and select Trigger reply
on event.
) next to the Add action button and select Trigger reply
on event.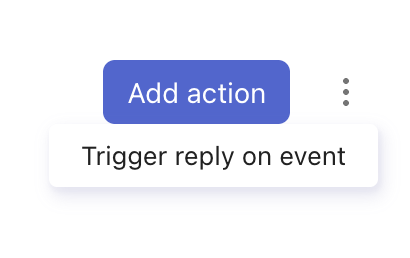
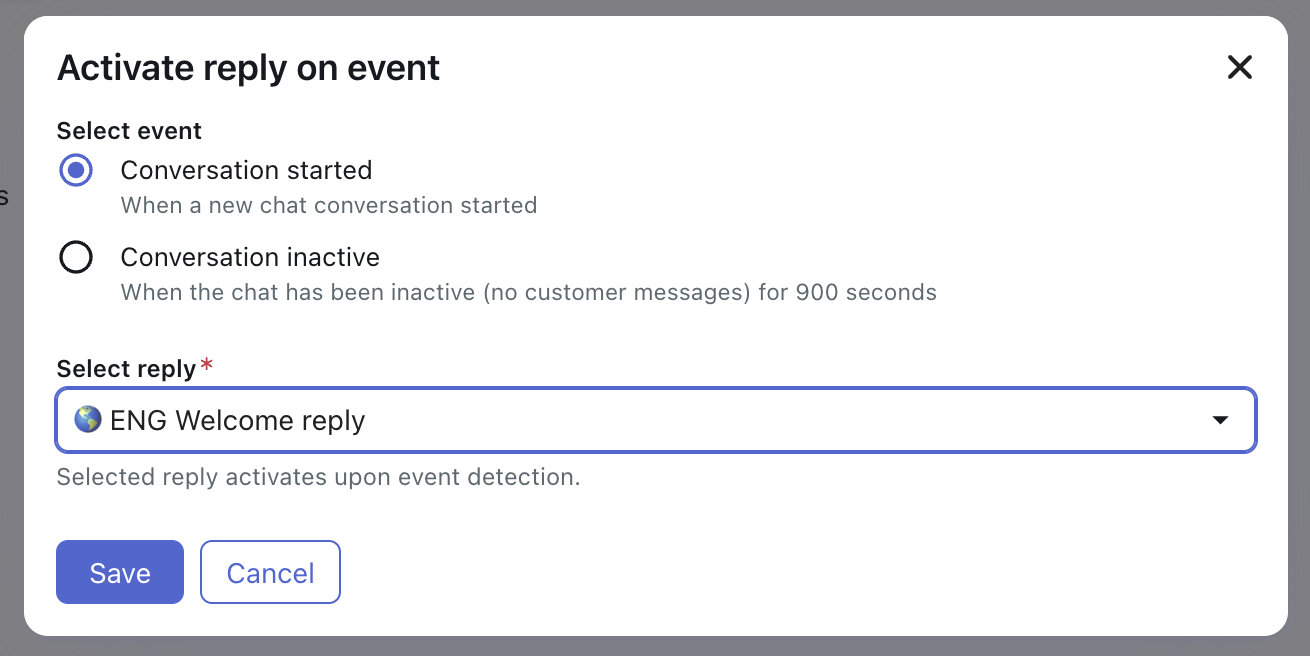
- Complete the following fields:
- For Select event, select Conversation started.
- For Select reply, select the welcome reply you want to use.
- Click Save.
Removing the welcome reply
You can remove the welcome reply if needed.
If you created a trigger reply action for Zendesk Chat, you can remove that too. It’s recommended to remove the trigger reply action first.
- In AI agents - Advanced, select the advanced AI agent you want to work with.
- Click
Settings in the sidebar, then select Events and actions.
- Click the delete icon (x) next to the trigger reply action you want to remove.
- In AI agents - Advanced, select the advanced AI agent you want to work with.
- Click
 Content in the sidebar, then select Use cases.
 - Select the Welcome reply.
- Select the language version of the reply you want to edit and click Edit dialogue.
- Delete all blocks from the dialogue except the first AI agent message block.
- Delete all content from the AI agent message block.
- Click Save or Publish.