Verified AI summary ◀▼
Use a CloudFormation stack to link your Connect instance with Contact Center. This setup integrates Amazon Connect with AWS services like Cognito and Kinesis, establishing trust between systems. Follow the provided steps to deploy the stack, which automates resource creation and configuration. Once complete, update user access and configurations, then notify the Professional Services team to activate the stack.
The AWS CloudFormation stack links your Amazon Connect and Zendesk Contact Center instances. After your Contact Center instance has been created by Zendesk, you'll receive a CloudFormation template URL needed for the installation.
You must have an Amazon Connect instance and a Contact Center instance before you can install your AWS CloudFormation stack.
To install the Contact Center CloudFormation stack
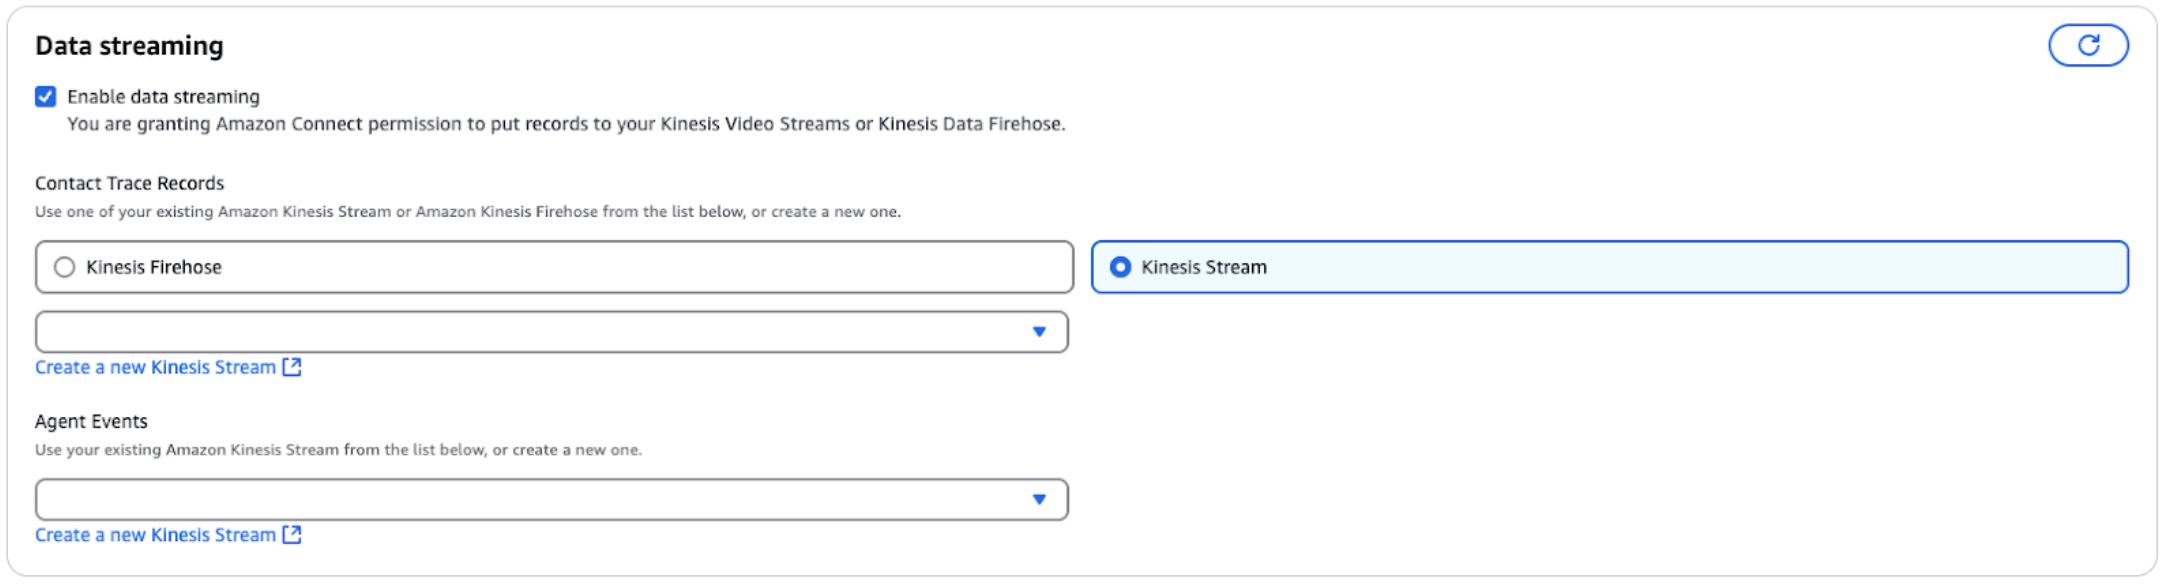
- In the AWS Management Console, make sure that Kinesis Stream data streaming
(not Kinesis Firehose) is selected for the Amazon Connect instance connected to the
deployment.
- Open your Amazon Console in the region where your Amazon Connect instance resides, then scroll to the bottom of the page showing details about the stack being installed.
- Accept the terms, then start the stack installation.
The installation process might take up to 15 minutes. When it's complete, the status appears as CREATE_COMPLETE next to the new stack in the Amazon Console.

After the stack installation completes, inform the Zendesk team that created the Contact Center instance so that they can activate the stack to link the Contact Center instance to your Amazon Connect instance.
After the stack has been activated, sign into the Contact Center instance using the login method set up in Amazon Connect, then install the Contact Center app in Zendesk and link it to your Contact Center instance.