Verified AI summary ◀▼
Learn to manage calls effectively with features like outbound calling, hold, mute, and call transfers. Use warm or cold transfers, add internal notes, and conduct conference calls. End calls with After Call Work to wrap up tasks, and set your next status to manage availability. These tools help streamline your call handling process and improve customer interactions.
In this article, you'll learn how to make outbound calls and use key features of Zendesk for Contact Center, from the basics like hold and mute, to advanced functions such as warm transfers and conference calls.
This article contains the following topics:
Making outbound calls
Use the following steps to make an outbound call.
To make an outbound call
- In Contact Center, click Outbound call.
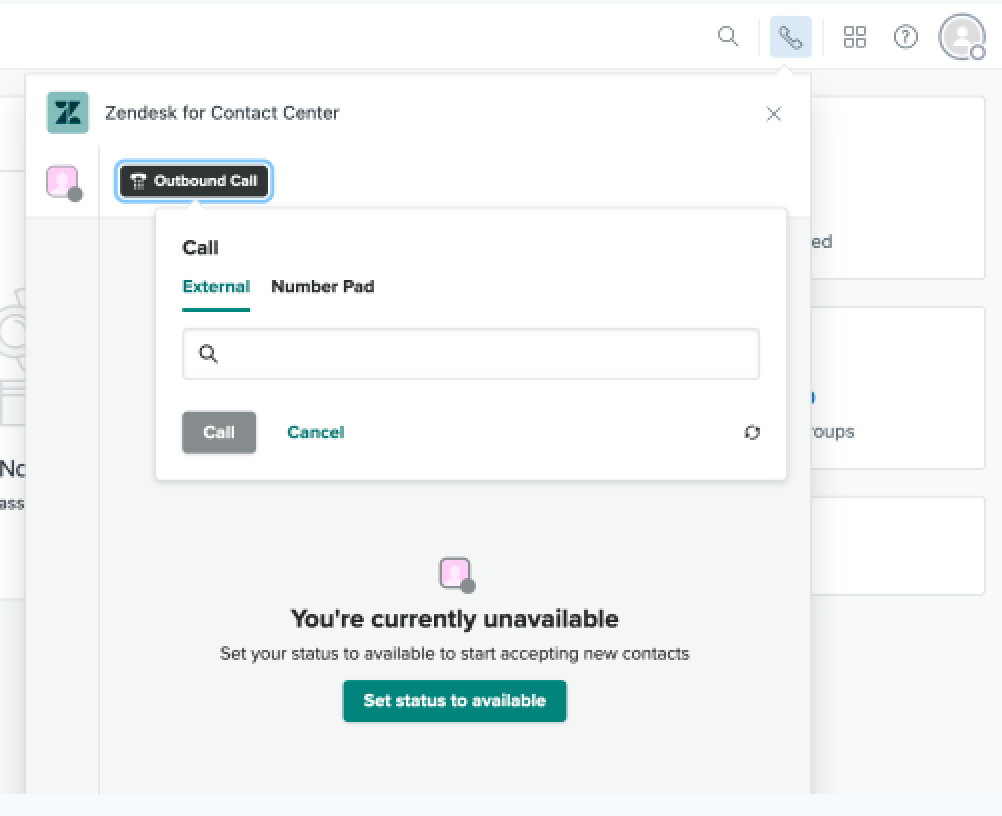
If you are calling a customer who has had previous interactions within the system or if you are using your internal CRM tool, the customer information will be displayed in the customer profile section on the right-hand side of the page once the call is connected.
A timer will appear next to the contact to show you how much time has elapsed on the call.
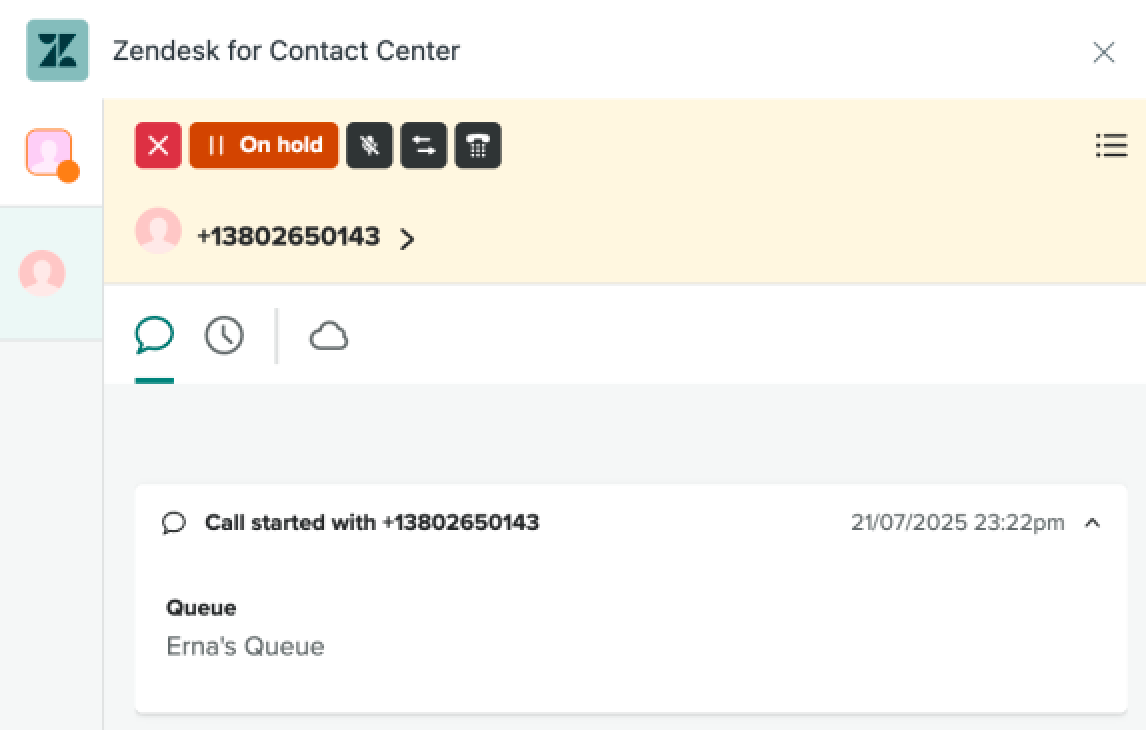
Placing calls on hold or mute
During a call, you might want to put a customer on hold or mute yourself.
To place a customer on hold, click Hold ⏸️ above the conversation tab. You'll receive a verbal notification that the customer is on hold, and the button will change color.
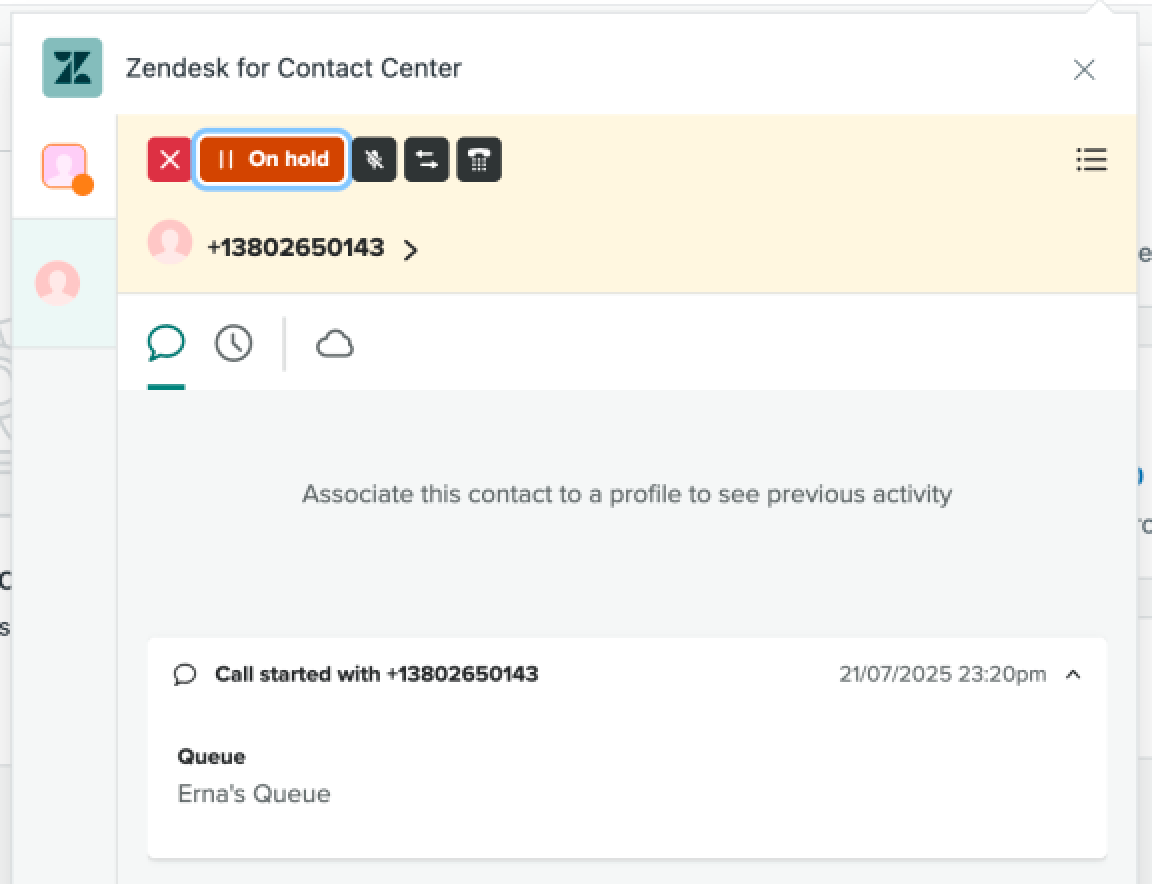
To resume the call, click the same button, which will now be orange and labeled Resume.
Similarly, to mute yourself, click the dark gray Mute button above the conversation tab, and to unmute, click the same button, which will now be labeled Unmute.
Transferring calls
When you need to transfer a call, click the Transfer (![]() ) button at the top of the screen. This will
will place you on hold while the transfer occurs.
) button at the top of the screen. This will
will place you on hold while the transfer occurs.
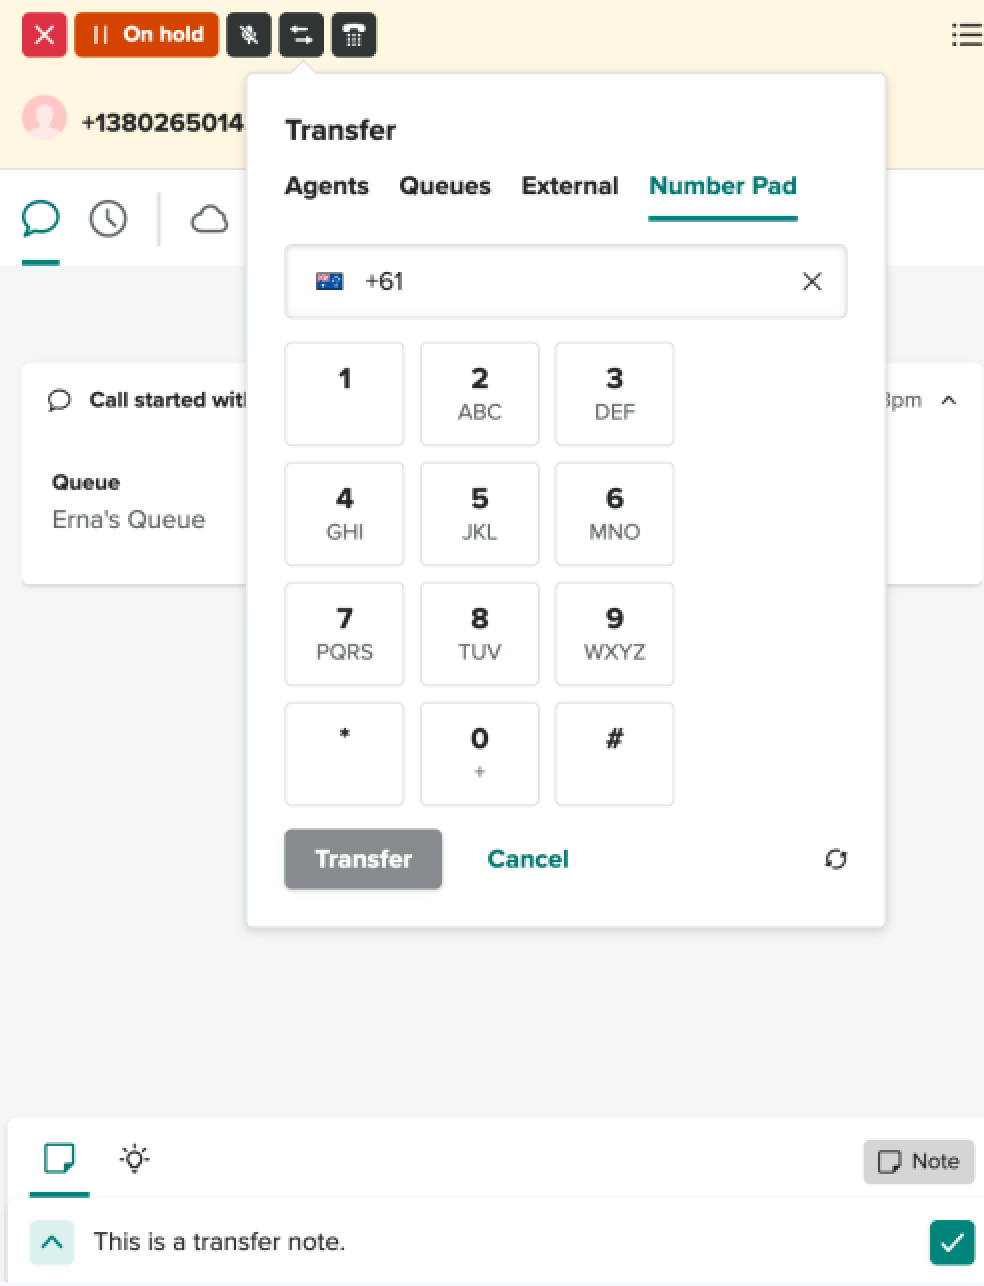
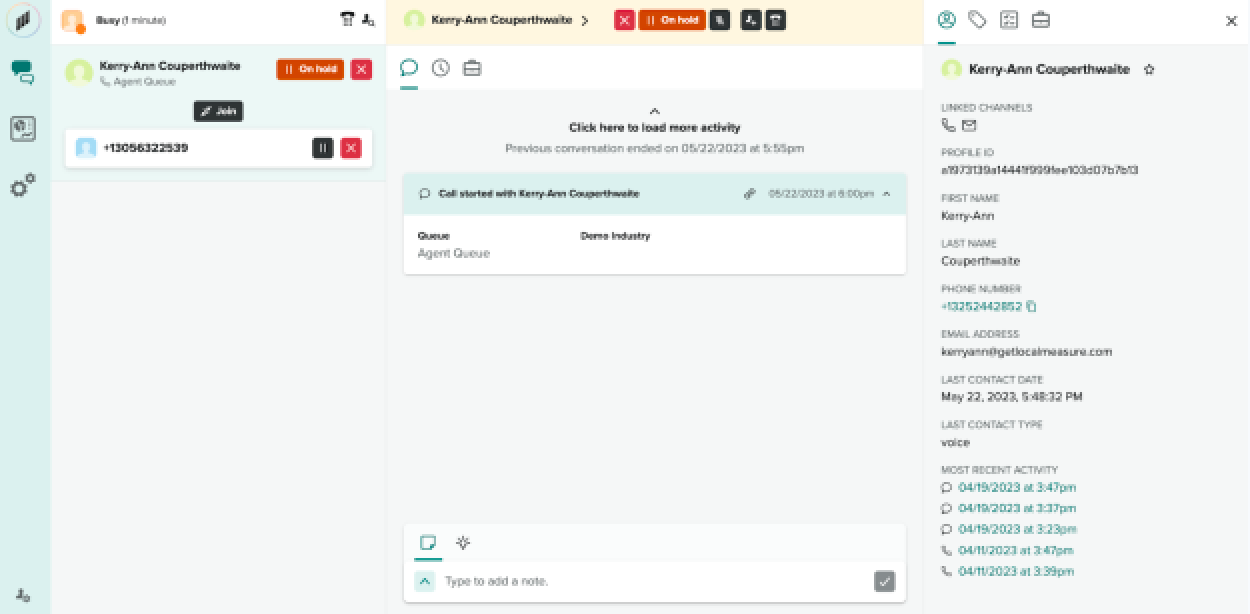
You can transfer to an individual person listed in quick connects or to another number. After selecting the person or number, click the transfer button to initiate the transfer. Once the call is transferred, you can add a note before closing the contact.
To cancel the transfer, click Cancel.
Internal transfer notes
To add an internal transfer note before transferring a caller, click the note button and start typing your note. Alternatively, you can type your note during the transfer process.
Click the tick (![]() ) button to save your note to the
customer’s profile.
) button to save your note to the
customer’s profile.
Cold transfer
After a transfer is initiated, to make a cold transfer, click the red x button next to the customer’s number. This will automatically put you in After Call Work (ACW) mode, and the customer will be in the queue with the third-party.
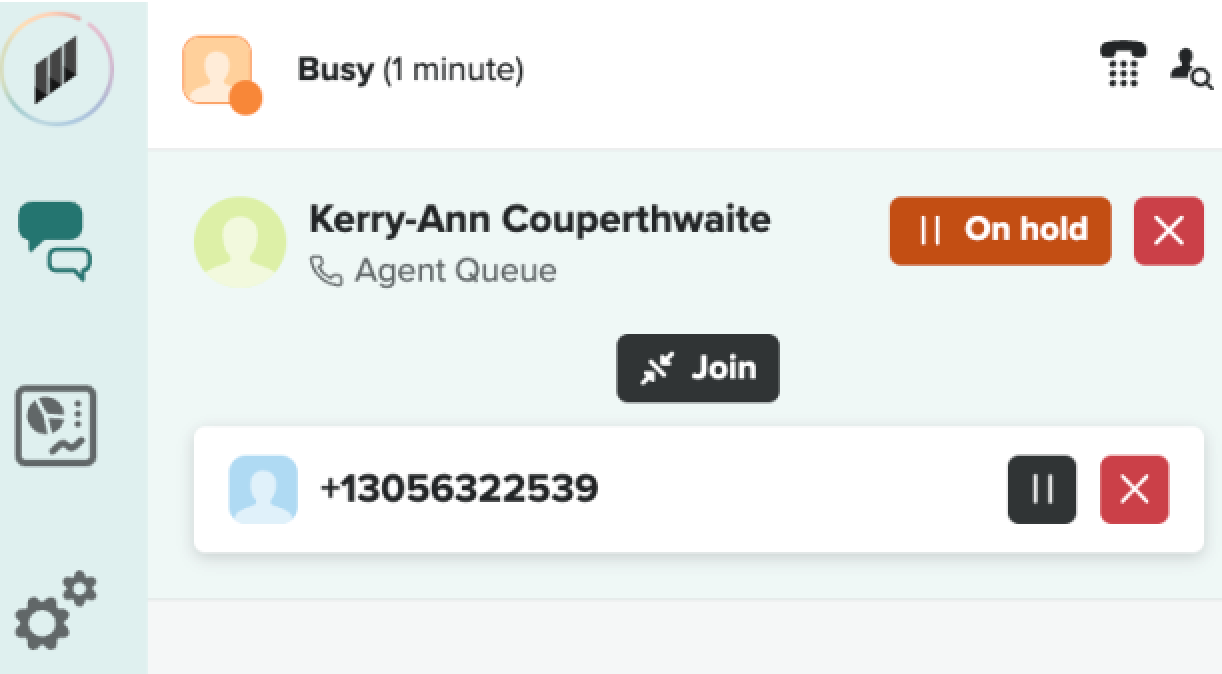
Warm transfer
To perform a warm transfer, initiate the transfer and wait for the third-party to answer. While waiting, the customer will be placed on hold and will not be able to hear your conversation with the third-party.
Once the third-party answers, you have two options: transfer the customer to the third-party or return to the customer after speaking with the third-party.
To transfer the customer to the third-party, click the red x button next to the customer's number. This will place you in After Call Work (ACW) mode and the customer will be placed in the queue with the third-party.
To return to the customer, click on the red x button next to the third-party's number or name.
Making a conference call
To start a conference call, initiate the transfer and wait until the third party answers. Once they accept the call, click Join which will connect all parties.
If you click Join before the third party has answered the call, the system will return an error.
Ending a call
Once your conversation with the customer is complete you can end the call by clicking the red x button at the top of the conversation window.

Your status will change to After Call Work and you will see the letters ACW appear in the top right corner of the screen.
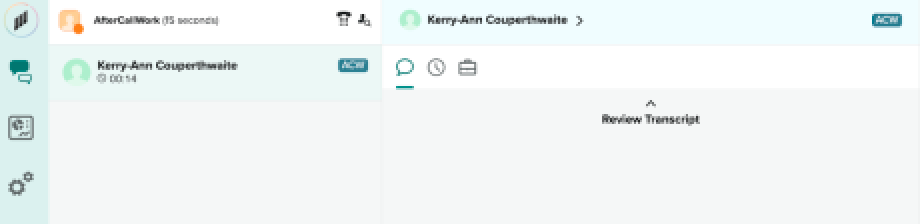
Use this time to add your notes and complete all after-call work, then close the contact by clicking Save and Close. Remember to select a resolution code in order to close the contact.
Once the interaction is closed, your status will automatically change to Available once more. If you want to go offline, change your status to Unavailable before closing the contact.
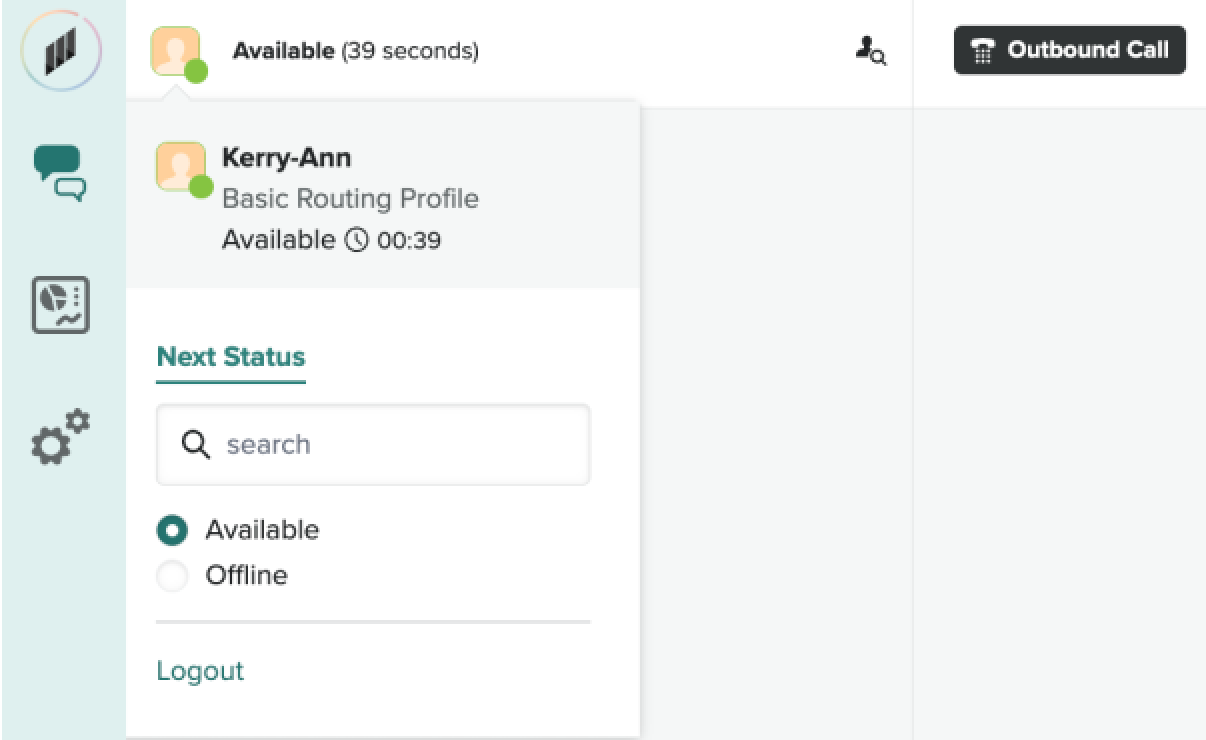
Using the next status
The agent next status helps an agent to change into the state they want to be by the end of the call. This is particularly useful if they need to take a lunch break or step away from their desk.
You can select agent Next status whilst you are on a call and speaking to a customer. You can set your next status, for example, Offline.
Once you end the call and close your interaction, the system will automatically put you into Offline status thereby ensuring that you will not receive any further calls that are waiting in the queue.