Verified AI summary ◀▼
Set up Amazon Connect for your contact center by creating a new instance in the AWS Management Console. Choose between automatic setup with a CloudFormation template or manual customization. Ensure SAML authentication, telephony options, and data streaming are configured. If using an existing instance, verify identity management and customer profiles are enabled. Each client requires a unique instance for optimal functionality.
The first step is to create a new Connect instance. You create Connect instances in the AWS Management Console. Generally, you will create the Connect instance in the AWS region closest to your customer or as required.
You can create the Connect instance automatically by using a CloudFormation template, or, if you want to customize it, you can create it manually.
This article contains the following topics:
Automatically creating a Connect instance from a CloudFormation template
In this section, you'll discover how to create a Connect instance from a CloudFormation template. You'll need the information provided by Zendesk in the previous section to proceed.
A Connect instance created using a CloudFormation template will have SAML authentication turned on. If an application is already configured on the SAML Identity Provider (IdP), and the metadata file is available during the deployment of this template, the template will configure all required Identity and Access Management (IAM) resources to integrate your Connect instance.
To automatically create a Connect instance
- (Optional) To turn on single sign-on for Connect instances, configure
an application in your IdP with SAML authentication turned on. Once the
application is configured, download the SAML metadata XML file.Note: The value for relay state in the application can be left blank. This can be updated after the Connect instance is set up.
- Navigate to the CloudFormation service in the AWS console.
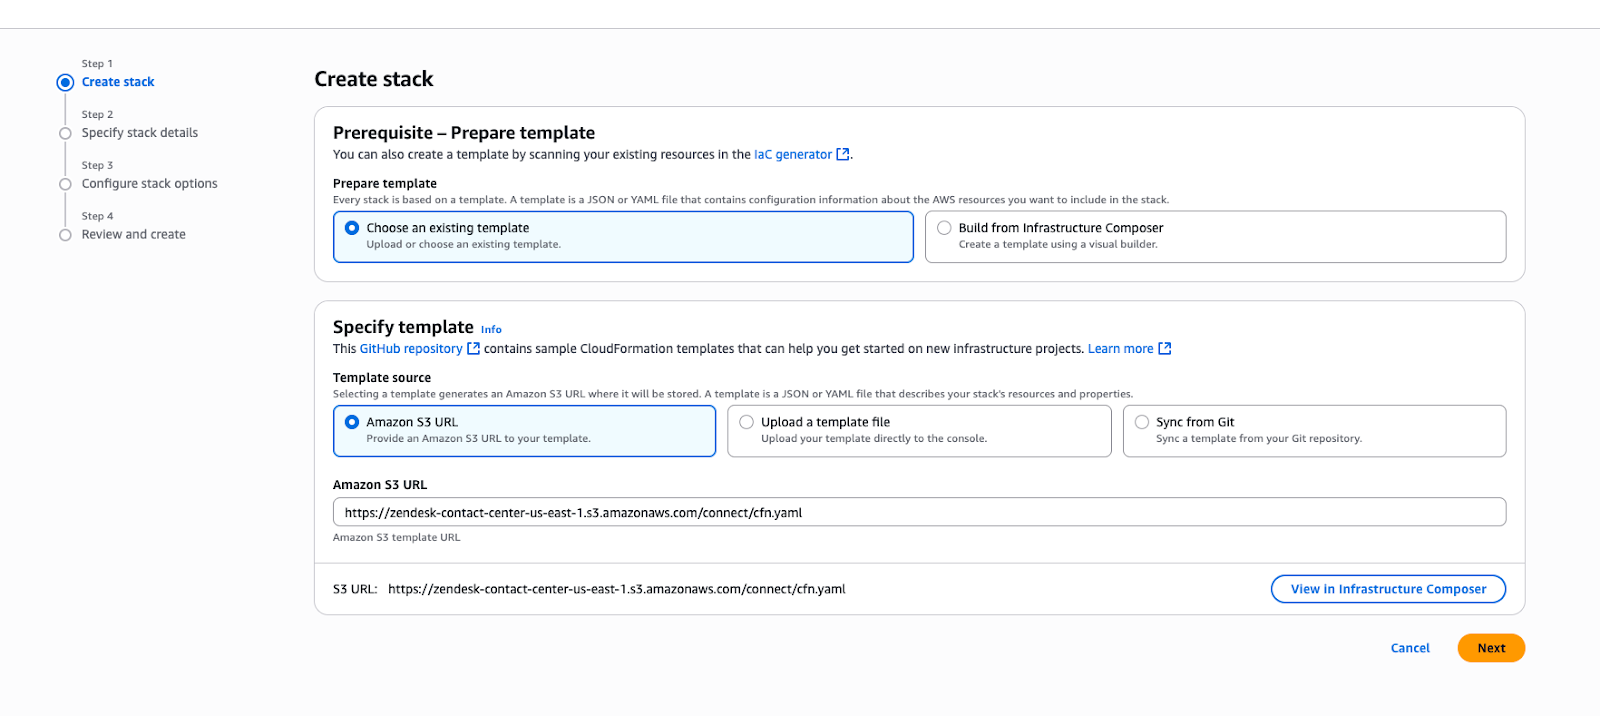
- Click Create stack.
- On the Create stack page, select the following:
- Choose an existing template
- Amazon S3 URL
- In the Amazon S3 URL field, enter the following
URL:
https://zendesk-contact-center-us-east-1.s3.amazonaws.com/connect/cfn.yaml
- Click Next.
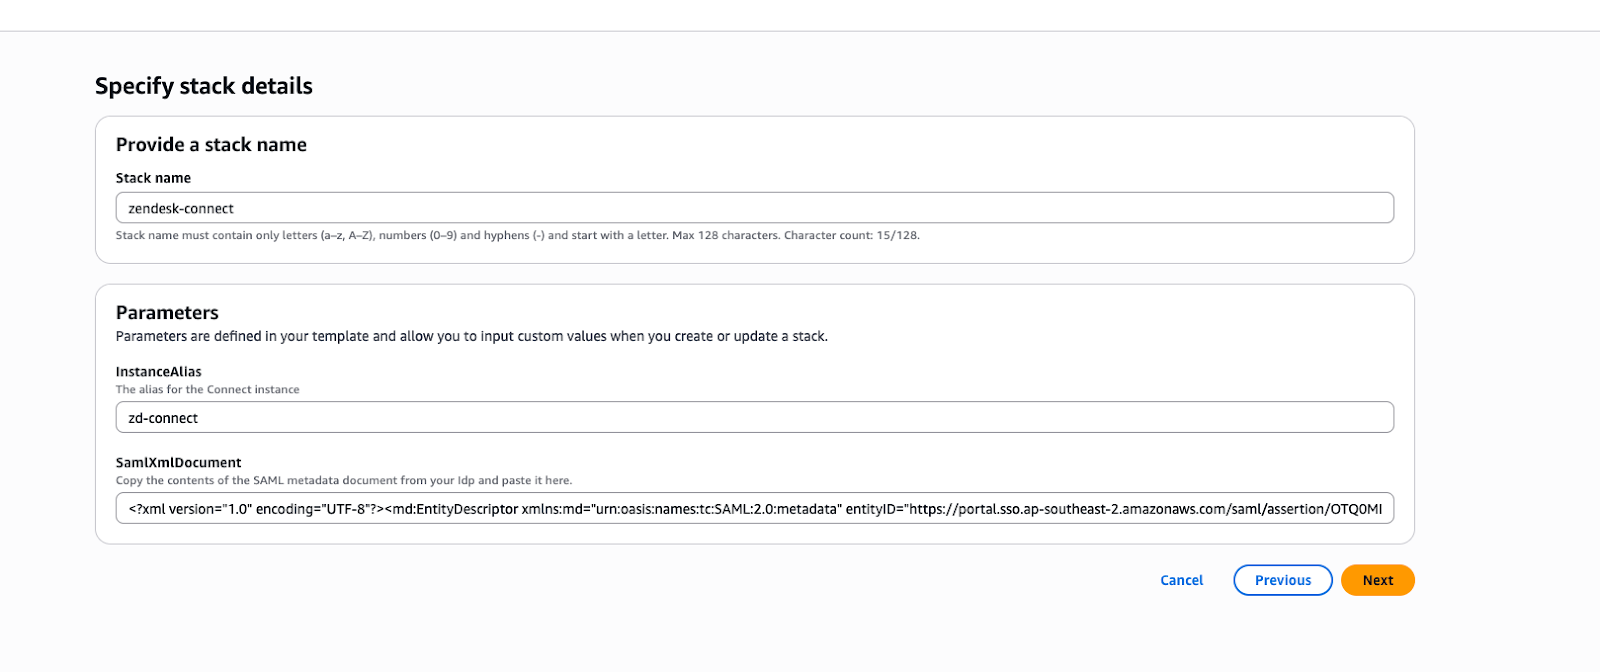
- On the Specify stack details page, enter a name for the stack, a unique value for InstanceAlias.
- If your SSO application is already configured, copy and paste the contents of
the metadata XML file under SamlXmlDocument. This parameter can be left blank if
the SAML application is not yet configured.Note: If you encounter an error that the metadata file is too large, leave the SamlXmlDocument parameter blank to complete the CloudFormation stack deployment, then set up the SAML configurations manually later.
- Click Next to complete the stack deployment.
- Optionally, configure your SAML application to your Connect instance. Note the
SamlRelayState from the stack outputs and update the relay state in the SAML
application configured in your SSO for your Connect instance.

When the stack runs, the template creates the following resources:
- Connect Instance
- S3 bucket for transcripts
- KMS key for S3 bucket
- Kinesis Stream
- Customer Profiles domain
- KMS Key for Customer Profiles domain
- SAML Identity Provider in IAM
- IAM Role for SAML
See your AWS documentation for more details about these resources.
Manually creating a Connect instance
If you want to customize your Connect instance, you can manually create it.
To manually create a Connect instance
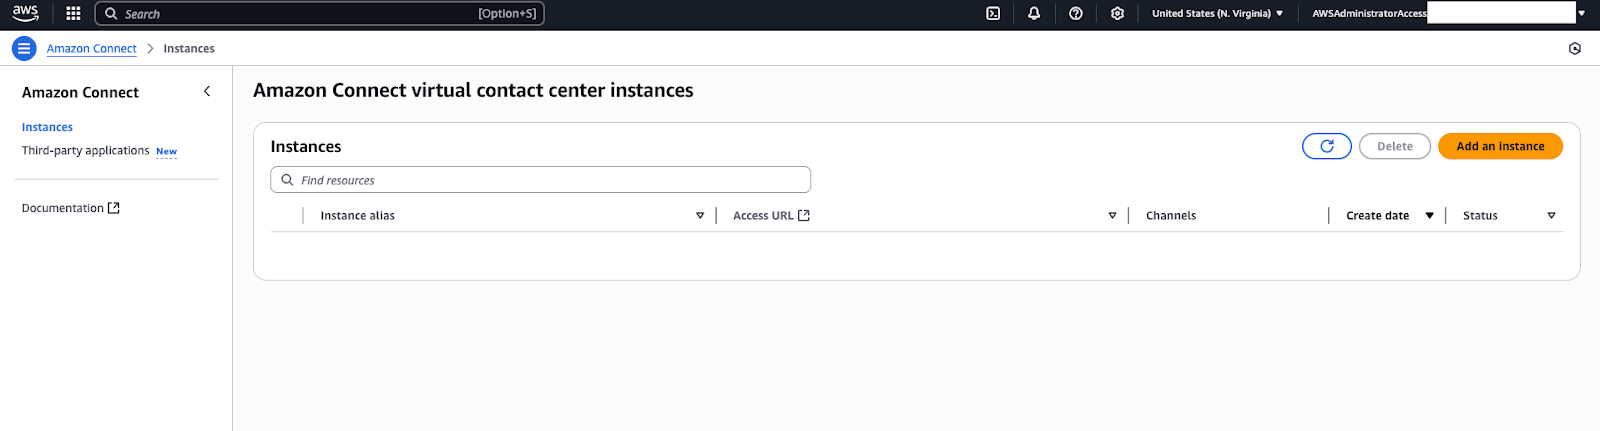
- In your AWS console, open the Amazon Connect service. You’ll see a page listing any existing Connect instances in the selected region.
- Click Add an instance.
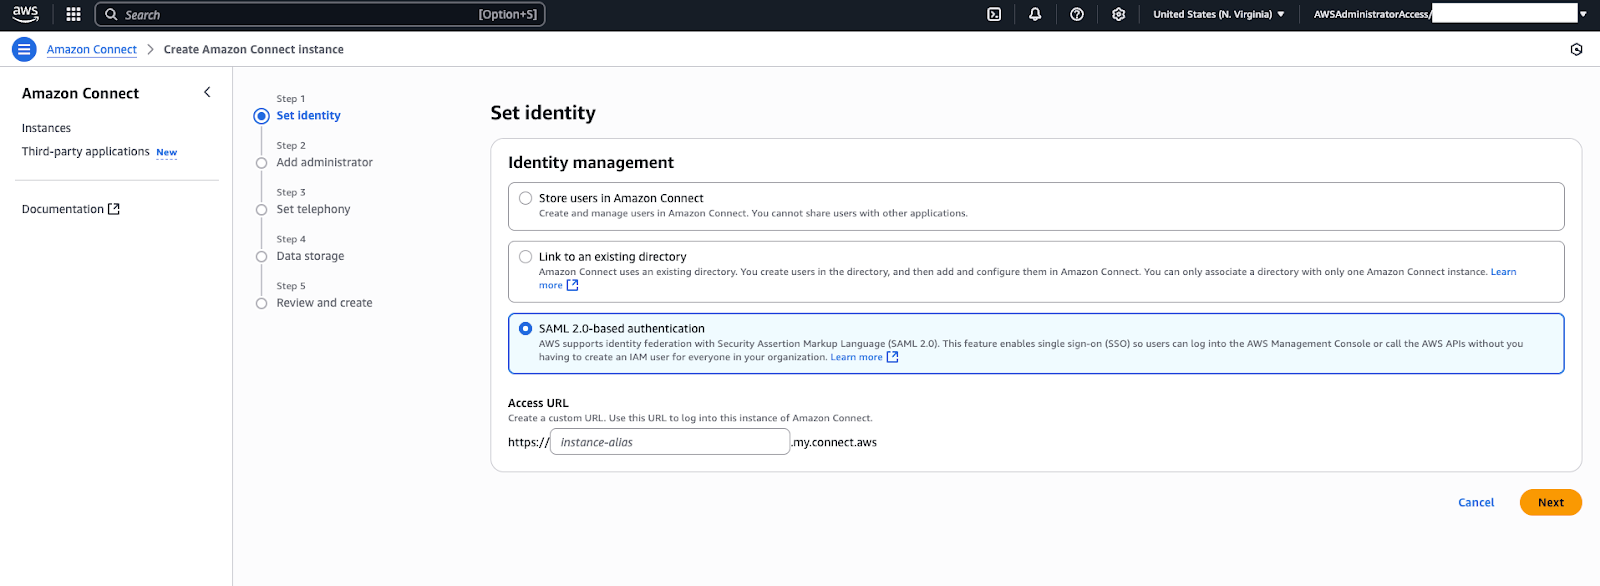
- On the Set identity page, choose your preferred identity management method (typically SAML 2.0-based authentication for client environments).
- Enter an access URL instance name. This name becomes part of the
instance’s URL.
For example, if you name it “MyDemoConnect”, the instance URL will resemble MyDemoConnect.awsapps.com/connect/. Choose a name that identifies the client or purpose, such as "ClientName-ConnectEU".
- Click Next.
- On the Add administrator page, specify whether an administrator user for Connect needs to be created. To make things easier, you can create an admin username (for example, “admin”) and a password. This will be the login used to access the Connect dashboard initially. Customers often integrate with their single sign-on using SAML, but for training and sandbox purposes, you can configure a manual admin user.
- Click Next.
- On the Set telephony page, under Telephony and data settings,
configure how your contact center will handle communications and store data:
- Telephony Options: You can turn on inbound and/or outbound calling. For most uses, turn on both Inbound and Outbound calling (so the instance can receive and make calls).
- Data Storage: Connect creates an Amazon S3 bucket in the background to store call recordings, chat transcripts, and other data. In the setup wizard, make sure that Enable customer profiles is turned on.
- Click Next.
- On the Data storage page, set the profile creation policy to Associate only.
- Deselect the Enable email option. This is not used by Contact Center.
- Make sure the Custom data storage (Advanced) option is unselected.
- Click Next.
- Complete the wizard and review the configuration. Once everything
looks good, click Create Instance.
Connect will begin provisioning the instance. It usually takes a couple of minutes for the instance to be ready. During this time, AWS is setting up the service and resources in the background.
Important: To ensure successful installation, don't close your browser or navigate away from the status page until the provision completes. - When the creation is complete, the console will show your new
instance. If you have set up the environment not to use SSO, you can click the
Access URL (the instance URL), which opens the Connect login page. Use the admin
username and password you set to log in. This will bring you to the Amazon
Connect dashboard, a web-based interface where you can manage your contact
center (configure contact flows, users, etc.). On first login, you might see
some default sample contact flows and a basic dashboard screen. At this point,
Connect is up and running.Important: If you have set up the environment to use SSO for login and authentication, you will need to complete the steps in Setting up users and access before you can log into Connect.
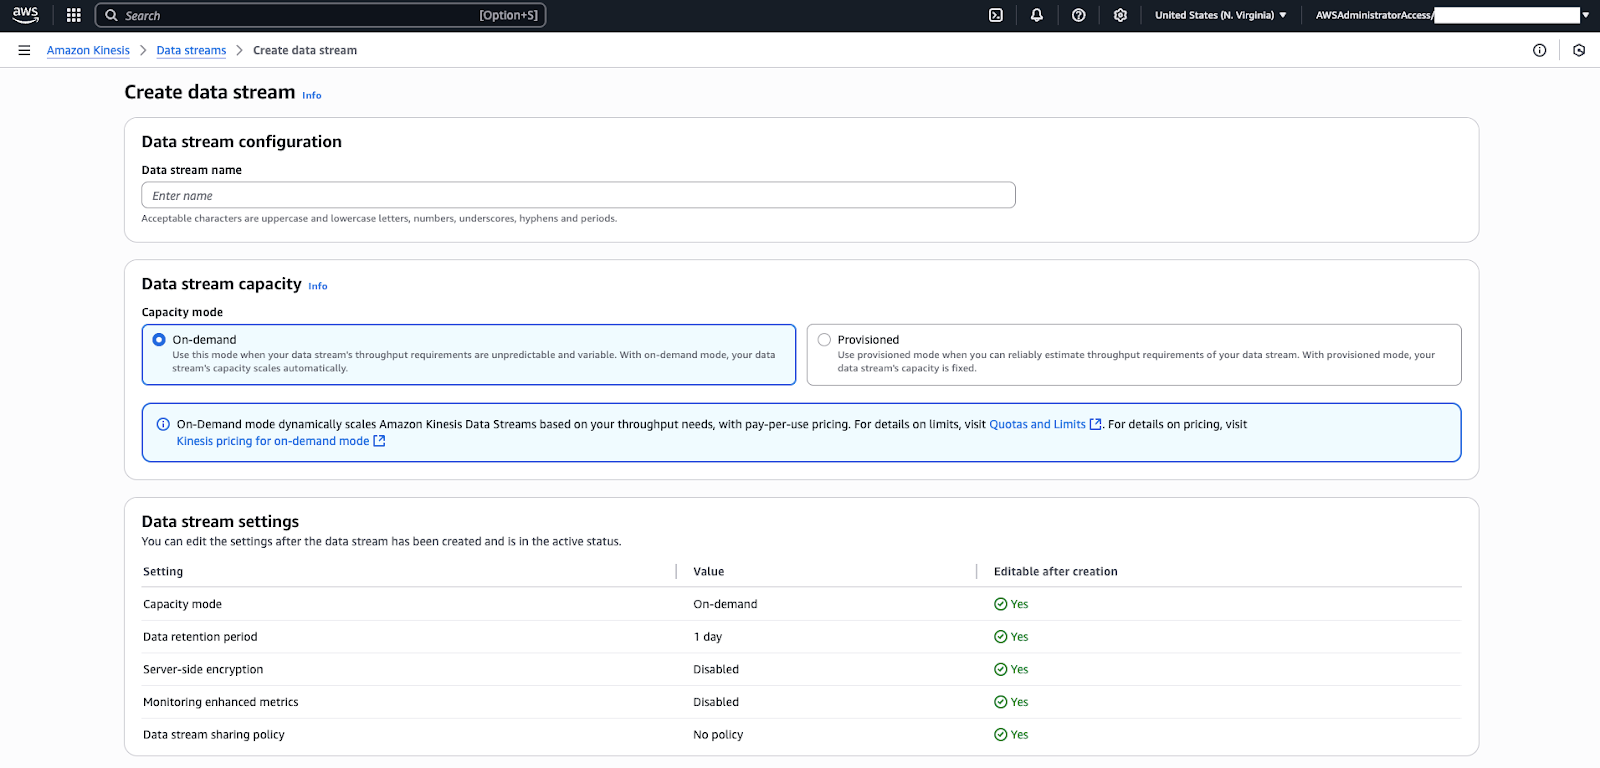
- Before proceeding to create the Contact Center account or the
CloudFormation stack, make sure that Kinesis Data Streaming is turned on in your
Connect instance. In the AWS Console, navigate to your Connect instance, click
Data Streaming > Enable data streaming, and select Kinesis
Stream. Create a new stream if needed. Tip: Make sure to turn on "Kinesis data streaming" and not "Kinesis Firehose".
- Click Save.
You now have a Connect instance. Every client needs their own Connect instance to use Contact Center.
If you're using an existing Connect instance, make sure the following are configured:
- An identity management method
- Customer profiles are turned on
- The profile creation policy is set to Associate only
- Kinesis data streaming is configured