Verified AI summary ◀▼
Set up automatic messages to enhance customer interactions by configuring welcome and idle messages. Customize these messages using personalization tokens for a more tailored experience. Admin access is required to manage these settings. Choose whether messages are sent automatically or with agent prompts, and specify idle times for triggering messages. This feature helps maintain communication flow and improves customer engagement.
Automatic messages are triggered when a new conversation comes into the inbox or when the agent or customer has been idle for a while. You need admin access in Contact Center in order to configure automatic messages.
This article contains the following topics:
Configuring your welcome message
Welcome messages can be set up as a default for your organization and at a queue level.
To configure your welcome message
- In Contact Center, click the settings icon (
 ) to access the admin settings.
 - Click the Workflows tab.
- Click Edit workflow and scroll down the page to Automatic
Messages.

- Click New Conversation.
- Add a custom welcome message and select whether it must be sent automatically or
if the agent should be prompted before sending it.
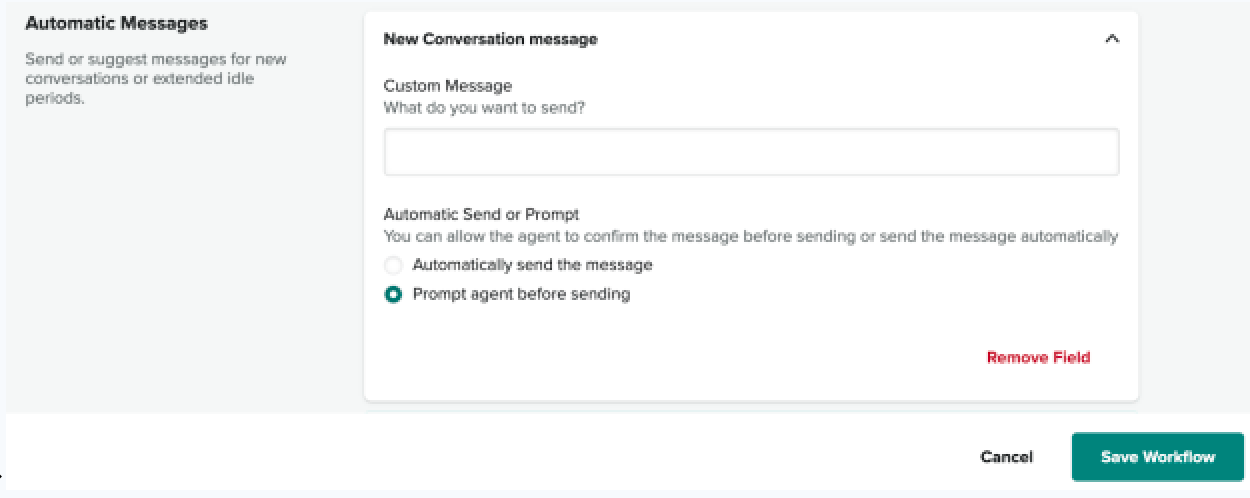
- Once you have completed the welcome message, click Save Workflow.
Configuring your idle message
- Agent idle sends a message when the agent hasn’t responded for a set amount of time.
- Customer idle sends a message when the customer hasn’t responded.
To add an idle message
- In Contact Center, click the settings icon () to access the admin settings.
- Click the Workflows tab.
- In the Automatic Messages section, click either Agent idle or
Customer idle.
- Enter your custom message, the idle time in seconds, and select how often this
message will be triggered. Then, select if the message will be sent
automatically or if it should prompt the agent before sending.
Click Save workflow.
Configuring personalization tokens
Welcome and idle messages can be customized using personalization tokens to improve the customer experience. The screenshot below shows an example.

For more information, see Using personalization tokens in Contact Center.