Verified AI summary ◀▼
Learn how to add resolution codes to your Contact Center, which help categorize interactions and enhance reporting insights. You can manually create codes or use a bulk upload via CSV or XML files. Admin access is required. Additionally, you can restrict codes to specific queues and set up workflows to ensure codes are selected before ending contacts.
You can add resolution codes in Contact Center using two different methods:
- Users can manually create resolution codes
- Using a bulk upload
Resolution codes, often labeled as disposition or wrap-up tags, are essential for categorizing interactions and gathering insights during reporting.
You must be an admin in Contact Center to add resolution codes.
This article contains the following topics:
Adding resolution codes manually
To manually add resolution codes
- To access the Administrator settings in Contact Center, click the cogs
icon on the left-hand side of the screen.
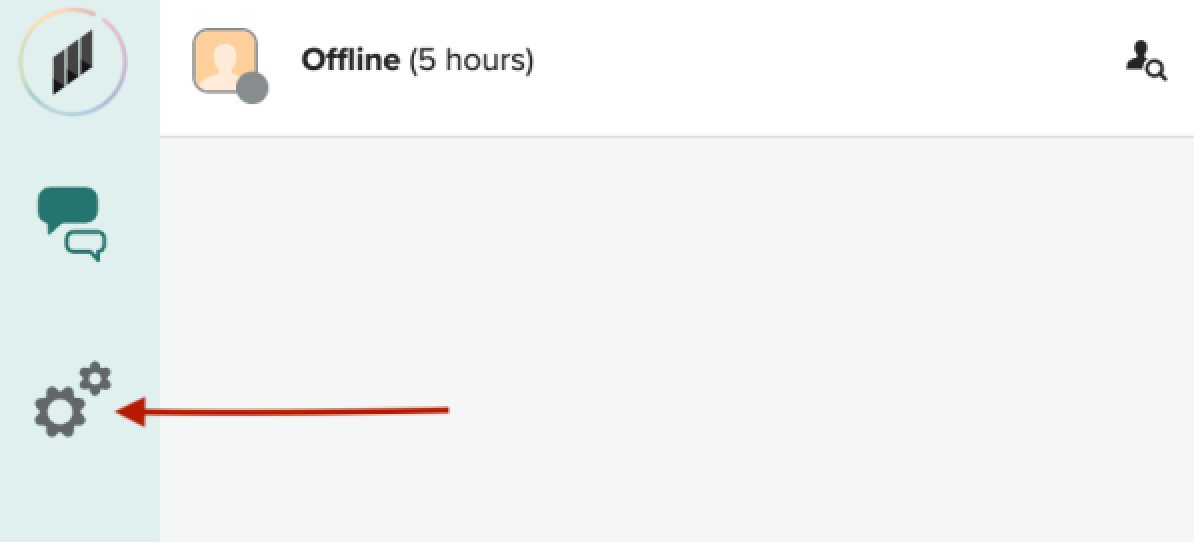
- Click the Resolution Codes tab.

- Click Add code or Add folder, then enter a name for your new
folder and click the green tick to save it.
Alternatively, you could add a single code, but depending on how many resolution codes you want to enter, it might be a good idea to start by adding a folder to store them.
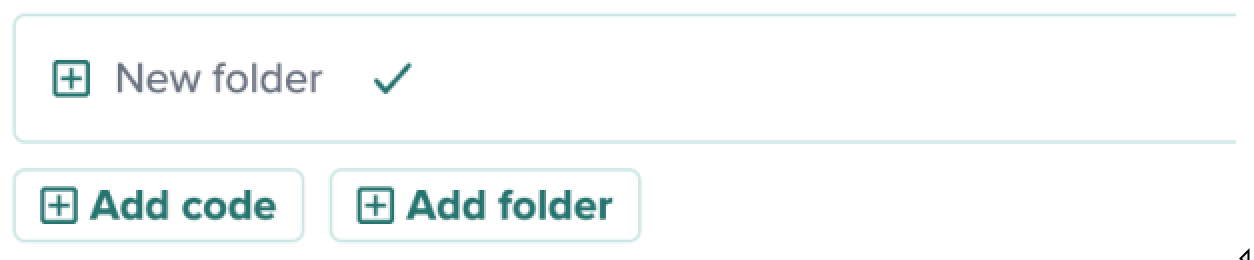
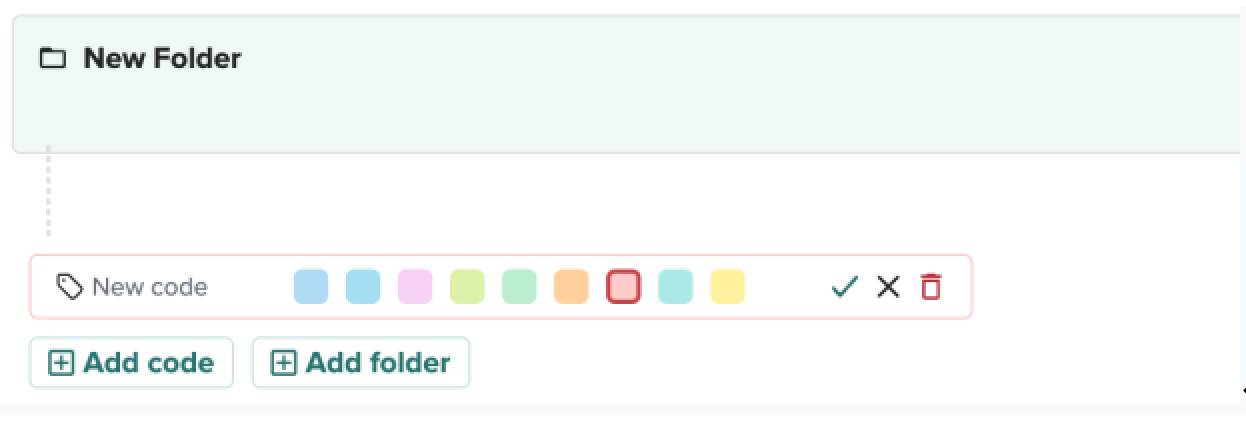
- Click the folder you created, then click Add Code.
- Enter the name of your resolution code, select a color from the color options,
then click the green tick to save your new code.
- Once you have added all your codes, click Save Draft and then click Publish to publish your codes and make them available for your company to use.
Adding resolution codes from a file
You can bulk upload Contact Center categories and codes using a CSV or XML file if you have a large number of categories and codes.
To add resolution codes from a file
- Make sure that the resolution code bulk upload template has the following
fields:
- ID:Optional. This can be a numeric or alphanumeric code.
- Name: Name of the code or description.
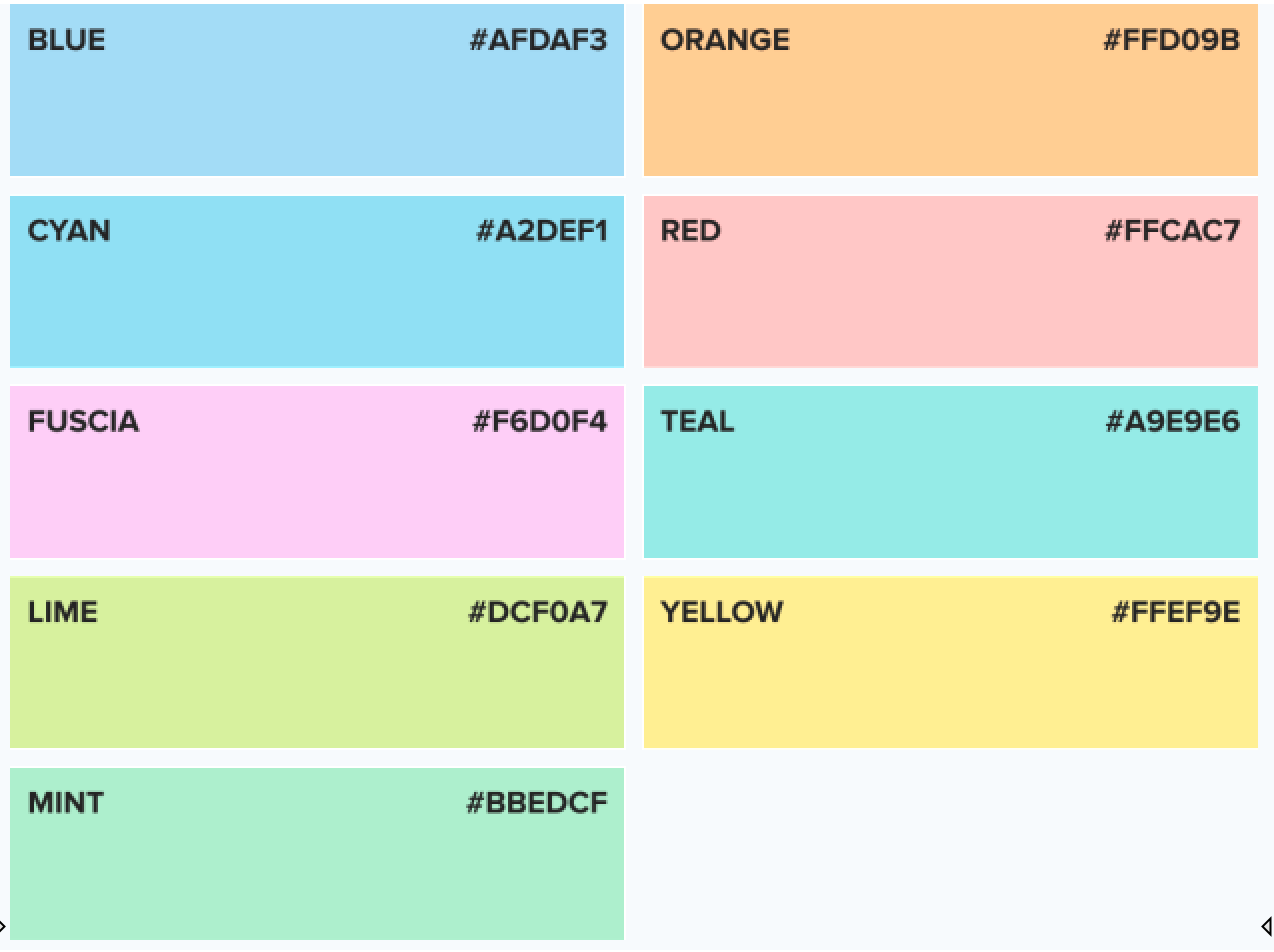
- Color Swatch Name: Choose one of nine available colors (illustrated below). Teal is the default color.
- Category Level One:Optional. This creates the first level category.
- Category Level Two:Optional. This creates the second level category.
- Category Level Three:Optional. This creates the third level category.

- Use colors for your codes to help differentiate them.
The template contains a column labeled Color swatch name. Use this column as a reference for the names. You can enter the hex code or the common name in the template.
Restricting resolution codes to a specific queue
Resolution codes can be restricted to specific queues. Admins can enable queue restriction on top-level categories (folders). These categories, including all subcategories and codes, will only appear for agents who have these queues in their routing profile.
To restrict categories by queue
- In Contact Center settings, click the Resolution Codes tab.

- Hover over the required folder. You will see that icons appear to the right.

- Click the visibility icon.
- Select the queues you want and then click Save queues.

- Click Save Draft and then Publish.
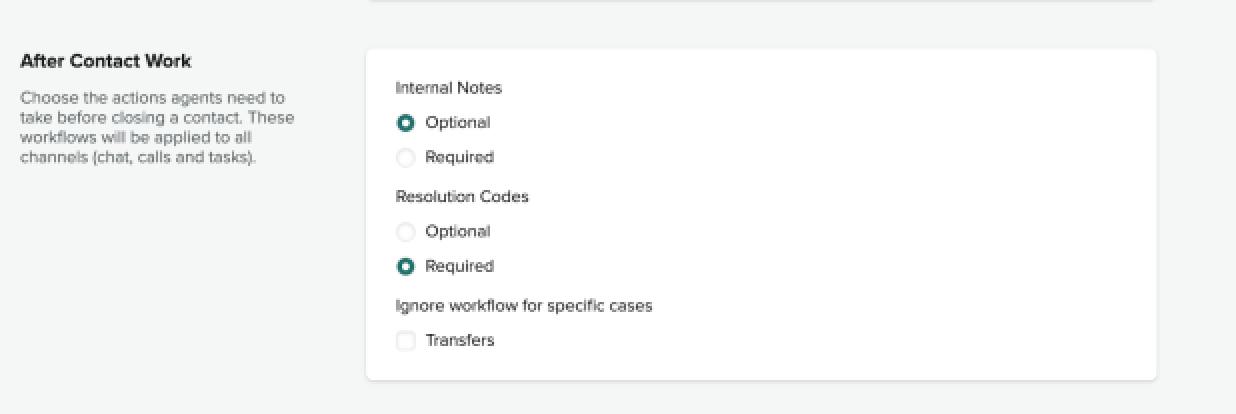
Using trigger workflow actions
If you want to ensure that resolution codes are selected before ending the contact, this can be enabled within workflows. You must be an admin in Contact Center.
To configure trigger workflow actions
- In Contact Center, navigate to Settings and click the Workflows tab.
- Click Edit for the required workflow.
- In the section After Contact Work, under Resolution Codes, select Required.