Verified AI summary ◀▼
Configure Google Workspaces SSO for your contact center by setting up SAML applications in Google Workspace and AWS Cognito. This enables single sign-on, streamlining user access and enhancing security. You'll create a SAML app in Google Workspace, configure an identity provider in Cognito, and specify it for agent authentication, allowing seamless integration and management of user identities across platforms.
Both Amazon Connect and Zendesk Contact Center can be configured for SSO with Google Workspace as the SAML-based identity provider. Amazon Connect and Contact Center each require a SAML application. The required SAML applications are created and configured in the Google Workspace admin console.
The Google Workspaces SAML application along with an AWS IAM identity provider will support the federation between Google and your AWS IAM users.
This article contains the following topics:
Configuring SSO for Amazon Connect
You can configure Amazon Connect SSO with Google Workspaces as described in Configure Single-Sign-On for Amazon Connect Using Google Workspace in the AWS documentation.
We recommend using Service Control Policies (SCPs) to manage permissions regarding what users and roles can do in Amazon Connect, protecting important resources and making your system more secure. See Security Best Practices for Amazon Connect.
The following example SCP can be used to prevent the deletion of the Amazon Connect instance and associated role.
<pre><code class="language-json">
<pre><code class="language-json">
{
"Version": "2012-10-17",
"Statement": [
{
"Sid": "AmazonConnectRoleDenyDeletion",
"Effect": "Deny",
"Action": [
"iam:DeleteRole"
],
"Resource": [
"arn:aws:iam::*:role/***Amazon Connect user role***"
]
},
{
"Sid": "AmazonConnectInstanceDenyDeletion",
"Effect": "Deny",
"Action": [
"connect:DeleteInstance"
],
"Resource": [
"***Amazon Connect instance ARN***"
]
}
]
}
</pre></code>
</pre></code>
Configuring SSO for Contact Center
Single Sign On (SSO) for Contact Center is implemented by configuring the Cognito Userpool to use a SAML application for sign-in. The Cognito Userpool in question is the one which was created by the Contact Center CloudFormation template.
Gathering the required Cognito Userpool details
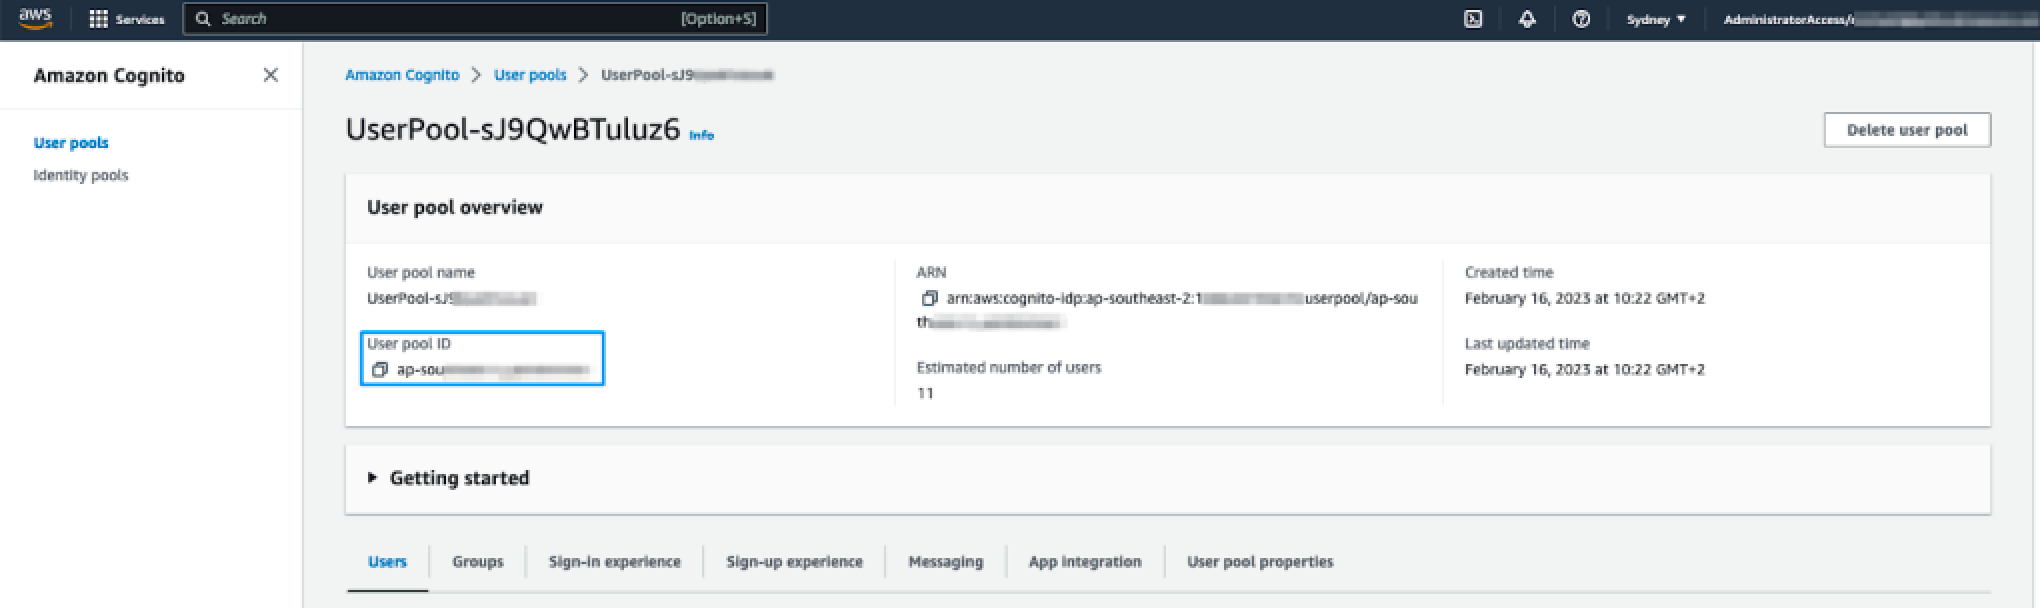
Sign in to the AWS account in which the Contact Center CloudFormation stack was created. Navigate to the Cognito service (ensure that you are in the correct region) and open the UserPool which was created when the Contact Center CloudFormation stack has been created. Note down the User pool ID as per the below image.
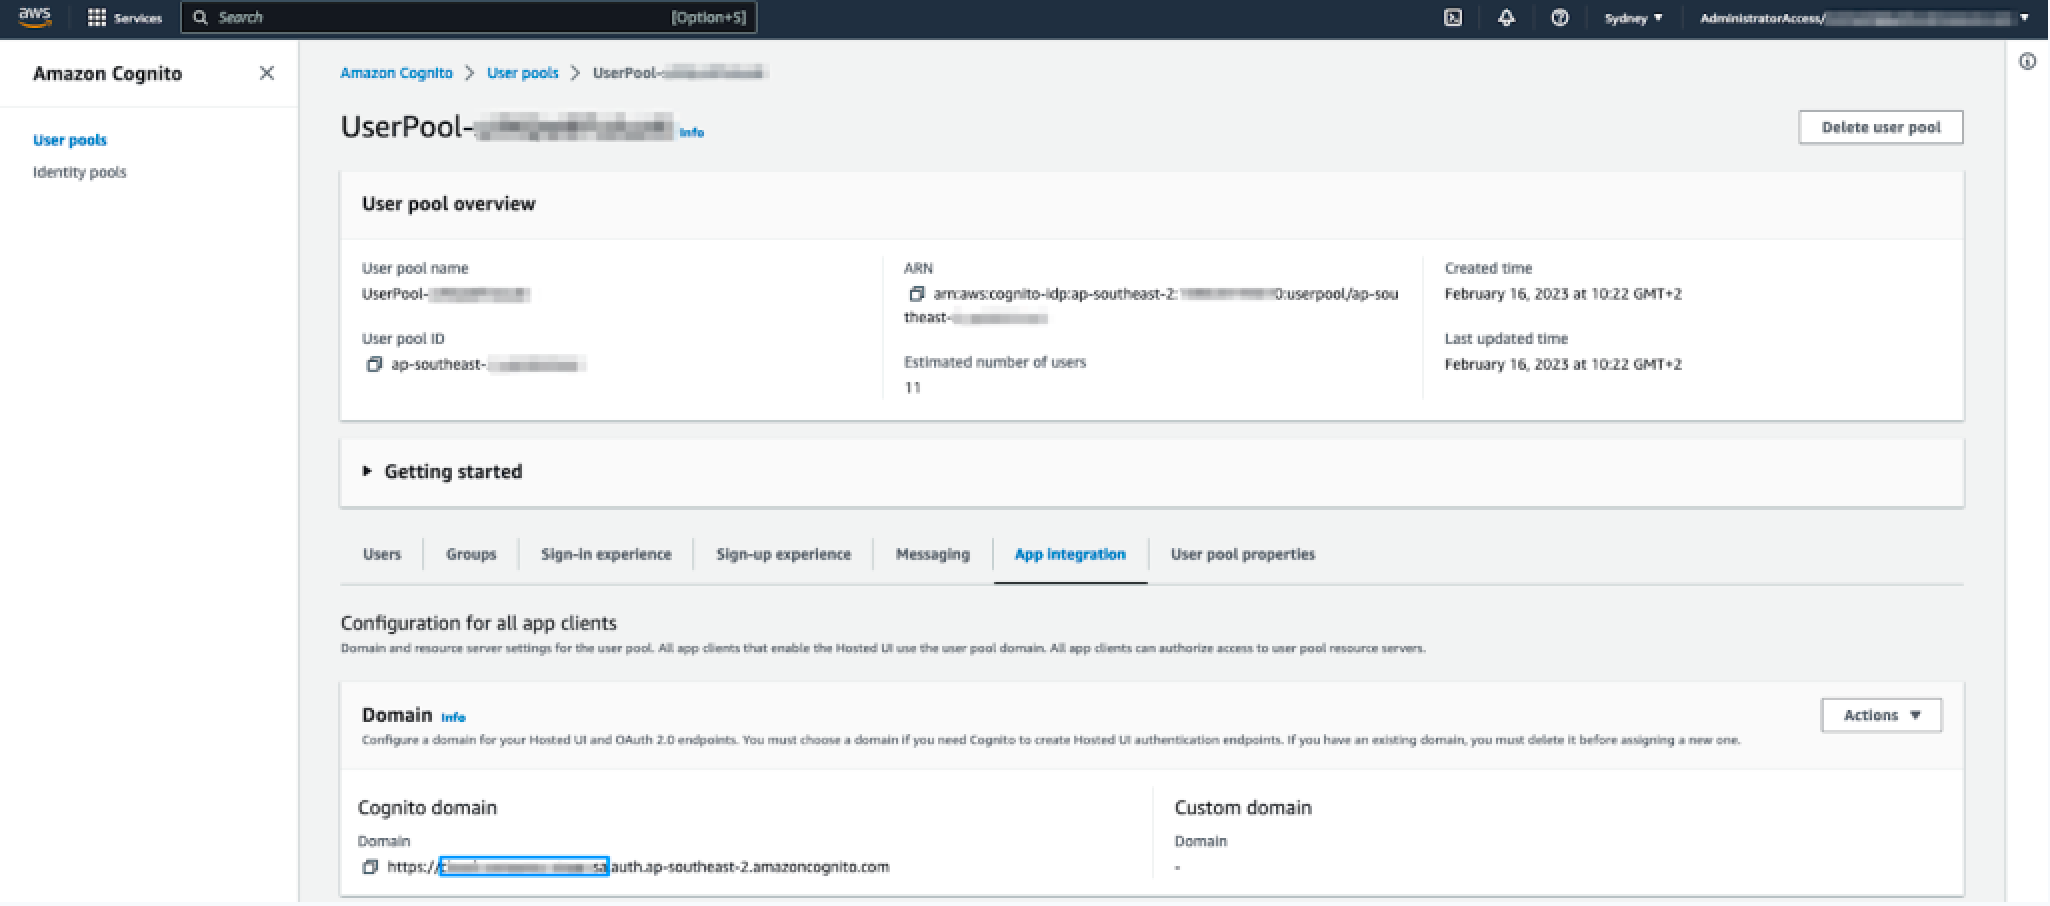
Click the App Integration tab and note down the Cognito domain prefix. This is the first part of the Cognito domain, before the '.auth.regionxxx' as highlighted in the image below. This is also the value that was specified in the CloudFormation template so can also be copied from the CloudFormation parameters tab if preferred.
Creating and configuring the SAML application
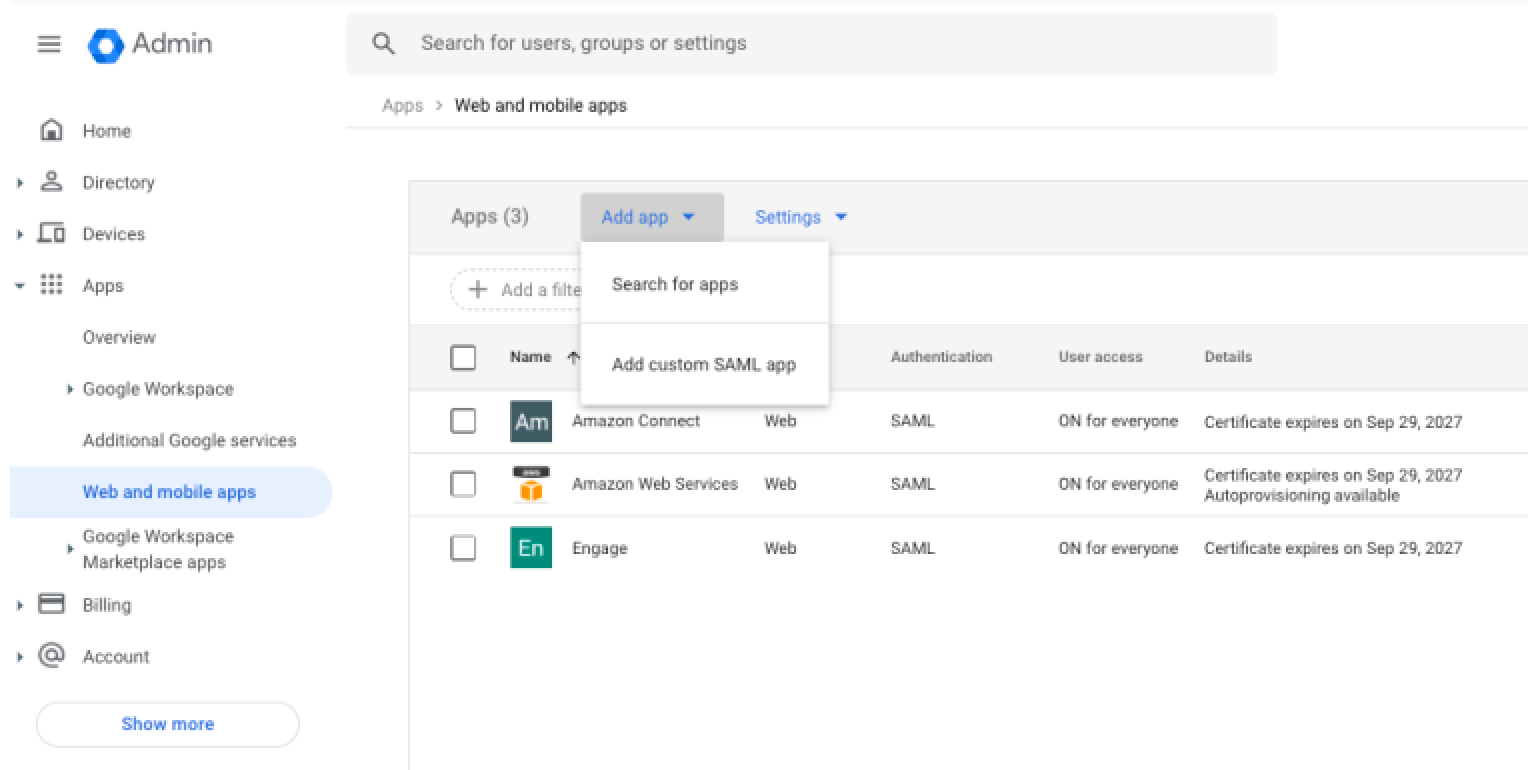
Open the Admin console in Google Workspace. In the left-most navigation panel, select the ‘Apps’ dropdown arrow and navigate to ‘Web and mobile apps’. Click on ‘Add app’ and select ‘Add Custom SAML app’.
To configure SAML integration for your Google Workspace app
- In the App details section, enter a name for your app, an optional description, and choose an icon.
- Click Continue.
- Click Download metadata. This file will be used to complete the Cognito configuration in AWS.
- Click Continue.
- Fill in the following fields under the Service provider details:
- ACS URL: https://${yourDomainPrefix}.auth.{region}.amazoncognito.com/saml2/idpresponse.
- Entity ID: urn:amazon:cognito:sp:${yourUserPoolId}
- NAME ID format: ENTITY
- Name ID: Basic Information> Primary email
Note: Replace ${yourDomainPrefix}, ${region} and ${yourUserPoolId} with the values from your Cognito user pool.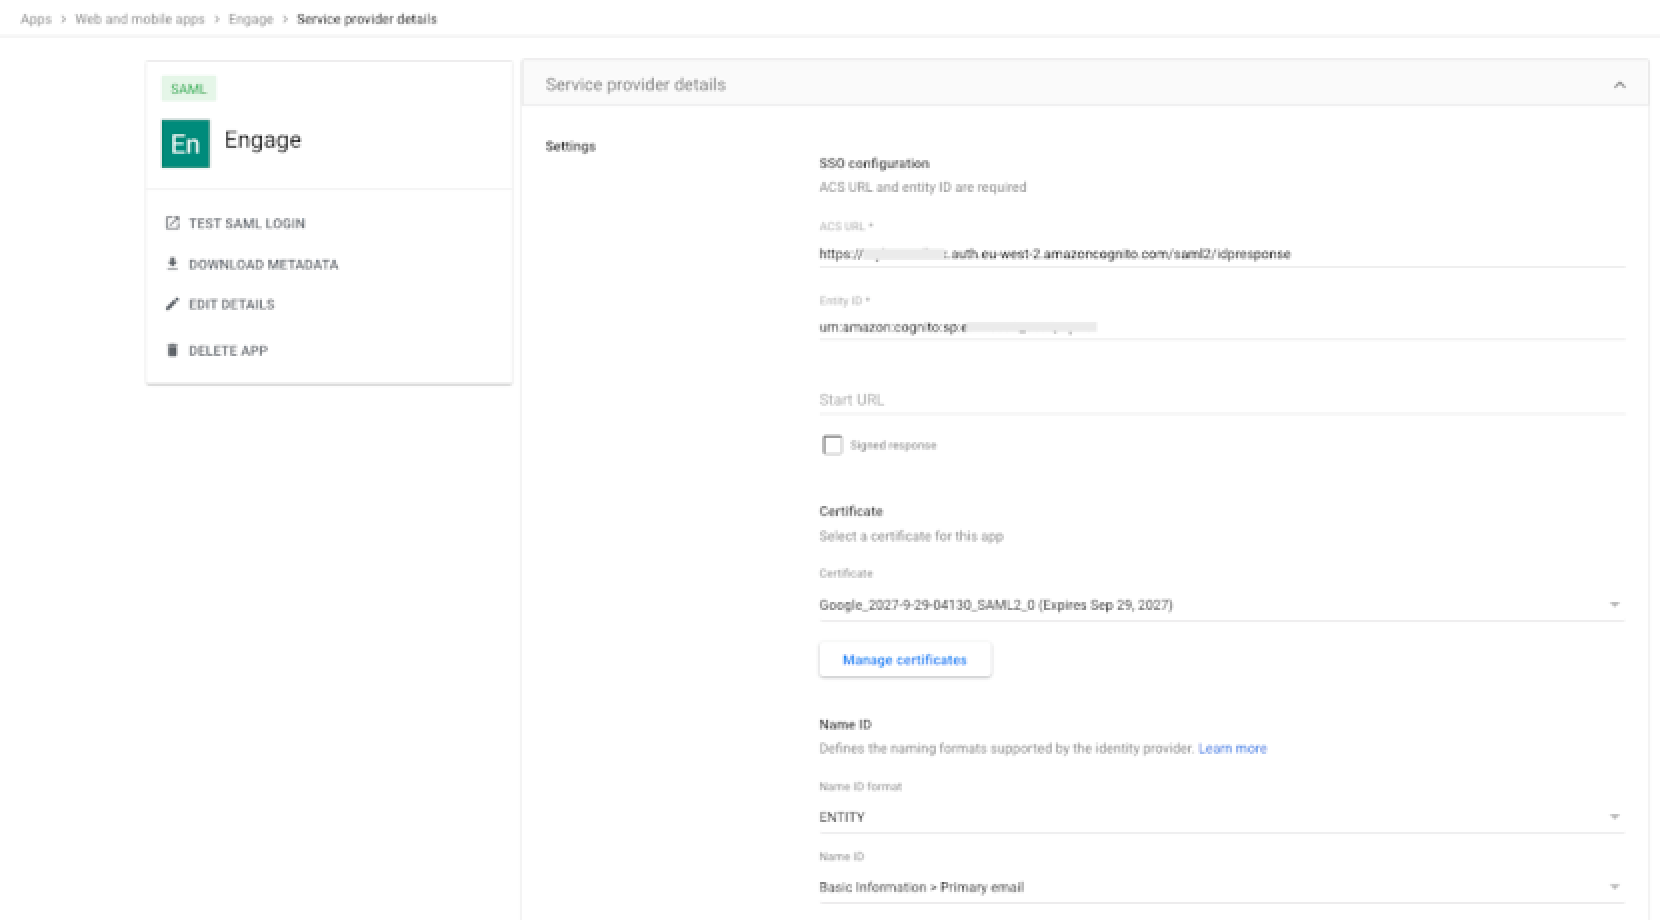
- Click Continue.
- Under Attribute mapping, add a Google Directory attribute with the following
value:
Google Directory attributes Value Primary email http://schemas.xmlsoap.org/ws/2005/05/identity/claims/emailaddress - Click Finish.
When you create a SAML app, it is turned off by default. This means for users logged in to their Google Workspaces account, the SAML app will not be visible to them. Next, turn on the Contact Center app for your Google Workspace users.
To grant users access to Google Workspace
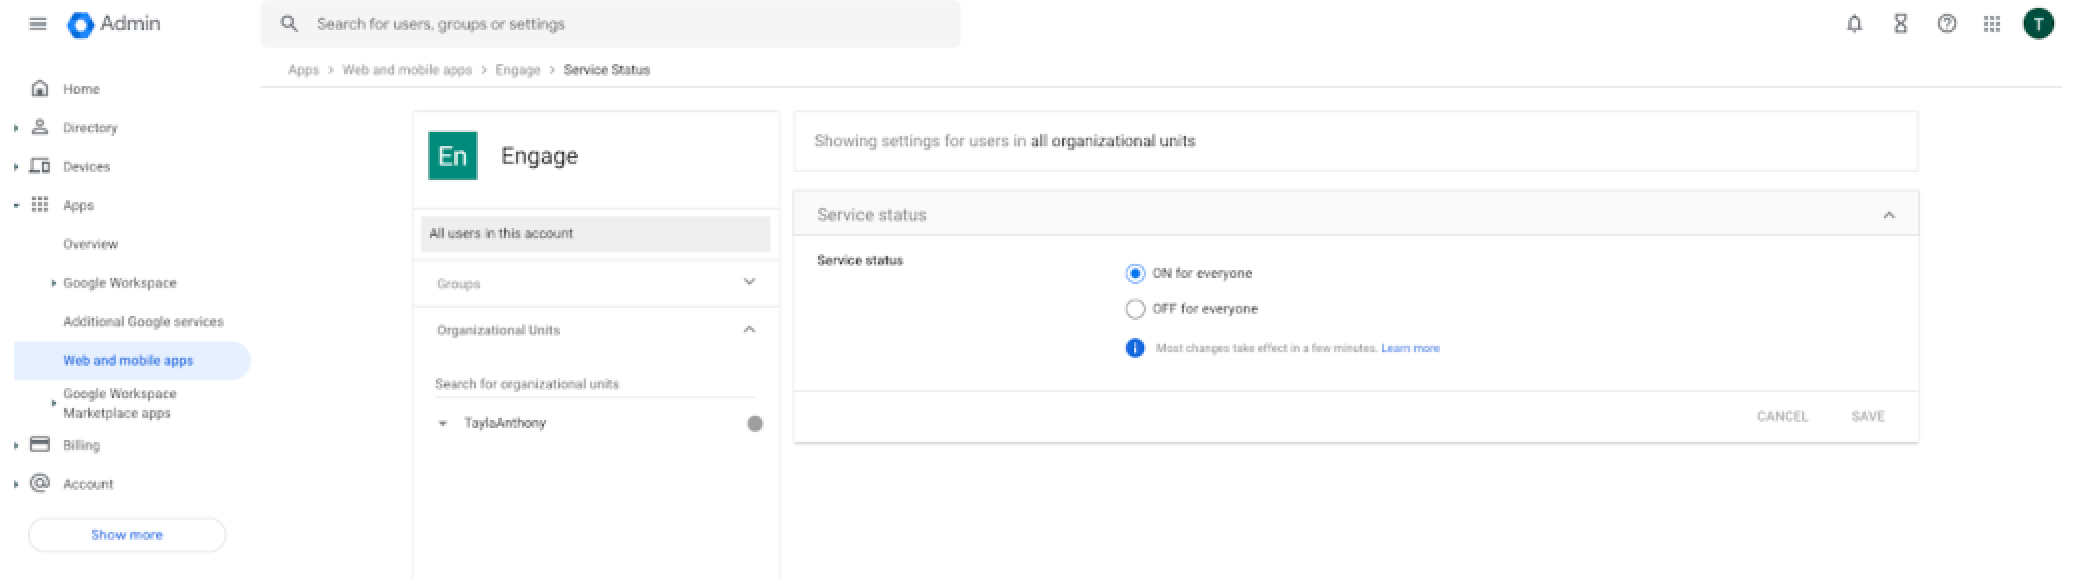
- Navigate to User Access under the Contact Center app configuration.
- Click View details.
- To turn on a service for everyone in your organization, click ON for everyone,
- Click Save.
If you do not want to activate this application for all users, you can take advantage of Google Workspaces organizational units and activate the Contact Center app for only a subset of users.
Configuring an identity provider in the Cognito User pool
To configure an identity provider
- Sign into the AWS account which contains the Cognito Userpool. Navigate to Cognito and open the userpool.
- Select the Sign-in experience tab and then click Add identity
provider as indicated on the image below:
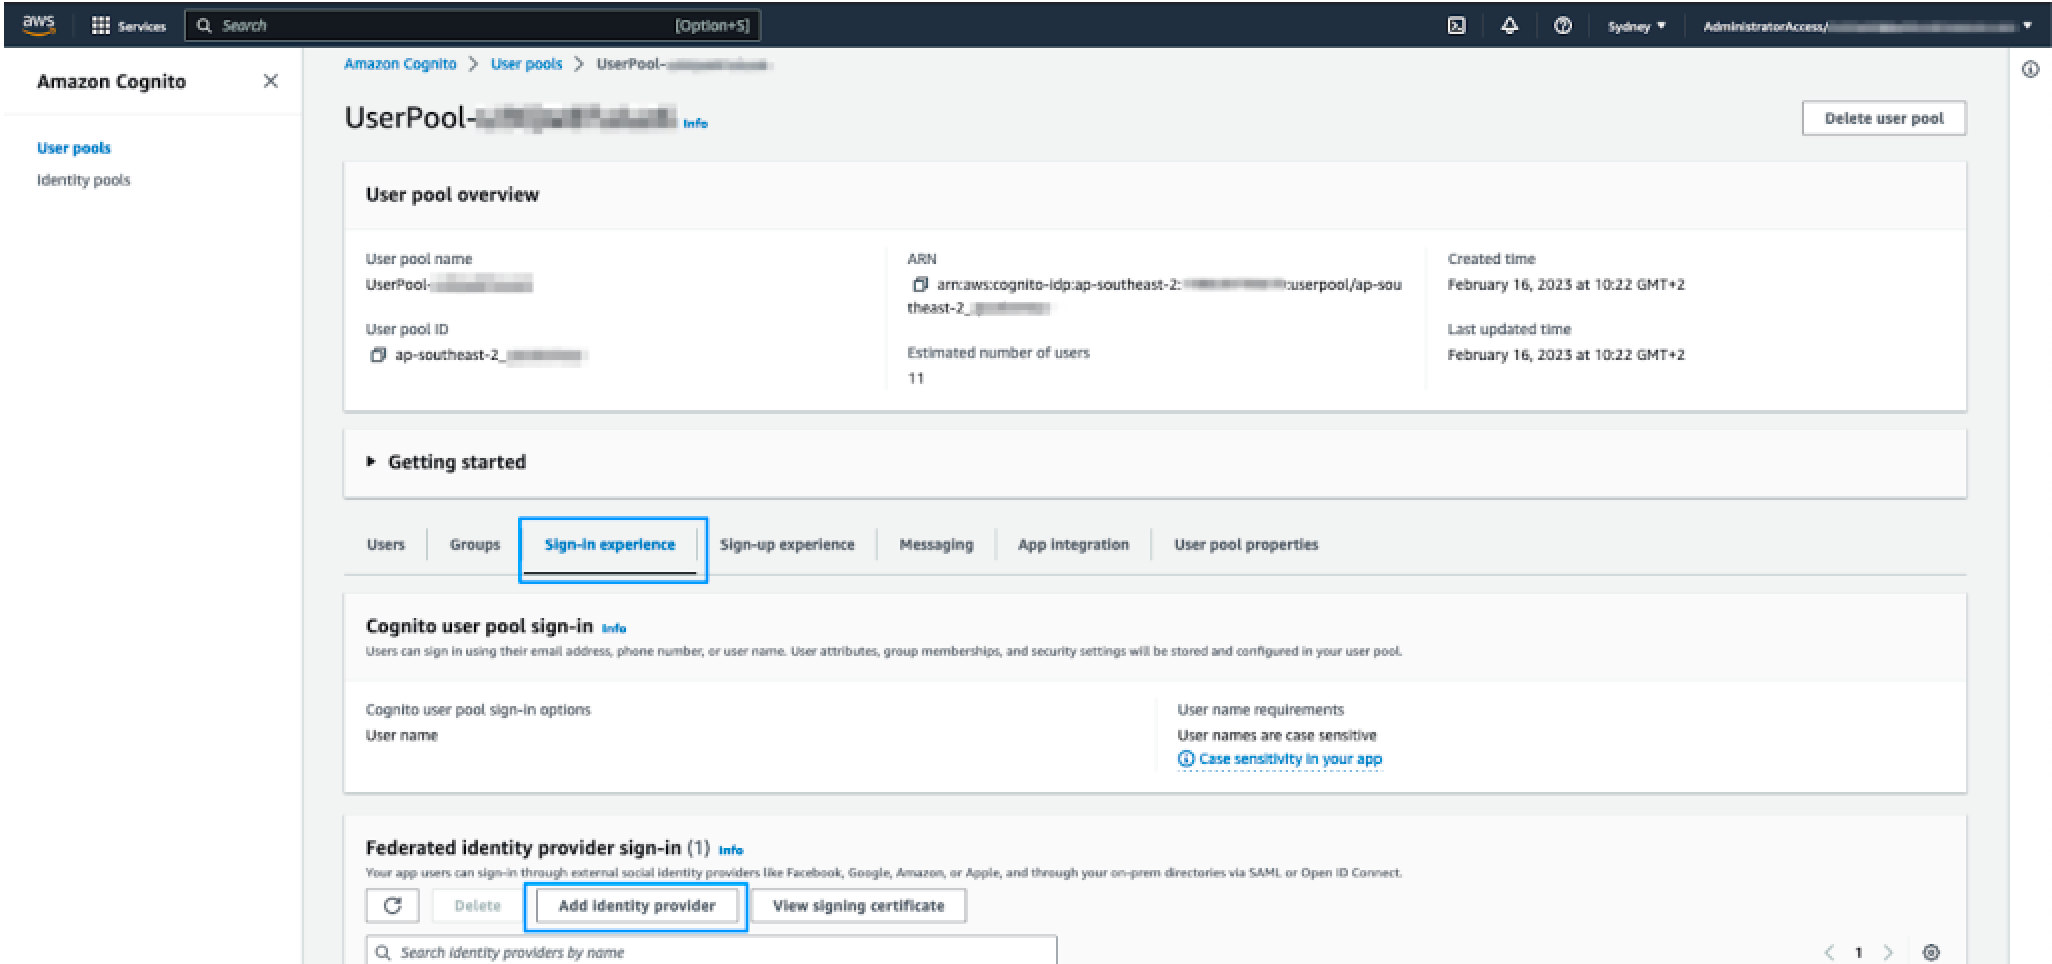
- On the resulting page, select SAML.
- Under Set up SAML federation with this user pool:
- Provider name: Enter a name for this identity provider. It is recommended to not use any spaces in the name e.g. google.
- Metadata document source: Upload the metadata file downloaded in the Google Workspace console.
- Under Map attributes between your SAML provider and your user pool, set the
following attribute:
User pool attribute SAML attribute email http://schemas.xmlsoap.org/ws/2005/05/identity/claims/emailaddress - Click Add identity provider.
At this point the required identity provider has been created. The last step in the Cognito configuration is to specify that the app client should use this identity provider.
Specifying this identity provider to be used for agent authentication
Now you need to specify the identity provided to use for agent authentication.
To specify the identity provider
- Select App integration from the tabbed view, scroll to the bottom and click app-client to open it.
- Once the app-client has been opened, scroll down to the Hosted UI section,
and click Edit.
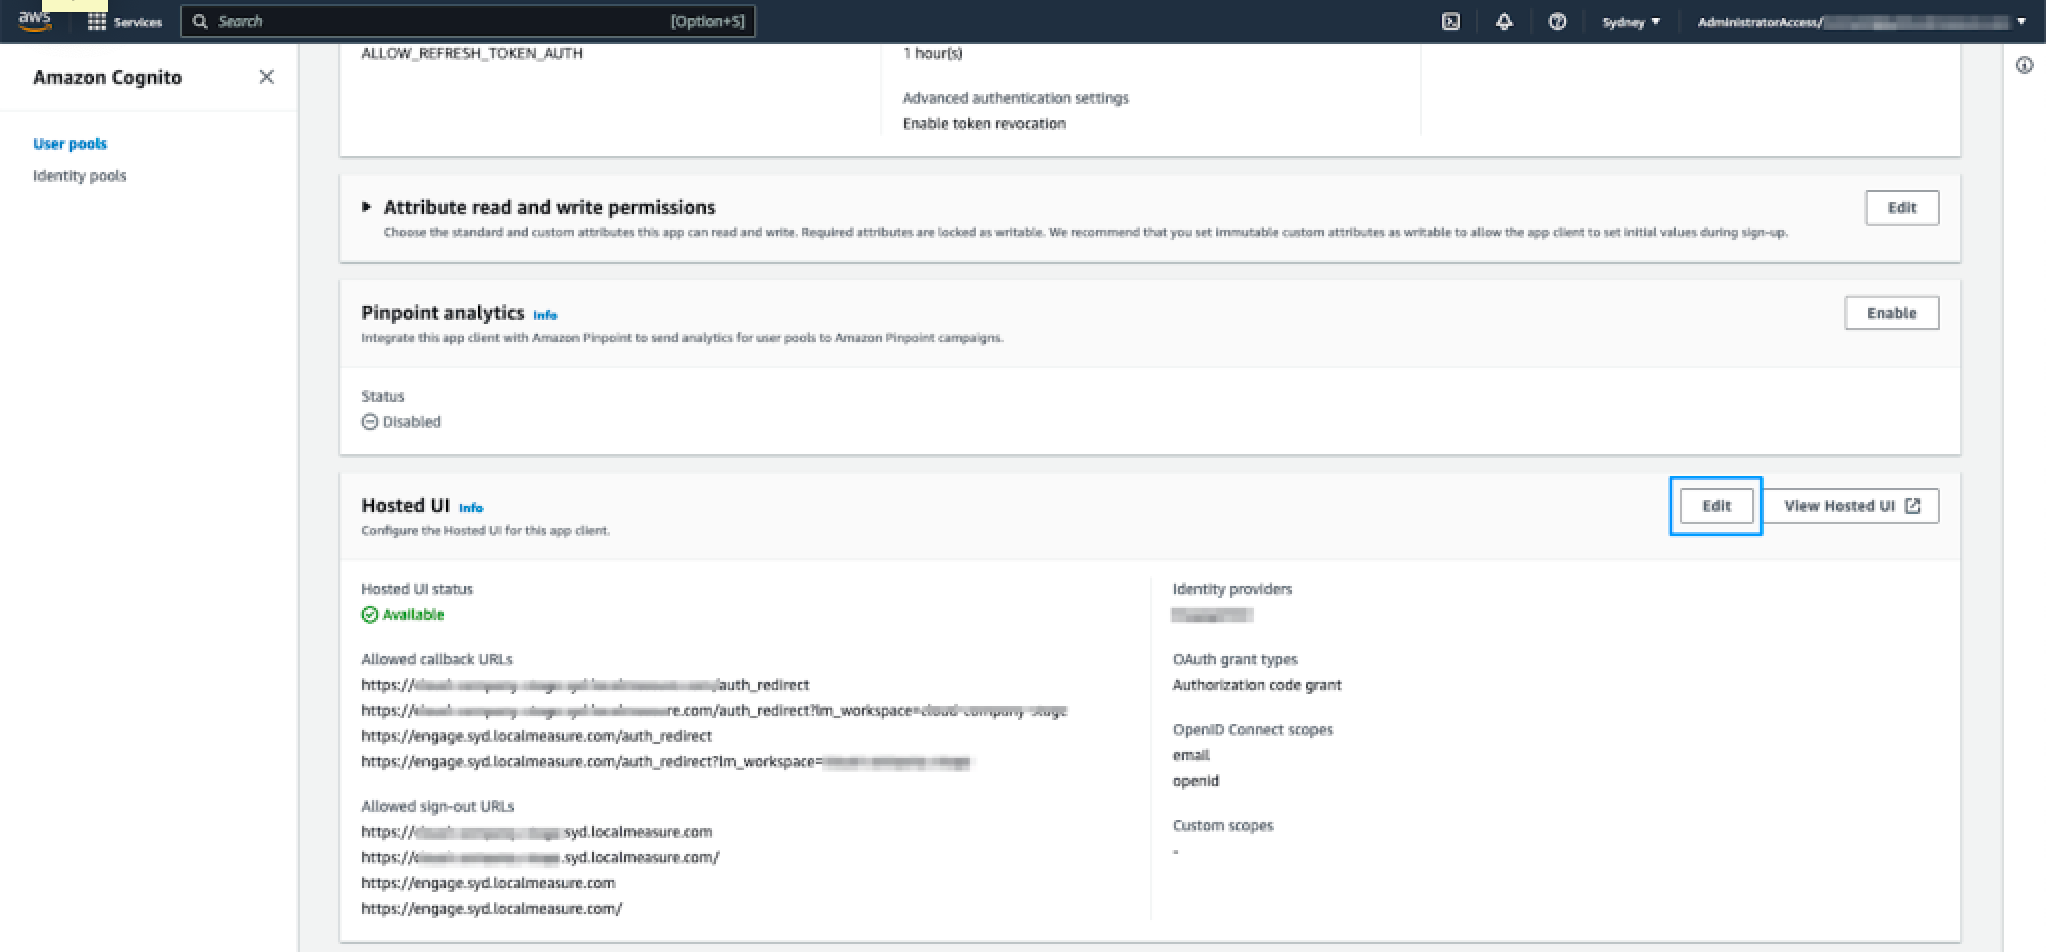
- Under Hosted sign-up and sign-in pages, scroll down to the Identity providers dropdown list. Click this and select the identity provider that you configured in the previous step.
- Click Save changes.
- Zendesk requires the name of the IDP (as configured under Sign-in experience) to complete the setup of your account. Include this along with the CloudFormation outputs information.