Verified AI summary ◀▼
Create a Contact Center account to link your Connect instance, enabling streamlined customer support. Use the admin portal to set up the account, ensuring the pod matches your instance. Configure details like account name, instance type, and license information. Once created, review the settings to confirm successful setup. This establishes your Contact Center account, ready for integration with your Amazon Connect instance.
With Connect ready, your next step is to create a Contact Center account.
Before you start, make sure that you have access to the Contact Center Admin app, with permission to access the your Connect instance. You can request access from your IT department.
As a Zendesk Professional Services user, you’ll use the Contact Center account admin interface to create a new Contact Center account tied to the client's Connect instance. This essentially onboards the client into the Contact Center system, establishing the one-to-one connection between Contact Center and Connect.
Zendesk provides a special account admin portal (distinct from the agent interface) for setting up and configuring customer accounts. It's accessible by Zendesk admins using the URL https://cc-admin.zende.sk. Once signed in, make sure you select the appropriate pod in the admin tool. The pod used must match the Zendesk instance pod.
The pod used to create the contact center instance must match the Zendesk account pod. This might be different to the Connect pod or region.
To add a Zendesk for Contact Center account
- In the admin console, navigate to the section where you manage customer
accounts and click Create new account.

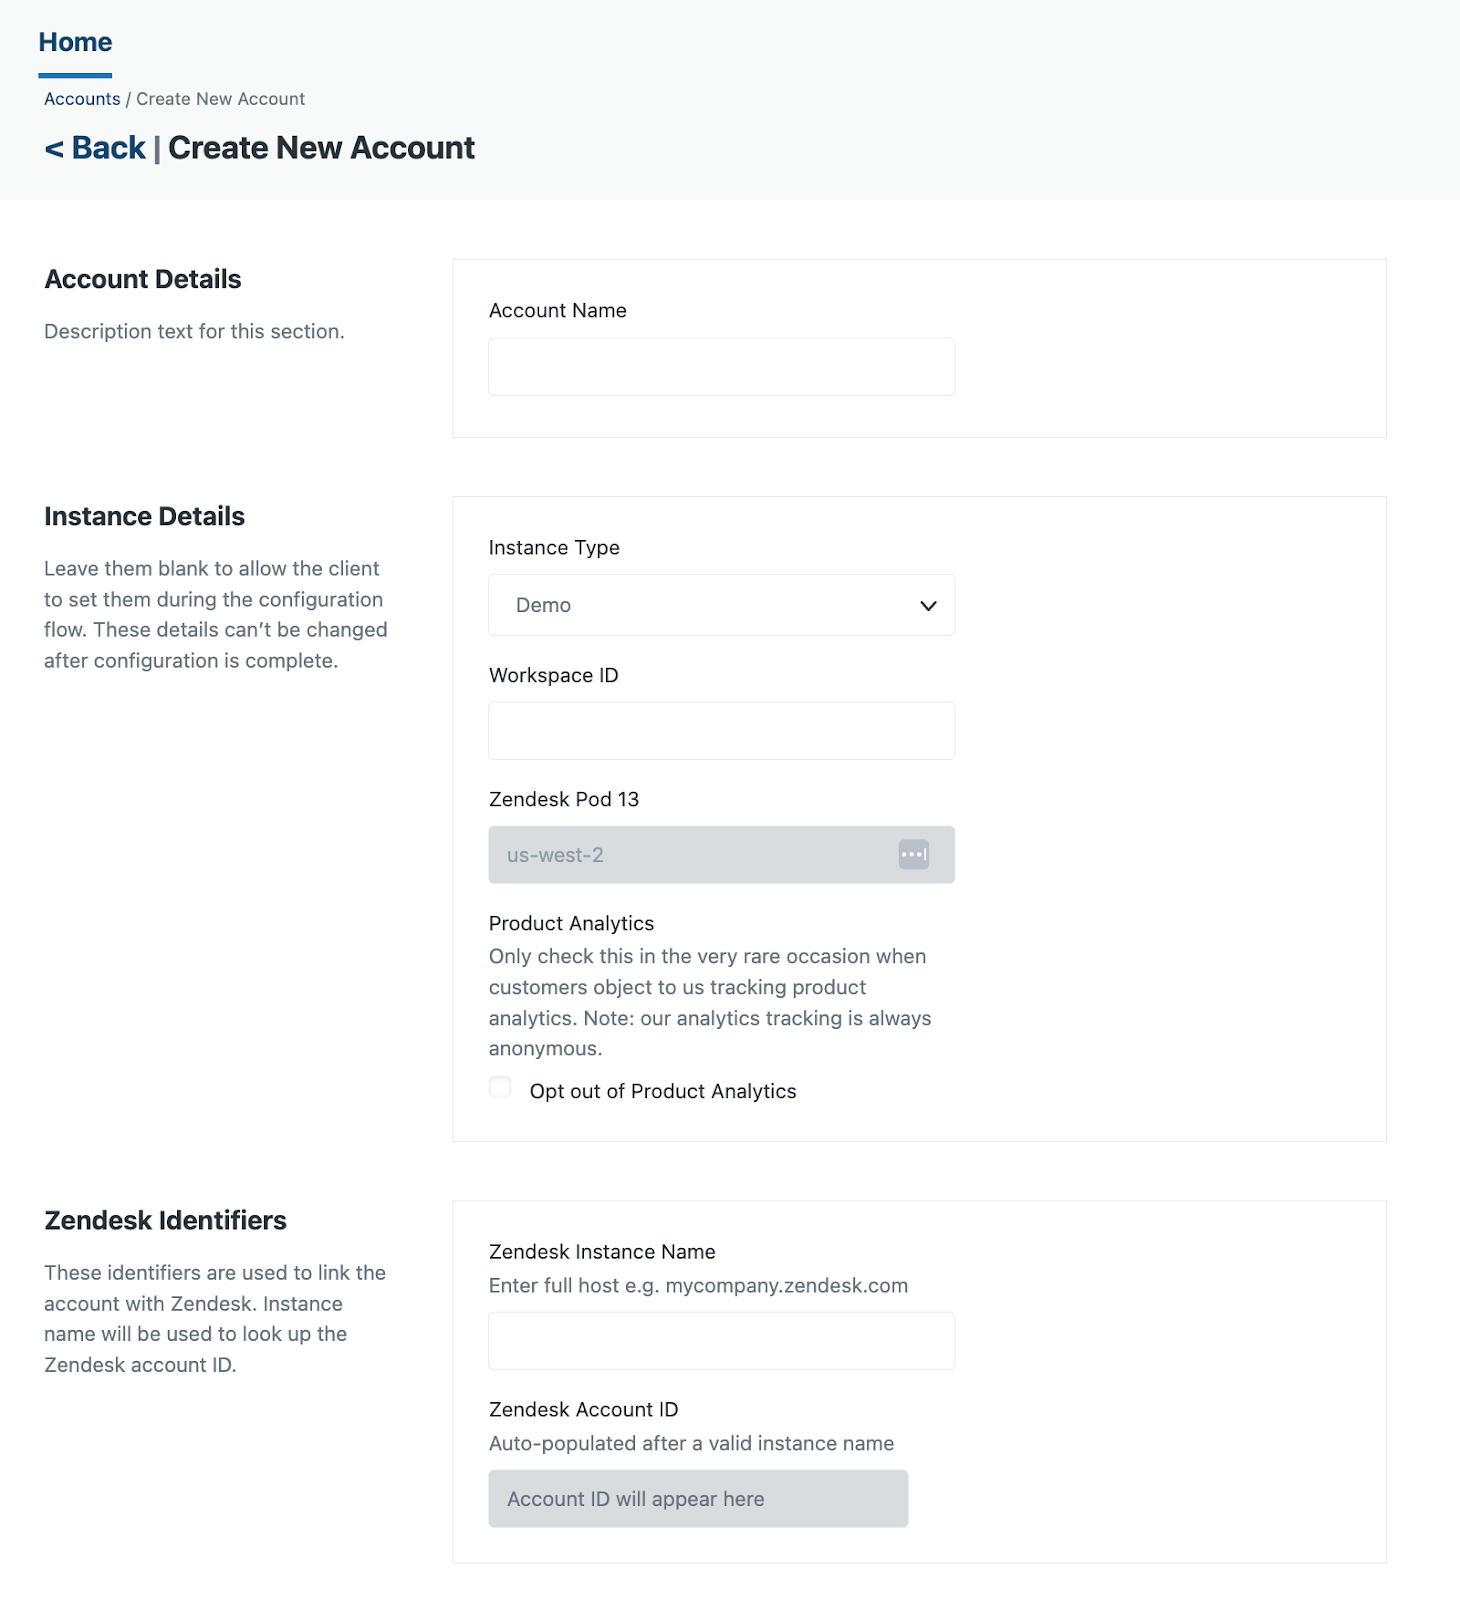
- On the Create new account page, configure the following:
- Account name: A descriptive name for the customer or project, for example (using the company name and environment), 'ClientXYZ Sandbox' or 'ClientXYZ Production'. This name might be used internally or in URLs, so keep it concise and identifiable.
- Instance type: Choose the type of instance, for example, 'Production' for a live account.
- Workspace ID: This will be automatically populated with the value entered in the account name field, but can be changed before you save the account. This will be used to form the URL to access the app and to link it to Zendesk.
- Licence details: Specify the maximum number of agents planned for the account, the rate per agent, and the expiration date for the account.
- Zendesk instance name: Enter your Zendesk subdomain. The account ID is automatically retrieved and will be displayed in the Zendesk account ID field.
- Technical contact: - Add a contact in case Zendesk needs to reach out about your account.
- Feature access: - Turn on/check the Advanced dashboards feature. This is turned on by default. If turned off, the customer will not be able to use the Contact Center Dashboards app.
- Product analytics: - Select this option if you give permission for us to share analytics data with third parties.
- Review your settings, then click Create account.
A new Contact Center account is created. You can see the new account listed in the admin console accounts list. At this stage, the account exists on the Zendesk side, but it’s not yet fully connected to the Connect instance.
- You can click the newly created account in the admin console to review its settings and confirm that the account has been successfully created.
You now have an Amazon Connect instance on AWS, and a Contact Center account in Zendesk.