Direct agent routing gives customers and partners a fast path to the right person, reduces time in shared queues, and makes ownership crystal clear. You can use it to offer VIP access to specialists, streamline internal and partner calls, and capture after-hours messages with voicemail for timely followups.
To achieve this, admins configure back office number assignments for agents. Back office number assignments can be either direct phone numbers know as direct inward dialing (DID) or internal extensions. Additionally, you can choose whether to offer voicemail for back office numbers.
This article contains the following topics:
Setting up a direct number for an agent
When setting up a dedicated phone number for an agent using DID, you can choose whether to offer voicemail and a custom message on that number.
- In Contact Center, click Admin Settings.
- Click the settings icon (
 ) in the
sidebar.
) in the
sidebar. - Click the Backoffice tab at the top.
- Click New DID Configuration.
- In the new DID configuration, select the Agent this phone number will
route calls to.
This is the DID owner.
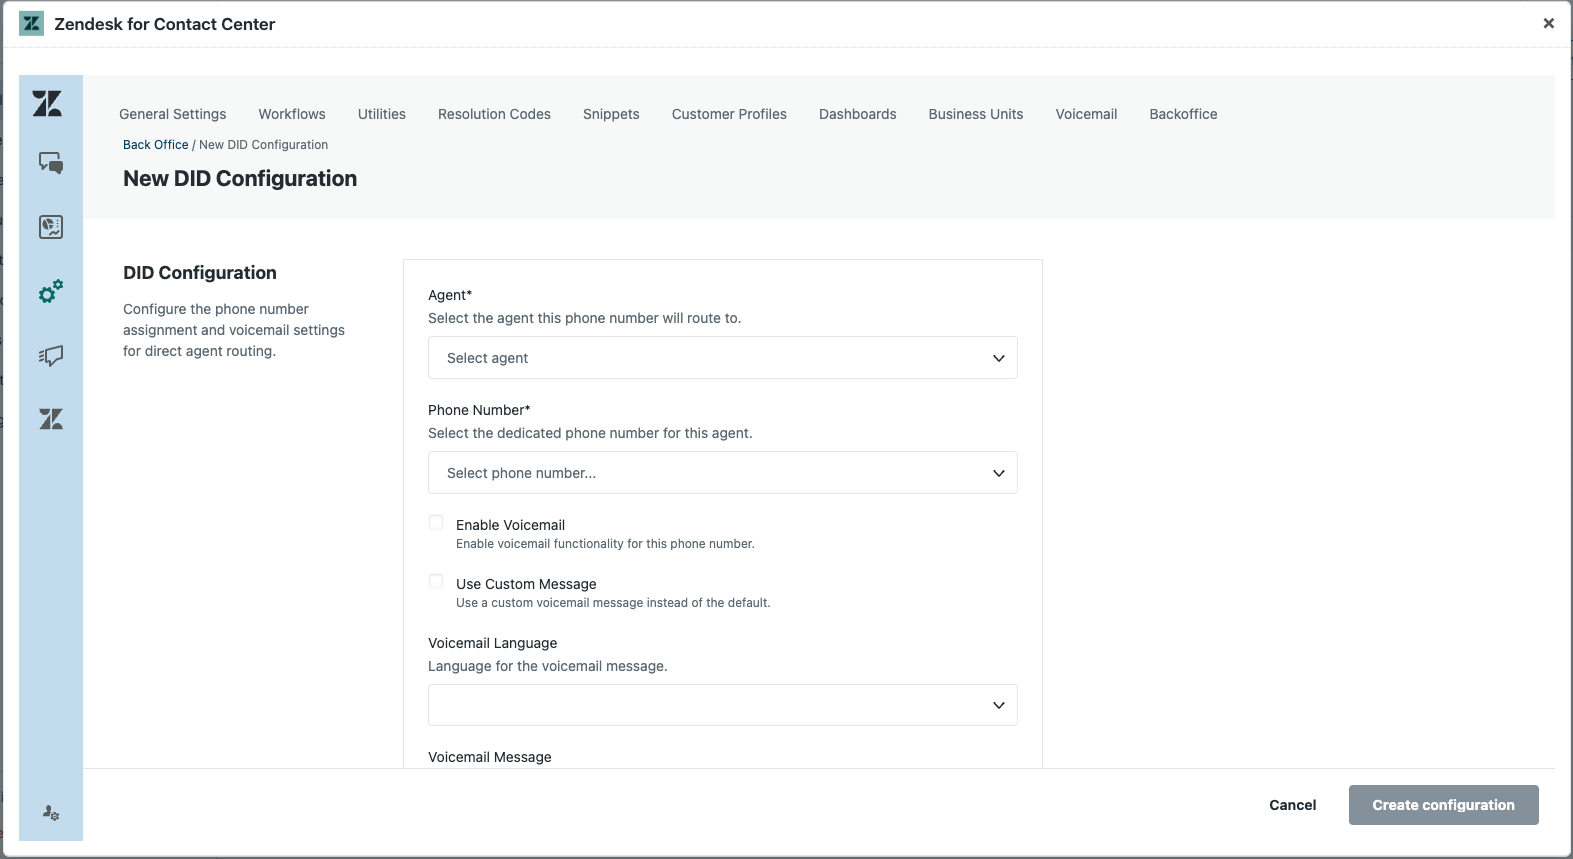
- Enter the dedicated Phone number for this agent.
- (Optional) Select Enable voicemail to offer voicemail for this number when the agent is unavailable.
- (Optional) Select Use custom message to play a custom voicemail message for this number when the agent is unavailable.
- (Optional) Under Voicemail language, select the language to use for the voicemail prompt.
- (Optional) Enter the custom Voicemail message to play to callers.
- (Optional) Select Enable call recording to record calls to this number.
- Click Create configuration.
Setting up an extension for an agent
When setting up an internal extension for an agent, you can control whether callers can leave voicemail on that extension and, if so, configure voicemail settings such as language and custom prompt options.
- In Contact Center, click Admin Settings.
- Click the settings icon () in the
sidebar.
- Click the Backoffice tab at the top.
- Click New Extension Configuration.
- In the new extension configuration, select the Agent this extension
will route to.
This is the extension owner.
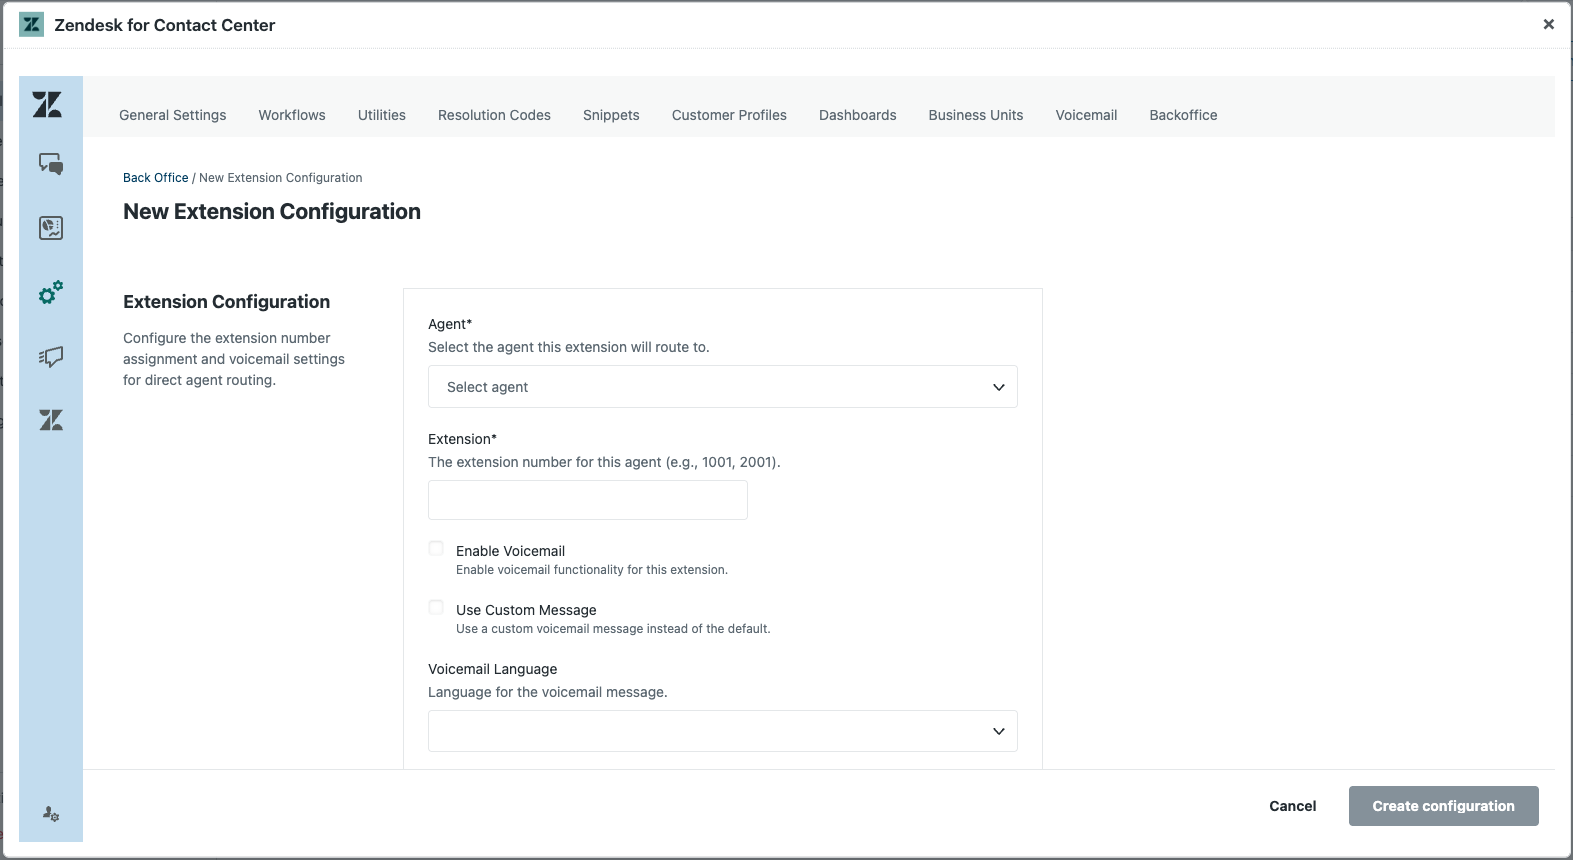
- Enter the dedicated Extension number for this agent (for example, 1001 or 2001).
- (Optional) Select Enable voicemail to offer voicemail for this number when the agent is unavailable.
- (Optional) Select Use custom message to play a custom voicemail message for this number when the agent is unavailable.
- (Optional) Under Voicemail language, select the language to use for the voicemail prompt.
- (Optional) Enter the custom Voicemail message to play to callers.
- (Optional) Select Enable call recording to record calls to this number.
- Click Create configuration.