Summary: ◀▼
Mapping Amazon Connect queues to brands helps classify incoming contacts for multiple brands, products, or regions. This ensures tickets route to the right agents, restricts access appropriately, and maintains accurate reporting. Admins can associate queues with brands to organize and manage ticket flow, supporting clear routing and brand-based access control for agents.
Mapping a queue to a brand helps Zendesk correctly classify incoming contacts as they move from Amazon Connect into Zendesk. This is useful when you support multiple brands, product lines, or regions, because it helps ensure tickets are routed to the right agents, access is restricted appropriately, and reporting stays accurate.
This article contains the following topics:
Understanding queues and brands
A brand is a customer-facing identity, allowing you to manage support for multiple products, companies, or regional departments through distinct contact points. An Amazon Connect queue is a virtual waiting area that holds incoming customer contacts until an agent becomes available.
In Contact Center, mapping an Amazon Connect queue to a brand determines which brand a call is associated with when it enters that queue and is handed off into Zendesk. This affects how tickets are associated with brands and can affect which agents can access or receive them. For example, if you use multiple brands, you can restrict access to tickets based on the brand.
Mapping queues to brands
As an admin, you can map Amazon Connect queues to Zendesk brands to keep tickets organized, routed, and reported correctly.
If you map the same queue to more than one brand, make sure your routing configuration and brand memberships are aligned so tickets are assigned as expected. To avoid ambiguity, don’t assign the same queue to different brands unless you have a clear shared-routing use case.
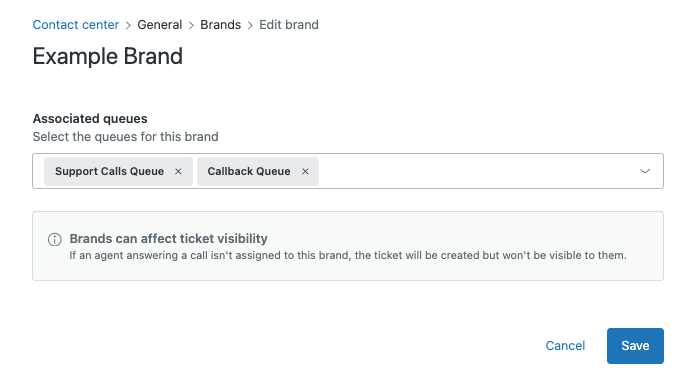
To map queues to a brand
-
From the Zendesk products menu, select Contact center.
-
Under General, click Brands.
-
Click on the name of the brand you want to edit.
-
Select the queues from the Associated queues menu.
-
Click Save.