

This recipe helps you to create a report that filters on follow-up tickets. It can be used to include or exclude those tickets.
This article contains the following topics:
What you'll need
Skill level: Intermediate
Time required: 15 mins
- Zendesk Explore Professional or Enterprise
- Editor or Admin permissions (see Giving agents access to Explore)
- Ticket data in Zendesk Support
Creating the report
-
In Zendesk Explore, click the reports (
 ) icon.
- In the Reports library, click New report.
- On the Select a dataset page, click Support > Support - Updates history, then click Start report.
-
In the Calculations menu (
 ), click Standard calculated metric.
-
On the Standard calculated metric page, enter a name for the metric like Follow-up Tickets, then enter or paste the following formula:
IF [Update channel]="Closed Ticket" THEN [Ticket ID] ENDIF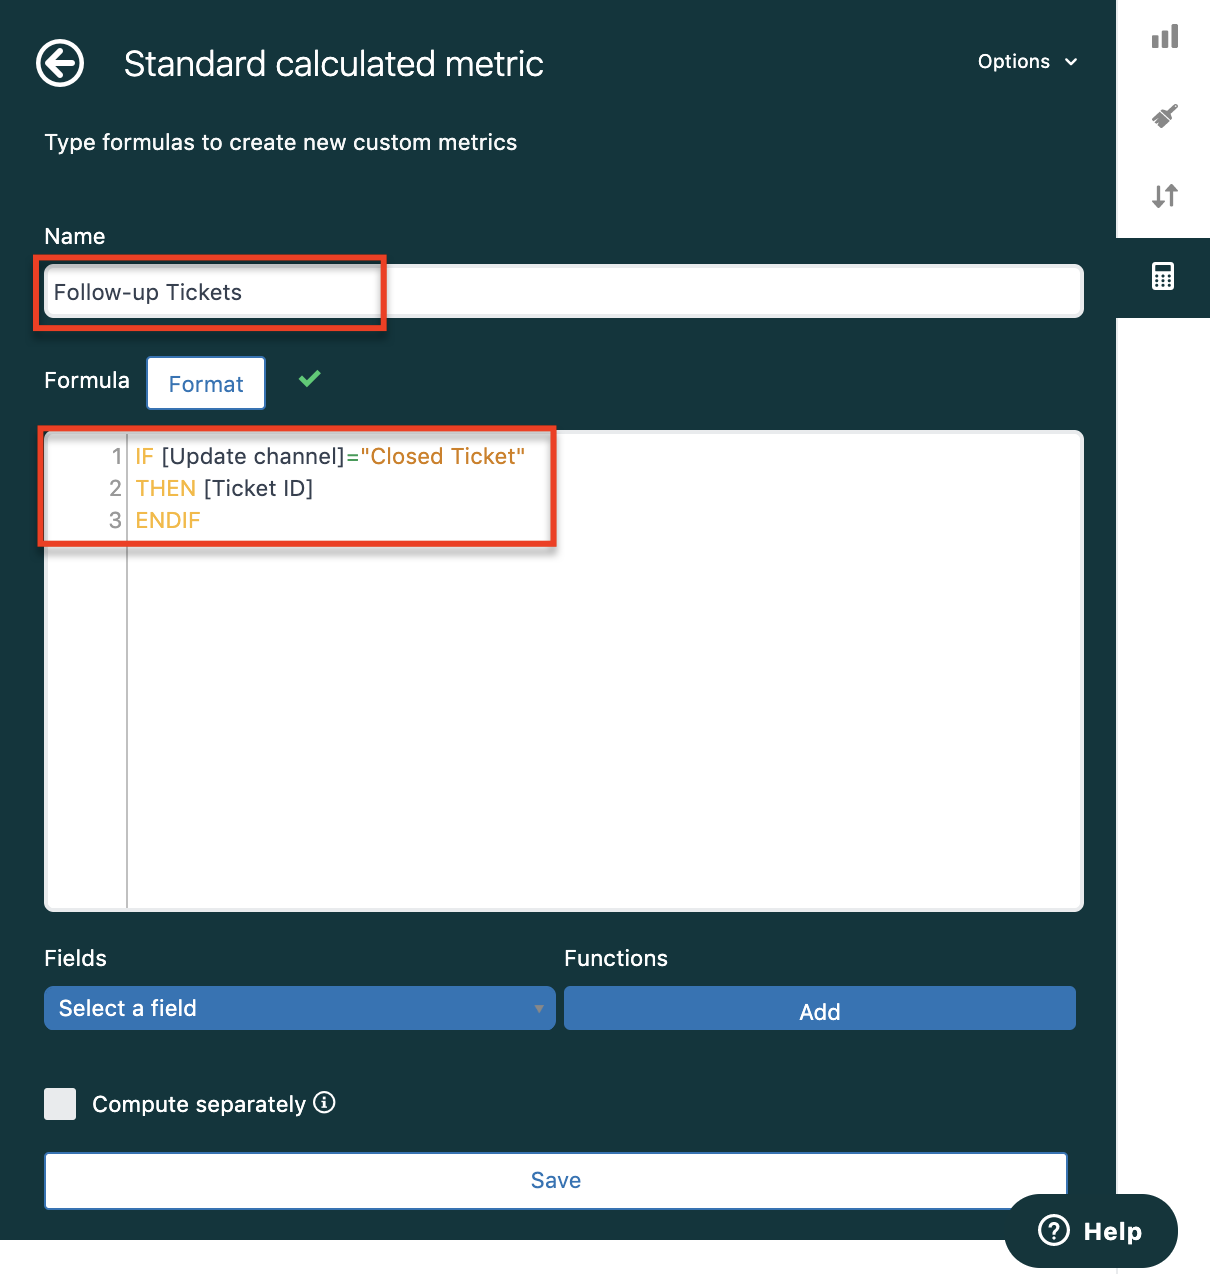
Tip: If you're working in a language other than English, read this article to help you enter Explore formulas in your language. - When you are finished, click Save.
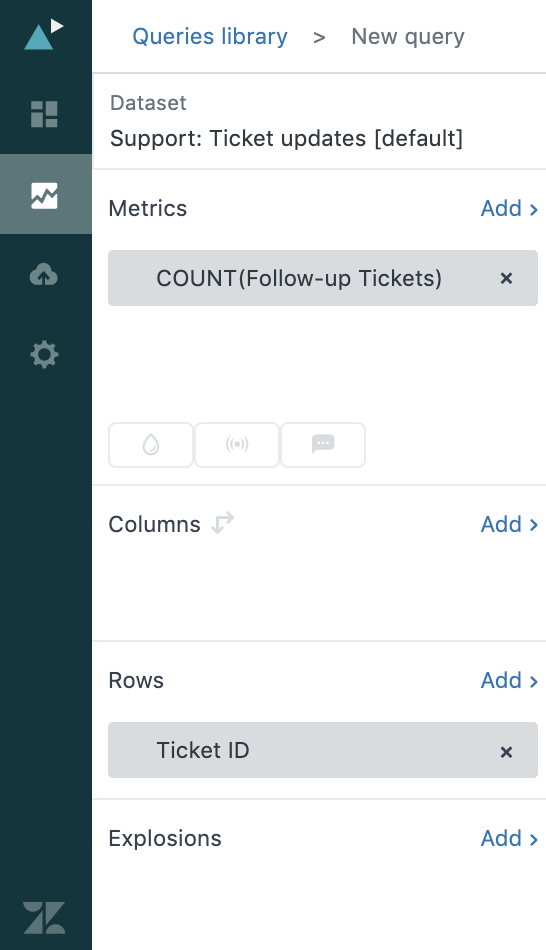
- In the Metrics panel, click Add.
- From the list of metrics, choose Calculated metrics > Follow-up Tickets, choose COUNT as the aggregator, then click Apply.
- In the Rows panel, click Add.
- From the list of attributes, choose Ticket > Ticket ID, then click Apply.
-
The current report setup will match the following:
-
In the result manipulation (
 ), menu. click Metric Filter.
-
On the Metric filter page, set both the minimum and maximum values as 1 to include follow-up tickets.
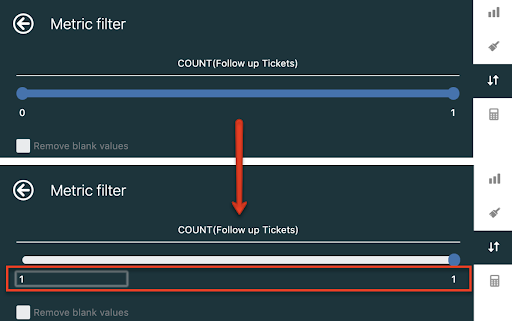
You could also set both the minimum and maximum values as 0 to exclude any follow-up tickets from the result.
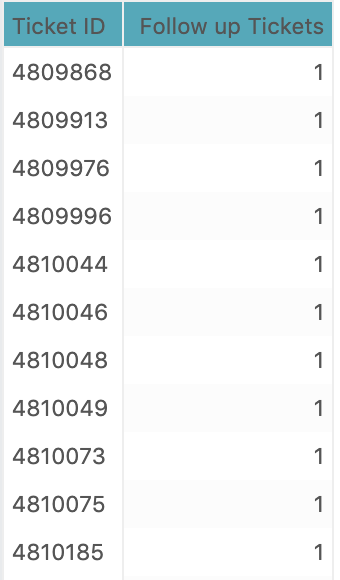
The report is complete. See the screenshot below as an example of the finished result with a list of internal tickets (tickets without any public comments).
Enhancing your report
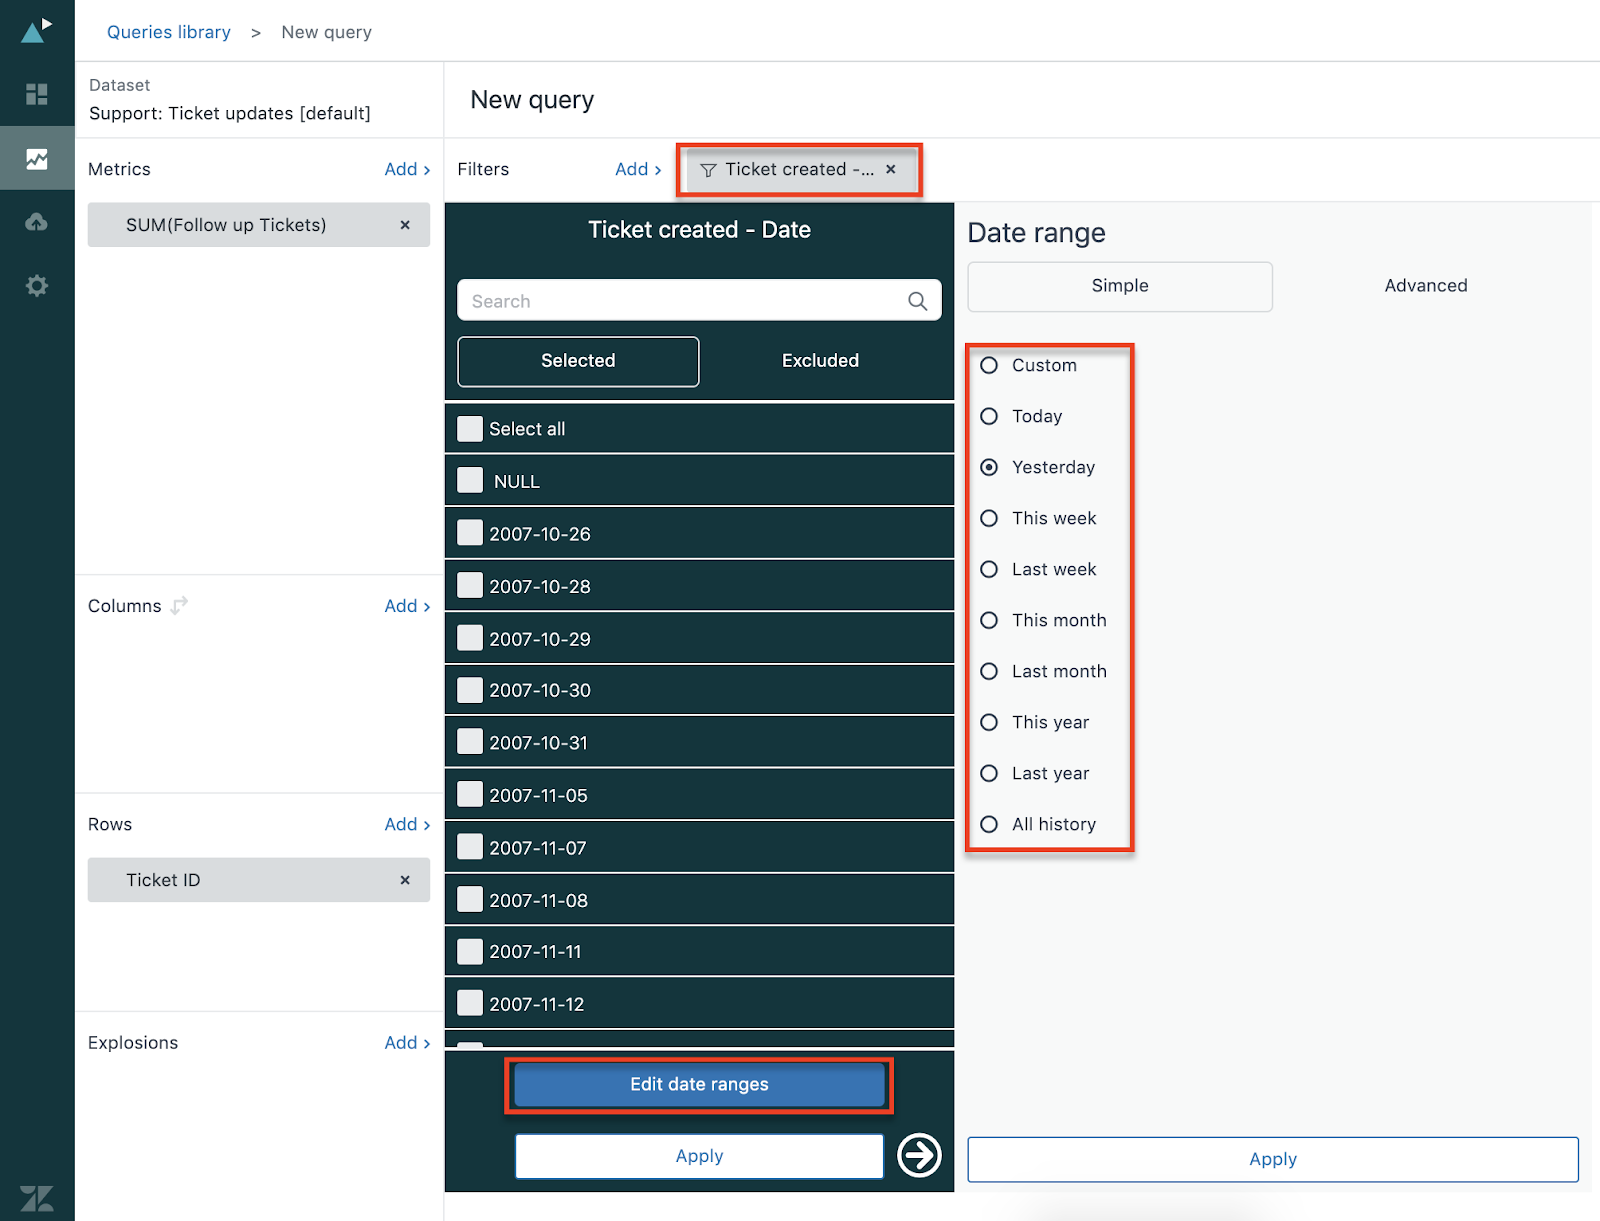
You can also filter on the Ticket Creation Date and only return tickets created within a specific date range. See below for an example of how to setup a date filter within the report.
- In the Filters panel, click Add.
- From the list of attributes, choose Time - Ticket created > Ticket created - Date, then click Apply.
-
Click the Ticket created - Date filter you just added, click Edit date ranges, then specify a date range (yesterday, last week, etc.) to filter on.
- When you are finished. click Apply.
- The report will return only tickets created within the date range you configured.