Summary: ◀▼
Manage QA groups to organize users, filter dashboards and conversations, and set assignments. You can create, edit, hide, archive, restore, or delete groups, and add or remove members in bulk. Support groups sync into QA, while QA-created groups stay separate. Groups include team members only and help admins, agents, workspace managers, and leads control visibility and access.
This article describes how to manage groups in Zendesk QA. Groups in Zendesk QA allow you to organize users, filter information in dashboards, filter conversations, and to set up assignments.
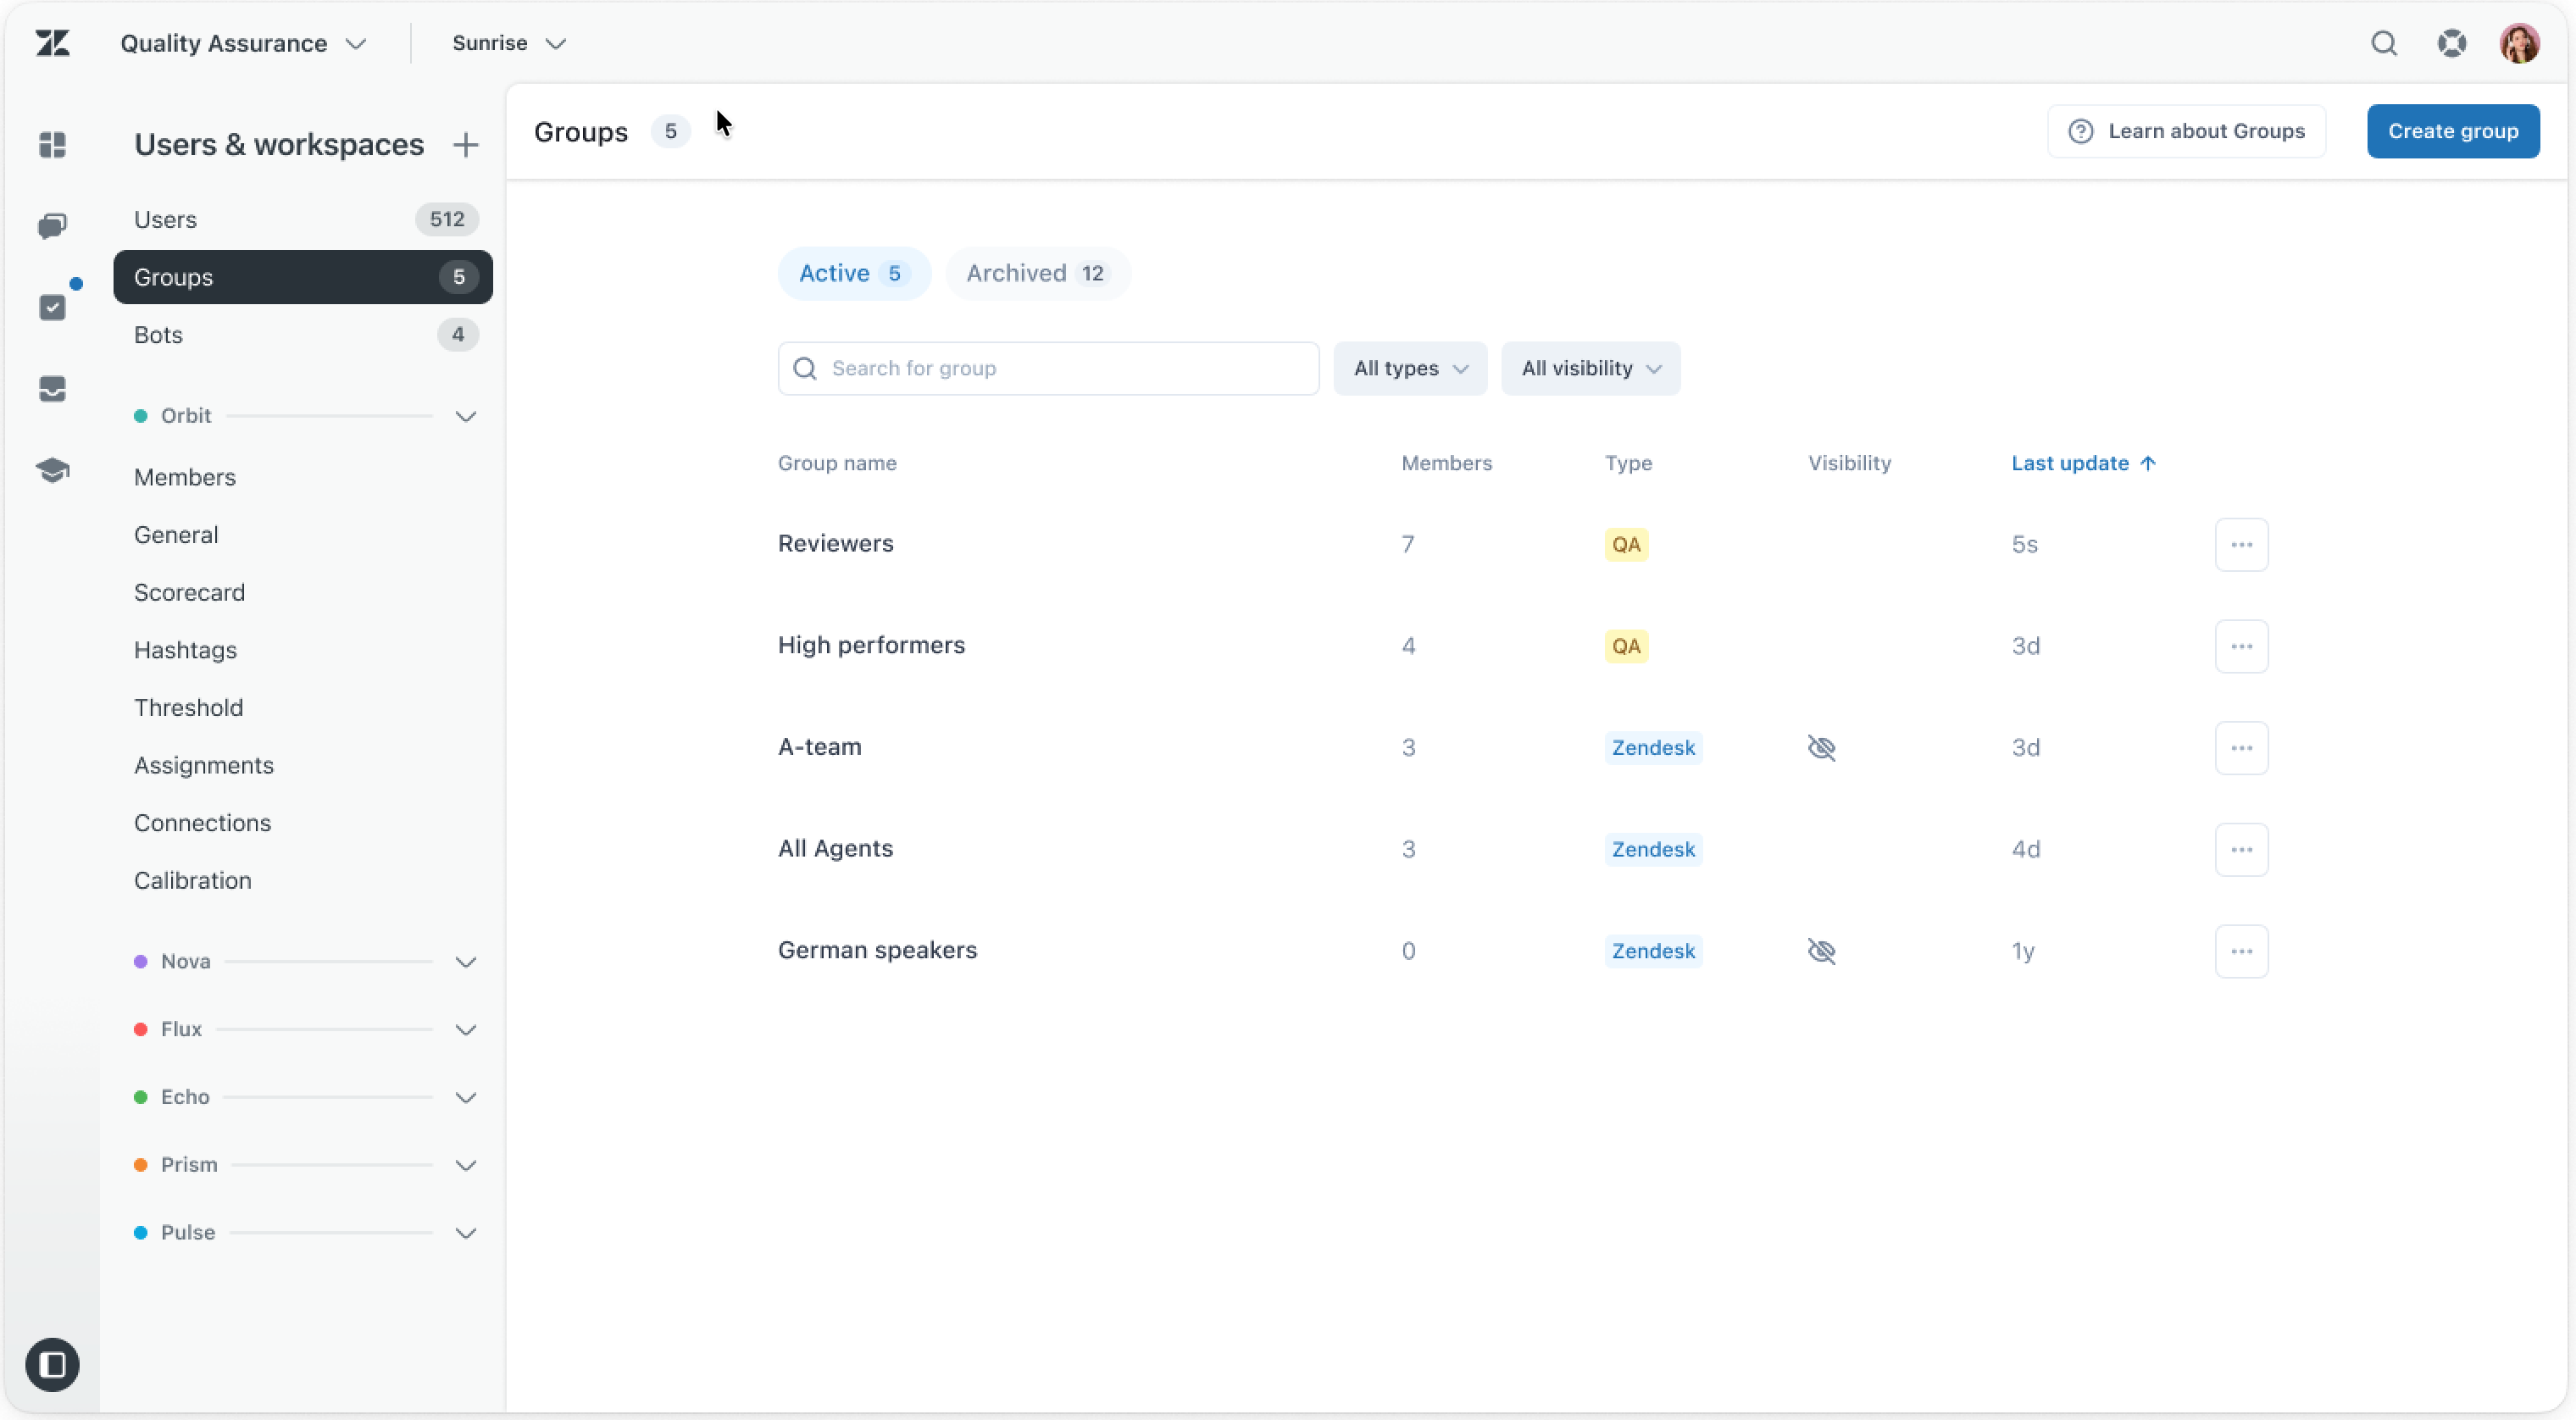
From the Zendesk QA Groups page, you can manage existing groups, add and remove team members, set a group’s visibility in QA, and archive or delete a QA group.
This article contains the following topics:
- About Zendesk QA groups
- Hiding and showing Zendesk groups in QA
- Editing QA groups
- Adding and removing users from QA groups in bulk
- Archiving QA groups
- Restoring archived QA groups
- Deleting QA groups
Related articles
About Zendesk QA groups
Except for private ticket groups, groups created in Zendesk Support automatically sync with Zendesk QA group lists. On the QA Groups page, these groups are listed as Zendesk under the Type heading.
Account owners, admins, and agents with a custom role with permission can create groups in Zendesk Support. All new team members created in Zendesk Support are added to at least one group, but they can belong to multiple groups. Groups can only include team members; end users cannot be added.
Admins, workspace managers, and leads can also create and manage groups in Zendesk QA. However, groups created in Zendesk QA don’t sync with Zendesk Support. Syncing happens only from Zendesk Support to Zendesk QA. Groups created in Zendesk QA are listed as QA under the Type heading.
Hiding and showing Zendesk groups in QA
Synced Zendesk Support groups are automatically visible in Zendesk QA. However, admins, workspace managers, and leads can also mark these groups as hidden. Marking a group as hidden removes it from filters and assignments in QA. This change only affects the group’s visibility in QA and doesn’t impact group settings in Admin Center.
Zendesk groups can be marked visible in QA at any time, so they’re shown in filters and assignments again.
- In Quality assurance, click your profile icon in the top-right corner, then select Users, bots, and workspaces.
- In the side menu, click Groups.
- Click the name of the group you want to hide.
- Select Hide in QA so the group is no longer visible in filters and
assignments in QA.
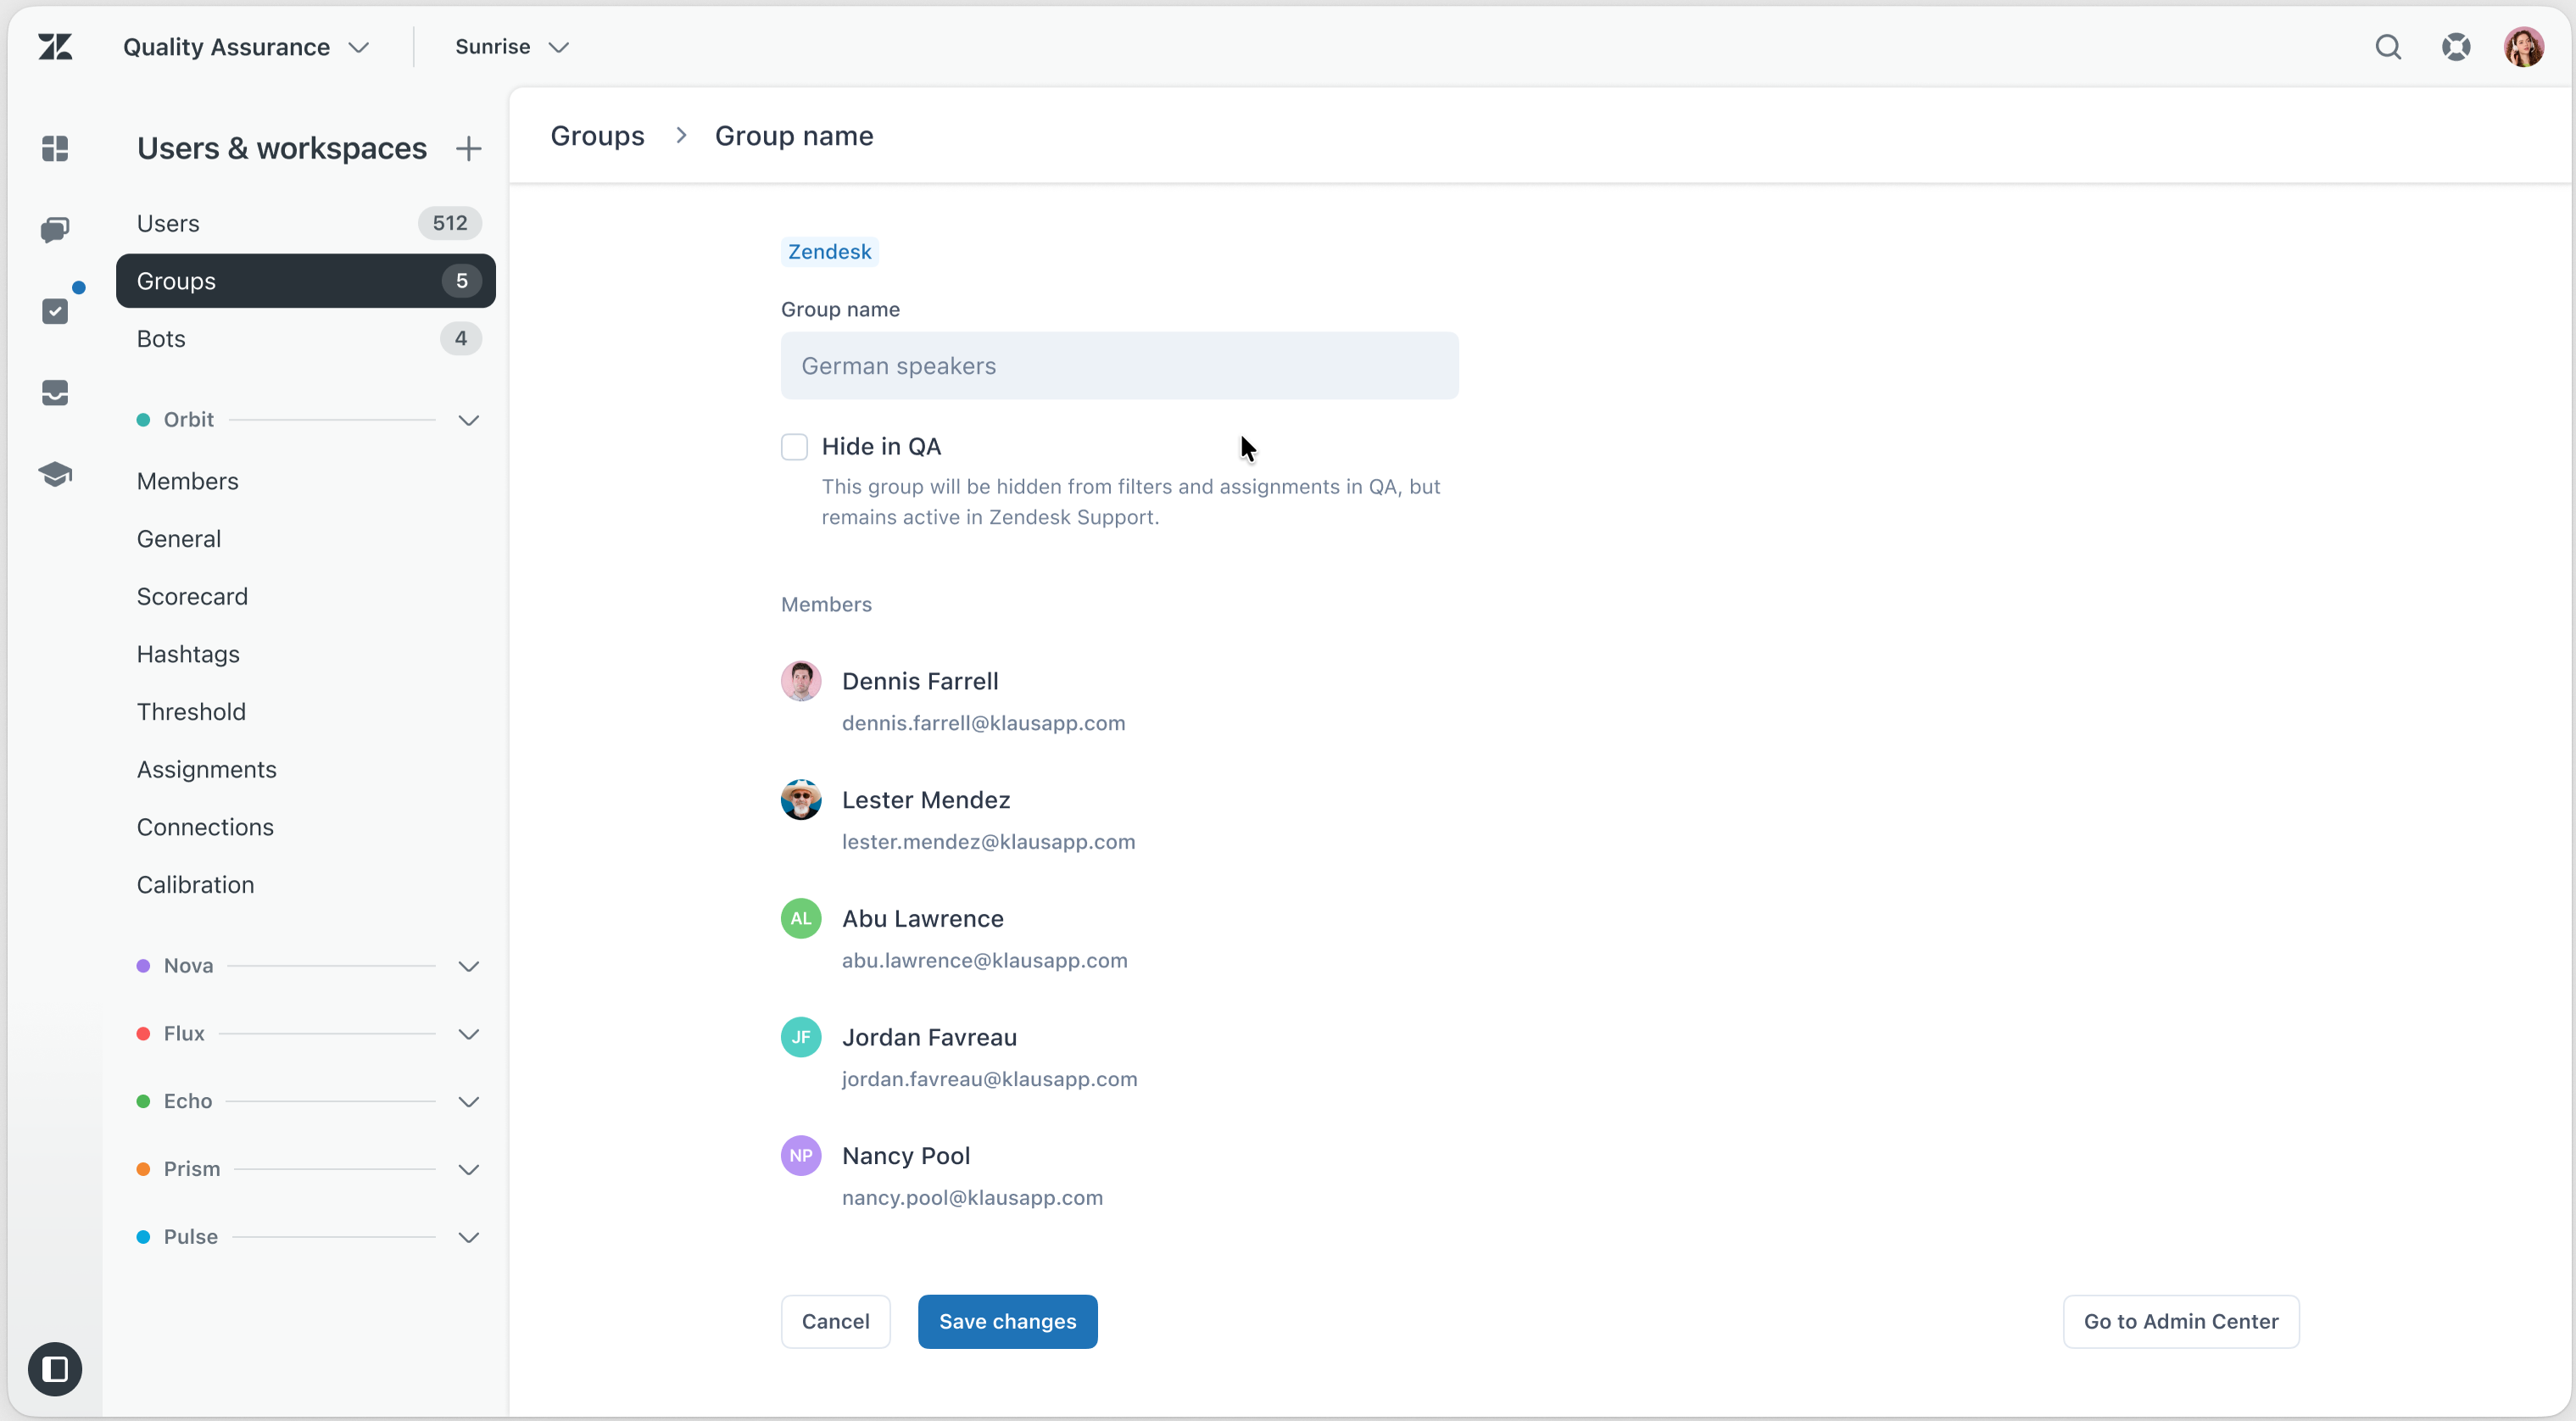
- Click Save changes.
- In Quality assurance, click your profile icon in the top-right corner, then select Users, bots, and workspaces.
- In the side menu, click Groups.
- Click the name of the group you want to show.
- Deselect Hide in QA so the group is visible in filters and assignments in QA again.
- Click Save changes.
Editing QA groups
Editing groups allows you to modify group names, and to add and remove members.
- In Quality assurance, click your profile icon in the top-right corner, then select Users, bots, and workspaces.
- In the side menu, click Groups.
- Click the name of the QA group you want to edit.
- (Optional) Make changes to the group’s name.
- (Optional) Under Add Group members, start typing the user’s name or email to autocomplete, then select them from the drop-down menu to add them to the group.
- (Optional) Click the x next to a user to remove them from the
group.
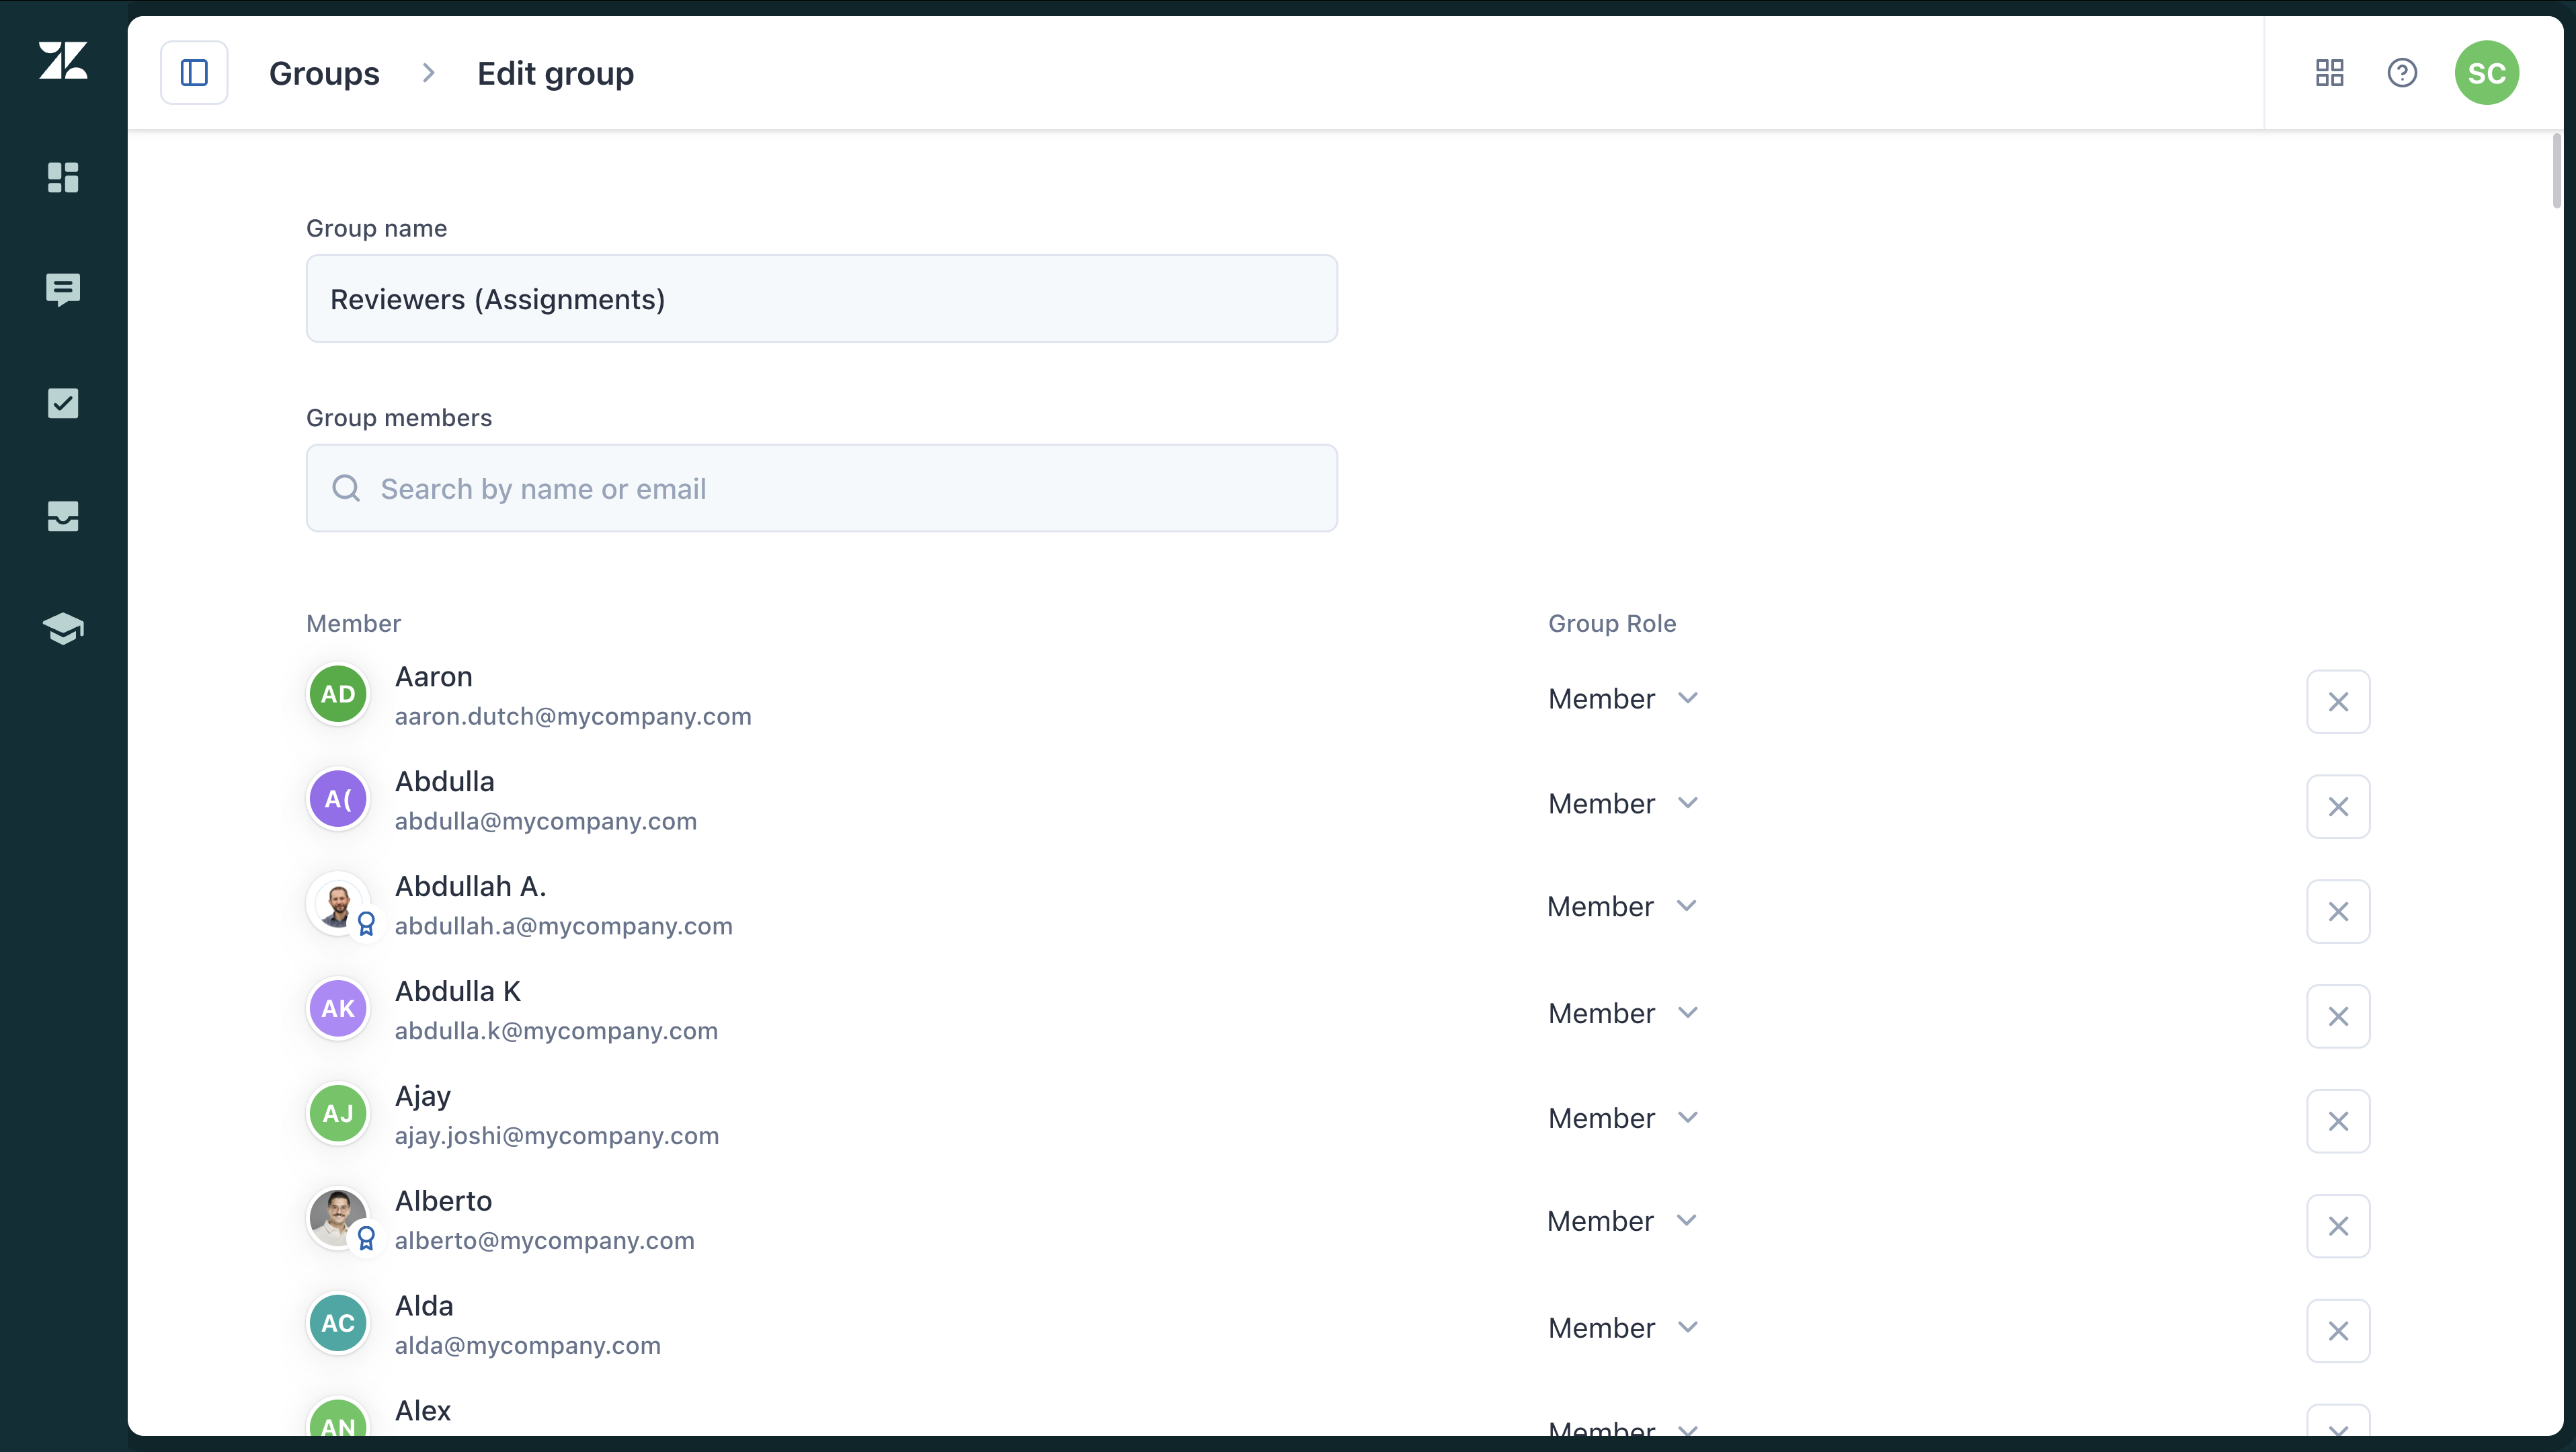
- Click Save changes.
Adding and removing users from QA groups in bulk
Admins and workspace managers can access the Users page to perform bulk actions such as adding and removing multiple users from QA groups.
Archiving QA groups
Admins, workspace managers, and leads can archive QA groups.
Archiving a QA group moves it to the Archived tab and hides it from filters and assignments. Existing data is preserved, and you can restore the group at any time and move it back to the Active tab.
- In Quality assurance, click your profile icon in the top-right corner, then select Users, bots, and workspaces.
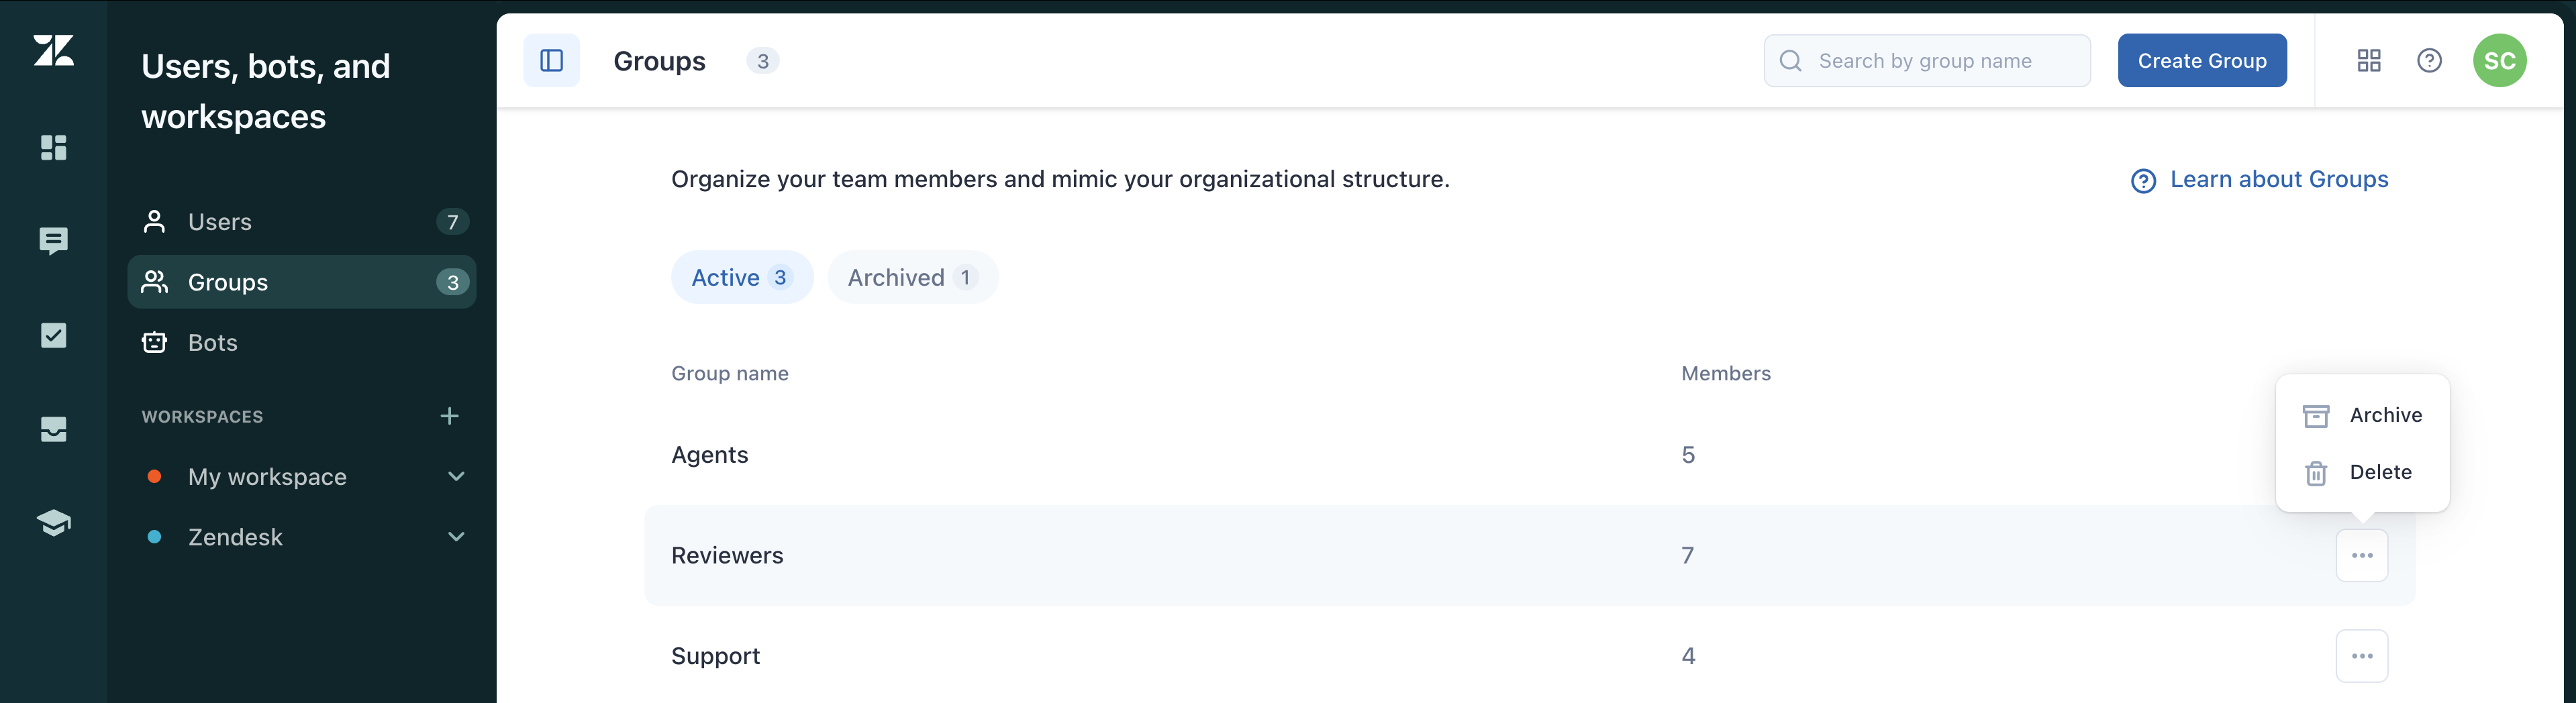
- In the side menu, click Groups.
- Next to the group you want to archive, click the options menu (
 ) and select Archive.
The group now appears under the Archived tab.
Restoring archived QA groups
You can restore an archived QA group to resume using it. The restored group is listed under the Active tab again.
- In Quality assurance, click your profile icon in the top-right corner, then select Users, bots, and workspaces.
- In the side menu, click Groups.
- Click the Archived tab.
- Next to the group you want to reactivate, click the restore icon (
 ).
).The group now appears under the Active tab.
Deleting QA groups
You can permanently delete both active and archived QA groups.
- In Quality assurance, click your profile icon in the top-right corner, then select Users, bots, and workspaces.
- In the sidebar, click Groups.
- Depending on whether the group you want to delete is active or archived,
perform one of the following actions:
- If the group is active, click the options menu () and select Delete.
- If the group is archived, click the Archived tab, then click
the delete icon (
 ) in the row for that
group.
) in the row for that
group.
- If the group is active, click the options menu (
- In the confirmation dialog, click Delete group.