You can create configured actions to allow AI agents to perform certain tasks during conversations with customers. When you create a configured action, you can use it at the AI agent level, use case level, or block level.
This article contains the following topics:
- Creating a configured action
- Adding a configured action at the AI agent level
- Adding a configured action at the use case level
- Adding a configured action at the block level
Related articles:
Creating a configured action
The configured actions you create are reusable for that AI agent. When you create a configured action, you can easily add it at the AI agent, use case, or block level.
Configured actions can be created from the Actions page, or from any place where configured actions can be added.
To create a configured action
- In the AI agents workspace, select the AI agent you want to work with.
- Click
 Actions in the sidebar, then select Configured actions.
 - Click Create configured action.
- In Name, enter a descriptive name for the configured action.
- In Target, select an appropriate target:
- If you’re building a conversation action, select Conversation.
- If you’re building a CRM action, select the specific CRM your AI agent is integrated with.
- In Task, select which task the configured action should perform:
- If you’re building a conversation action, see Available conversation actions for AI agents for more information about the available options, including additional fields associated with each task.
- If you’re building a CRM action, see the appropriate article below for more information about the available options, including additional fields associated with each task:
- Click Create.

Adding a configured action at the AI agent level
AI agent–level configured actions are executed in every conversation your AI agent engages in. They require an event and an associated configured action. You can:
Adding a configured action at the AI agent level
You can add a configured action at the AI agent level.
To add a configured action at the AI agent level
- In the AI agents workspace, select the AI agent you want to work with.
- Click
 Settings in the sidebar, then select Events and actions.
 - Click Add action.
- From the list, select the event that should trigger the configured
action.
For more information about each event, see About events for AI agents.

- From the next list, select an existing action or click Create
action to create a
new configured action.
Your configured action is added to the list under the event you associated it with.
Triggering a reply when a conversation starts or becomes inactive
You can trigger a specific reply (dialogue) when a conversation starts or when it becomes inactive. This special configured action can be triggered based only on the Conversation started or Conversation inactive event.
To trigger a reply when a conversation starts or becomes inactive
- In the AI agents workspace, select the AI agent you want to work with.
- Click
Settings in the sidebar, then select Events and actions.
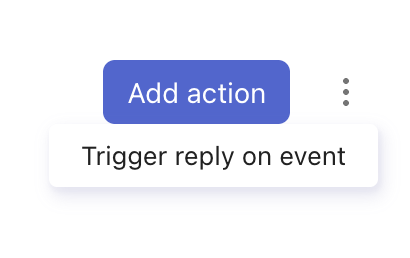
- Click the drop-down arrow next to Add action and select
Trigger reply on event.
The Activate reply on event dialog appears.
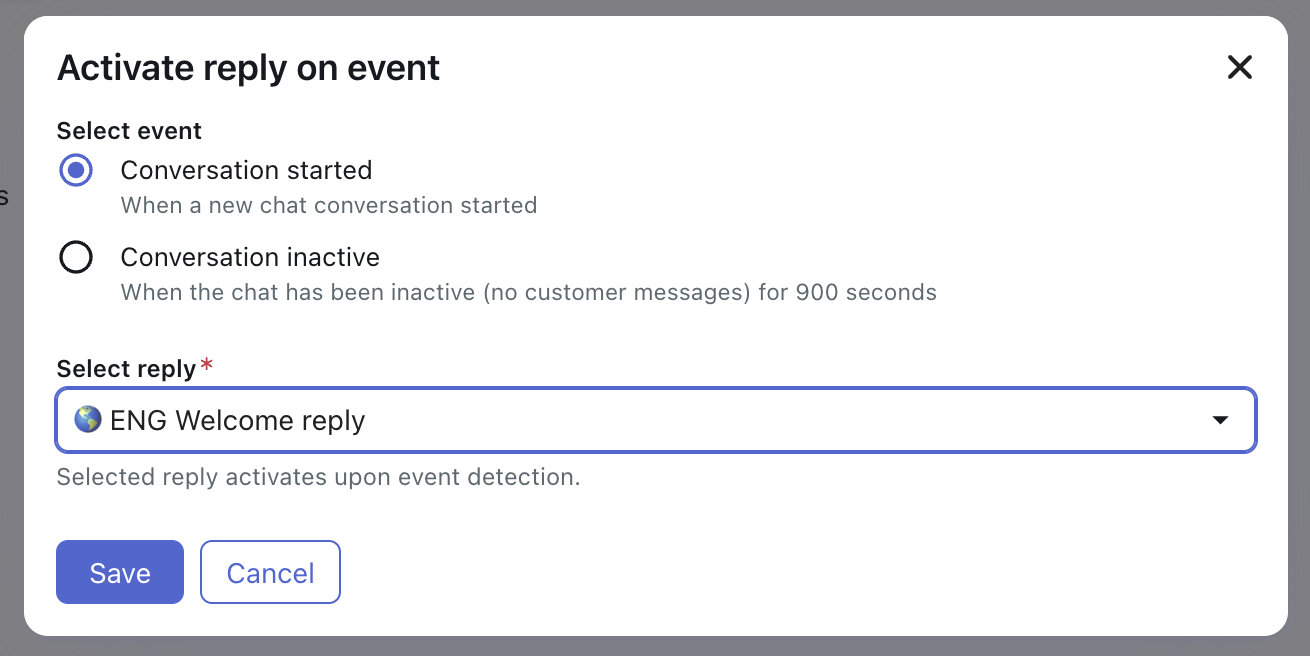
- Select either Conversation started or Conversation inactive as the event that should trigger the reply.
- In Select reply, select the reply (dialogue) that should be triggered when the event you selected above occurs.
- Click Save.
Adding a configured action at the use case level
Use case–level configured actions are executed when a specific use case is triggered during a conversation. You select the configured action you want to execute when the use case is triggered. Use case–level configured actions are particularly useful if you want to apply a configured action to all replies within a use case.
To add a configured action at the use case level
- In the AI agents workspace, select the AI agent you want to work with.
- Click
 Content in the sidebar, then select Use cases.
 - Select the use case you want to associate a configured action with.
- Click Add action.
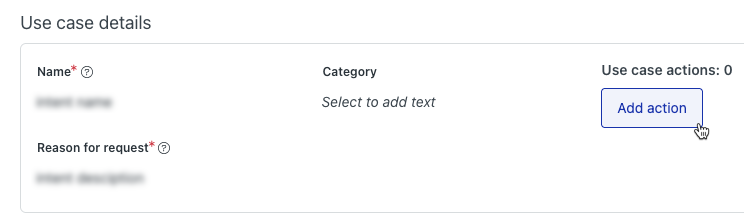
- From the list, select an existing action or click Create action to
create a new configured
action.
Your configured action is added under Use case actions.
- Click Save.
Adding a configured action at the block level
Block-level configured actions are executed when a particular block within a conversation flow is reached. These actions are useful for more granular control within your dialogues.
To add a configured action at the block level
- In the AI agents workspace, select the AI agent you want to work with.
- Click
Content in the sidebar, then select Use cases.
- Select the use case that contains the dialogue you want to add a configured action to.
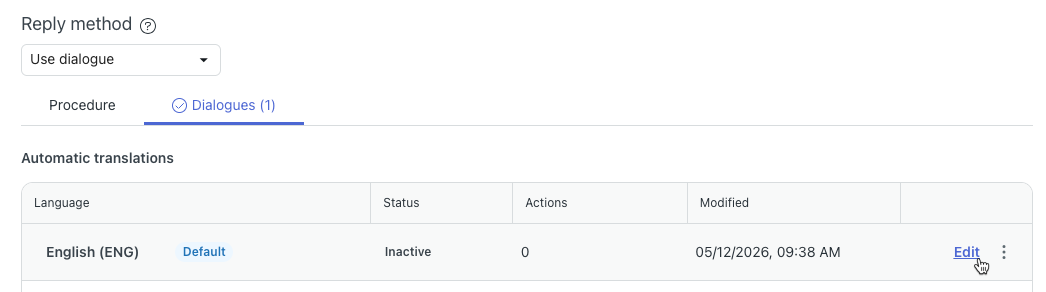
- Select the Dialogues tab.
- Hover over the reply that contains the dialogue you want to add a configured
action to and click Edit.
The dialogue builder opens.
- Select the block you want to add a configured action to.
- In the Details pane on the right, under Configured actions, click Add action.
- From the list, select an existing configured action or click Create
action to create a
configured action.

Your configured action is added under Configured actions.
- Save or Publish the dialogue.