This article contains the following topics:
Enable Zendesk Chat
Before adding the widget to your website or help center, first, make sure Zendesk Chat is enabled in Zendesk Support.
- Go to Zendesk Support > Admin > Go to Admin Center > Channels > Web Widget
- Turn on Chat if it's not already
- Click Save

Adding the widget to your website
After Chat is enabled, you can obtain the widget to add to your website by following the steps below:
- Go to the Setup tab in Zendesk Support > Admin > Widget
- You'll see the widget snippet code here
- Copy it by clicking Copy to clipboard

- Add the snippet code to the source code of your website and to every page you want to see the widget. Insert it to right before the closing html </body> tag.
If you don't know how to access the source code of your website, please contact your web developer.
Adding the widget to help center
After Chat is enabled, add the widget to your help center by following the steps below:
-
Go to the Setup tab in Zendesk Support > Admin > Widget
-
Turn on Add to Help Center
-
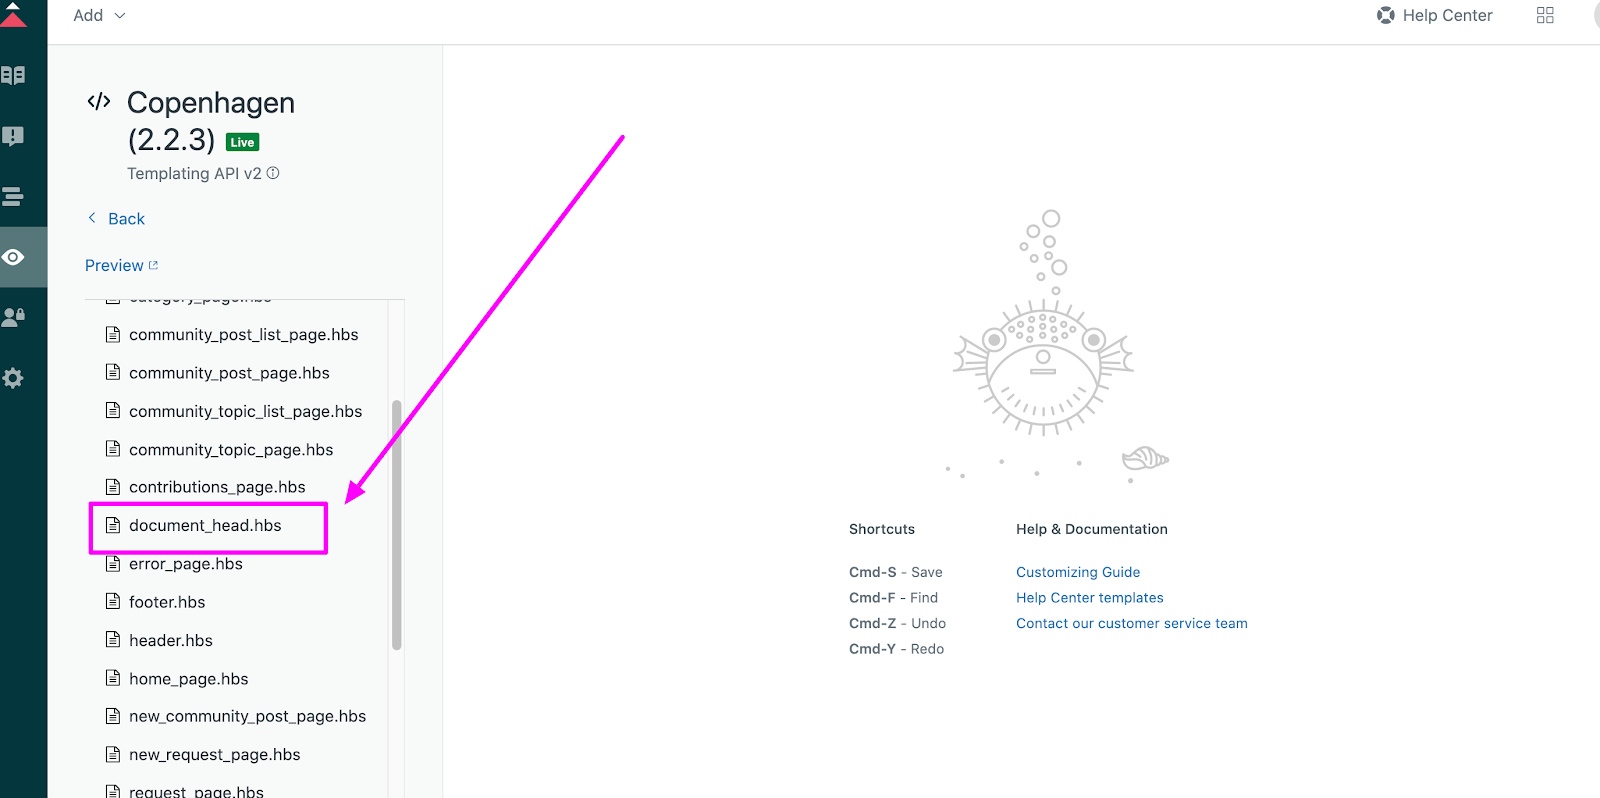
This adds the Web Widget to the help center header document_head.hbs, and displays the widget on every page of the help center.

-
Locating the Chat Widget added to help center (Zendesk Guide)
After Add to Help center is switched on, the widget snippet is added to document_head.hbs in Zendesk Guide.
Where is document_head.hbs?
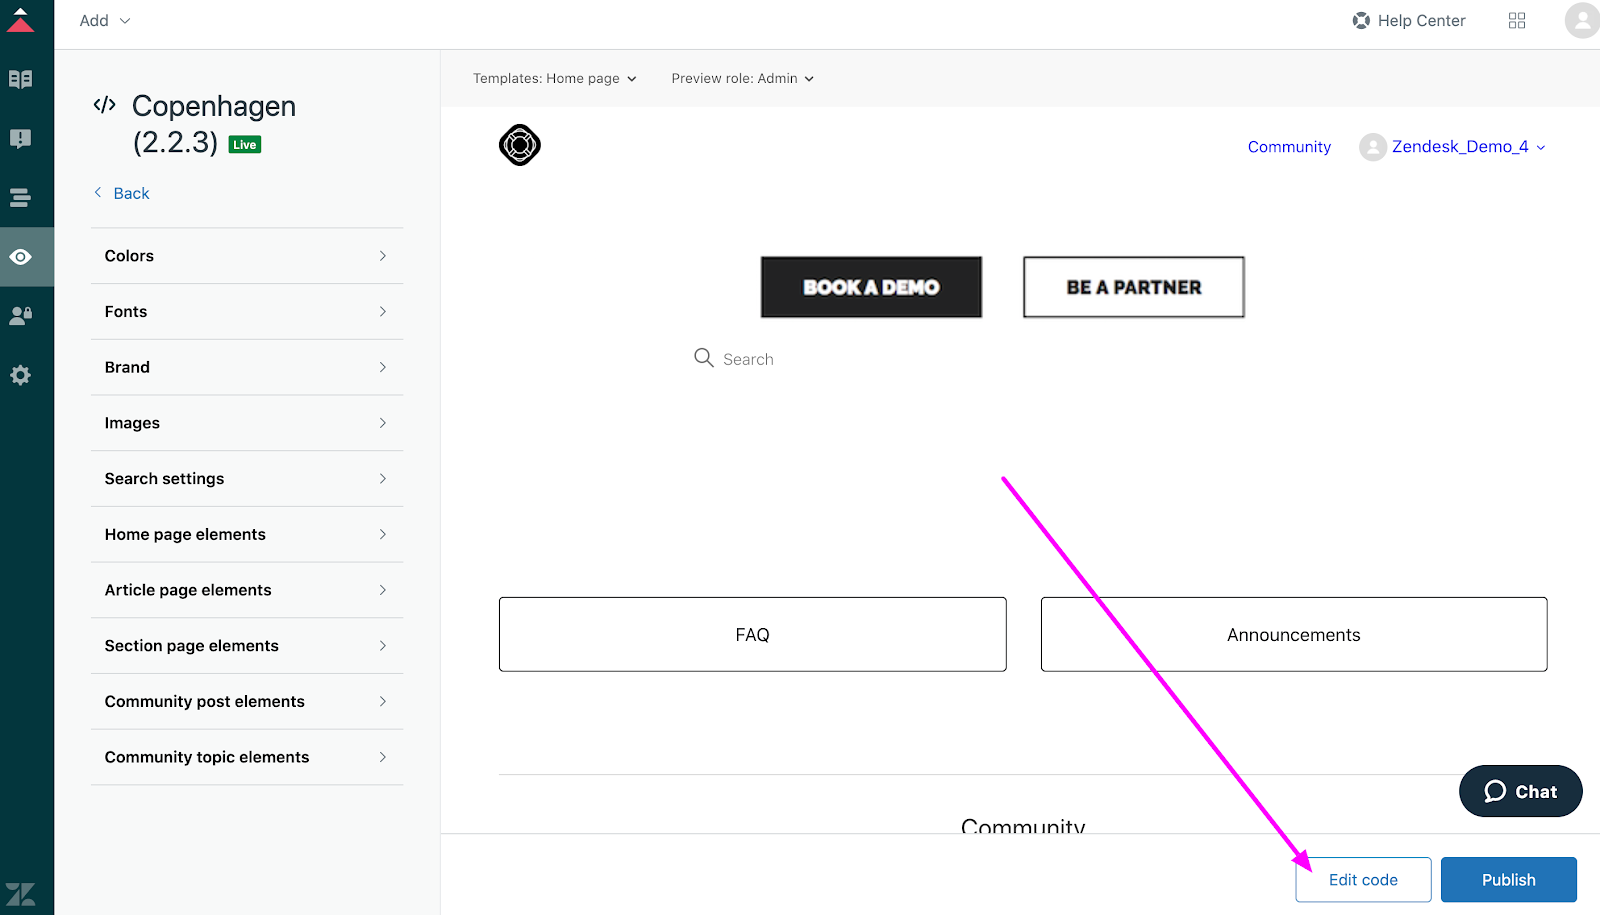
It’s in Zendesk Guide > Guide Admin > 👁🗨 > Customize > Edit Code. Or follow the screenshots below:


For more details, have a look at Zendesk’s article on Adding the Web Widget to your website or Help Center.