This guide helps you to set up Zendesk for Contact Center with Zendesk and Amazon Connect. It covers setting up a Connect instance, integrating it with the Zendesk for Contact Center app and with Zendesk itself.
You'll learn about the overall process from creating a Connect instance, linking it with the Contact Center app and Amazon Cognito, and how key components relate to each other.
This article contains the following topics:
Understanding key terms
Before you start, it’s important to know the key building blocks of Contact Center and how they interact:
- Amazon Connect is AWS’s cloud contact center that powers Contact Center. It manages calls, chats, queues, and contact flows. Each Contact Center customer must run a Connect instance in their own AWS account, and a Contact Center account can link to only one Connect instance.
- Amazon Cognito is an AWS managed authentication service for web and mobile apps, handling sign-up, sign-in, and access control. For Contact Center, it hosts the user pool for agents, supervisors, and admins, securely managing passwords and logins so users can access the Contact Center app in Zendesk. The integration automatically creates this user pool using CloudFormation, avoiding a custom identity system.
- Amazon CloudFormation automates AWS setup with templates, deploying all resources and permissions for the Connect and Contact Center integration in a single stack. Think of it as an installer: the stack provisions and configures the components that let Amazon Connect and the Contact Center app work together, saving time and reducing errors.
-
The Zendesk Contact Center app is a contact-center-as-a-service
platform from Zendesk that works with Amazon Connect, adding an omnichannel
inbox, AI-assisted tools, and advanced dashboards. Agents sign in to Contact
Center to handle calls and messages, and these are handled by the customer’s own
Connect instance.
It’s deployed in the customer’s AWS environment using CloudFormation, so Contact Center data (for example, call recordings and customer information) stays in the customer’s environment, not on Zendesk servers. After linking the Connect instance and deploying the stack, Contact Center and Connect function as a unified solution.
- Dual-stack upgrade process: Upgrades use a dual-stack approach: instead of updating the existing CloudFormation stack, deploy a new stack from the latest template, switch Contact Center to it after testing, then retire the old stack. This ensures a safe rollback point, since in-place CloudFormation rollbacks can fail (for example, due to permissions). Dual-stack is the only supported upgrade path. To begin an upgrade, request the updated template URL from Zendesk and create the new stack in the customer’s AWS account.
Setting up Contact Center
Use the following steps to get your contact center up and running:
- Setting up Amazon Connect
- Creating a Contact Center Account (Zendesk Professional Services Only)
- Deploying the CloudFormation Stack in a new instance
- Setting up users and access
- Enabling writeback from Contact Center to Zendesk
- Adding a Contact Center admin user
- Configuring Amazon Connect approved origins
- Installing and configuring the Contact Center app
Setting up Amazon Connect
Connect instances are created in the AWS Management Console. Generally, you'll create the Connect instance in the AWS region closest to your customer or as required.
You can create a Connect Instance using a CloudFormation template, or manually.
Setting up Connect using a CloudFormation template
(Optional) To turn on single sign-on for Connect instances
- Configure an application in your IdP with SAML authentication turned on.
- Download the SAML metadata xml file.
The value for Relay state in the application can be left blank and updated after your Connect instance is set up.
The template turns on SAML SSO on the Amazon Connect instance. If your SAML IdP app is already configured and you provide its metadata during deployment, the stack automatically provisions the IAM resources to integrate Connect with that IdP.
To deploy the Connect instance template
- In the AWS console, navigate to the Cloudformation service.
- Click Create stack, then enter the following Amazon Simple
Storage Service (S3) URL:
https://zendesk-contact-center-us-east-1.s3.amazonaws.com/connect/cfn.yaml
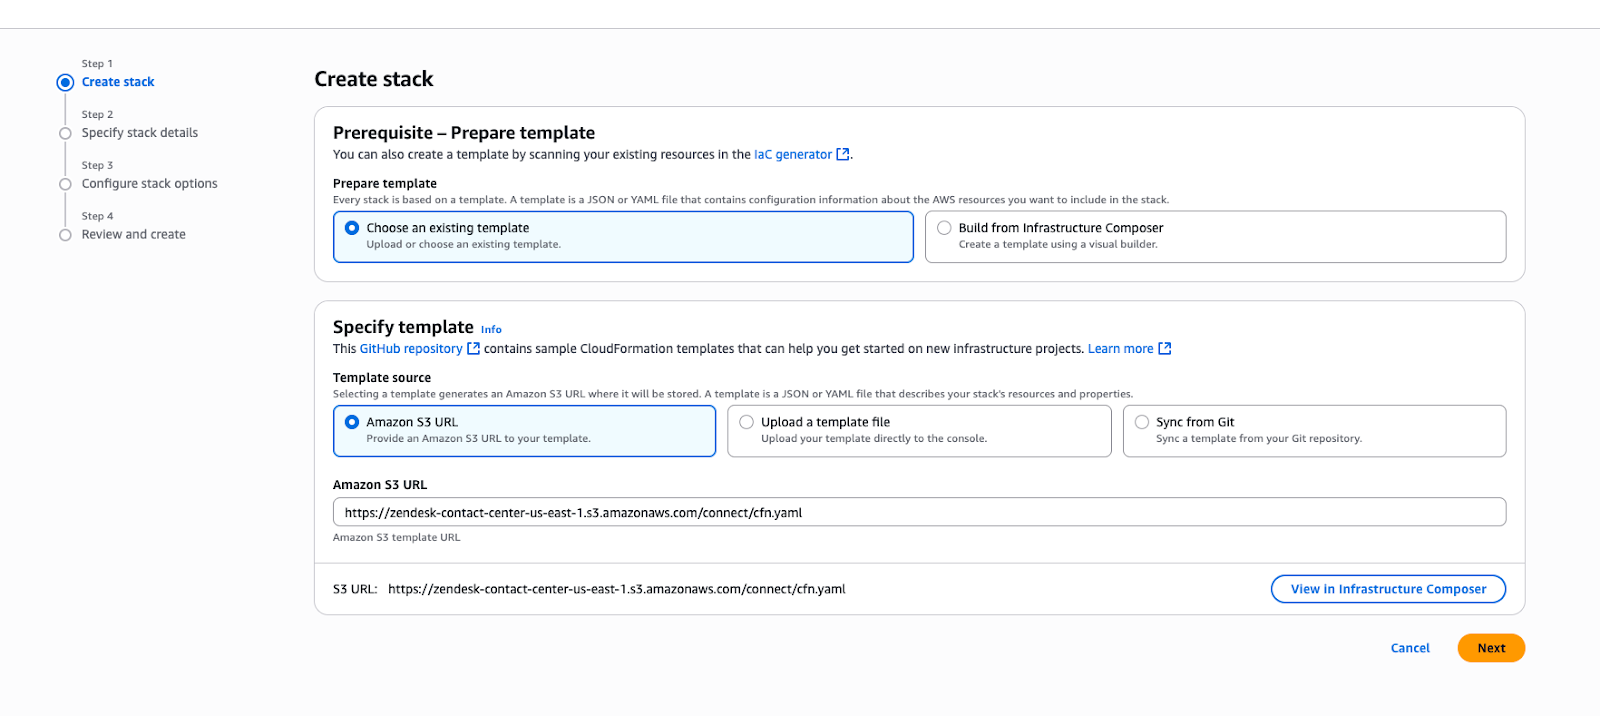
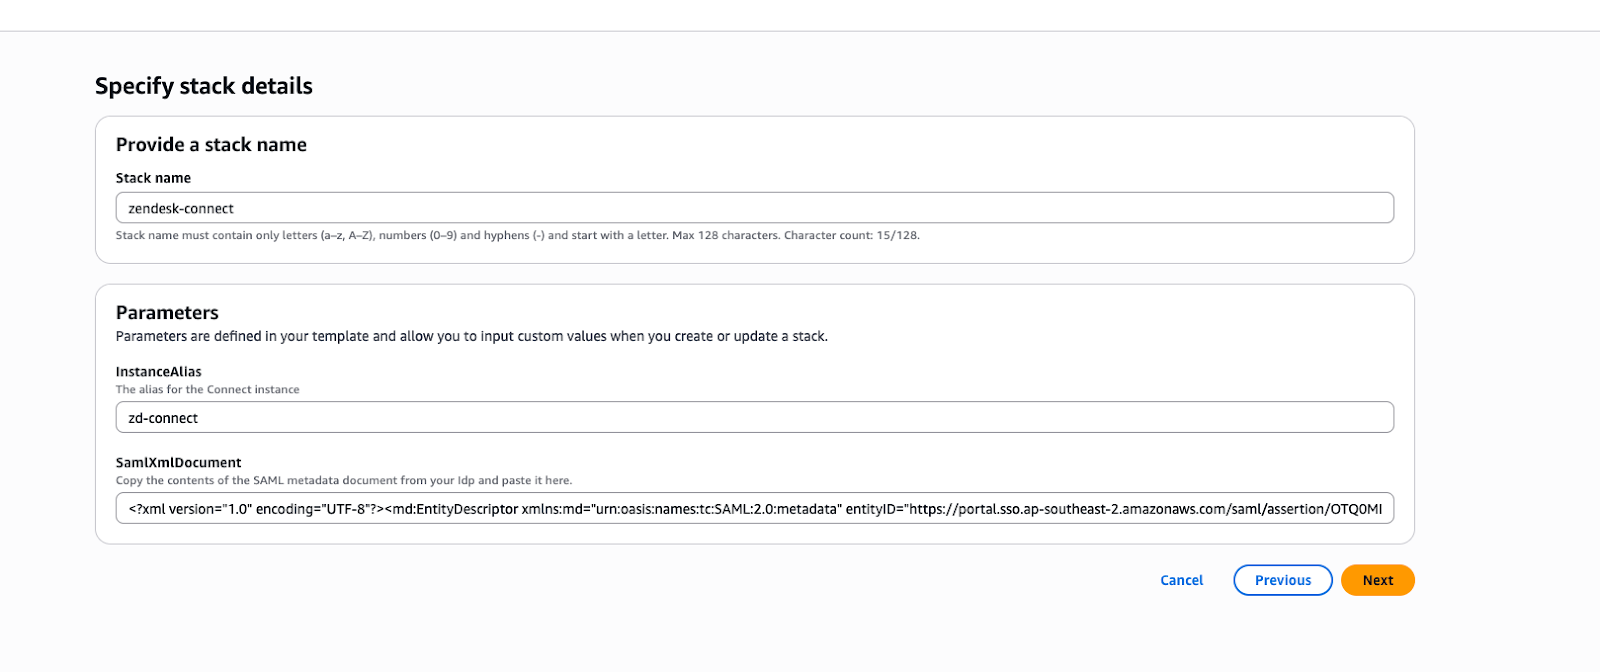
- Enter a unique value for InstanceAlias and paste the entire contents of
the metadata xml file in the SamlXmlDocument field if you configured it,
or else leave the field blank.Note: If you encounter an error that the metadata file is too large, leave the "SamlXmlDocument" parameter blank to complete the CloudFormation stack deployment, then setup the SAML configurations manually afterwards.
- Click Next and complete the stack deployment.
- Finally, note the SamlRelayState from the stack outputs and update the
relay state in the SAML application configured in your SSO for your
Connect instance.

The following resources are provisioned by the template:
- Connect Instance
- S3 bucket for transcripts
- KMS key for S3 bucket
- Kinesis Stream
- Customer Profiles domain
- KMS Key for Customer Profiles domain
- SAML Identity Provider in IAM
- IAM Role for SAML
Setting up Connect manually
If you don't want to automatically create your Connect instance, you can configure it manually.
To manually create a Connect instance
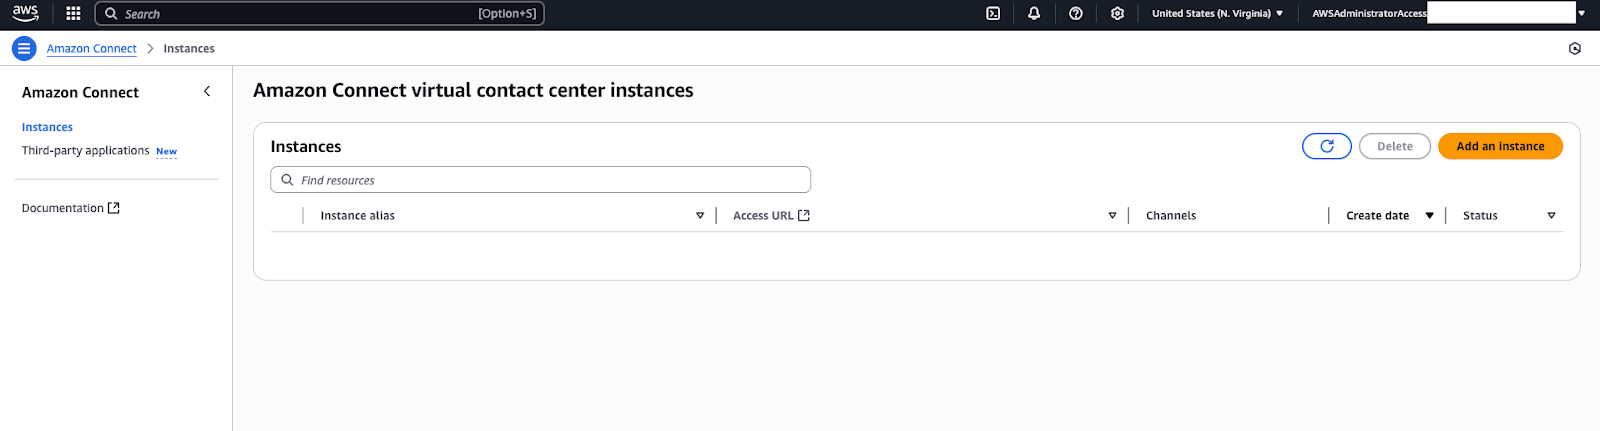
- Sign into the AWS console and open the Connect service.
- On the Amazon Connect virtual contact center instances page, click
Add an instance.
- Choose your preferred identity management method (usually,
SAML 2.0-based authentication for client
environments).
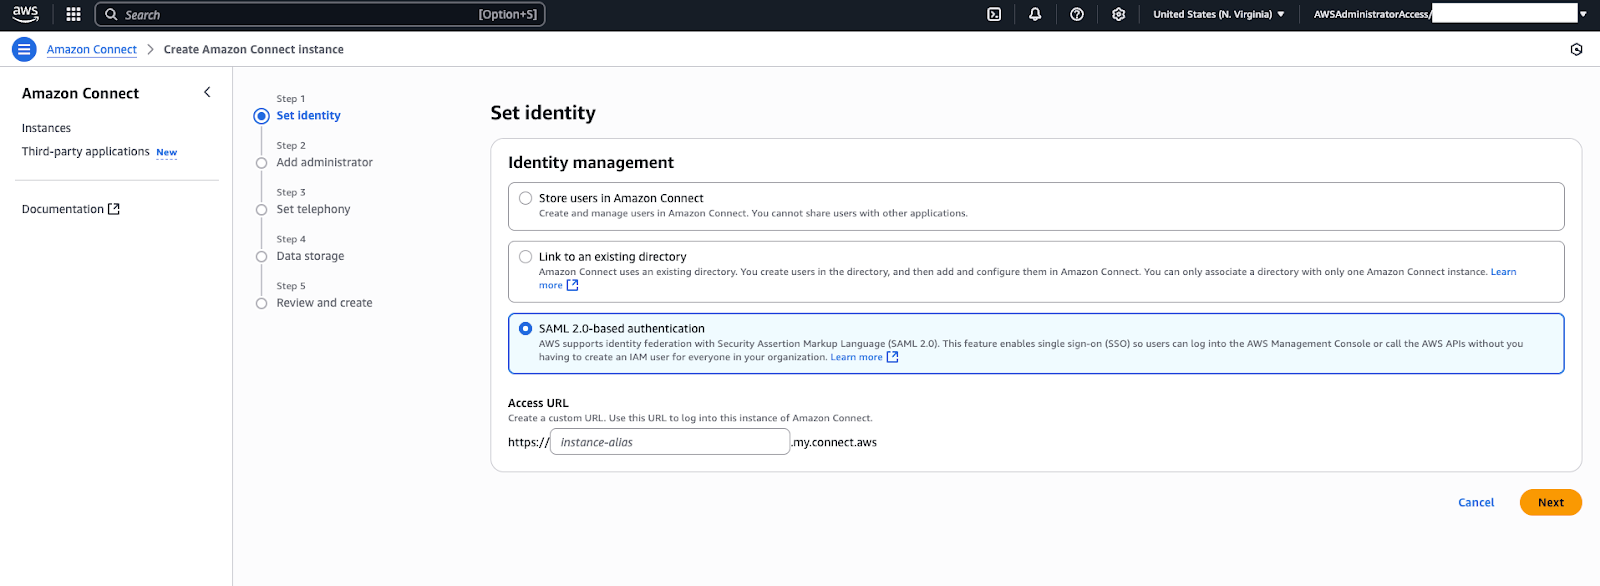
- On the Set identity page, enter your Access URL and instance name. This name will become part of the instance’s URL. For example, if you name it 'MyDemoConnect', the instance URL will look like MyDemoConnect.awsapps.com/connect/). Choose a name that identifies the client or purpose (for example, ClientName-ConnectEU).
- Specify whether an admin user for Connect needs to be created. For simplicity, you can create an admin username and a password. This will be the login used to access the Connect dashboard initially. In real deployments, customers often integrate with their single sign-on using SAML, but for training and sandbox purposes a manual admin user can be created.
- Under Telephony and data settings, configure how the contact
center will handle communications and store data:
- Telephony Options: You can turn on inbound and/or outbound calling. For most uses, turn on both Inbound and Outbound calling (so the instance can receive and make calls).
-
Data Storage: Connect creates an Amazon S3
bucket to store call recordings, chat transcripts, and other
data. In the setup wizard, make sure that the option: Enable
customer profiles” is turned on.
We recommend that the Profile creation policy is set as Associate Only.
- Turn off Enable email. It's not used in Contact Center.
- Uncheck Custom data storage (Advanced).
- Continue through the wizard, reviewing the settings on the
final page. Once everything looks good, click Create Instance.
Connect will begin provisioning the instance. It usually takes a couple
of minutes for the instance to be ready. During this time, AWS is
setting up the service and resources in the background. Note: Avoid closing the browser or navigating away until setup is complete, to prevent any interruption. The creation process is fairly fast and robust, but it’s a good practice to wait.
When the creation finishes, the AWS console shows your new instance.
- If you didn't configure SSO, click Access URL (the
instance URL) to open the Connect sign in page. Use the admin username
and password you created to sign in.
This opens the Connect dashboard, a web-based interface where you can manage your contact center. When you first sign in, you might see some default sample contact flows and a basic dashboard screen.
 Note: If you set up SSO for login and authentication, you must complete the steps in Setting up users and access before you can sign in to the Connect environment.
 - Make sure that nsure that Kinesis data streaming is turned on
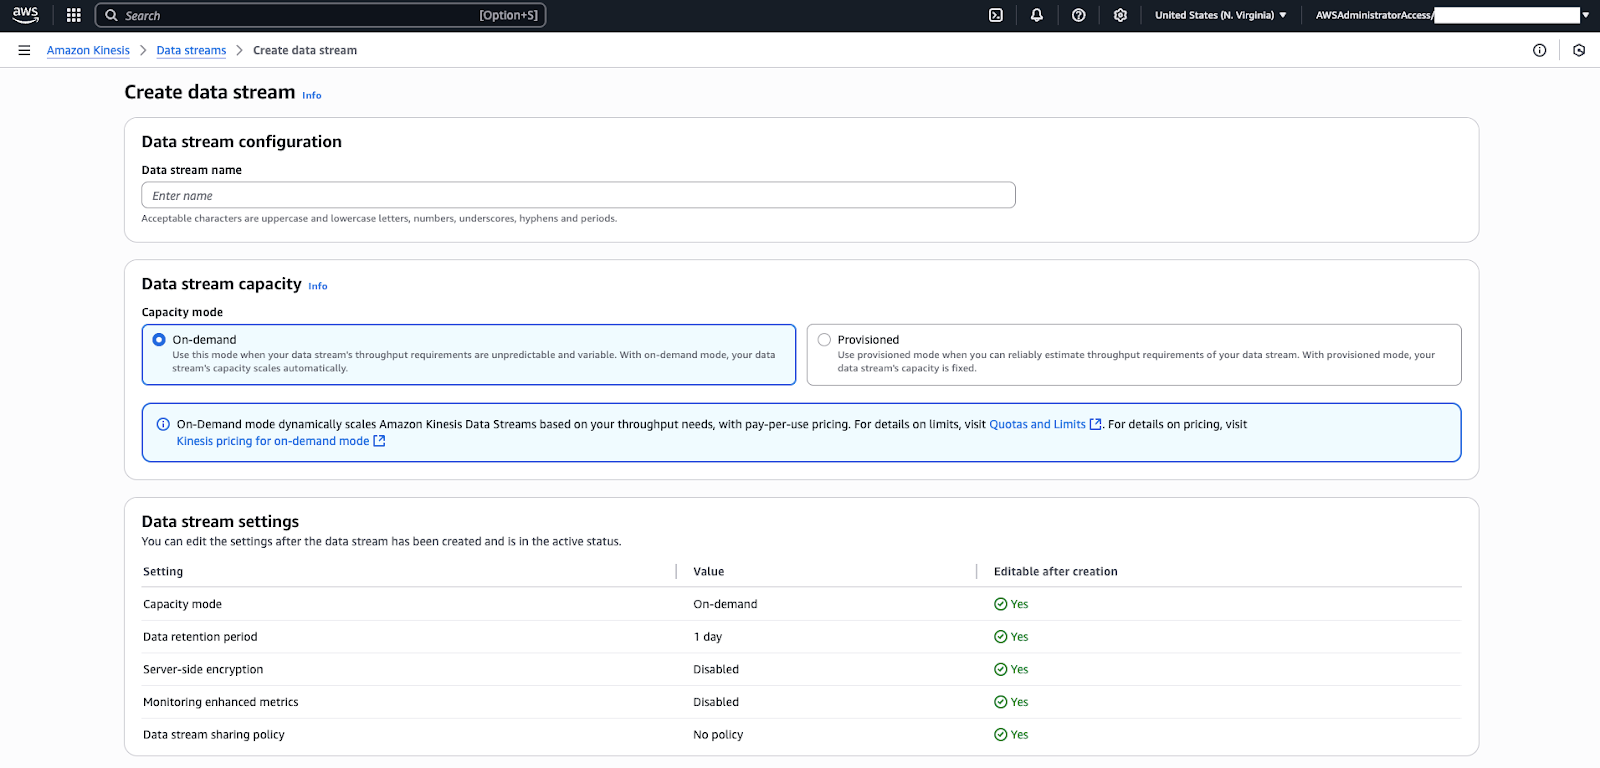
in the new Connect instance. In the AWS Console, navigate to the new
Connect instance > Data Streaming > Enable data streaming
and be sure to select Kinesis Stream and create a new stream if
needed. Tip: Make sure to turn on Kinesis data streaming, not Kinesis firehose.
- Click Save.
You now have a working Amazon Connect instance.
Creating a Contact Center Account (Zendesk Professional Services Only)
With Connect ready, your next step is to create a Contact Center instance.
Before you start, make sure that the following is in place:
- You must have access to the Contact Center Admin app, with permission to access the relevant instance. You can request access from your IT department.
As a Zendesk Professional Services user, you’ll use the Contact Center account admin interface to create a new Contact Center account tied to the client's Connect instance. This essentially onboards the client into the Contact Center system, establishing the one-to-one connection between Contact Center and Connect.
Zendesk provides a special account admin portal (distinct from the agent interface) for setting up and configuring customer accounts. It's accessible by Zendesk admins using the URL https://cc-admin.zende.sk. Once signed in, make sure you select the appropriate pod in the admin tool. The pod used must match the Zendesk instance pod.
The pod used to create the contact center instance must match the Zendesk account pod. This might be different to the Connect pod or region.
To add a Zendesk for Contact Center account
- In the admin console, navigate to the section where you manage
customer accounts and click Create new account.

- On the Create new account page, configure the following:
- Account name: A descriptive name for the customer or project, for example (using the company name and environment), 'ClientXYZ Sandbox' or 'ClientXYZ Production'. This name might be used internally or in URLs, so keep it concise and identifiable.
- Instance type: Choose the type of instance, for example, 'Production' for a live account.
- Workspace ID: This will be automatically populated with the value entered in the account name field, but can be changed before you save the account. This will be used to form the URL to access the app and to link it to Zendesk.
- Licence details: Specify the maximum number of agents planned for the account, the rate per agent, and the expiration date for the account.
- Zendesk instance name: Enter your Zendesk subdomain. The account ID will be automatically retrieved and will be displayed in the Zendesk account ID field.
- Technical contact: - Add a contact in case Zendesk needs to reach out about your account.
- Feature access: - Turn on/check the Advanced dashboards feature. This is turned on by default. If turned off, the customer will not be able to use the Contact Center Dashboards app.
- Product analytics: - Select this option if you give permission for us to share analytics data with third parties.
- Review your setting, then click Create Account.
A new Contact Center account is created. You can see the new account listed in the admin console accounts list. At this stage, the account exists on the Zendesk side, but it’s not yet fully connected to the Connect instance.
- You can click the newly created account in the admin console to review its settings and confirm that the account has been successfully created.
You now have an Amazon Connect instance on AWS, and a Contact Center account in Zendesk.
Deploying the CloudFormation Stack in a new instance
To link Connect and Contact Center, use a CloudFormation stack provided by Zendesk. The stack is a pre-defined set of AWS resources and configurations that sets set up everything you need for the integration. This includes linking Connect with other AWS services such as Amazon Cognito for user management, Amazon Kinesis for streaming contact data, AWS Lambda functions for any custom logic, as well as establishing trust between Connect and the Contact Center app.
- Access to the Contact Center Admin app, with permission to access the relevant instance.
- Someone with access to the AWS Console will need to perform part of the process, Depending on the customer’s ability to share access, this could be a Zendesk employee or a member of the customer team.
There are three scenarios in which a CloudFormation stack must be installed:
- A new Contact Center instance that has never had a CloudFormation stack installed.
- An existing Contact Center instance that has had a CloudFormation stack installed via the legacy (non-admin app) method.
- An existing Contact Center instance that has had a CloudFormation stack installed via the current (admin app) method.
The process itself is similar across each of the above scenarios, with the differences being how automated the process is and how much manual review or updates might be required.
To deploy the CloudFormation stack
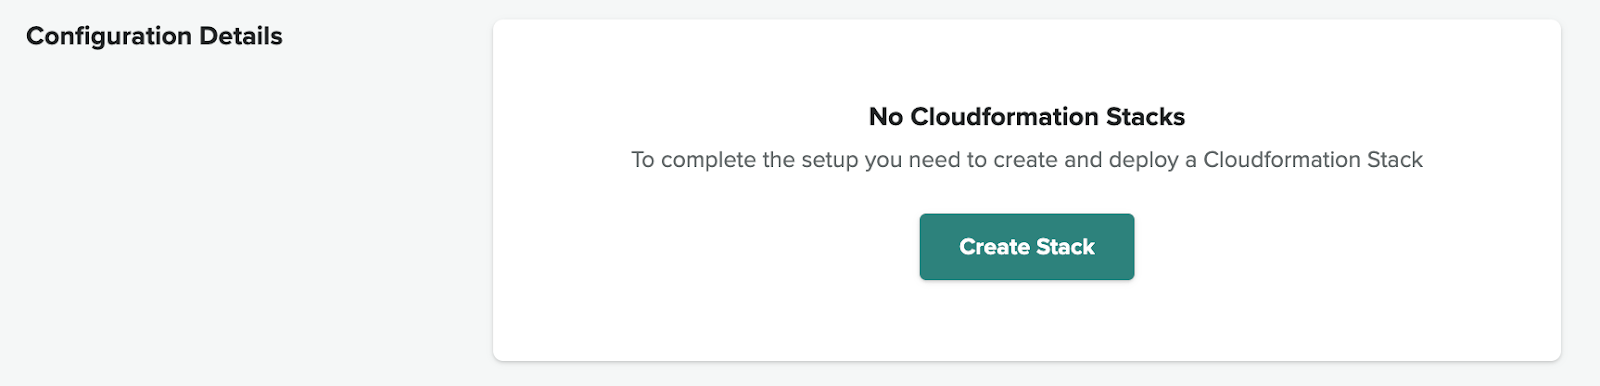
- In the account admin console, for the newly created account, click
Create stack.
- Provide the required details for the CloudFormation template.
- Stack name: A name for the CloudFormation stack. You can choose something such as: <Account name from previous section> + “CF” + “07-30-2025”. We recommend including a date in the stack name to make sure it's easy to understand when the stack was installed.
- Stack region: This is the region in which you will deploy your CloudFormation stack.
- Amazon Connect instance ARN: Enter the ARN (Amazon Resource Name, a unique identifier for AWS resources) of the Connect instance you created. You can find this in the AWS console on the Amazon Connect service, in the instance details page, look for the Instance ARN (it typically looks like arn:aws:connect:region:account-id:instance/xxxxxxxx-xxxx-....). Copy this value from AWS and paste it into this field in the admin console. For more information, see the AWS documentation.
- For new installations, configure the following:
- Click New setup.
- For the Domain prefix, enter the URL domain of your Connect account.
- Access your Connect account by navigating to the Account overview section from the Access URL which will have the following form: https://YOUR_DOMAIN_PART.my.connect.aws.
- Copy the <YOUR_DOMAIN_PART> section and use it to fill in the domain profile section.
- For existing installations, configure the following:
- Select Use an existing user pool and app client.
- Enter the User pool ID and App Client ID that are being used in AWS.
- Configure the following:
-
Dashboard and analytics: - Select
Enabled.
This is turned on by default and will remain turned on unless you turn it off. This turns on data flowing into the Contact Center Dashboards app, which is a separate free app available from the Zendesk Marketplace.
- Resource tags: These are optional.
-
Dashboard and analytics: - Select
Enabled.
- After filling in the necessary fields, click Launch
stack.In the pop-up page, you have two options:
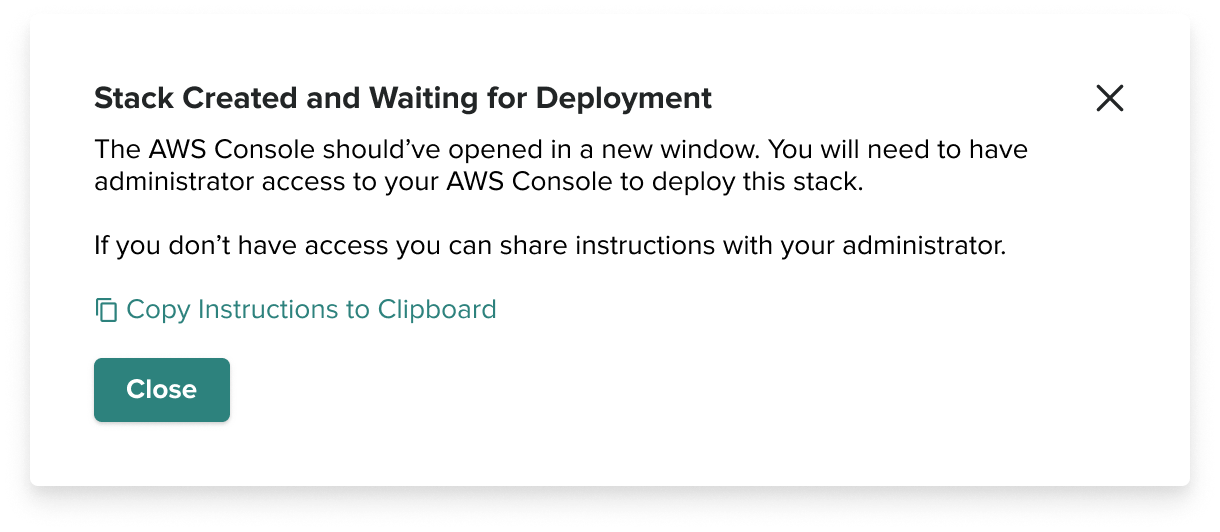
- Automated launch: After creating the CloudFormation stack, you will be automatically redirected to the AWS CloudFormation console with the template ready to deploy. This is convenient if you or someone on your team has access to the customer’s AWS account with sufficient permissions.
- Manual template copy: If you don't have direct access to the AWS account, click Copy instructions to clipboard to export the CloudFormation template (usually as a JSON or YAML file or a link). This link or export can then be used by the relevant team with AWS access to implement the CloudFormation stack.
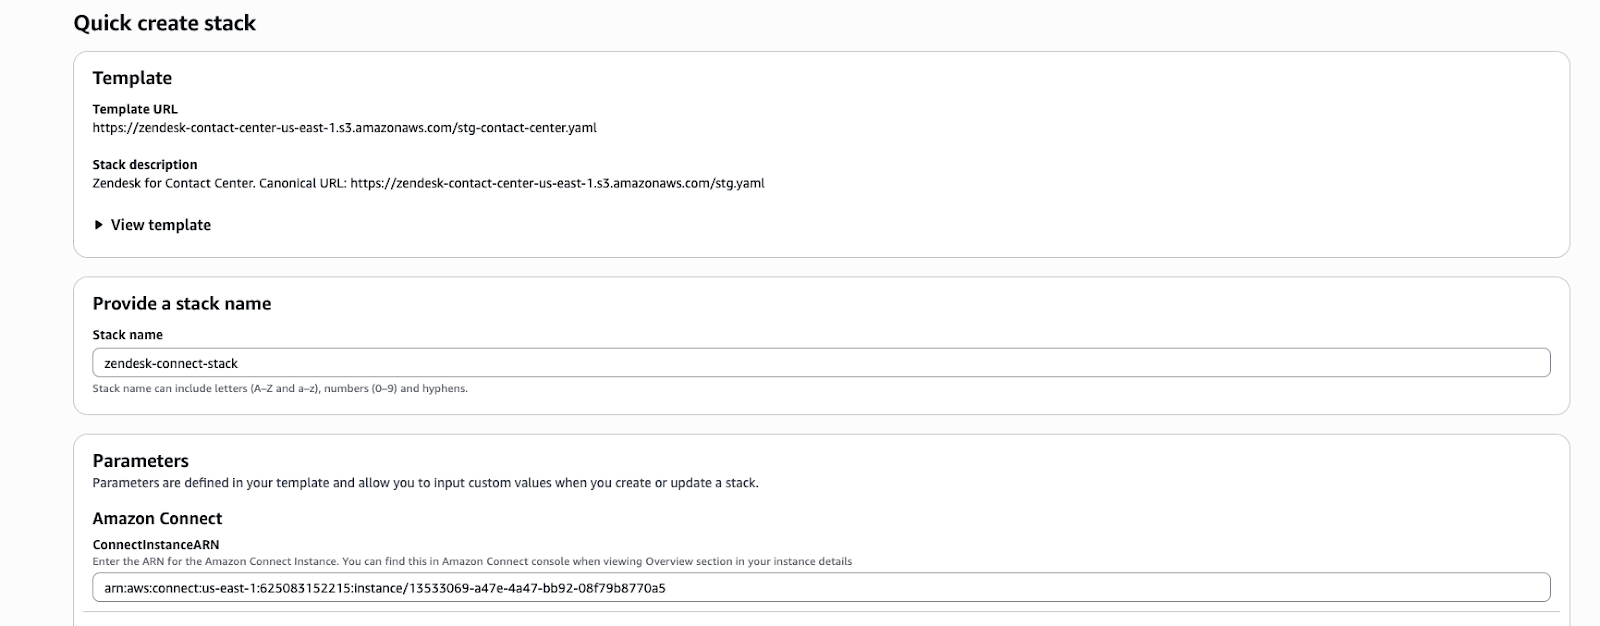
- A new browser tab opens on the AWS CloudFormation Quick create stack page with the template already loaded. You’ll see the stack name and parameters filled in as you provided.
- Scroll down to the bottom of the page and, in the Capabilities and transforms section, check and mark all the acknowledgments.
- Click Create stack.
Once initiated, CloudFormation will start creating resources. In the AWS CloudFormation console, you can watch the progress. It will list events such as “CREATE_IN_PROGRESS” for various components. This process can take a few minutes. The stack is doing a lot in the background: setting up IAM roles and policies, Lambda functions, Kinesis data streams, Amazon Cognito user pool and groups, Connect settings, and more . Typically, this completes without intervention. The status will change to CREATE_COMPLETE when the process completes.
While it runs, do not close the stack page.
Tip: You can refresh your web browser to see updates, but we recommend waiting for the stack to complete. If the stack fails, it will roll back (you’ll see a status such as ROLLBACK_COMPLETE). If you have any problems, see the troubleshooting section below.
- When the CloudFormation stack shows CREATE_COMPLETE, the integration
is complete. The CloudFormation template automated the previously manual
steps. At this point, the following is in place:
- An Amazon Cognito user pool (and associated identity pool, if applicable) specifically for this Contact Center instance’s users.
- An LMAdmin user group in Cognito (created by the stack) that will be used to designate admin users in Contact Center.
- AWS Lambda functions or other services for features such as transcription, bots, and others, connected between Connect and Contact Center (the exact resources depend on the template scope).
- IAM Roles/Permissions that allow Zendesk’s platform to access the Connect instance (within the limits needed) and vice versa, without exposing unnecessary access.
- Connect might need configuration adjustments using the API, for example, attaching Amazon Lex bots or setting up flow modules if the product requires, though many such things are often optional, or configured later.
Now, the Connect account, the Contact Center account, and the CloudFormation resources are all in place and connected.
To perform post-stack steps
Once the stack begins deployment, it will show in the Still deploying state. While in this state, you can click Check Status to check the status of the stack deployment. When it's fully deployed, it will appear as Ready to activate.
- Once you are ready to link the new stack, click Activate.

Setting up users and access
In this section, you'll make sure that users (agents or admins) can sign into Contact Center and that Connect will allow the connection. The following sections detail how to configure Cognito for a variety of SAML providers. The high-level requirement for configuring SSO is summarized and can be used as guidance for configuration of any new SAML providers that have not yet been documented.
Setting up users with SSO and SAML
Contact Center leverages Amazon Cognito for agent authentication, including single sign-on (SSO). The benefits of this approach are:
- No agent data is stored in the Zendesk environment. All agent data is stored in Amazon Cognito in the client's own AWS account.
- Amazon Cognito caters for user pools where users can manually be created.
- Amazon Cognito caters for SAML federation, which enables SSO, with most SAML providers.
- A SAML application (and associated xml configuration file) is required.Note: To set up single sign-on (SSO) for Connect, configure the SAML application in the IAM Identity Center, which is often in a separate AWS account and region. However, the identity provider, role, and policy are established in the same AWS account as Connect.
- The SAML application must have the following specified:
Attribute Value ACS URL https://${yourDomainPrefix}.auth.${region}.amazoncognito.com/saml2/idpresponse Application SAML audience urn:amazon:cognito:sp:${yourUserPoolID} Application start URL (optional) Contact Center login URL - The SAML application must have the following two SAML
attributes:
SAML Attribute Maps to this string value or user attribute Format Subject ${user:email} Persistent http://schemas.xmlsoap.org/ws/2005/05/identity/claims/emailaddress ${user:email} - Configure the identity provider in Cognito with the following
attributes:
User pool attribute SAML Attribute email http://schemas.xmlsoap.org/ws/2005/05/identity/claims/emailaddress
The following resources provide additional information about setting up SSO with various services:
Manually adding users using Cognito user pools (if you're no using SAML/SSO)
When the CloudFormation stack ran, it created an Amazon Cognito user pool for this Contact Center instance. The user pool is a directory of user accounts who can authenticate to Contact Center. It likely also created an App Client in Cognito (which the Contact Center web app uses to allow users to login), and an LMAdmin group for admin permissions. The next step is to create at least one user in this user pool so you can test logging into Contact Center.
To manually add a user
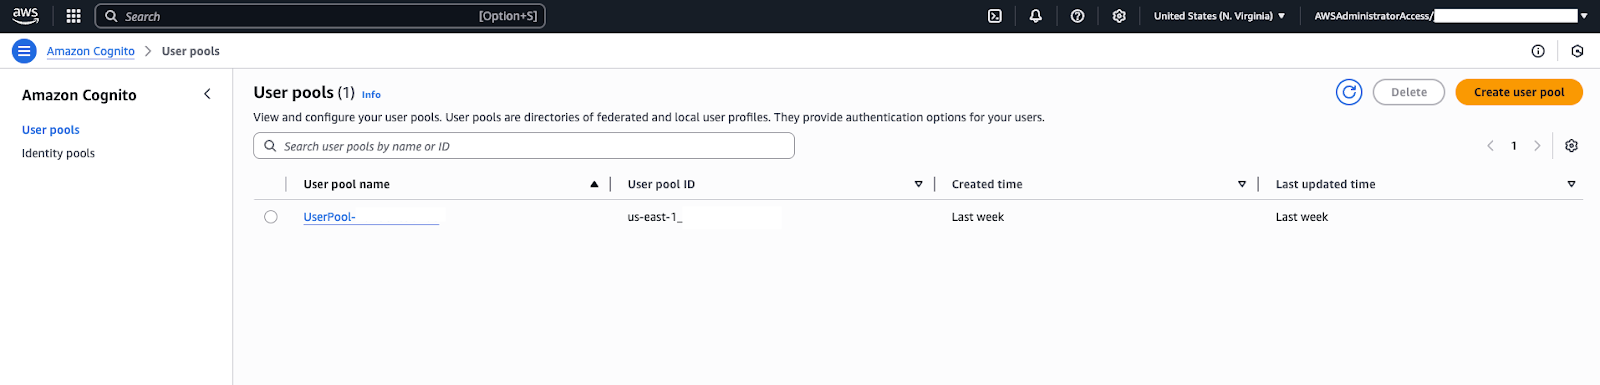
- Navigate to the Cognito service in the AWS console. Under User pools,
click the use pool you want to manage.
- Go to App client settings, Login pages tab, and edit the Managed login pages configuration.
- Change the Identity Provider to be the Congito user pool directory.
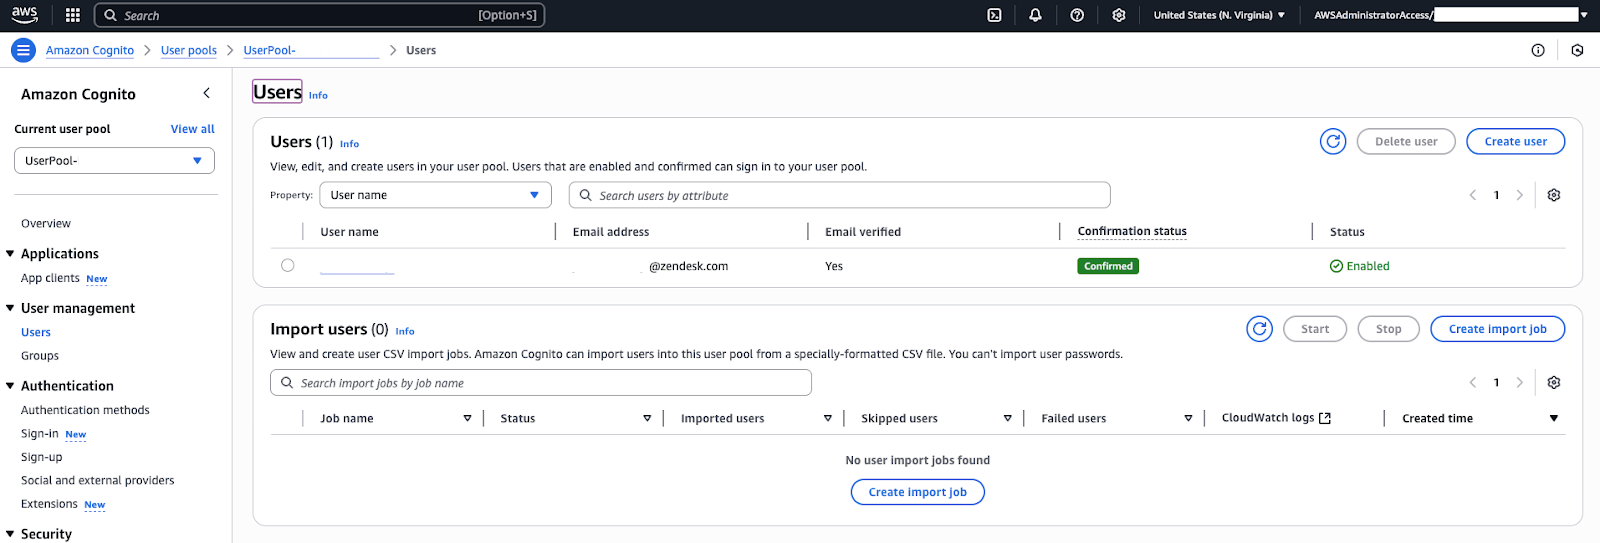
- In the Cognito user pool console, find the section for “Users”
and choose “Create user” (or “Add user”). You'll be prompted to
enter details for the new user account:
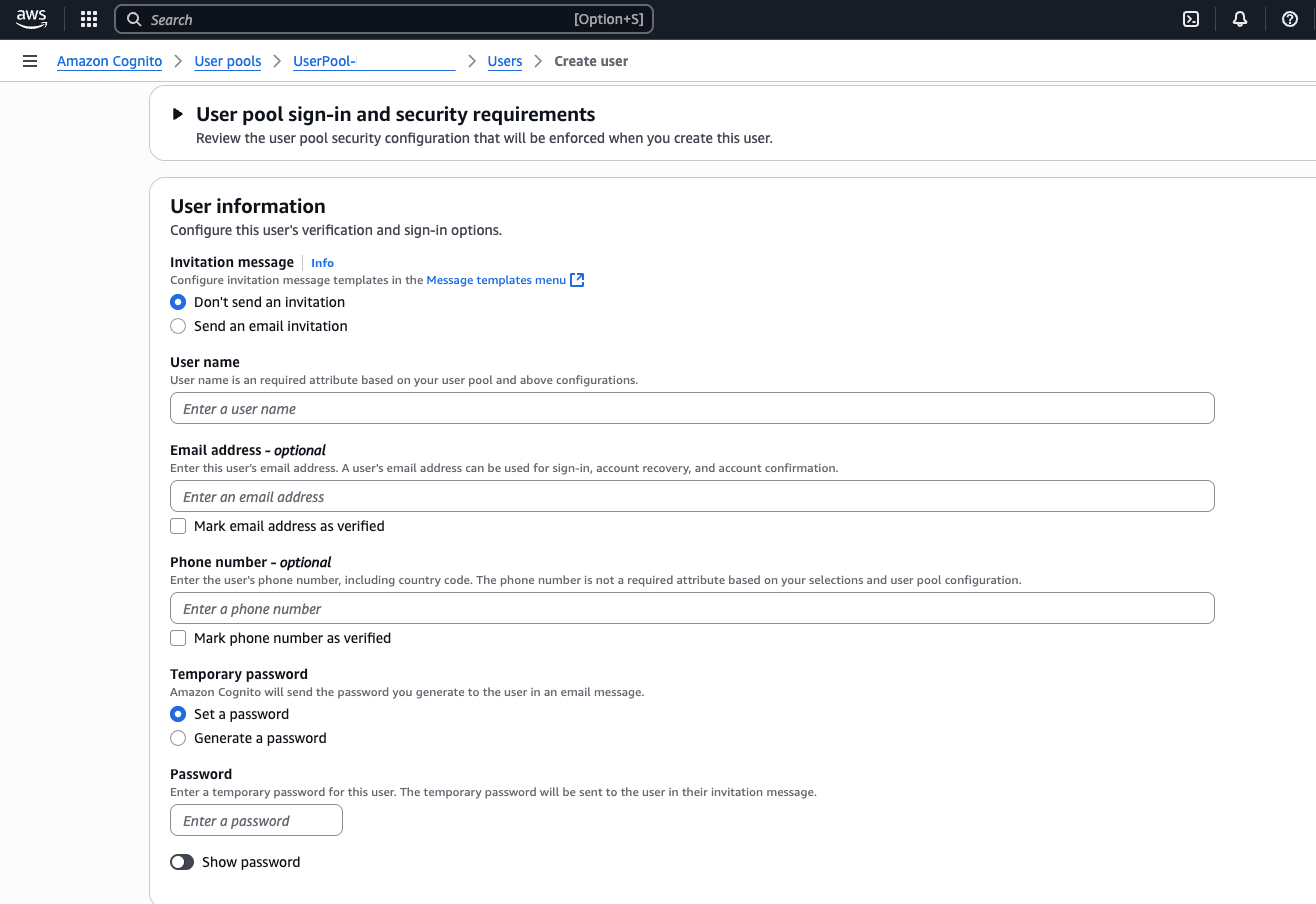
- Username: Choose a username (for example, the person’s email or a simple name).
- Temporary Password: Set an initial password for the user. (Cognito might require the user to reset the password on first login, but for internal testing you can set a simple one and. optionally, turn off the reset requirement).
- Contact Info: Depending on settings, you might need to provide a valid email address and/or phone number for the user (these can be used for password recovery or multi-factor authentication).
- Account Status: Make sure that Mark phone/email as verified is checked if you provided those and don’t want Cognito to expect a verification step. Also, check Temporary password so the user must change it on first sign in (for production users).
-
Create the user. The new user will now appear
in the user list for the pool.
This user represents an agent (or admin) who can log into the Contact Center web app.
Enabling writeback from Contact Center to Zendesk
To allow Contact Center to send call recordings back to Zendesk after a call, turn on the Voice Post Call Lambda in AWS.
To turn on writeback
- Navigate to Lambdas in your Amazon Console.
- In the "Functions" section, search for "post". This returns a function with a name containing 'VoicePostCa'
- Open this function, and on the Function overview page, select
Configuration > Triggers from the navigation menus.
Select the Contact Center Zendesk Voice Post Call Lambda function:
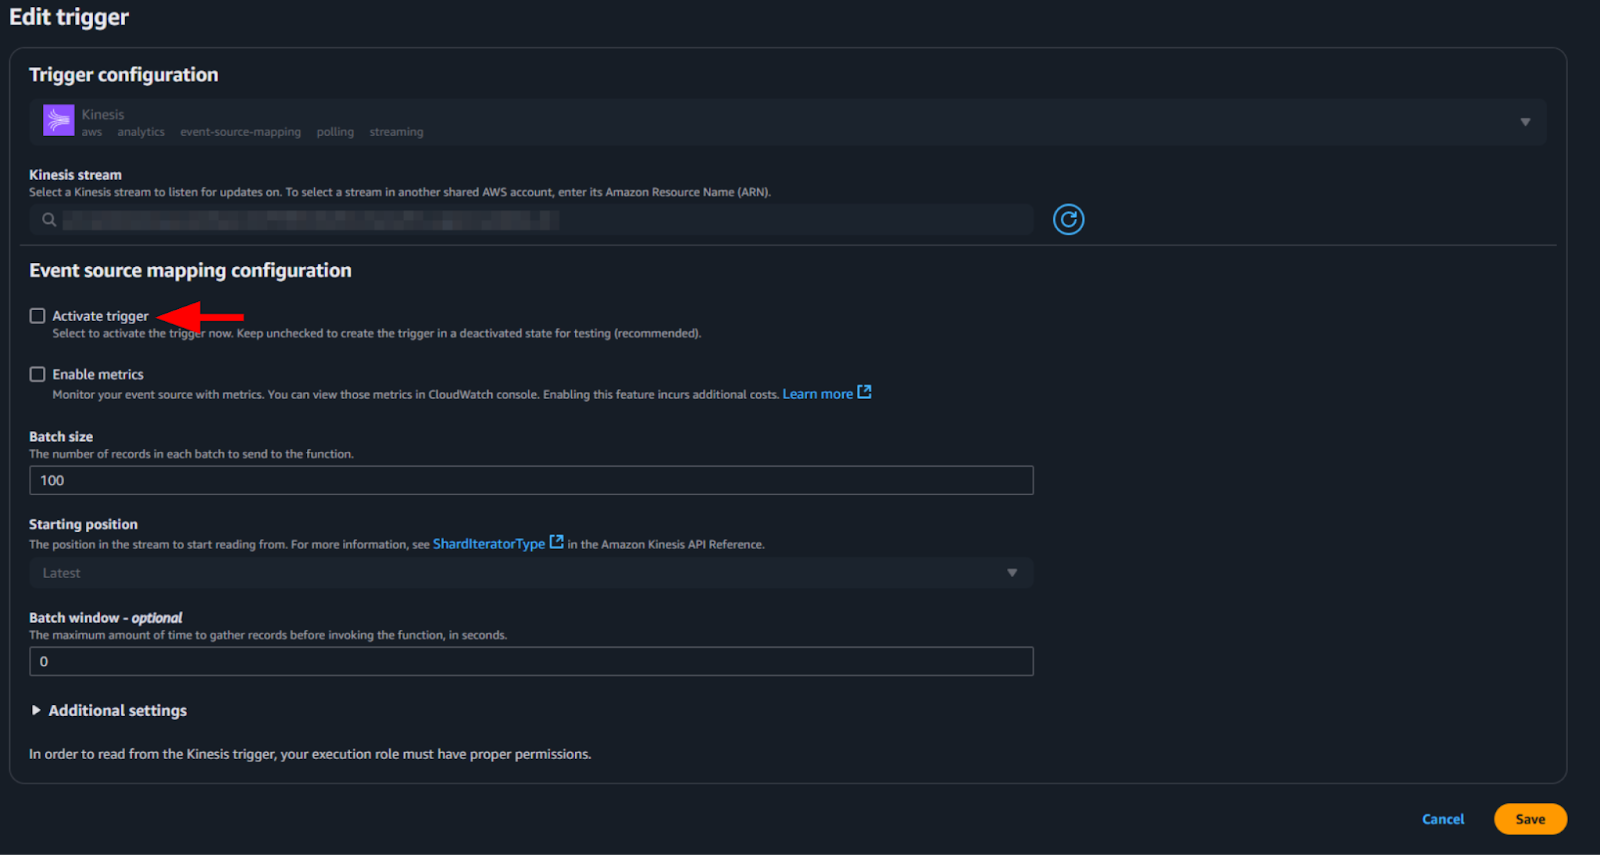
- For Kinesis, select its checkbox, then click Edit.
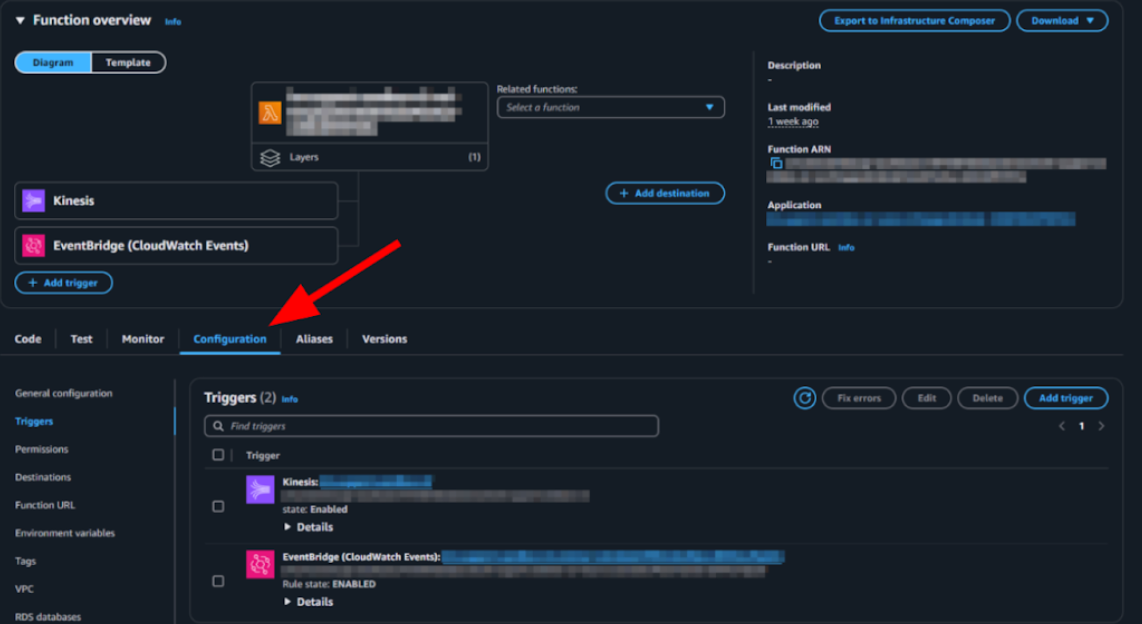
- On the Edit trigger page, select Activate trigger, and save the
change.
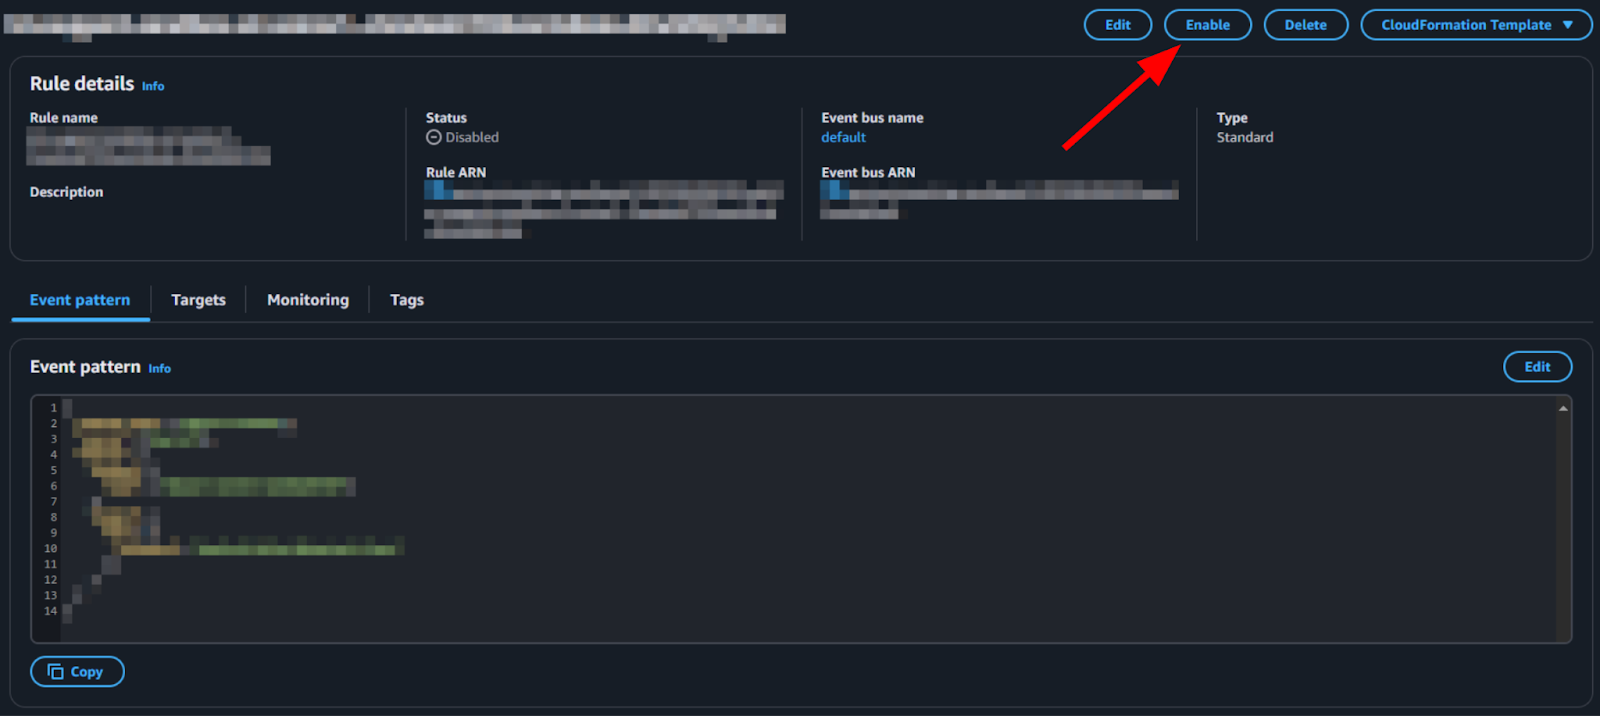
- For EventBridge, click the link in the name (blue highlighted
hyperlink).

- In the EventBridge rule details page, click Enable.
- Repeat the above steps for the following Lambda functions:
- ContactLensEventsLambda
- CTRIngestLambda
After these steps have been completed, your call transcripts will be shown in your Zendesk tickets from a Contact Center voice call.
Note: If a dual stack upgrade is performed, these triggers must be turned off on the old Lambda, and only then turned on for the new Lambda. See Understanding key terms.
Adding a Contact Center admin user
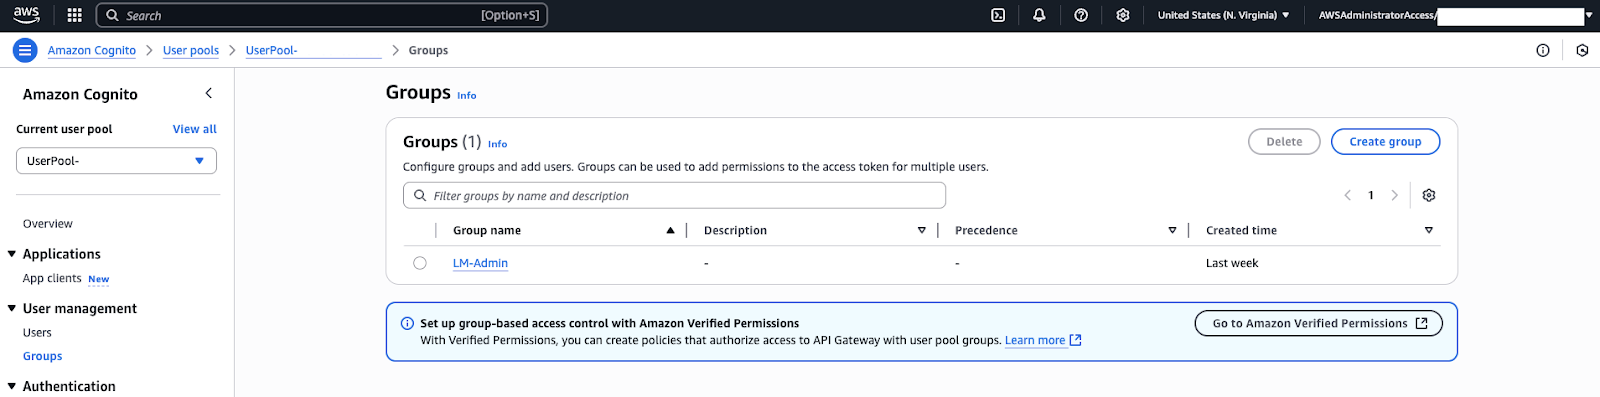
By default, newly created users are regular users. If a user has administrator privileges in Contact Center (meaning they can configure Contact Center settings, view dashboards, and so on), they must be added to the LMAdmin user pool group that was created with the CloudFormation stack.
To add a Contact Center admin user
- In the Cognito user pool, go to “Groups” and you will see a group named LMAdmin.
- Click the LMAdmin group and add your new user to the group.
.
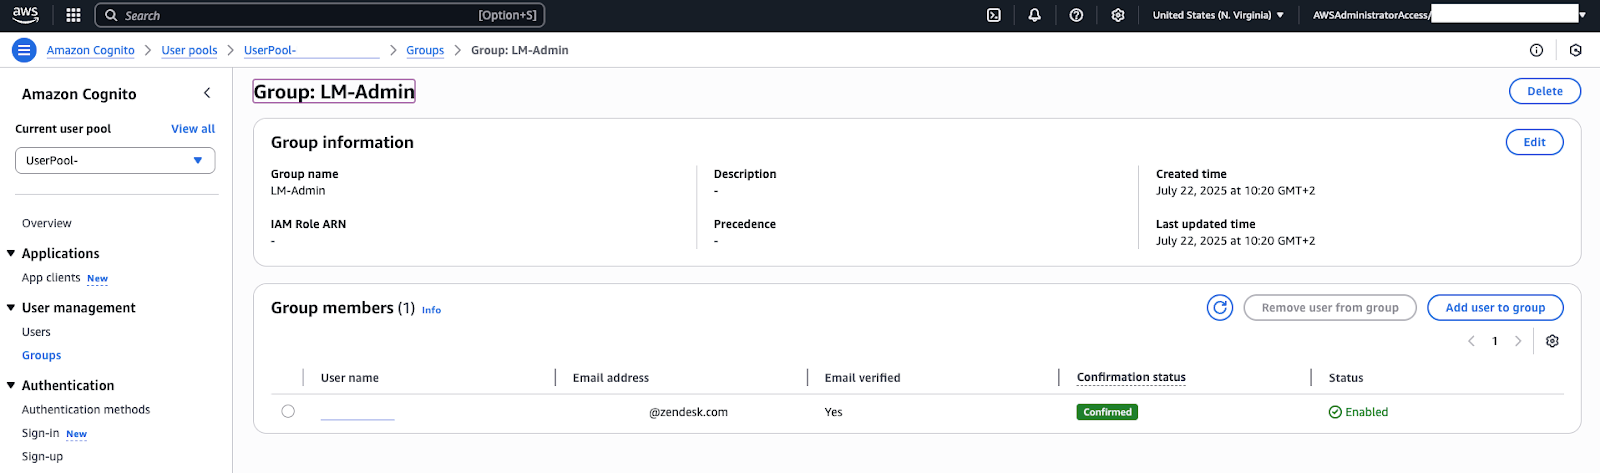
If you use SSO, the users available to add to this group are only created after they have successfully signed into Contact Center at least once. Once added, the user will gain access to the settings and dashboard pages in Contact Center.
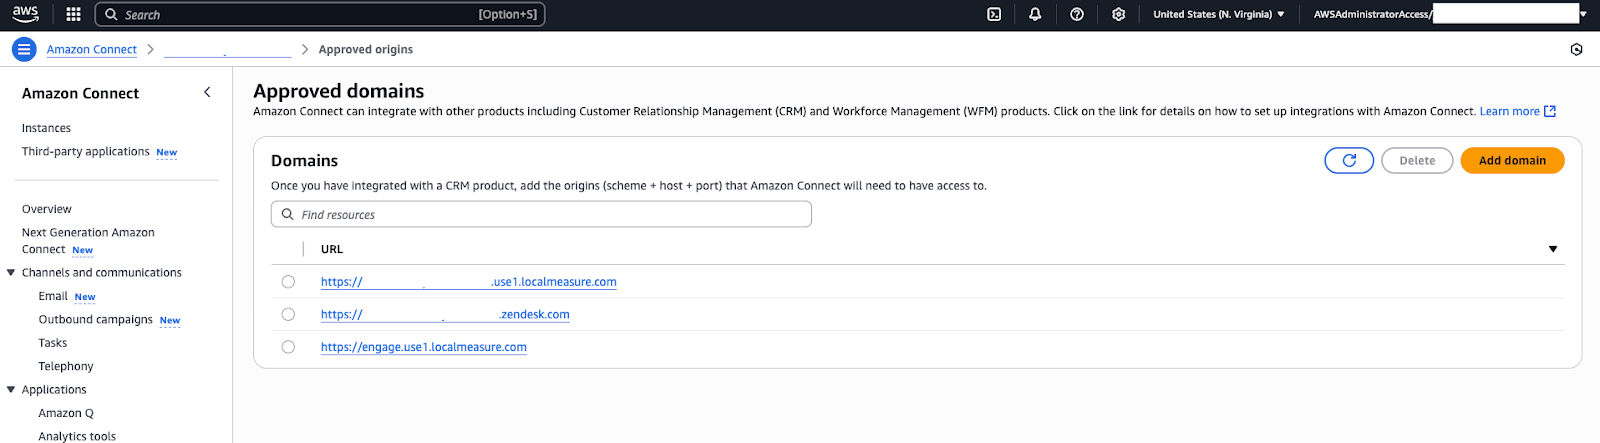
Configuring Amazon Connect approved origins
Connect includes a security setting that controls which web origins (domains) are allowed to embed or access the Connect streams (for example, the softphone agent interface). Since Contact Center is a separate web app that links to Connect (through the browser, using Connect streams, API, and SAML login behind the scenes), you must whitelist the Contact Center domain in the Connect instance settings. This ensures that when an agent uses Contact Center, Connect recognizes it and permits the connection.
To configure approved origins
- In the AWS console, open the Amazon Connect service and click your instance name to view its details.
- In the Approved origins section, enter the origin (domain URL) for the Contact Center web app that agents will use. Typically, Contact Center is accessed via a web app URL.
- Add the following URLs:
- https://${Zendesk instance name}
- https://1162892.apps.zdusercontent.com
- http://1162894.apps.zdusercontent.com
Replace Zendesk instance name with your Zendesk subdomain for example, https://demoinstance.zendesk.com
- Save your changes. Connect now trusts requests coming from that domain.
Why this matters: If you skip this step, when a user tries to sign into Contact Center, and it tries to silently open the Connect stream or perform actions via the Connect APIs, it might get blocked due to CORS (cross-origin request) restrictions. Whitelisting the domain prevents that issue. You need to do this once for each Connect instance and integrating app.
With the Cognito user in place and the Connect origin set, the integration setup is complete complete. You can now test the end-to-end functionality.
To test your contact center
- Sign out of the Contact Center admin console and navigate to the Contact Center agent login page, https://${Zendesk Instance Name}/agent.
- Sign in with SSO or the user credentials you set up in Cognito
(username and password).
You'll now be in the Contact Center independent interface. This web app will link to Connect in the background (using the allowed origin we set and the integration configuration we deployed). If your Connect instance is brand new, there might not be much to see yet (until you set up a phone number or chat). However, you can verify connectivity by seeing if the Connect softphone/agent status controls load in Contact Center.
For example, you might see your Connect agent status (Online/Offline) indicator in Contact Center and be able to change status or make a test outbound call if you've claimed a number. This indicates the integration is working.
Installing and configuring the Contact Center app
You're now ready to install the Contact Center app in your Zendesk account.
To install the Contact Center app
- In your Zendesk account, navigate to Admin Center.

- Navigate to Zendesk Support Apps.
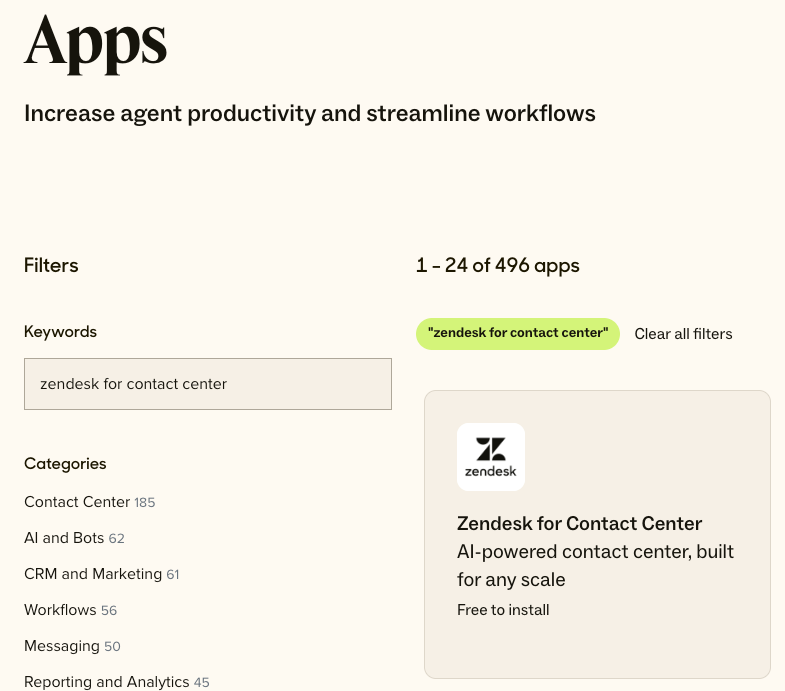
- Open the Marketplace.
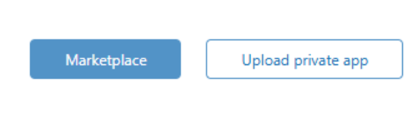
- In the Zendesk Marketplace, search for, and install the Zendesk for Contact Center
app.
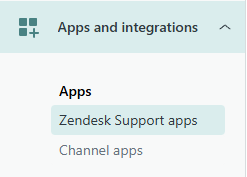
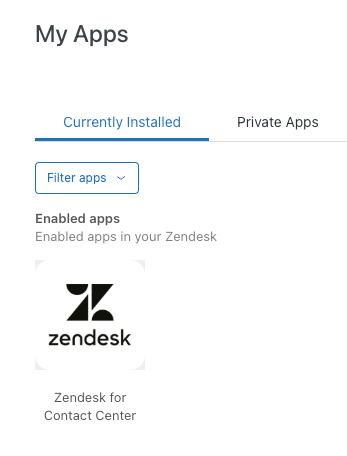
- Navigate to Admin Center > Apps and Integrations > Apps >
Zendesk Support apps > and click the Contact Center app.
- Update the following settings using your existing Contact Center instance
URL:
- Title: Typically, use the suggested name.
- Contact Center workspace: Once you've set up your Contact Center environment, you can retrieve the workspace value from the URL of your standalone Contact Center environment.
- Zendesk for Contact Center region: Once you have your Contact Center environment set up, you can retrieve this region value from the URL of your Contact Center environment.
-
Enable role restrictions: Restrict Contact Center
access to specific roles.
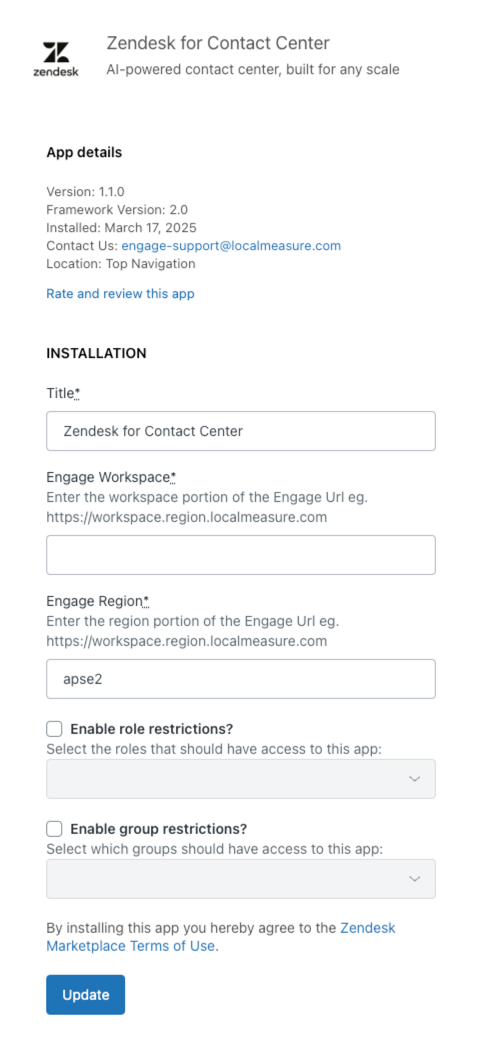
- Enable group restrictions: With this optional setting you can limit specific groups to have access to the Contact Center app.
- Click Update.
The Contact Center app will now appear in the top right corner of your Zendesk instance.
Now that you've installed the Contact Center app, you can configure its settings.
To configure the Contact Center app
- In Zendesk Admin Center click Apps and integrations > API tokens.
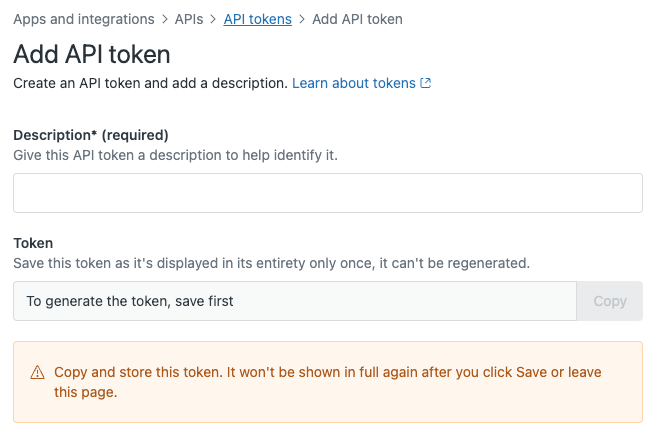
- Click Add API token.
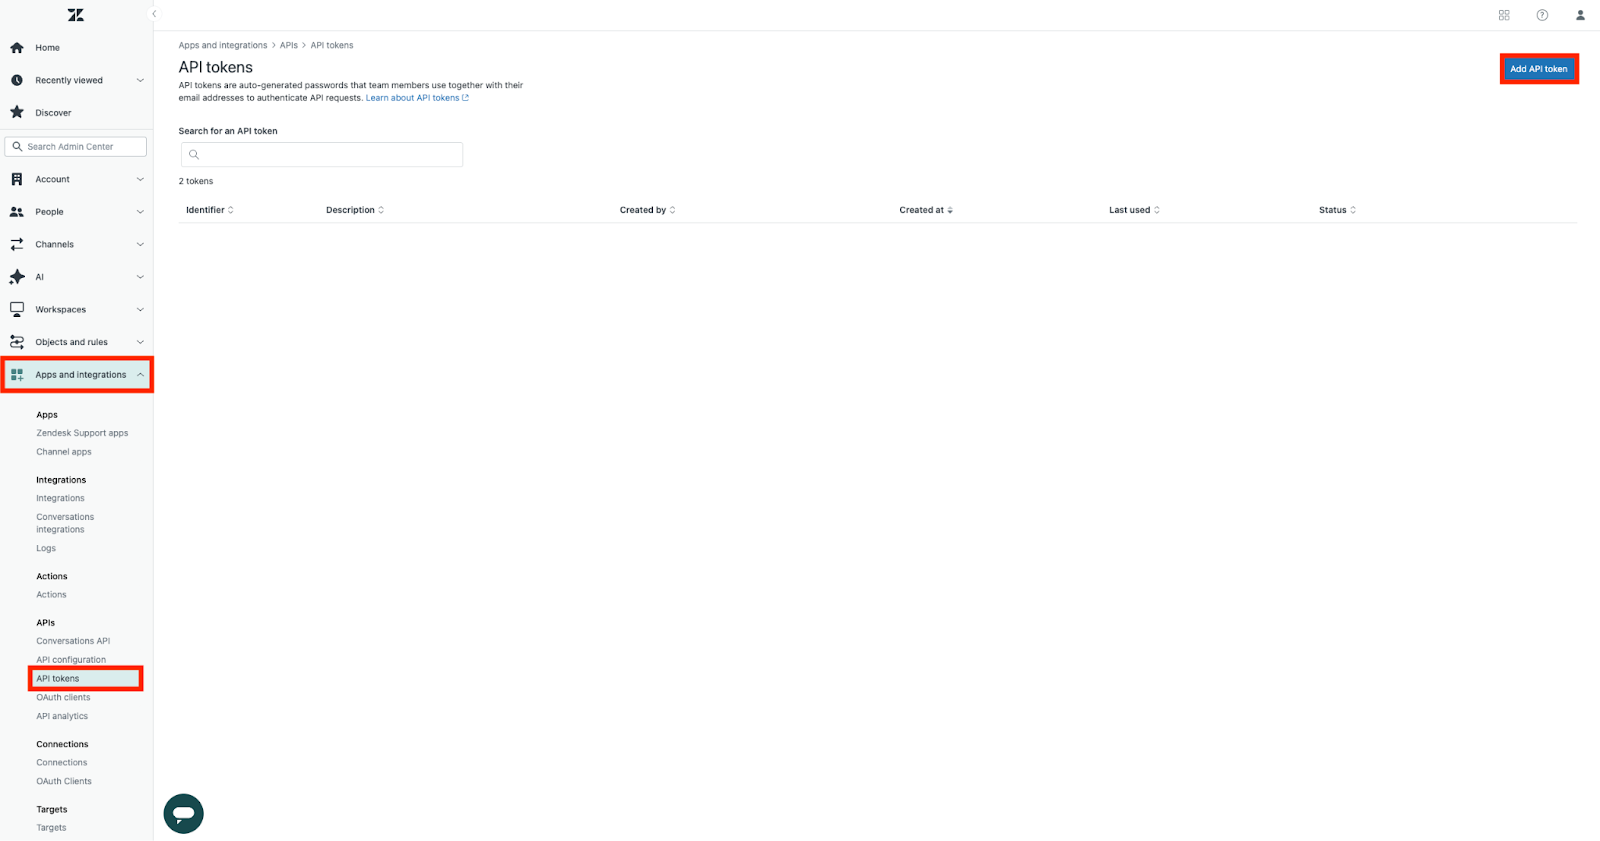
- On the Add API token page, enter a descriptive name for the token, for example, "Connect Contact Center to Zendesk".
- Click Save.
Copy the token string and keep it handy for the next steps.
- In Contact Center, click the settings icon (
 ), then click Admin
settings.
), then click Admin
settings.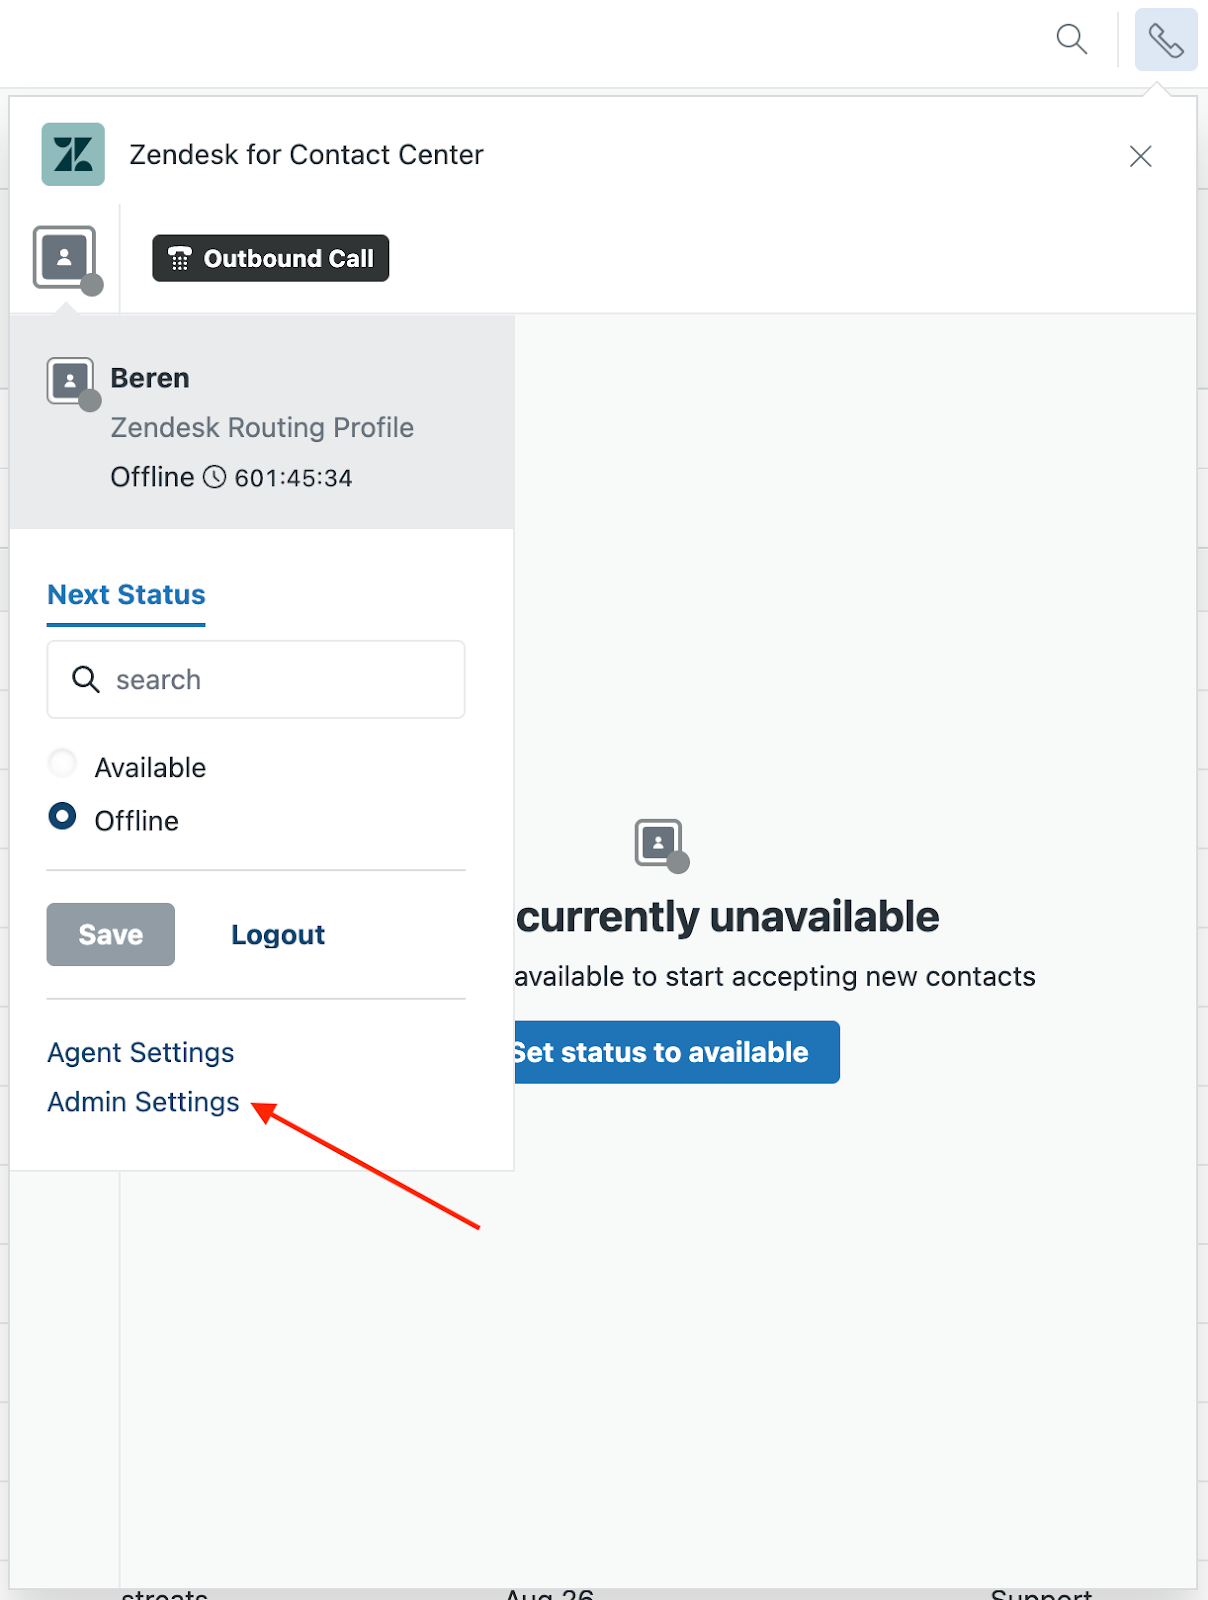
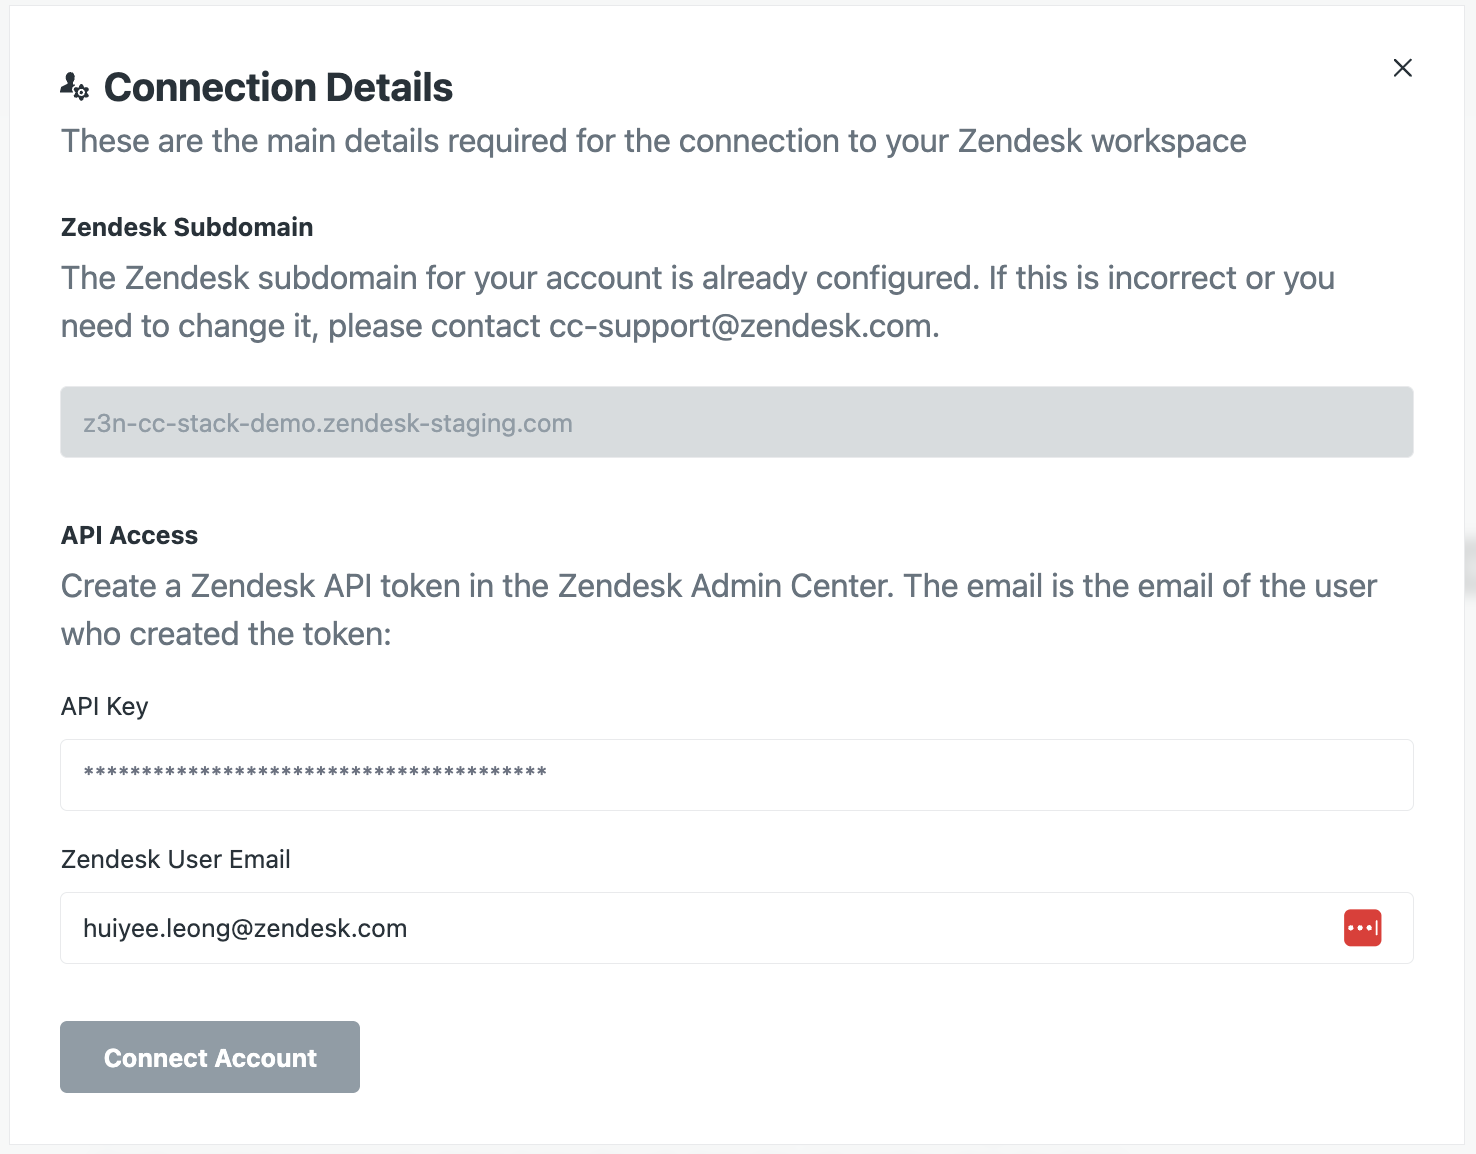
- Click the Zendesk settings icon (
 ). You'll see helpful information
about getting your Contact Center app connection to your Zendesk
account.
). You'll see helpful information
about getting your Contact Center app connection to your Zendesk
account. - Expand the Your Zendesk account panel, then click Edit.
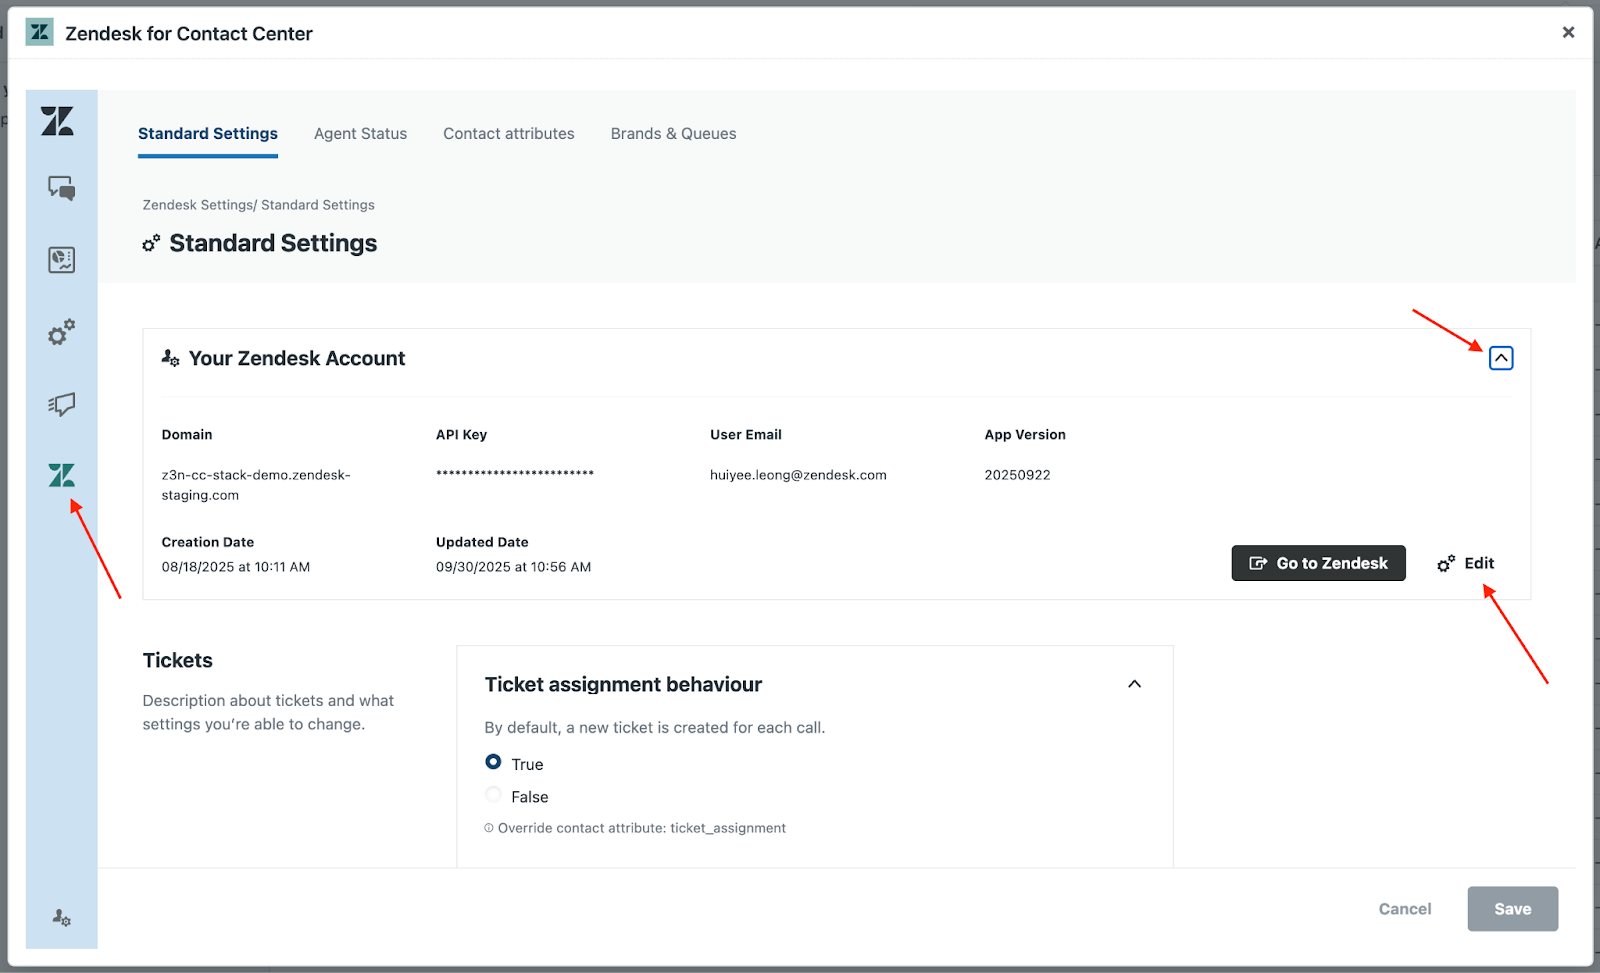
- In the API key field, paste the API key you copied previously.
- In the Zendesk user email field, enter your Zendesk admin email address.
- Click Connect account.
You'll see a page that helps you set up your creation rules for Zendesk tickets, as well as how transcripts and recordings will be handled. If you're not sure what to enter, you can configure these items later.
- Click Complete.
The Contact Center app and your Zendesk account are now linked.
- In your Zendesk environment, perform a hard refresh of your browser.
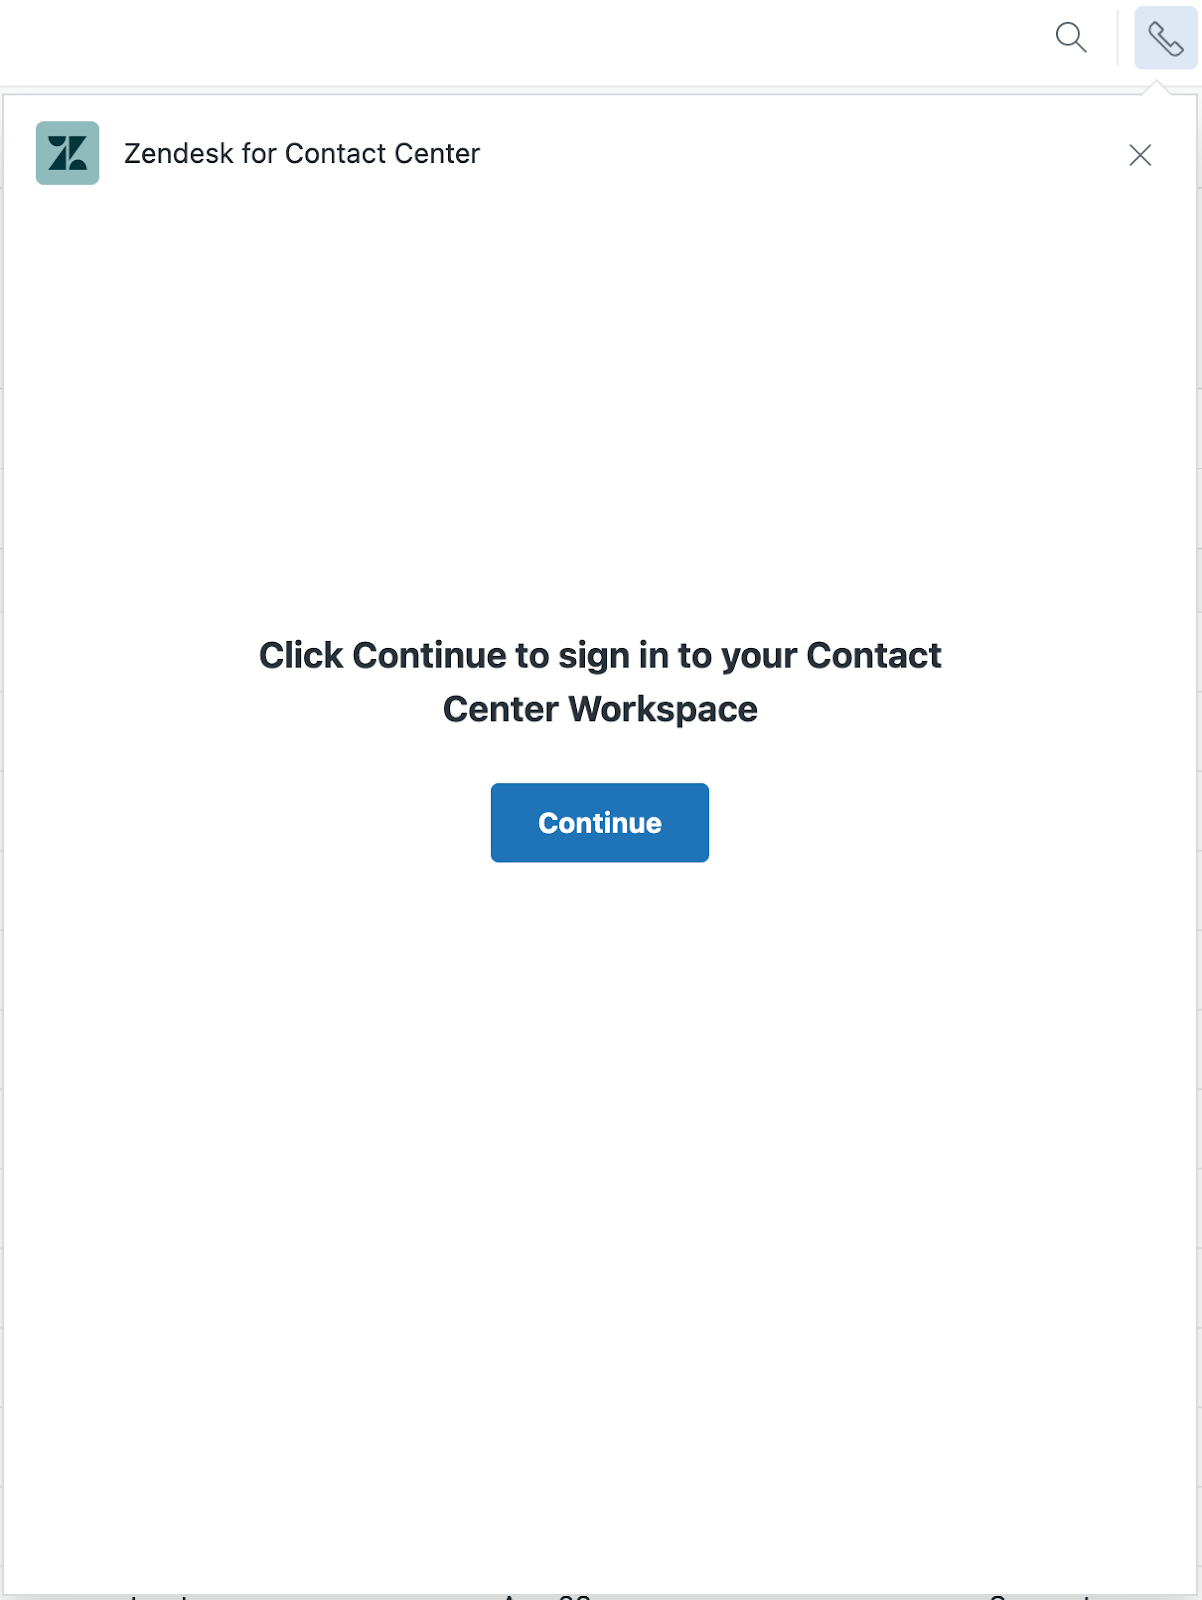
- Click the phone icon (
 ) to open the Contact Center
app.
) to open the Contact Center
app.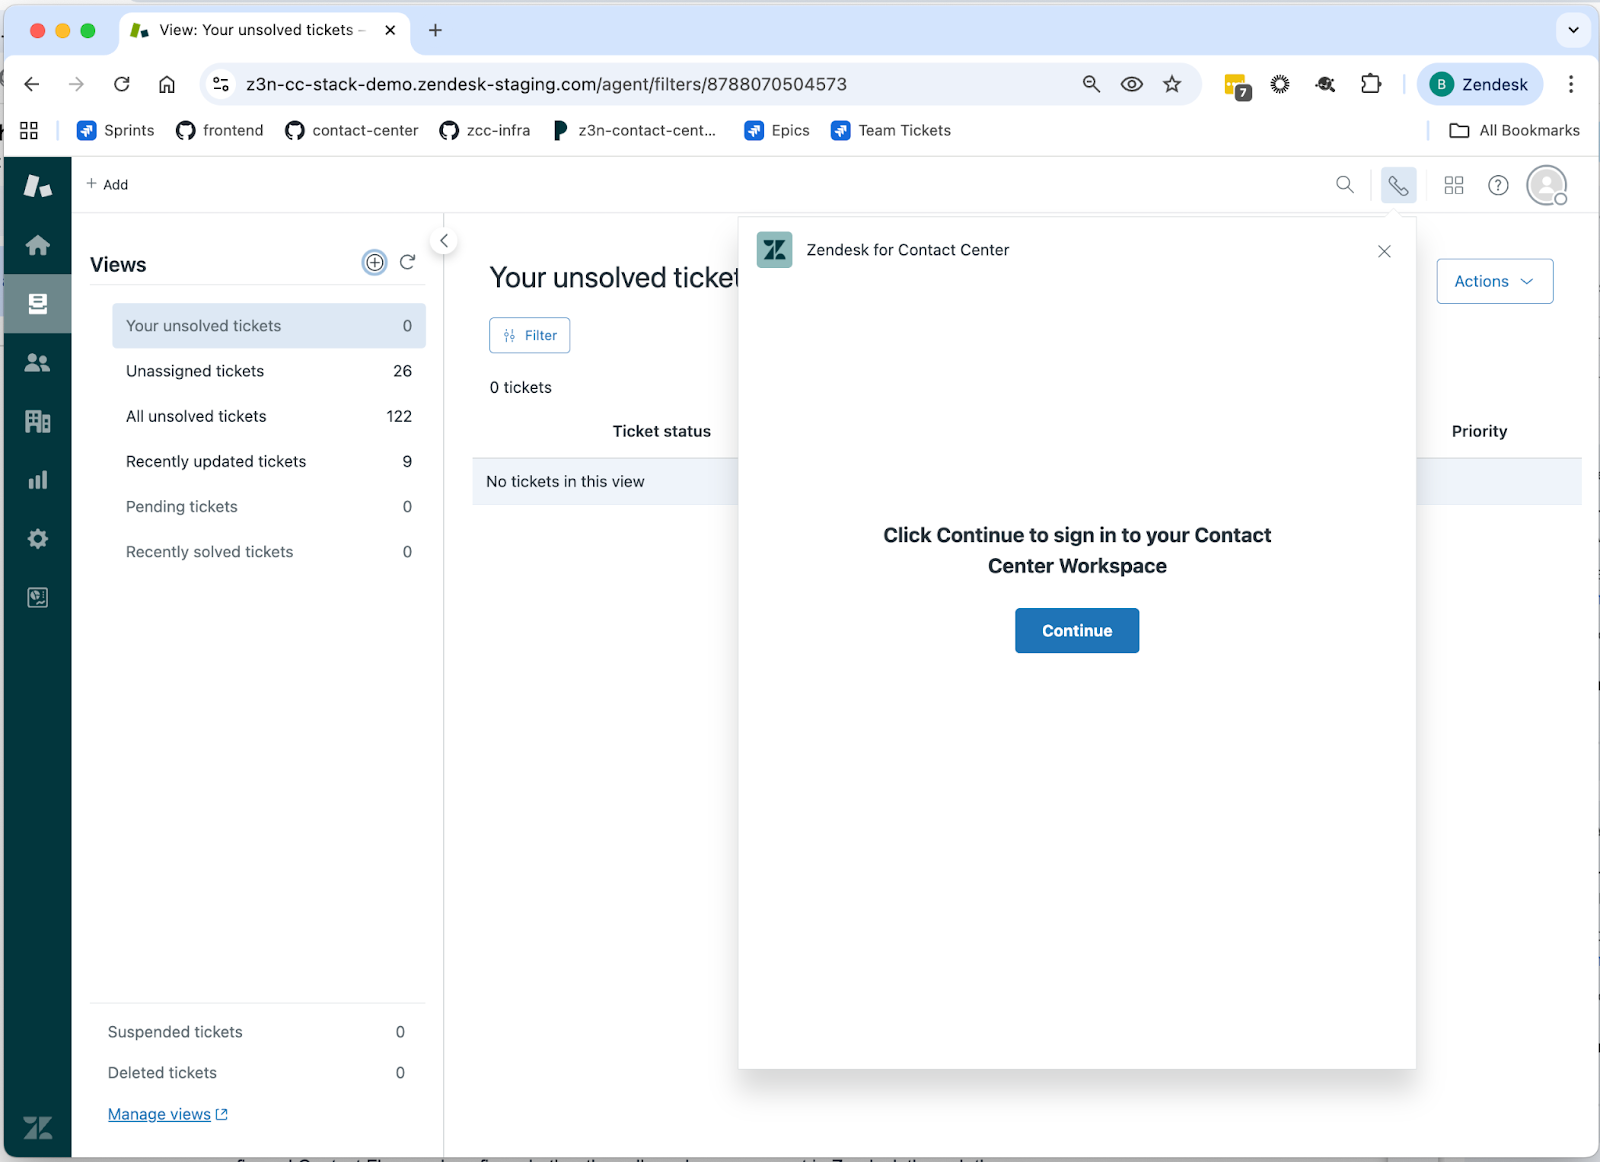
- Click Continue.
- Sign in using the authentication process set up for your account.
- Perform a test call by setting up a new number in the Connect dashboard, linking it to a new or preconfigured contact flow, and confirming whether the call reaches your agent in Zendesk through the app.
You've now finished setting up your contact center.
Next steps
Now you've completed the installation, here are some useful resources to get you started using Contact Center.
Troubleshooting Contact Center
In this section, you'll learn about a few common issues and how to address them.
-
CloudFormation Stack Failure (Rollback): If the CloudFormation
stack does not deploy successfully on the first try, the stack creation will
fail and automatically roll back to the original configuration.
For example, if the stack initially failed with the error, “Subscribe CTR (Contact Trace Records) Stream”, this might indicate that a resource couldn’t be created. To diagnose this, open the stack details page and look at the event where it failed. In this example, it’s likely a prerequisite was missed: Amazon Connect’s Contact Trace Records streaming was not turned on. The “CTR stream” refers to Connect’s contact data stream (using Amazon Kinesis). CloudFormation was attempting to set up a connection for streaming contact data, but since no Kinesis stream was defined in Connect, it failed.
Solution:
- See "Kinesis data streaming" in the Setting up Amazon Connect section.
- If the CloudFormation stack fails, carefully read the error
message or check the Events tab of the stack in AWS for the
failed resource. Common issues could be missing permissions or missing
pre-configuration. For instance, make sure:
- The Connect instance is in a state ready for integration (if it needs any specific setting turned on such as streaming, do that first).
- The parameters you entered (such as the Connect ARN) are correct.
- You have the necessary AWS permissions to create all the resources (lack of IAM permissions could cause failure; typically you need admin rights on the AWS account to deploy this stack).
-
Data Streaming or Storage: If your CloudFormation stack
creation fails at the ConnectDetails step, this could be due to the data
streaming or data storage configurations not being set up as expected by the
stack. These settings are checked in your Connect instance in the AWS
Console.
- Data Streaming: Make sure you selected the Kinesis Data Streaming opti as “Kinesis Stream” and not “Kinesis Firehose”.
- Data Storage: Make sure that the Call recording, Chat transcripts and Export reports S3 buckets are set up and turned on in the Data storage section in Connect.
- Allowed Origins / Login Issues: After setup, if users cannot sign in or the agent desktop isn’t connecting to Amazon Connect, double-check the Approved rigins in the Connect instance. If the domain was incorrect or not added, the connection will be blocked. Add the correct domain and try again. If users still can’t log in, ensure they exist in Cognito or SSO platform and have the right credentials.
- Cognito user pool tips: When testing logins, remember that if a Cognito user is created with a temporary password, the first login must use a flow that allows the password to be changed. The Contact Center sign in interface might handle this by prompting a reset. If not, you might need to manually set a permanent password for the user in the Cognito console (you can choose Set password for the user and turn off the force-reset option). For long-term use, advise clients on setting up an identity provider or managing users according to their IT policies.
- Rollback cleanup: If a CloudFormation stack fails and rolls back, it usually cleans up all resources it attempted to make. However, it’s good to verify that partial resources (such as a Cognito user pool or IAM roles) weren’t left behind. Usually, CloudFormation removes them, but if you see any orphaned resources, you might remove them manually to avoid confusion before retrying.