IT assets are things, such as hardware and software, that IT teams need to procure, allocate, refresh, and retire over time. Within Zendesk assets are the records for each asset type. The information captured varies by asset type and is defined by admins.
Individual assets can be assigned and viewed by agents. Additionally, admins can create new asset records and modify details of existing assets.
Assigning IT assets in tickets
When a support or service request is related to an asset, agents can use the context panel to assign an asset to users and organizations.
- In Zendesk Support, open a ticket.
- In the ticket, click the IT asset management icon (
 ) in the right sidebar.
 - (Optional) In the Assets panel, select the user or organization for which you
want to assign assets.
The default value is the ticket requester.
- Click Assign asset.
- Click All assets or the name of a specific asset type.
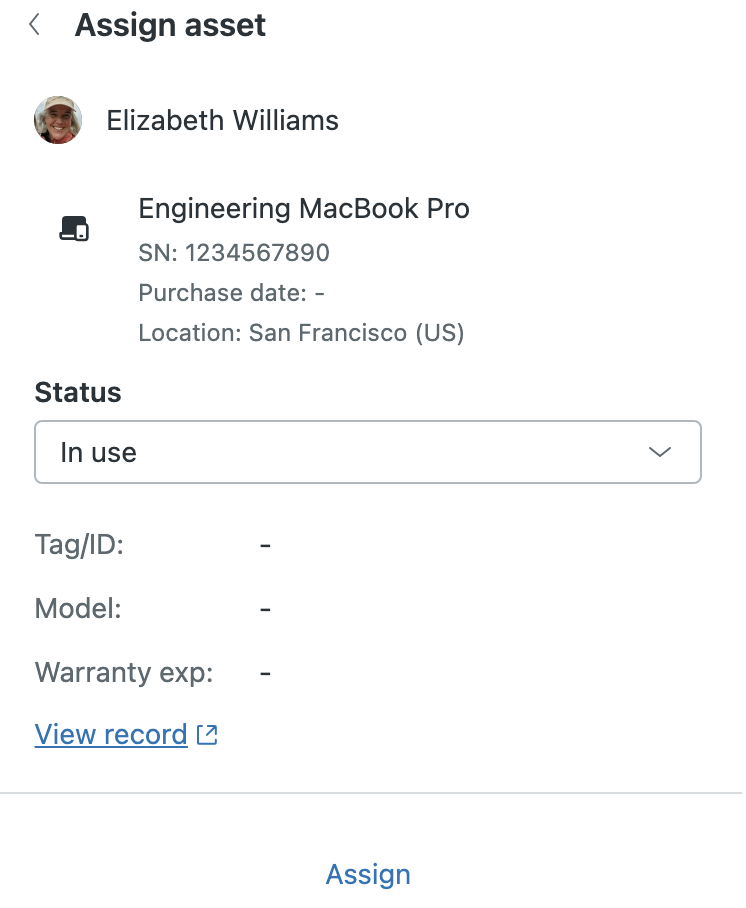
- Select an available asset and click Select.
- Select the asset's Status.
- Click Assign.
Viewing an asset's details from a ticket
Agents can see a summary of key information about assigned assets in the IT asset management view in the context panel. An agent can open an asset's details directly if they need to learn more about an asset already assigned or are considering assigning it to the selected user or organization.
The data tracked for each asset is defined by admins through a combination of the global asset fields (including the standard asset fields), asset type custom fields, and asset type custom fields inherited from parent asset types. The fields within an asset record are organized based on their origin.
- In a ticket, click the Asset Management icon () in the right sidebar to open the context
panel.
- (Optional) Select the user or organization for which you want to view
assigned assets.
The default value is the ticket requester.
- Beneath the asset you want to view more information about, click View
record.
This opens the asset record's details in a new tab. The asset details are read-only for agents.
Performing asset management actions from a ticket
In addition to assigning assets and viewing asset details within the ticket interface, admins and agents in custom roles with permission can also initiate certain asset management action flows without leaving the Agent Workspace.
- In a ticket, click the Asset Management icon () in the right sidebar to open the context
panel.
- (Optional) In the Assets panel, select the user or organization for which
you want to manage assets.
The default value is the ticket requester.
- Next to the device you need to perform an action on, click the options menu
(
 ), select Run action flow, and
then select one of the following options:
), select Run action flow, and
then select one of the following options:- Lock device
- Restart device
- Unassign device
- Erase device
Note: The available actions are determined by the external services connected to action builder, such as Jamf Pro and Microsoft Intune. If neither of these services are connected, the only action flow option available is Unassign device. - If locking a device through Jamf Pro, when prompted, enter a pin that can be
used to unlock the device.
Save the pin securely. It isn't automatically recorded in Jamf Pro or Zendesk.
- In the confirmation dialog, click Start action.
After the action begins it can't be stopped. You'll receive a pop-up confirmation notification when the action completes.