Verified AI summary ◀▼
Access customer context through the context panel to view user profiles, interaction history, and device information. This feature helps you understand customer needs by displaying essential details like contact info, recent interactions, and pages viewed. You can also update user profiles and filter interactions by application or event type, enhancing your ability to provide personalized support.
This article describes how to view customer context in the context panel, including additional user profiles and events from applications other than Zendesk. You must have the Agent Workspace to use the context panel.
This article includes the following sections:
- About customer context
- Displaying customer context in a ticket
- Using the user essentials card
- Viewing interaction history
- Using pages viewed
- Viewing device information (live chat and messaging)
Related articles
About customer context
To provide better, faster, and more personalized responses to customers, you can view customer context in a ticket. By default, customer context includes:
- A user essentials card with details about the support requester, including contact information, time zone, and language.
- Interactions with a list of recent conversations, tickets, and and other related events from the requester. Agents can use this to better understand what the requester needed help with recently.
- Pages viewed which displays the 20 most recent account web pages or help center articles viewed by the requester. Formerly known as Visitor Path.
-
Device information For live chat and messaging, displays useful device
information associated with the user, including location, IP address, device type, OS, and
browser.
Light agents, contributors, and agents in a Chat-only role can't view end user device information.
Additionally, if enabled by your administrator, customer context can include additional user profiles and interaction history (events) from applications other than Zendesk.
Displaying customer context in a ticket
When viewing a ticket , you can open the customer context panel to view more information about the support requester. The conext panel is closed by default.
To view customer context
- Click the User icon (
 ) on the side of the ticket. This opens customer context in
the context panel.
) on the side of the ticket. This opens customer context in
the context panel. 
Using the user essentials card
The user essentials card displays basic profile information about the ticket requester, including user name, contact information, social identities, organization membership, time zone, and preferred language.

You can make basic updates to the user essentials card. If allowed by an account administrator, you can also view the requester’s additional user profiles for integrated third-party applications.
(Professional plans and above) If configured by an admin, the user essentials card may display additional information about the ticket requester. This information can include additional contact information, or custom fields, such as a membership ID.

Updating the user essentials card
You can update the user essentials card by adding a note, or editing the requester’s Zendesk user profile.
To add a note to the user essentials card
- Click the User icon ( ) on the side of the ticket. This opens customer context in
the context panel.
- In the user essentials card, enter your comments in the user notes text editor
(
 ). Text added here becomes part of the requester’s profile
and is not associated with the specific ticket.
). Text added here becomes part of the requester’s profile
and is not associated with the specific ticket.
To edit the requester's profile
- Click the User icon ( ) on the side of the ticket. This opens customer context in
the context panel.
- In the essentials card, click the view more details icon (
 ). This opens the profile page. See
Viewing a user’s profile in Zendesk Support to
learn more about the information in the profile.
). This opens the profile page. See
Viewing a user’s profile in Zendesk Support to
learn more about the information in the profile.
Viewing additional user profiles
Depending on which applications your account supports, your customers may have more than one user profile. For example, your customer may have a Shopify user profile in addition to their Zendesk user profile. To help you resolve customer issues, it can be useful for you to see each profile.
This option is only available if enabled by an account administrator.
To switch between profiles
- Click the User icon ( ) on the side of the ticket. This opens customer context in
the context panel.
- In the essentials card, click the Profiles menu icon (
 ) next to the user’s name and select the profile you want to
view.
) next to the user’s name and select the profile you want to
view. 
- If there are more than 10 fields in the profile, you can click View
all at the bottom of the list to see a full description. Click View less to
collapse the list.

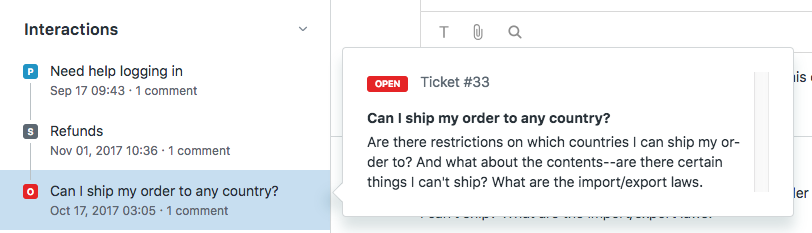
Viewing interaction history
Interactions list the requester’s recent Zendesk user events, as well as events for any other integrated applications. You can view or preview the tickets in this list, and filter the interactions to locate specific events.

Viewing a ticket in the interaction history
- Click the User icon ( ) on the side of a ticket. This opens customer context in the
context panel.
- Hover over the title of any ticket in the interaction history to see a preview, or
click the ticket title to open the ticket.
If a ticket displays the subject "Incident," this means that the ticket was created with no subject.
Note: Archived tickets are excluded from the interaction history. For information about how to view archived tickets, see About ticket archiving.
Filtering interactions (user events)
Your customers may have interactions for more than one application. To help you resolve customer issues, it can be useful for you to filter user events by application or event type.
To filter interaction events
- Click the User icon ( ) on the side of the ticket. This opens customer context in
the context panel.
- In Interactions, click the filter icon (
 ).
). - Use the drop-down top select the events you want to view.


You can view:
- All events for all applications
- All events for a specific application
- A specific type of event for an application
- To clear the filter, click the refresh icon (
 ).
).
Using pages viewed
Customer context also includes Pages viewed (also called visitor path), which displays the 20 most-recent web pages, app screens, or help center articles viewed by the requester. Tracking begins when an end user first lands on any page with a Web Widget or mobile SDK embedded in it, and only pages with a widget or SDK embedded are recorded. The list is updated in real time – it shows what the requester is currently viewing, and updates if they move to another page, screen, or article.
The chat visitor path persists only while a chat session is active. This is because the visitor path loses significance when a chat session ends. In Messaging, the visitor path persists across sessions.
Light agents can't access the Pages viewed list.
To view the pages viewed list
- Click the User icon ( ) on the side of the ticket. This opens customer context in the
context panel.
- In Pages viewed, click the down arrow (v) to expand the list.
This displays the web pages, app screens, or help center articles the requester has viewed, including what the requester is currently viewing, that meet the criteria listed above.

- If the customer is using the Web Widget to conduct the conversation, click any link in the list to open the pages they have viewed. A path in a conversation initiated via a mobile SDK does not include active links.
- If there are more than three events in the list (or more than 10 for live chat conversations), click the View all link at the bottom of the visitor path to see an expanded list, with a maximum of 20 events.
The warning banner (live chat only)
The Chat path may also display a warning banner, alerting the agent to a discrepancy between the visitor's existing profile and the data collected in a pre-chat form. This banner is informational-only. See Understanding the warning banner in the customer context panel for more information.
Viewing device information (live chat and messaging)
When the device information activated in the Agent Workspace, agents can view it in the customer context in the context panel. Device information is view only.
To view device information
- Click the User icon ( ) on the side of the ticket. This opens customer context in
the context panel.
- Expand the Device information section.

- (Messaging tickets only) Click the reload icon (
 ) to refresh the information.