In this Explore recipe, you’ll learn how to create a report to monitor and compare how ticket sentiment or intent changes throughout the ticket lifecycle.
This article contains the following topics:
What you’ll need
Skill level: Beginner
Time required: 5 minutes
- Zendesk Copilot add-on
- Intelligent triage turned on and configured to detect customer intent, sentiment and language
- Dynamic detection turned on for sentiment and intent
- Ticket intent or sentiment data in Zendesk Support
- Editor or Admin permissions
Reporting on ticket sentiment or intent changes
You can create a report to view how sentiment or intent evolves in tickets over time.
To report on ticket sentiment or intent changes:
- In Explore, click the reports (
 ) icon
 - In the Reports library, click New report
- On the Select a dataset page, click Support > Support - Updates history, then click Start report
The report builder opens - Next, add your metrics, the things you want to measure. In this case, you’ll add the number of tickets updated. In the Metrics panel, click Add
- From the list of metrics, choose Tickets > Tickets updated, then click Apply
- In the Columns panel, click Add
- From the list of attributes, choose the following:
- Tickets fields changes > Changes - Field Name
- Also select Changes - Previous value and Changes - New value
- Click Apply
- In the Filters panel, add a filter for Changes - Field Name. Set the filter to include one of the following:
- Sentiment
-
Intent

- Click Apply.
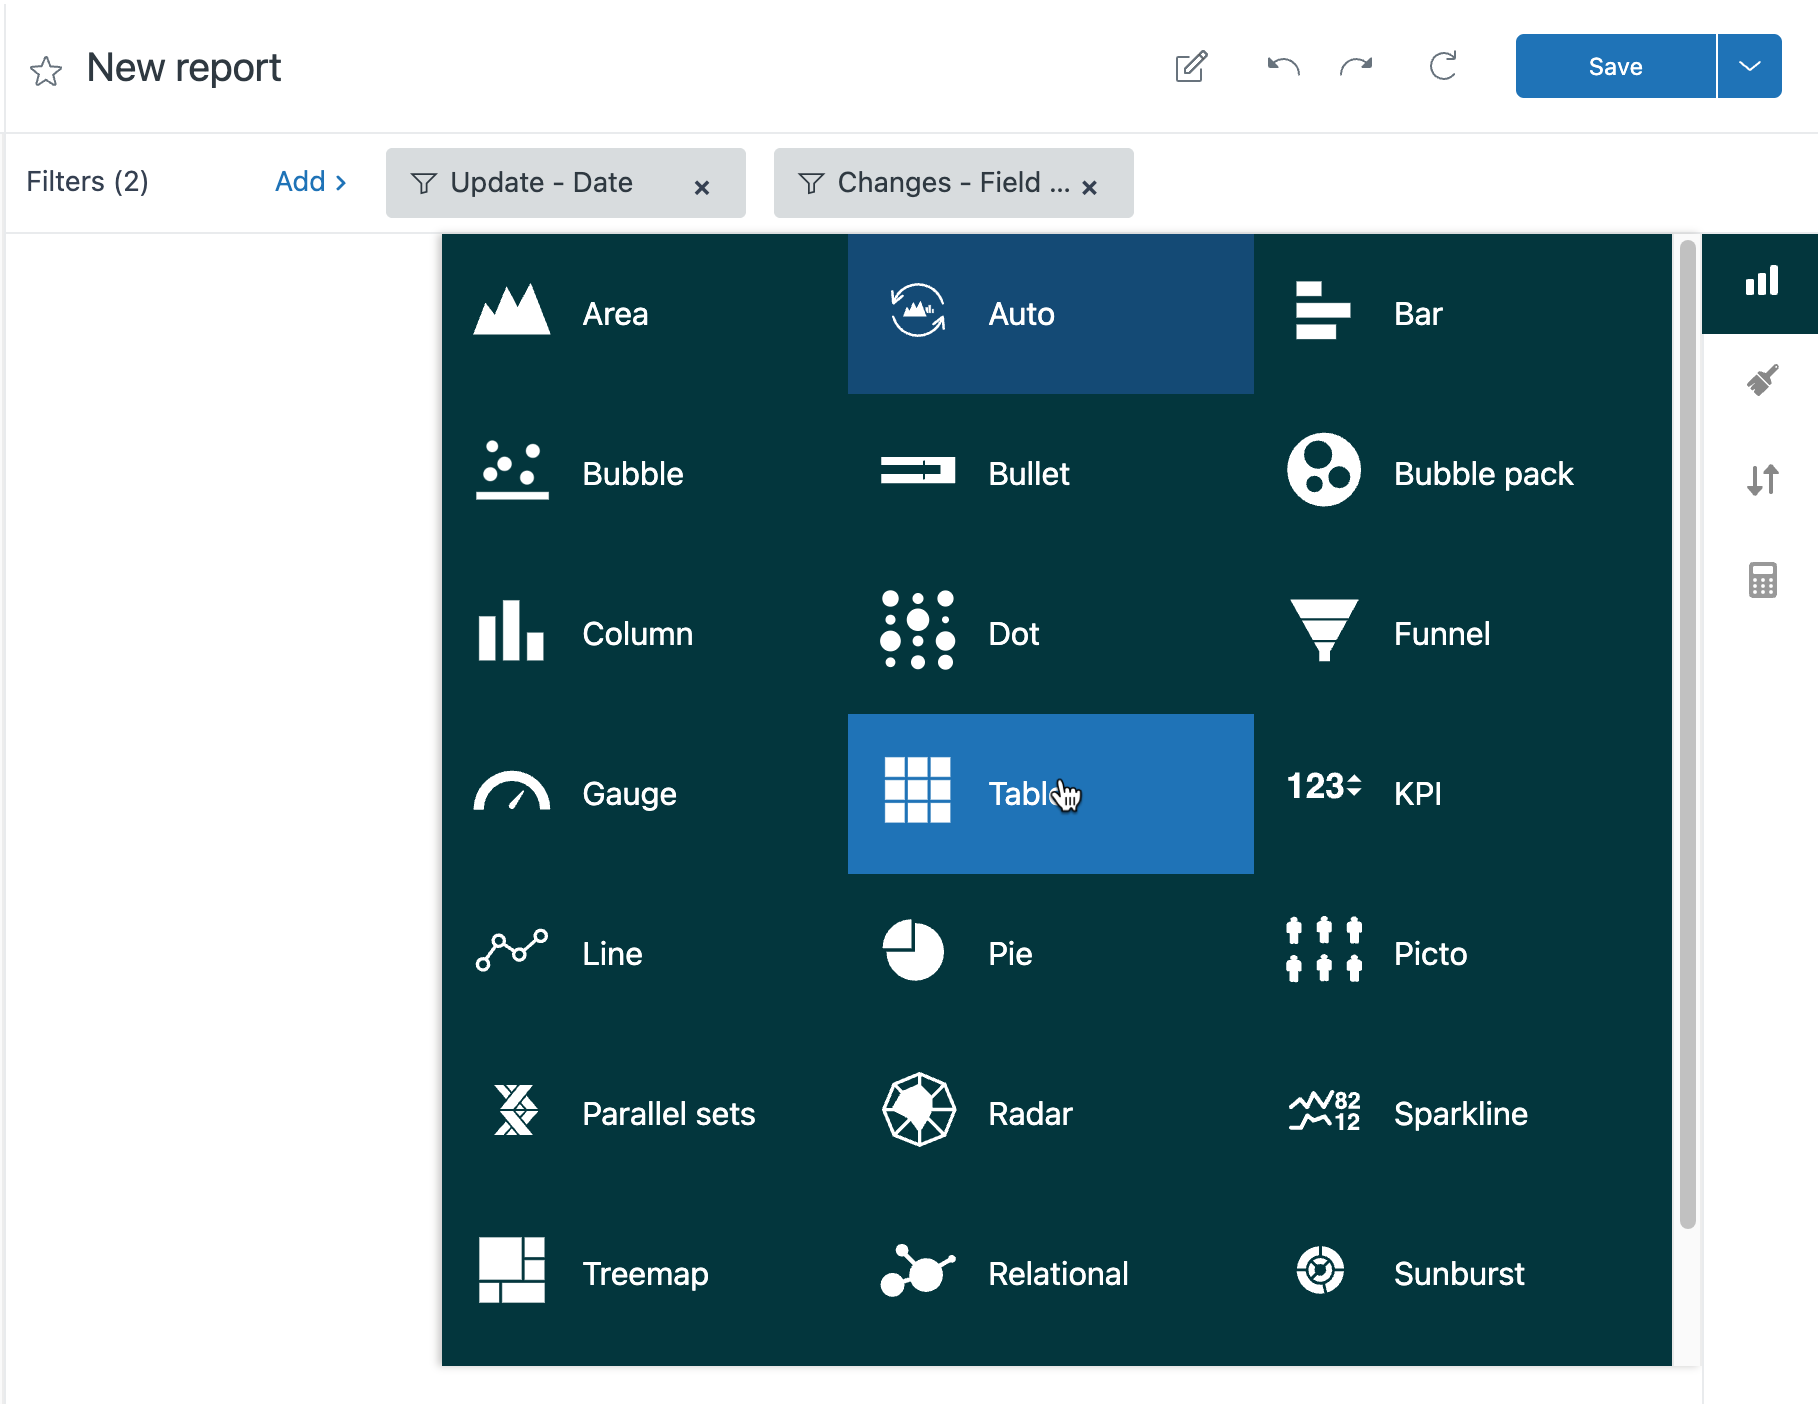
- From the Visualizations menu (
 ), choose Table
- Give your report a meaningful name for future reference and then click Save
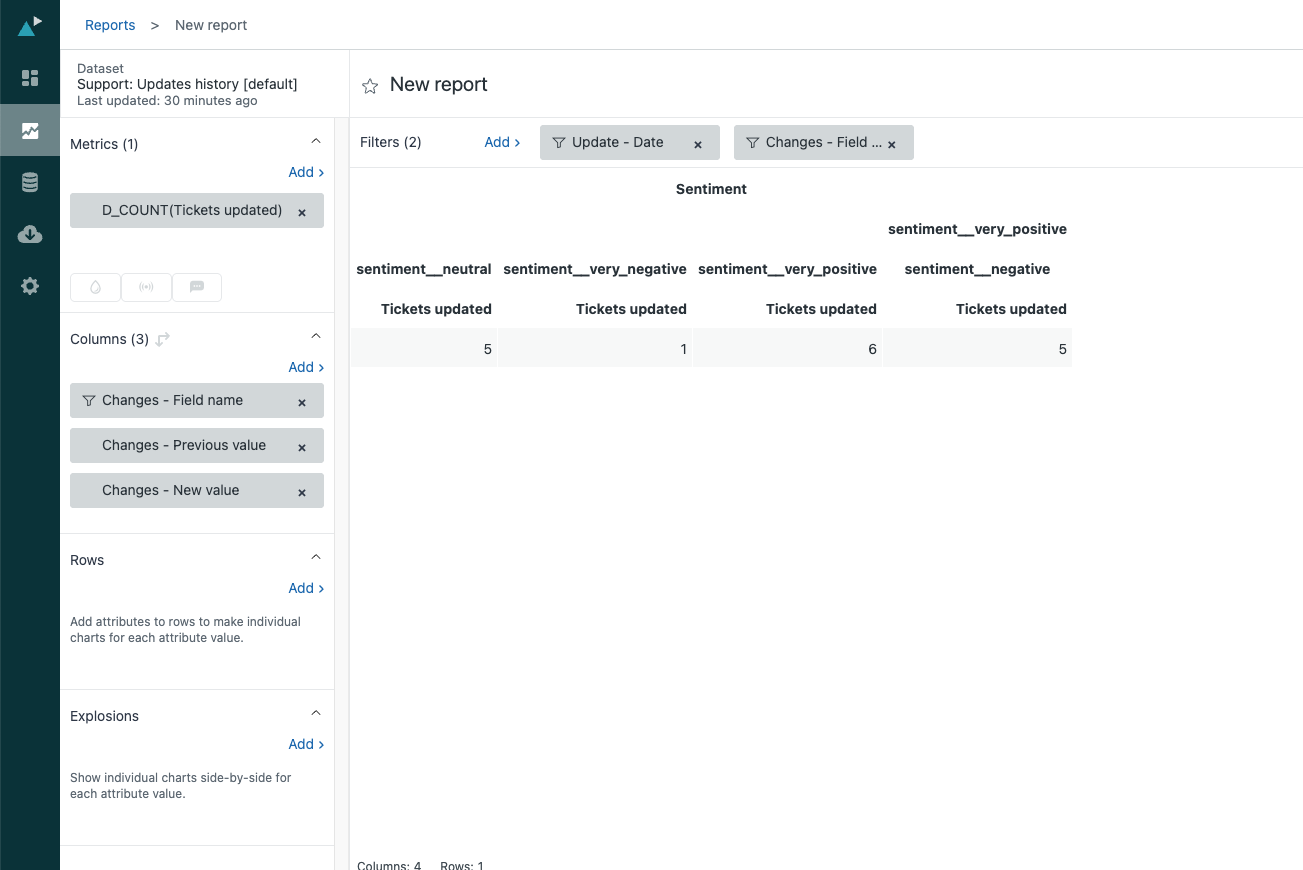
The screenshot below shows an example of what your report will look like when it’s completed when you select the sentiment filter. The table displays how many tickets experienced each type of sentiment.