Verified AI summary ◀▼
Configure the Workday app to customize how your team accesses employee data. Add or remove fields, map them to match records, and rearrange objects to suit your needs. You can also reorder, edit, or remove objects to ensure the app displays relevant information for agents. This flexibility helps tailor the app to your support processes, enhancing your team's ability to manage customer inquiries effectively.
After installing and connecting the Workday app for Zendesk Support, Zendesk admins and team members in a custom role with permission can configure it to suit your company's needs. For example, you can add or remove fields, map fields, and rearrange objects to change the order and appearance of the app.
To learn more about how the integration works, see About the Workday app for Zendesk Support.
Adding Workday objects and fields to the app
- Phone number
- Mailing address
- Job title
- Department
- Manager's name
- Employment status (full-time, part-time, etc.)
During this process, you'll match Workday and Zendesk fields so that the correct data from Workday displays in the sidebar. Later, you can edit and reorganize fields.
To add Workday objects to the app
- In Admin Center, click
 Apps and integrations in the sidebar, then select Integrations >
Integrations.
Apps and integrations in the sidebar, then select Integrations >
Integrations. - Click the Workday link.
- If you have multiple connections, click the name of the connection you are setting up.
- In the Manage data section, click Add Workday object.
- In the Select object field, select the name of the Workday object you'd like to
add from the drop-down list, then click Next.
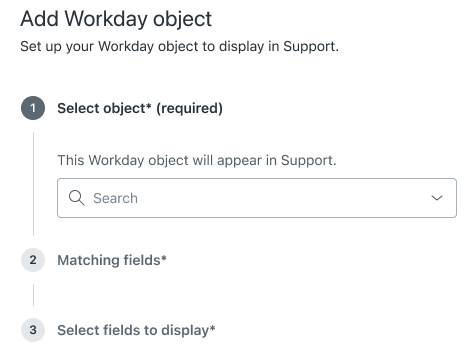
- In the Matching fields section, select the Zendesk and Workday fields the app
should use to find matching records, then click Next.
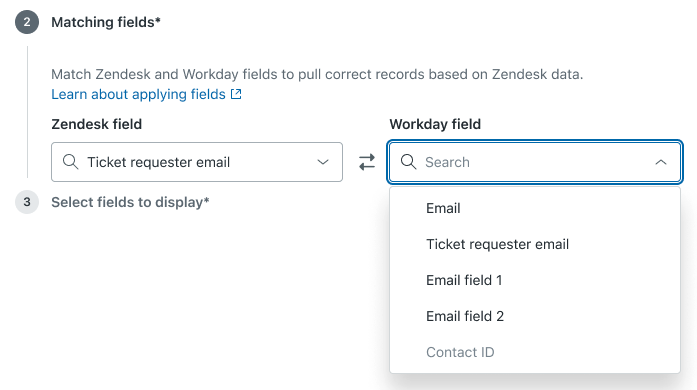
Select fields that make sense for your use case. For any Zendesk ticket, Zendesk attempts to find a record in Workday with data in the selected field that exactly matches the data in the specified Zendesk field. In the case of a drop-down field, the field tag value is used instead of the title.
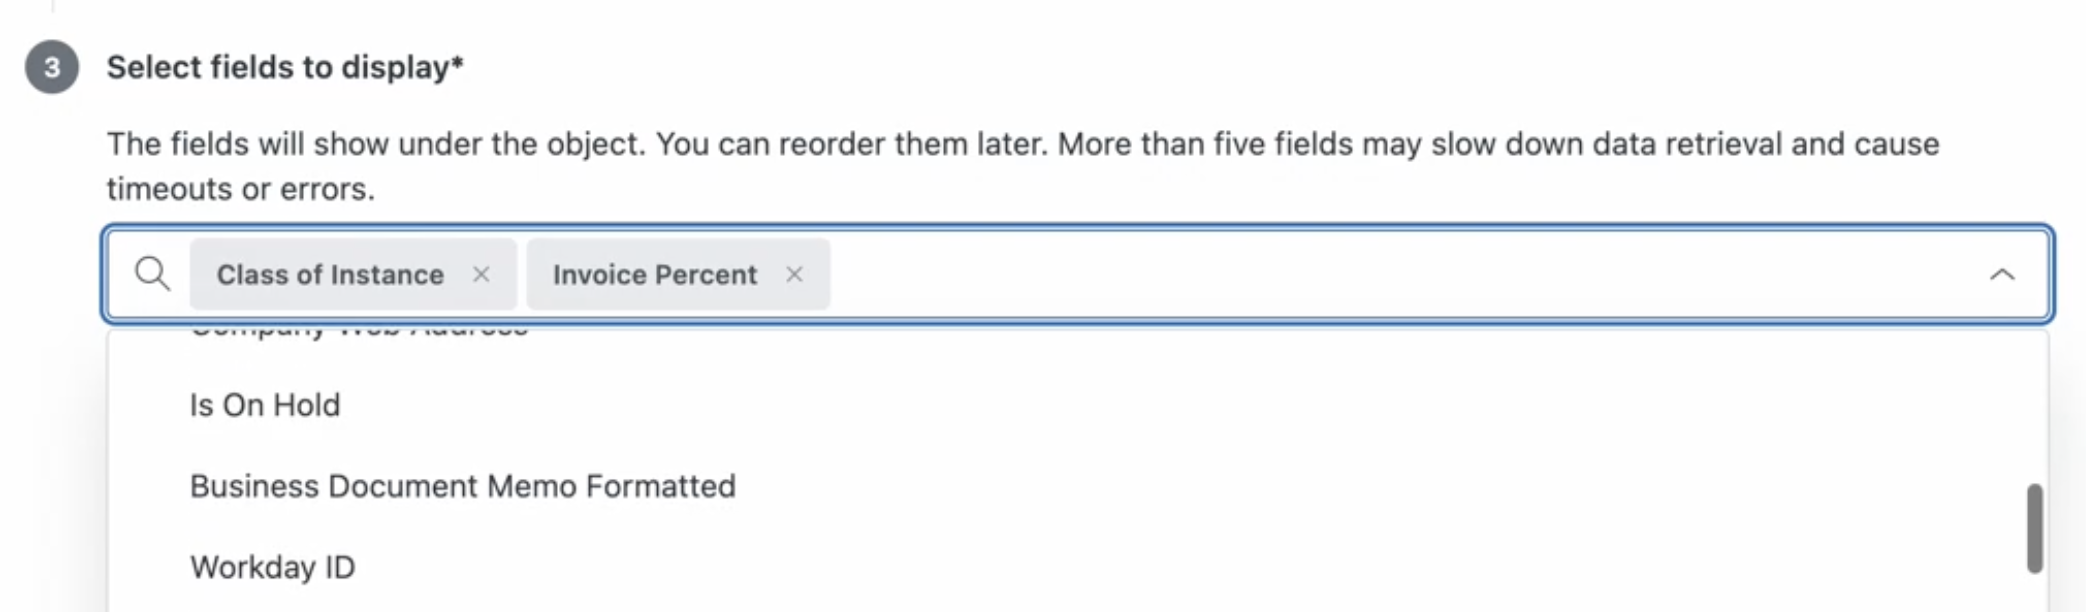
- In the Select fields to display section, select the Workday fields you’d like to
display in the app. Begin typing to display available fields, and select them
from the drop-down list as they appear. You can reorder them later. When you’re
done adding fields, click Next.
- Click Add.
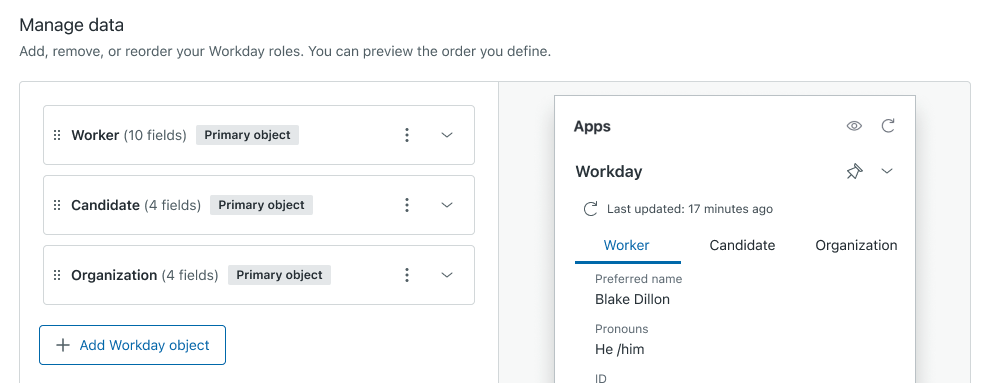
The preview pane displays how the added objects will appear to agents. Use the preview to determine whether objects need to be adjusted or reordered.
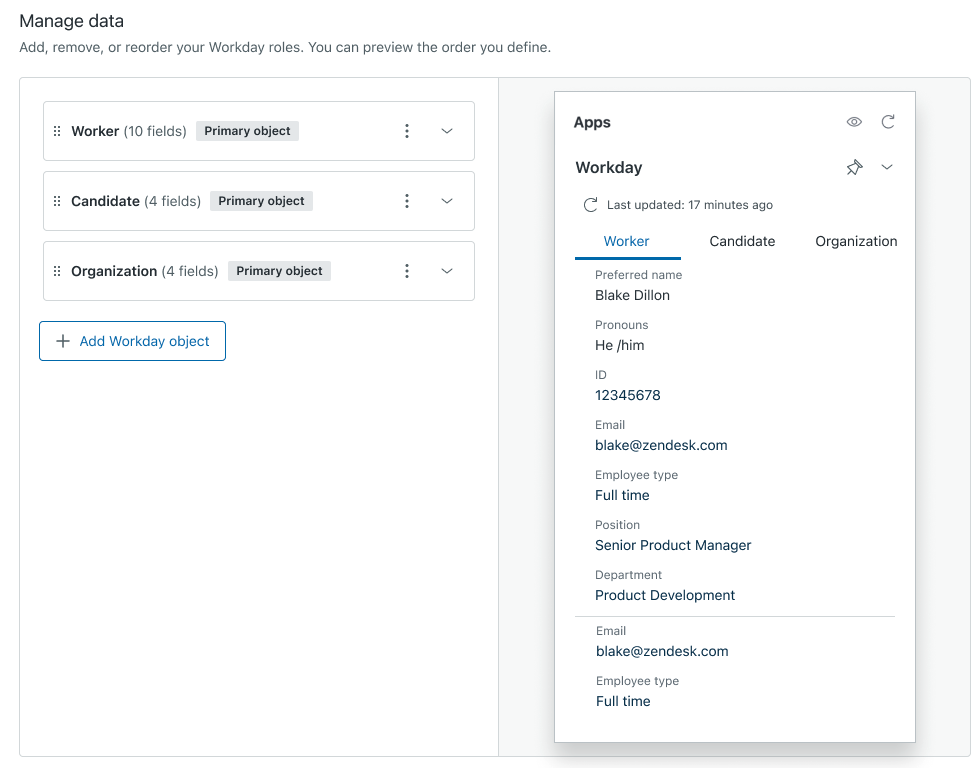
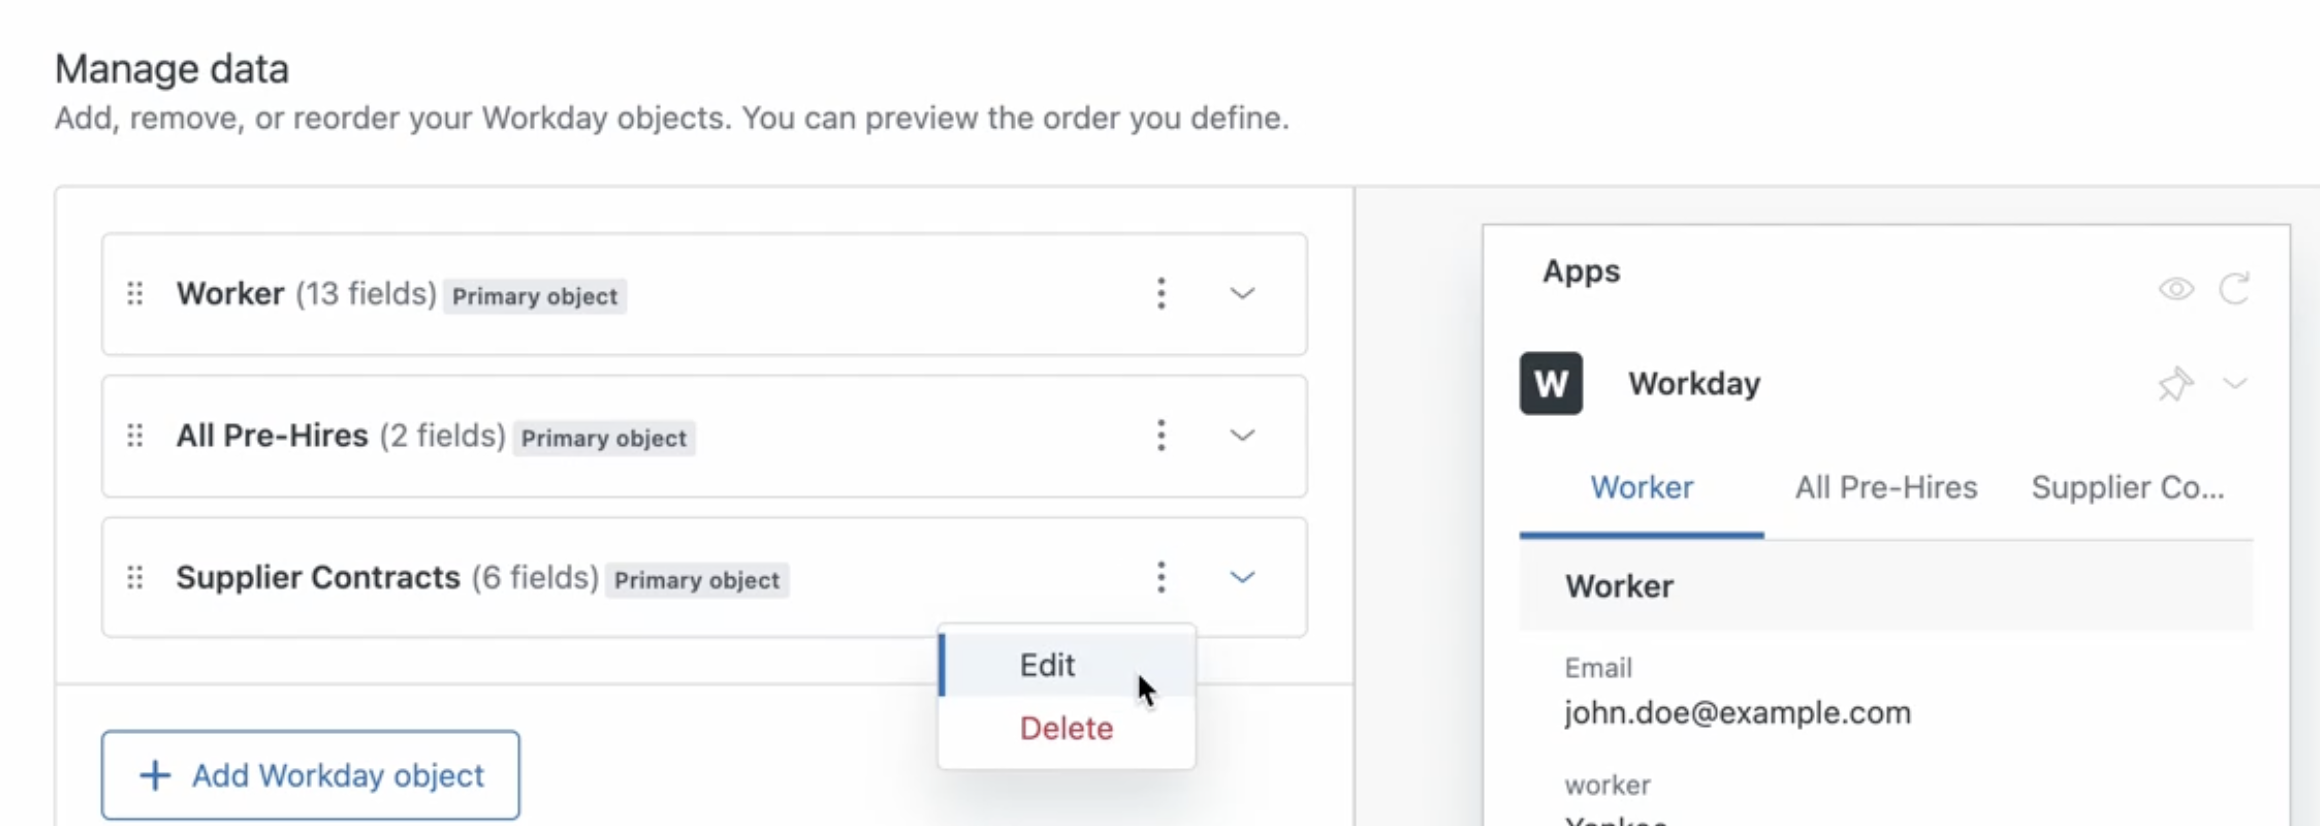
Reordering, editing, or removing objects
You can reorder, edit, and remove objects within the app configuration. Make sure you click Save after making changes.
- Click the grabber icon (
 ) to drag and drop objects and fields within objects
to reorder them. The order represented in the configuration will determine the
order of fields displayed in the Workday app.
) to drag and drop objects and fields within objects
to reorder them. The order represented in the configuration will determine the
order of fields displayed in the Workday app. - To delete an object from the app, click Delete from the drop-down menu, then click Delete object to confirm.
- To edit an object, click Edit. The name of the object will be read only, but all other fields can be modified, including field matching.