As part of setting up your Zendesk Suite trial, you have the opportunity to add additional changes to your account in addition to the basic tasks and email setup.
Zendesk provides you with a setup wizard that you can use to add custom fields to your ticket. Custom ticket fields enable you to capture the exact information you need from customers to quickly solve tickets. To learn more, see Adding custom ticket fields to your tickets and forms.
This article includes these sections:
Starting the setup wizard for custom ticket fields
After you’ve wrapped up the basic trial tasks for Zendesk Suite, start the setup wizard for custom ticket fields. The wizard helps you customize your Support tickets by adding new fields that your agents can use to gather additional information and help solve tickets
To set up custom ticket fields
- When you open a ticket, you’ll see an invitation to customize your ticket
information.
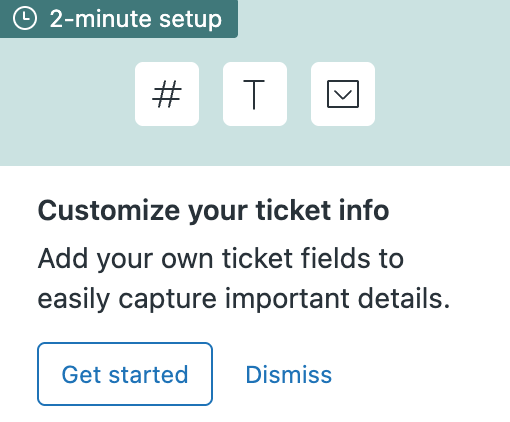
- Click Get started to open the wizard.
Adding custom fields
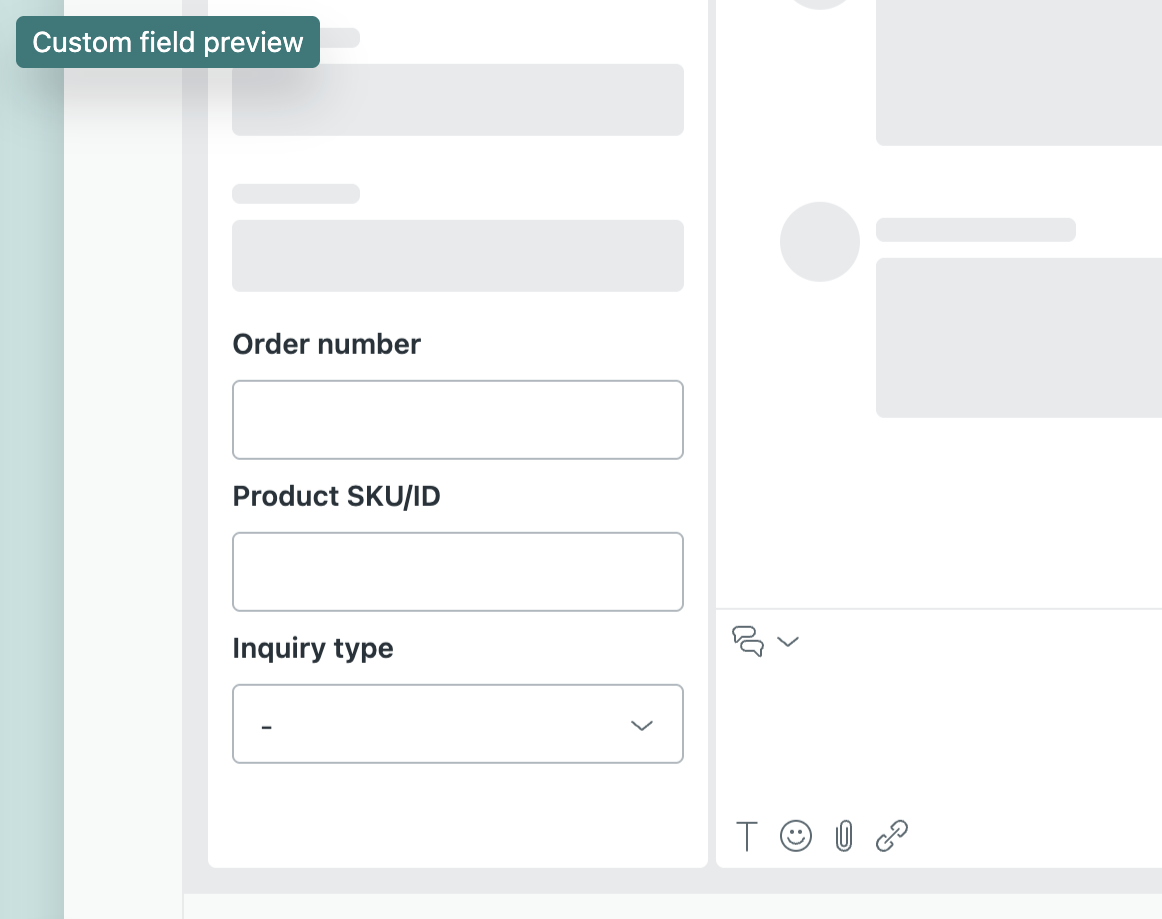
The wizard shows the custom fields you can add to tickets. As you work through the wizard, you’ll see a preview of how the custom fields will appear in tickets.
To add custom fields
- In the wizard, select the fields you want to add.
All the fields are selected by default, but you can select or deselect them as desired.
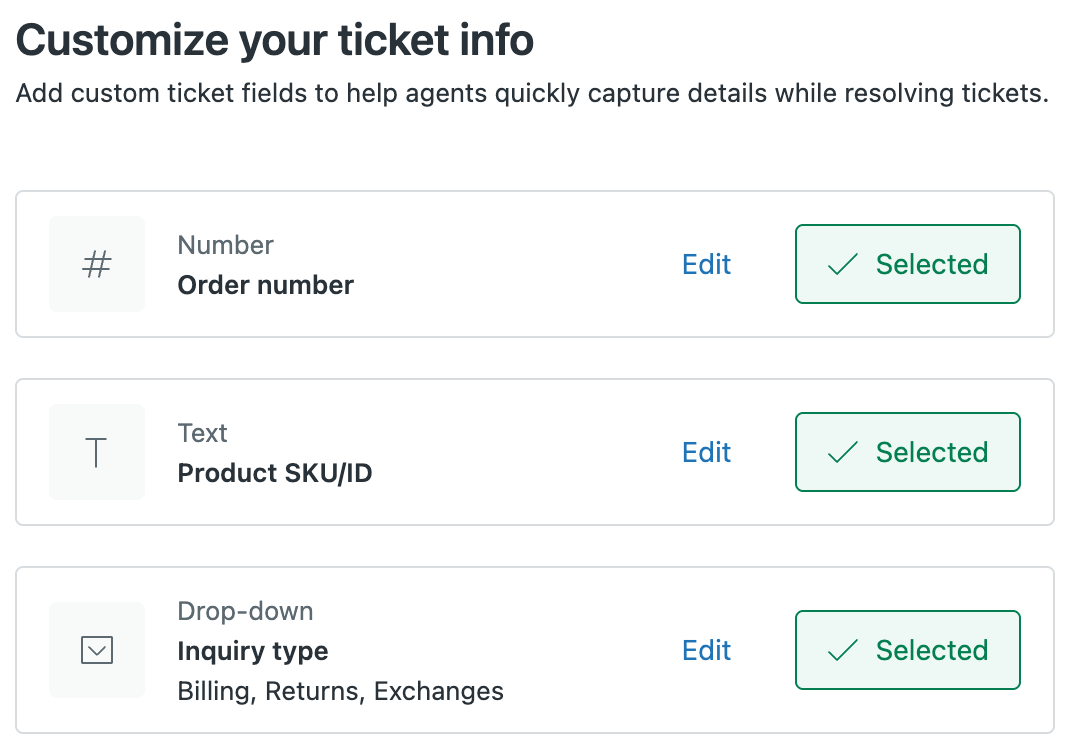
Fields you can select include:
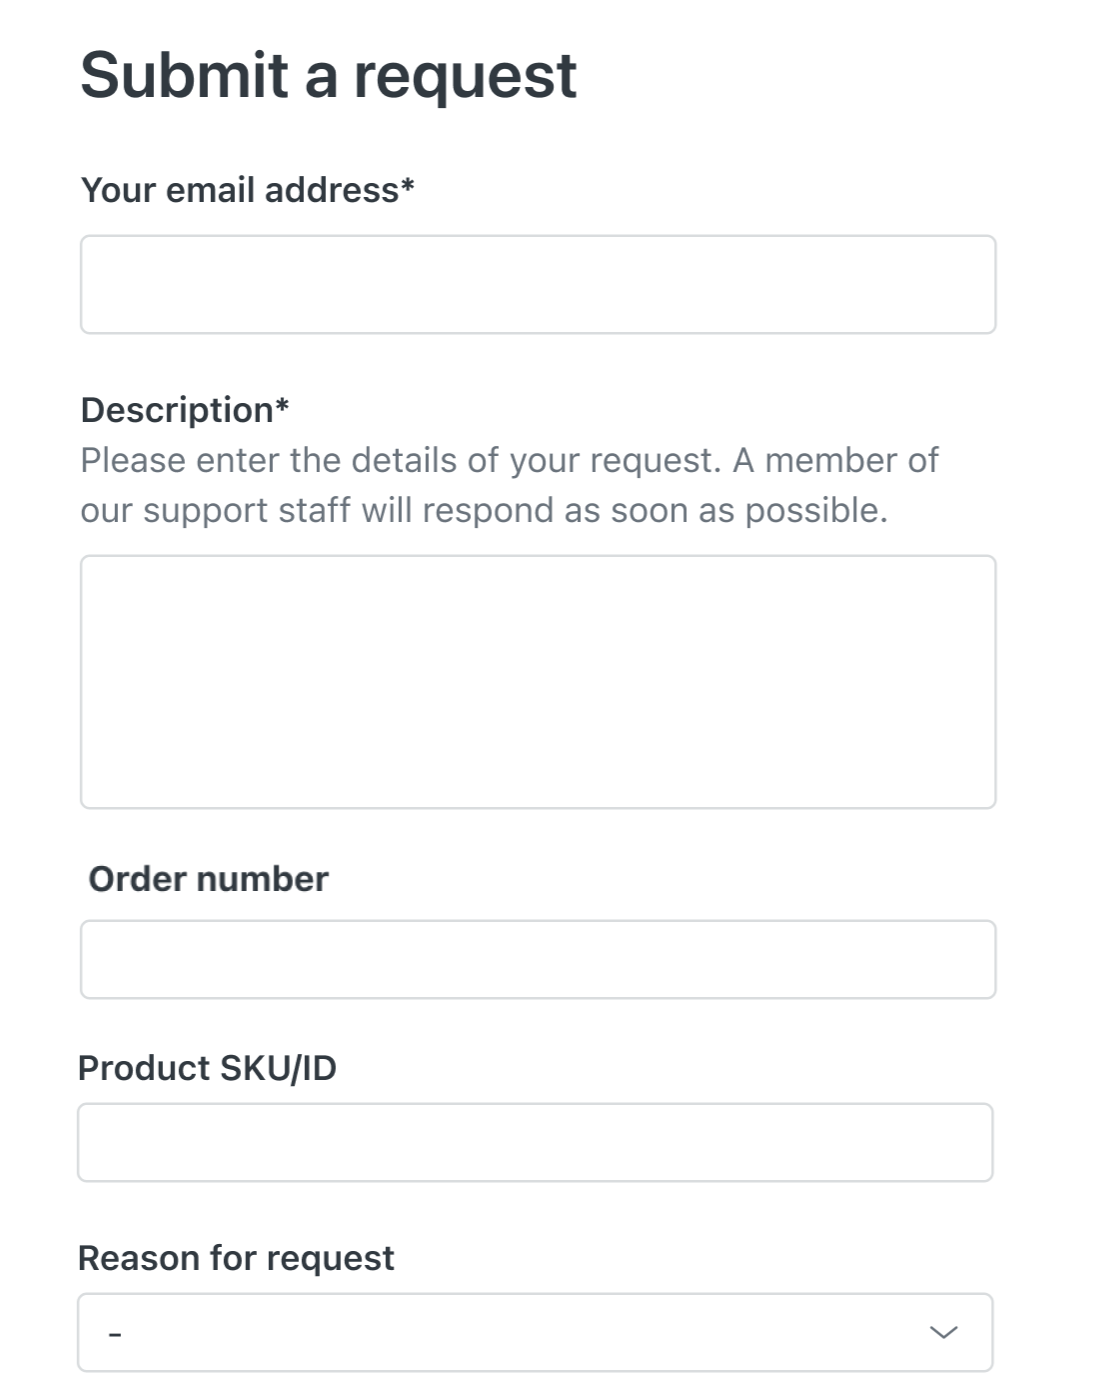
- Order number: Adds an Order number field to the ticket. This field accepts numerical values only.
- Product SKU/ID: Adds a field to the ticket that you can use to include a Product SKU or Product ID in a ticket.
- Add an Inquiry type drop-down menu to a ticket. You can use this menu to set what type of inquiry is associated with the ticket: Billing, Returns, or Exchanges.
- You can select the fields and use them “as is” or click Edit to make changes.
For edits, you can change the field names to suit your own needs. You can also change the values that appear in the drop-down menu. See example below.
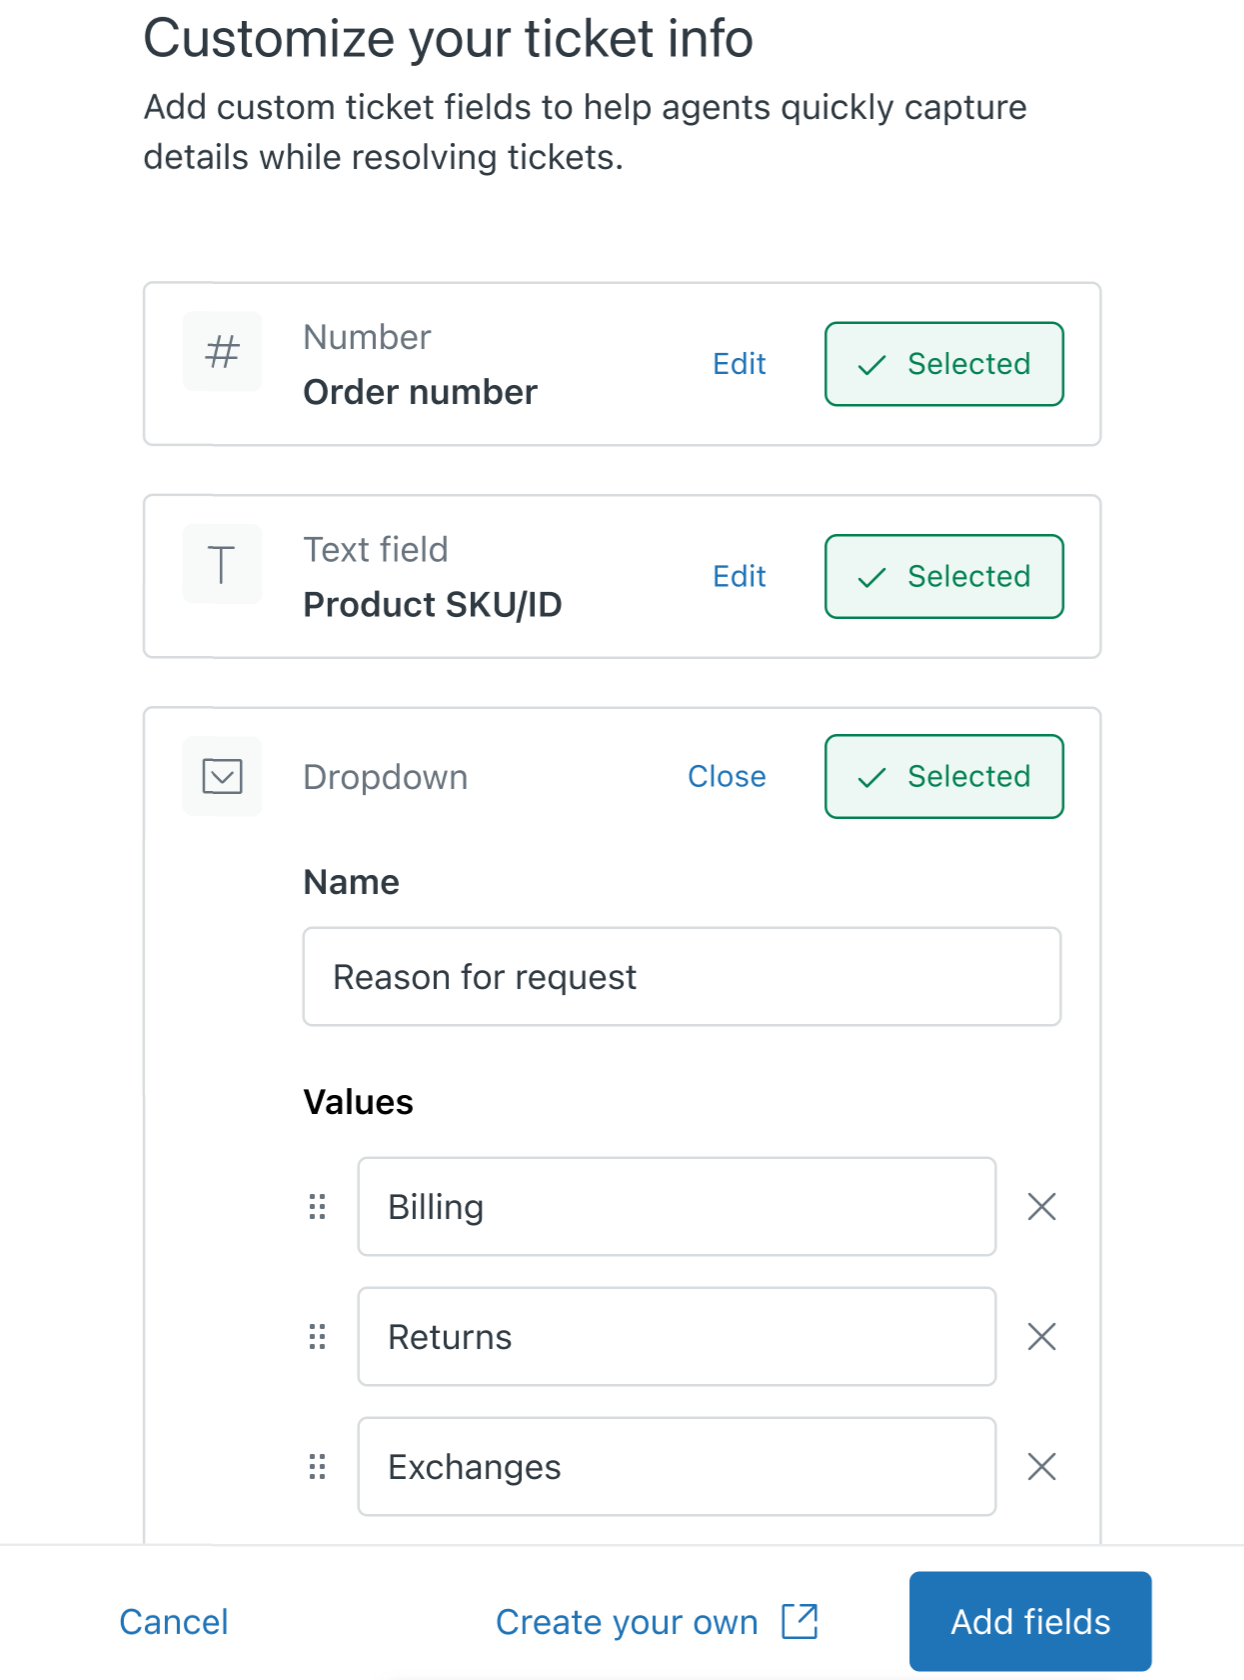 Tip: To completely customize the ticket fields, click Create your own to open the Tickets fields page in Admin Center. See Adding custom ticket fields to your tickets and forms.
 - When you’re finished selecting and editing the fields, click Add fields.
After a few moments, you’ll see a message confirming that the custom fields were added.

- Open a ticket to see the new fields you added.
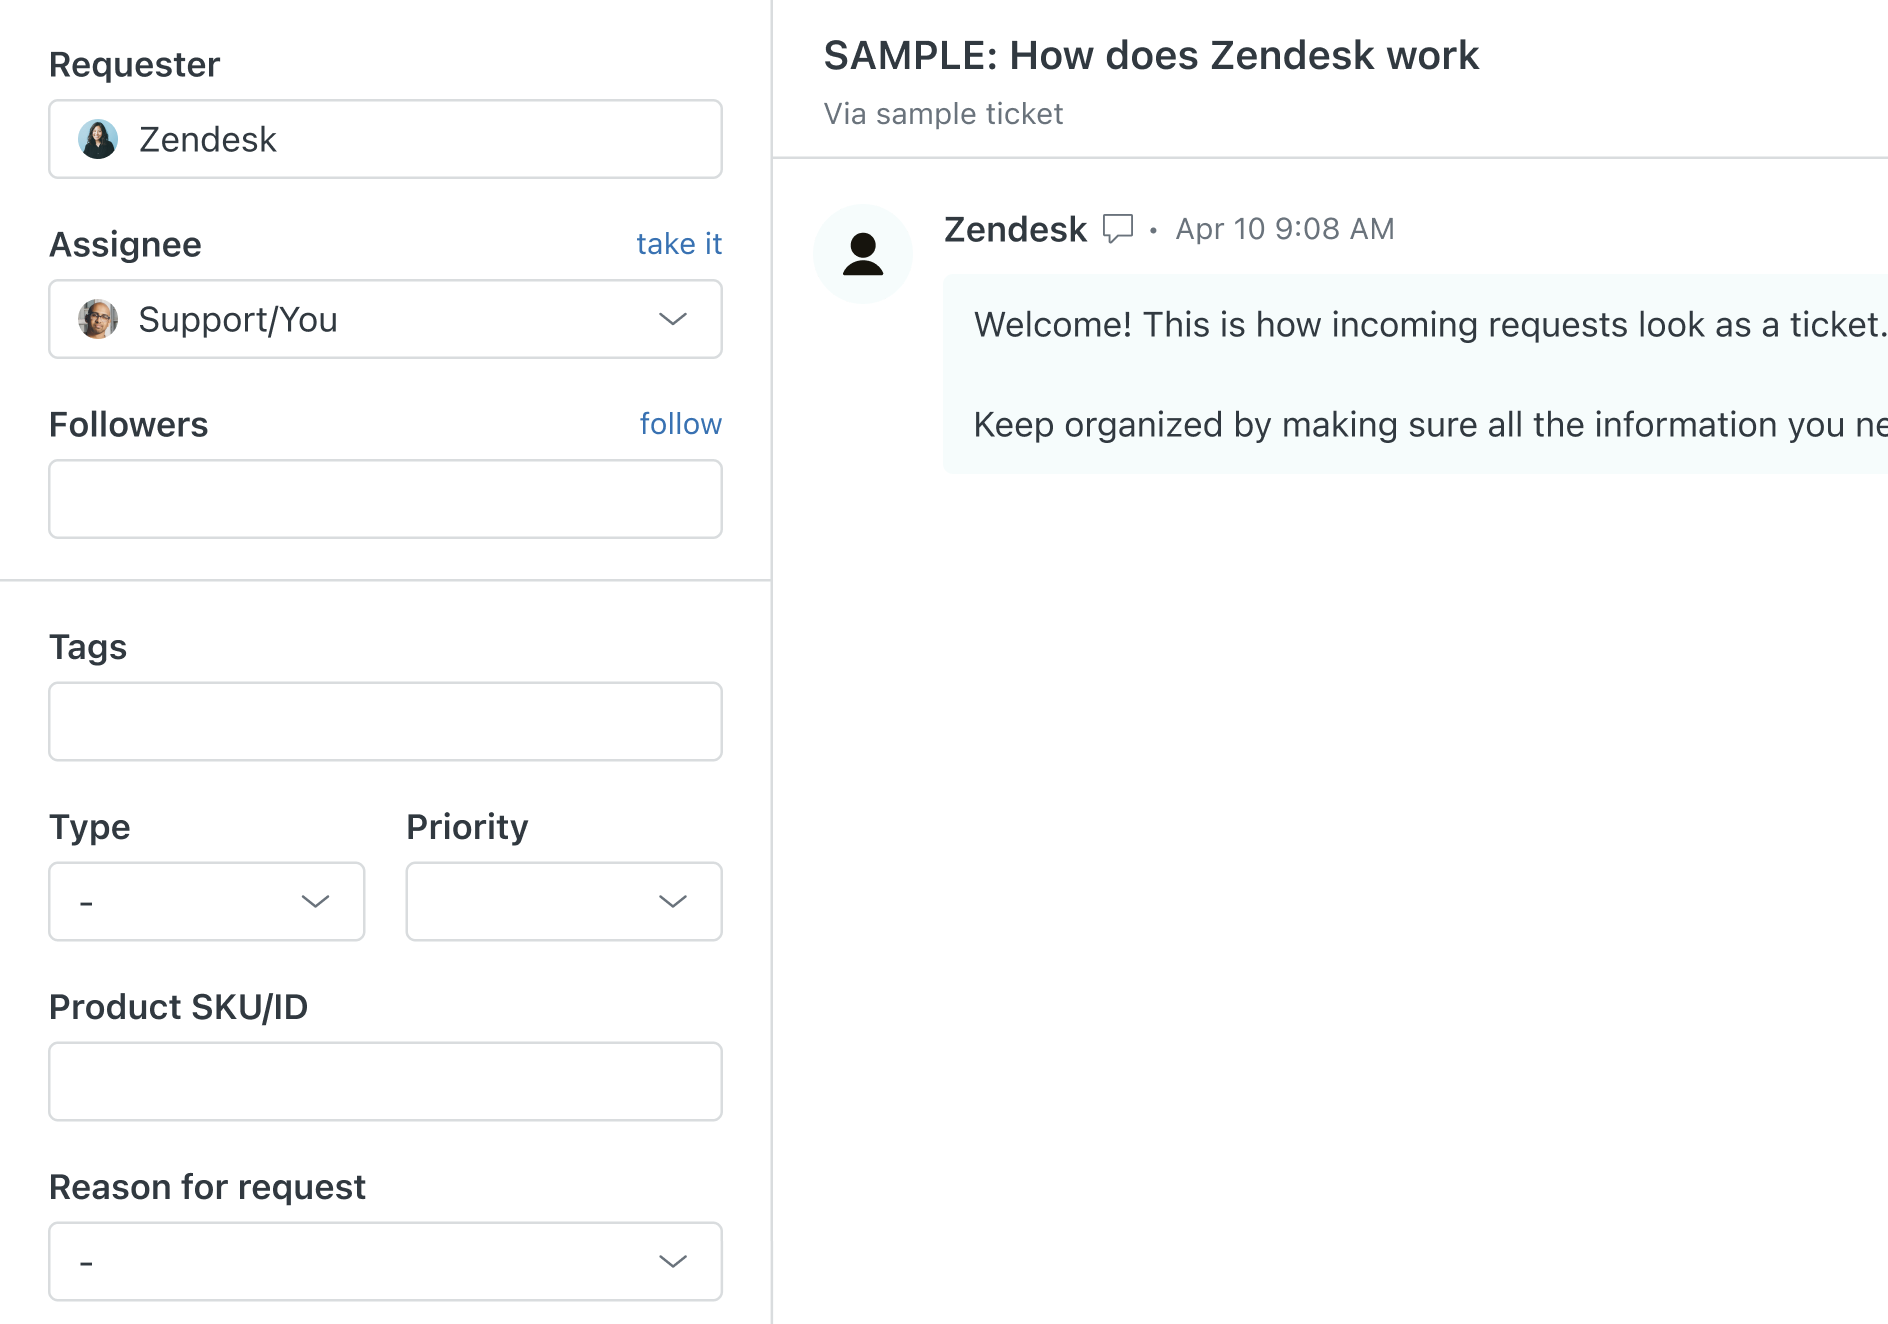
You’ll also see these new fields on your help center request forms.