
Authenticating end users is important for many business purposes. When providing conversational support, users might try to carry on a conversation between devices and channels. By authenticating the end users, you can make sure all points of contact are associated with the correct end user. This can enhance the quality of support your agents provide and increase the security of sensitive information that might come up while agents assist your end users.
About end-user authentication for messaging
- Increasing confidence that the end users your agents are talking to are who they claim to be.
- Making it possible to identify a single user across channels if you embed the widget on multiple domains or link to external services, such as Shopify.
- Making it possible to identify a single user across different devices and browsers.
Terminology for messaging authentication
- JWT: Zendesk uses signed JSON Web Tokens (JWTs) to authenticate end users for messaging. These tokens contain details that verify the identity of the end users. For more information about JWT, see jwt.io.
- Signing key: A signing key is created by a Zendesk admin in Admin Center and shared with a developer on your team, who then uses it to sign the JWT as necessary.
- External ID: An alphanumeric string, such as a user name or ID from an external system, that is unique to each user.
- User name: (Optional) The name of the end user associated with the external ID or email address. If you include the user's name in the JWT, it appears in the Agent Workspace. This information can help agents communicate with end users.
- Email: (Optional) The unique email address associated with an end user.
Overview of implementing messaging authentication for end users

- The process of messaging authentication begins with an admin generating a signing key and providing it to a developer. Then the developer uses the signing key to implement a back-end service that can create signed JWTs for users as requested.
- When requested, the back-end service creates and returns signed JWTs to your website or mobile app. The JWTs created by this service must include a unique external ID and, optionally, an email address to identify the end user.
- Any time the user is logged in, your website or app needs to call an equivalent login API available for web widget and mobile SDKs, at which time the JWT is passed to Zendesk to verify the claimed identity of the user.
Requirements for authenticating end users for messaging
- Zendesk Agent Workspace is activated.
- You're using the web widget or mobile SDK channels for messaging.
- You associate email identities with end users.
- If you want authenticated users to have verified email identities, the
JWTs you issue to end users must contain both the
emailandemail_verified: trueclaims.
Agent experience when authenticating messaging end users
Agents see a green check mark icon next to the visitor's name when the end user is authenticated. If you're using external IDs to uniquely identify end users, that value appears next to the user's profile.
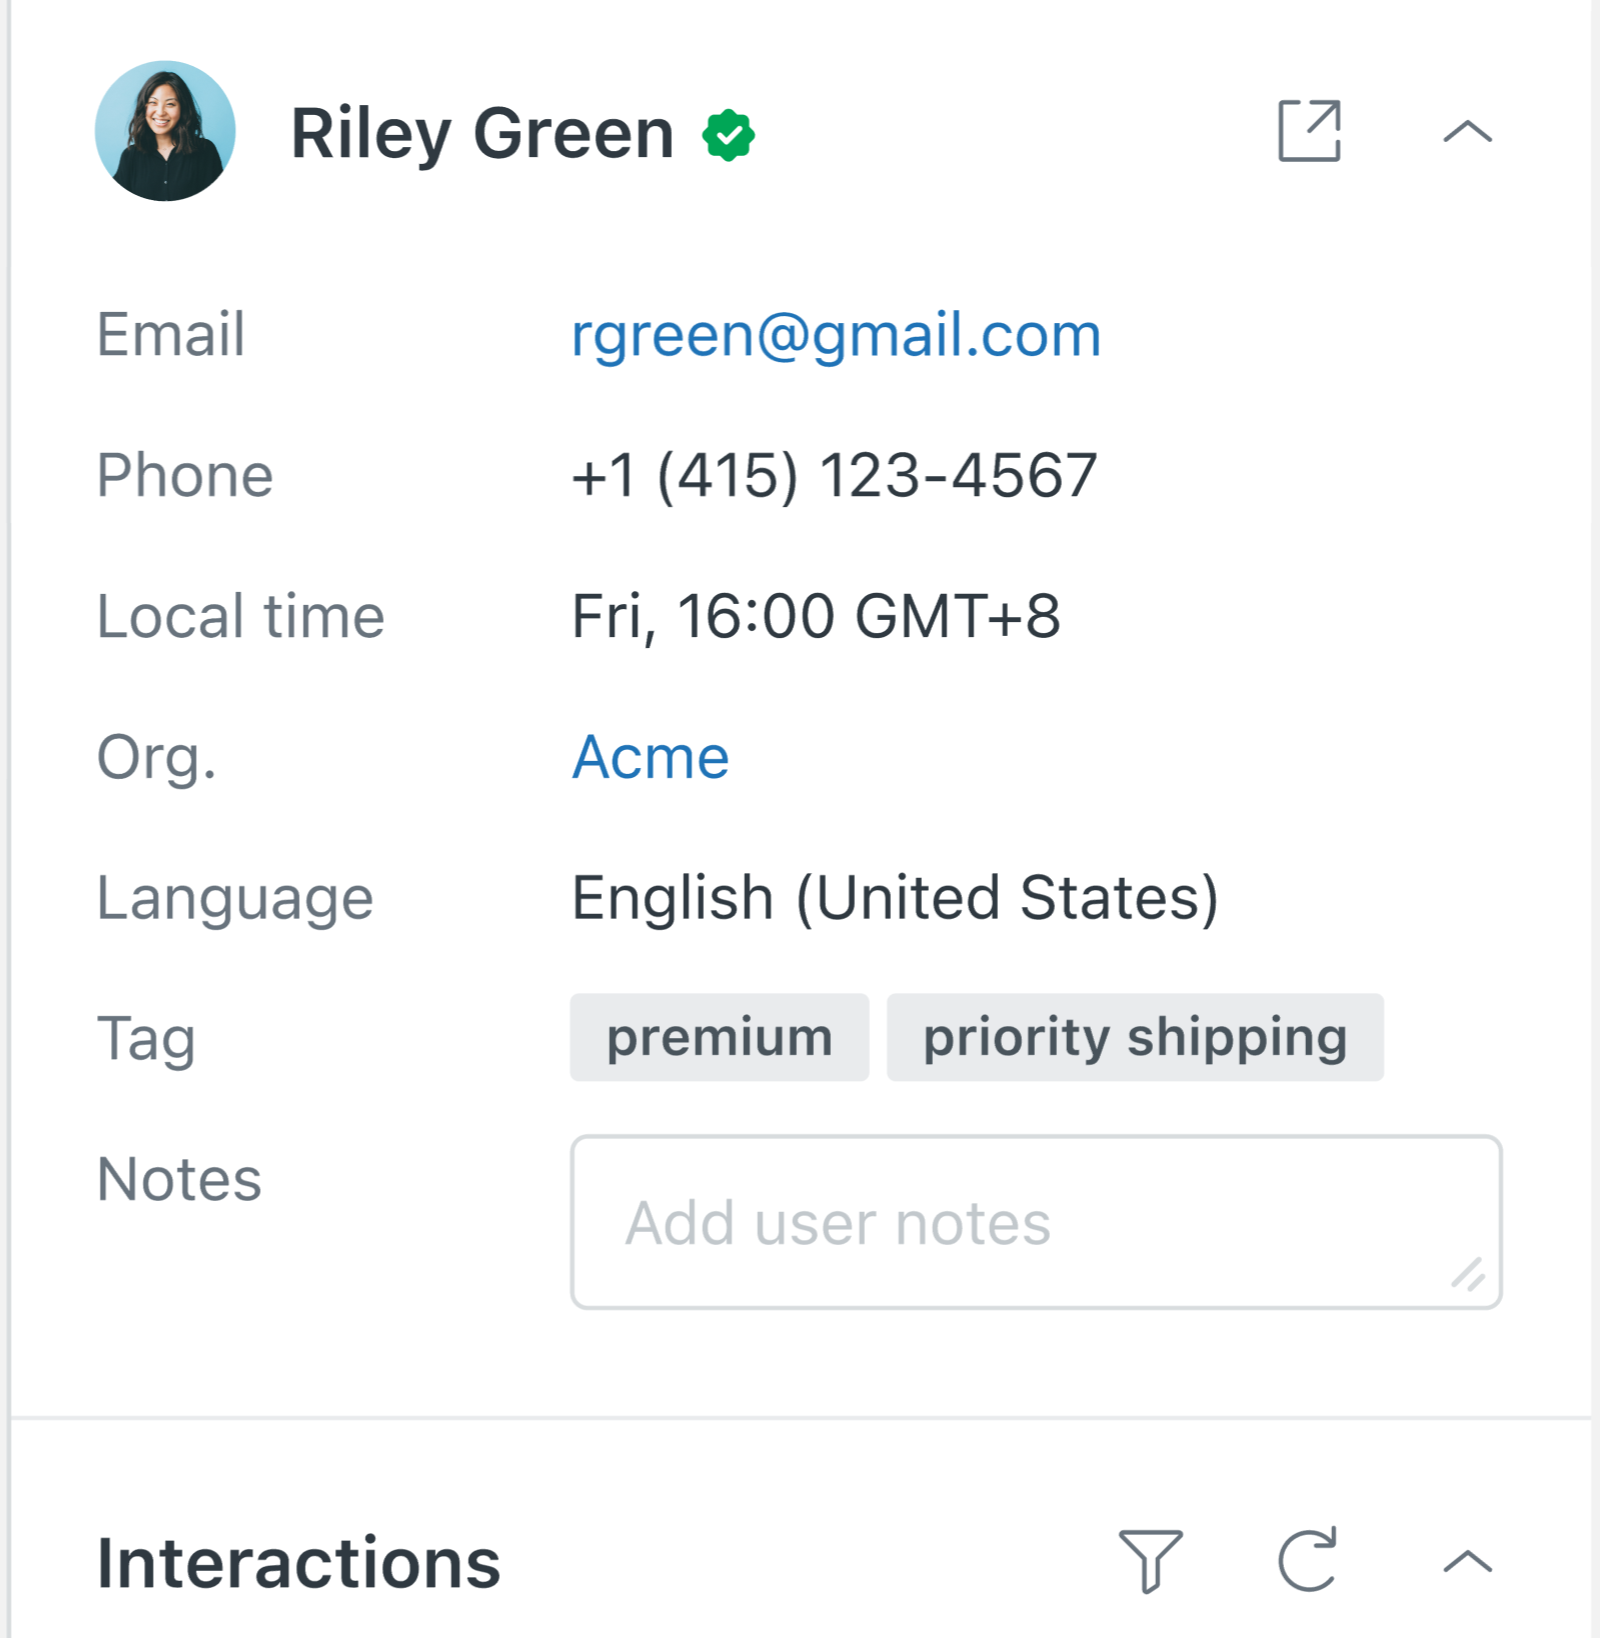
Additionally, each response posted by an end user after they are authenticated has the check mark icon.

End user experience with authentication for messaging
After you implement end-user authentication for messaging, end users shouldn't notice much of a difference. After they have been authenticated and their identity is verified with Zendesk, end users aren't prompted to provide their name or email address by messaging bots as part of the default messaging response.
Conversations for authenticated end users are synced across devices when the end user is authenticated. Furthermore, if an end user authenticates mid-conversation, the anonymous conversation that was created before they signed in is automatically merged with the authenticated conversation to provide conversational continuity.
Creating and sharing a signing key
Signing keys are used by developers to create JWTs for end users. You must be an admin to create a signing key. You can create a maximum of 10 keys. If you attempt to create a new key after reaching your limit of 10, you are prompted to delete unused keys.
- In Admin Center, click
 Account in the sidebar, then select Security > End user
authentication.
Account in the sidebar, then select Security > End user
authentication. - Click the Messaging tab, then click Create key.
If you are creating your first key, Create key appears at the bottom of the page. Otherwise, it appears in the top-right corner.
- Enter a Name for the key and click Next.
- When prompted, click Copy to copy the shared secret and then click
Hide key forever.
The key is saved and an ID is automatically assigned. You can find a key's ID in the list of keys on the Messaging tab of the End user authentication page.
- Confidentially send the key's ID and the shared secret you copied to your developer.
Authenticating end users with an external ID
- external_id: (Required) This is the unique alphanumeric string that can be used to identify each user. Commonly, these IDs are pulled from external systems. An ID can't exceed 255 characters.
- scope: (Required) The caller's scope of access. The only valid value
is
user. - name: (Optional) The name of the user. Including the name in the JWT payload enables Zendesk to display the user's name in the Agent Workspace and helps your agents provide more customized support.
{
    "external_id": "12345678",
    "scope": "user",
    "name": "Jane Soap"
}
Authenticating end users with email identities
- Authenticated users are authenticated through signed JWTs.
The use of JWTs provides a trustworthy approach because the content of a signed JWT can't be tampered with by end users. If you're concerned about impersonation attacks, you should restrict email identities to authenticated end users. This is the most secure option and is the default approach for new Zendesk accounts.
- Unauthenticated users are end users who provide an email address in response
to a prompt by a Zendesk bot.
Keep in mind that permitting the use of email identities for unauthenticated users can make you vulnerable to people impersonating other users by providing an email address they don't own.
Configuring email identities
An admin must turn on email identities and configure how to use them.
- In Admin Center, click
 Channels in the sidebar, then select Messaging and social >
Messaging.
Channels in the sidebar, then select Messaging and social >
Messaging. - Click Manage settings.
- Click Email identities, and then select one of the following
options:
- Use only verified emails: Email identities are created
only for users who are authenticated and have a verified email address
included in their issued JWT. Agents can still manually add an
email identity to a user record.
With this option, agents see the email address provided by unauthenticated end users in the chat history, but they won't see an email identity attached to the user. If an agent needs to follow up with an unauthenticated user over email, they must manually add the email identity to that user record. If the unauthenticated user's email address already exists on a different user record, the agent has the option to merge the two user records together.
- Use both verified and unverified emails: Email identities
are created both for users who are authenticated and have a
verified email address in their JWT as well as for
unauthenticated users who provide email addresses through bot
flows. With this option, agents are more likely to find the end
user's email address in the essentials card, and email
identities for unverified email addresses are clearly marked as
unverified in the Agent Workspace. When needed, agents can ask
end users to authenticate if they need to send email
follow-ups.
In the event of a conflict, verified email identities supersede unverified email identities.
- Use only verified emails: Email identities are created
only for users who are authenticated and have a verified email address
included in their issued JWT. Agents can still manually add an
email identity to a user record.
- (Optional, but not recommended) If you want any user, even
unauthenticated users, to be able to claim verified email addresses,
select Unauthenticated user can claim verified emails.
When you select this option, the verification state of email identities collected from messaging channels is no longer trustworthy because an imposter can show up after a user is authenticated and take possession of their email status in a later messaging interaction. This means impersonation attacks are more likely to succeed and agents have limited means of knowing whether the end user is who they claim to be.
- Click Save settings.
Issuing JWTs with email addresses
- external_id: (Required) This is the unique alphanumeric string
that can be used to identify each user. Commonly, these IDs are pulled
from external systems. An ID can't exceed 255 characters.
Zendesk uses the
external_idas the primary identifier for users authenticating over messaging. When authenticating a user with a valid JWT, Zendesk first resolves an existing user with theexternal_id. If noexternal_idmatch is found, users are resolved using the email address provided. - scope: (Required) The caller's scope of access. The only valid
value is
user. - email: (Required) The email address of the user being signed in.
Must be unique to the user.
Set the email address to the user's primary email address in Agent Workspace. The inclusion of secondary email addresses in JWTs isn't supported.
- email_verified: (Optional) Whether or not the end user in
question has proven ownership of the email address. If you want end
users to have verified email identities, the JWTs you issue must contain
both
emailand"email_verified": trueclaims. - name: (Optional) The name of the user. Including the name in the JWT payload enables Zendesk to display the user's name in the Agent Workspace and helps your agents provide more customized support.
{
    "external_id": "12345678",
    "email": "janes@soap.com",
    "email_verified": true,
    "name": "Jane Soap",
    "scope": "user"
}