Verified AI summary ◀▼
The integration lets you track the number of support tickets linked to each Jira issue, helping prioritize tasks based on customer demand. Set it up by adding custom fields in Jira to display ticket counts and IDs. This feature updates automatically when tickets are linked or unlinked, providing clear visibility into customer requests related to specific Jira issues.
The Zendesk Support for Jira integration allows Jira issues to be sorted by the number of Zendesk Support tickets linked to each issue. This can help your developers prioritize their work by elevating Jira issues that have a larger number of customers requesting a specific feature or reporting the same bug.
Understanding how linked tickets are reported in Jira
To use this feature, custom fields must be added to your Jira projects. The setup process requires a Jira admin to create one or both of these custom fields:
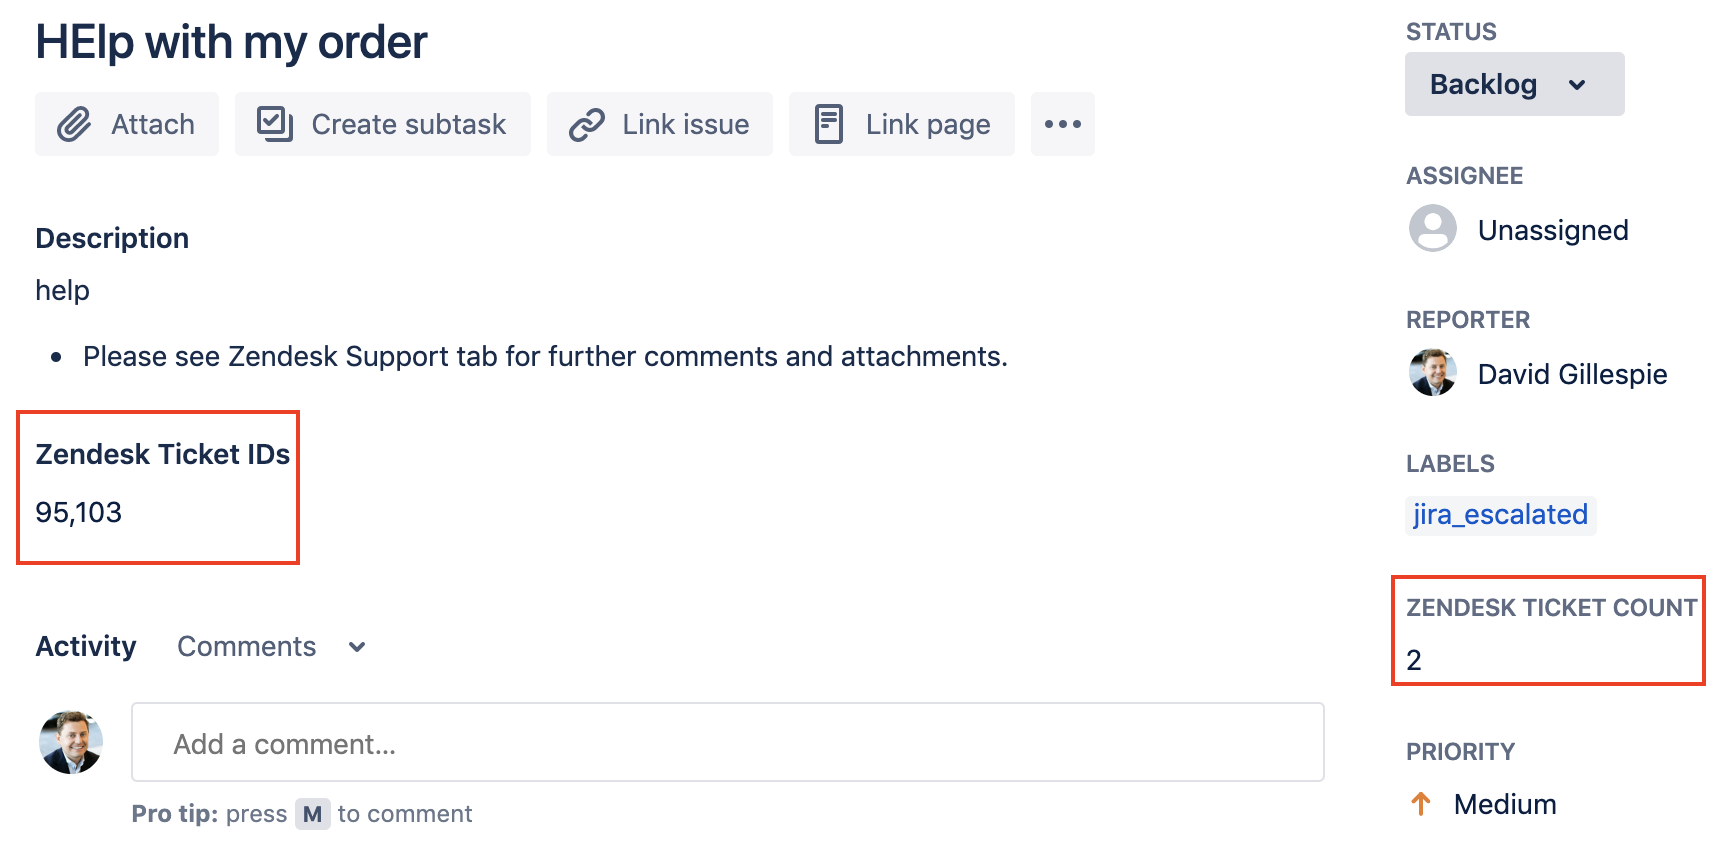
- A paragraph field to list ticket IDs
- A number field to count the number of tickets
Then, the administrator must add one or both of these fields to Jira project pages. Each of these custom fields can be used independently.
After completing the setup, the feature automatically updates and displays the following information:
- When a ticket is linked to a Jira issue, the Zendesk Ticket Count field is incremented by one, and the ticket ID is appended to the Zendesk Ticket IDs field.
- When a ticket is unlinked from a Jira issue, the Zendesk Ticket Count field is decreased by one, and its ID is deleted from the Zendesk Ticket IDs field.
- If a Jira instance is linked to multiple Zendesk accounts, a prefix is added to each ticket ID, separated by a dash (-), to identify tickets and avoid ambiguity.
Setting up the integration to display linked tickets in Jira
Turning on linked ticket reporting in Admin Center
First, turn on linked ticket reporting in Admin Center.
To turn on linked ticket reporting
- In Admin Center, click
 Apps and integrations in the sidebar, then select Integrations >
Integrations.
Apps and integrations in the sidebar, then select Integrations >
Integrations. - Click the Jira link.
- If you have multiple connections, click the name of the connection you are setting up.
- On the Support app tab, select Turn on linked ticket reporting in Jira.
- Click Save.
Setting up linked ticket reporting in Jira
Next, create the custom fields in Jira and add them to your pages.
To set up the linked tickets reporting feature
- In Jira, click the Settings (cog) icon on the upper-right, and select Issues.
- Select Fields > Custom fields from the left navigation panel.
- On the Custom fields page, click Create custom field in the upper-right corner.
- On the field type selection page, click Paragraph, then click Next.
- On the text field configuration page, enter a name and description for
the text field.
The Name field is case-sensitive and must be entered precisely as shown below.
- Name: Zendesk Ticket IDs
- Description: Lists the Zendesk ticket IDs related to the Jira issue in a comma-separated string.
- Click Create.
- On the next page, use the checkboxes to select which pages the field should appear on, then click Update.
- Click Add custom field in the upper right corner.
- On the field type selection page, select Number Field, then click Next.
- On the number field configuration page, enter a name and description for
the number field.
The Name field is case-sensitive and must be entered precisely as shown below.
- Name: Zendesk Ticket Count
- Description: Number of Zendesk tickets linked to Jira issue
- Click Create.
- On the field association page, use the checkboxes to select the pages the number field should appear on, then click Update.
- Confirm the fields are displayed on the correct pages.
