Summary: ◀▼
You can set up calls in your browser or forward them to a phone to place and receive voice calls. Use a supported browser with WebRTC, and check network, firewall, and headset setup for call quality. For call forwarding, add your forwarding number, country, and extension in your profile; international calls may require calling enabled, and forwarded calls show your account number as caller ID.
You can place and receive calls in your web browser or forward calls to a phone.
Make sure your admin has given you access to the voice channel.
This article contains the following sections:
Setting up your browser for calls
Before you start, ensure that you are using a supported web browser because these support Web Real-Time Communication (WebRTC), the browser-based communication protocol that Zendesk uses to make calls.
To set up your browser for calls
-
In Support, click the Voice icon (
 ) in the top bar.
 - In the call console, click the globe icon (
 ), then select Via
Browser.
), then select Via
Browser.
With omnichannel routing Without omnichannel routing 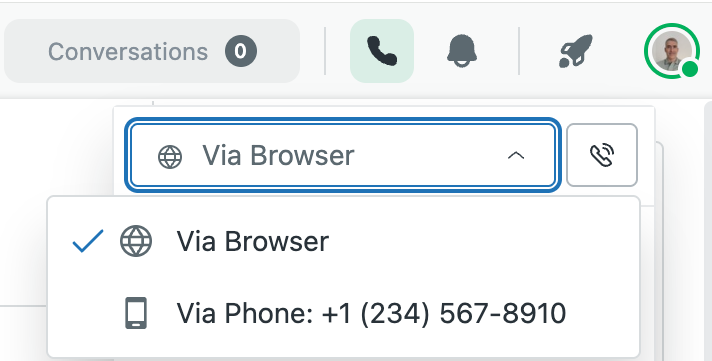
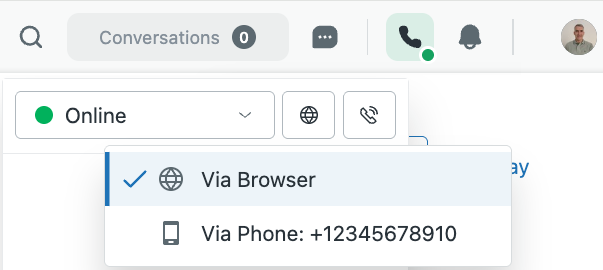
Setting up your phone for call forwarding
To set up your browser for call forwarding
- In Support, click your profile photo in the top-right corner, and then select Manage profile.
- Next to Agent forwarding, click + add number.

- Under Agent forwarding number, select a country and enter your phone
number.
If your phone number includes an extension, add it to the extension field. If you also use additional key presses, you can also add those to the extension field. For example, if a caller must dial '123' followed by a pound ('#') key, enter '123#'.
 Note: If multiple users will share the same forwarding number, you must include different extension numbers for each agent.
 - Click Save.
Your forwarding number is saved to your profile.
- Click the Voice icon () in the top bar.
- In the call console, click the globe icon (), then select Via
Phone.
With omnichannel routing Without omnichannel routing Tip: You can use the Zendesk Support mobile app to set your agent status. See About the Zendesk Support mobile app.