Verified AI summary ◀▼
Track agent time spent outside the platform using the time tracker Chrome extension. Configure it by mapping general tasks to URLs, allowing you to monitor agent activities. Agents can install the extension to see tracked activities on visited URLs. Admins can manage settings to auto-track or handle unmapped URLs, enhancing visibility into agent time management.
Admins in Zendesk Workforce Management (WFM) can track how agents spend time outside of Zendesk by using the Zendesk time tracker Google Chrome extension.
Configure extension tracking by mapping general tasks or unified agent statuses to URLs that agents visit.
By mapping general tasks or statuses to URLs, you can understand how agents work and choose how the activity is recorded when they visit a mapped URL. Additionally, you can configure which visited URLs automatically update agents’ statuses in Support.
After you set up extension tracking and agents install and sign in to the extension, they can also see which activity is tracked on the URLs they visit. This helps them better understand how their time is tracked.
This article contains the following topics:
Understanding external website tracking in WFM
To track agent activities and tasks that occur outside of Zendesk, you must first have defined general tasks or mapped unified agent statuses in WFM.
The browser extension tracks the time agents spend on websites you map in WFM. You can map an entire domain or a specific URL within a domain, and each is tracked separately.

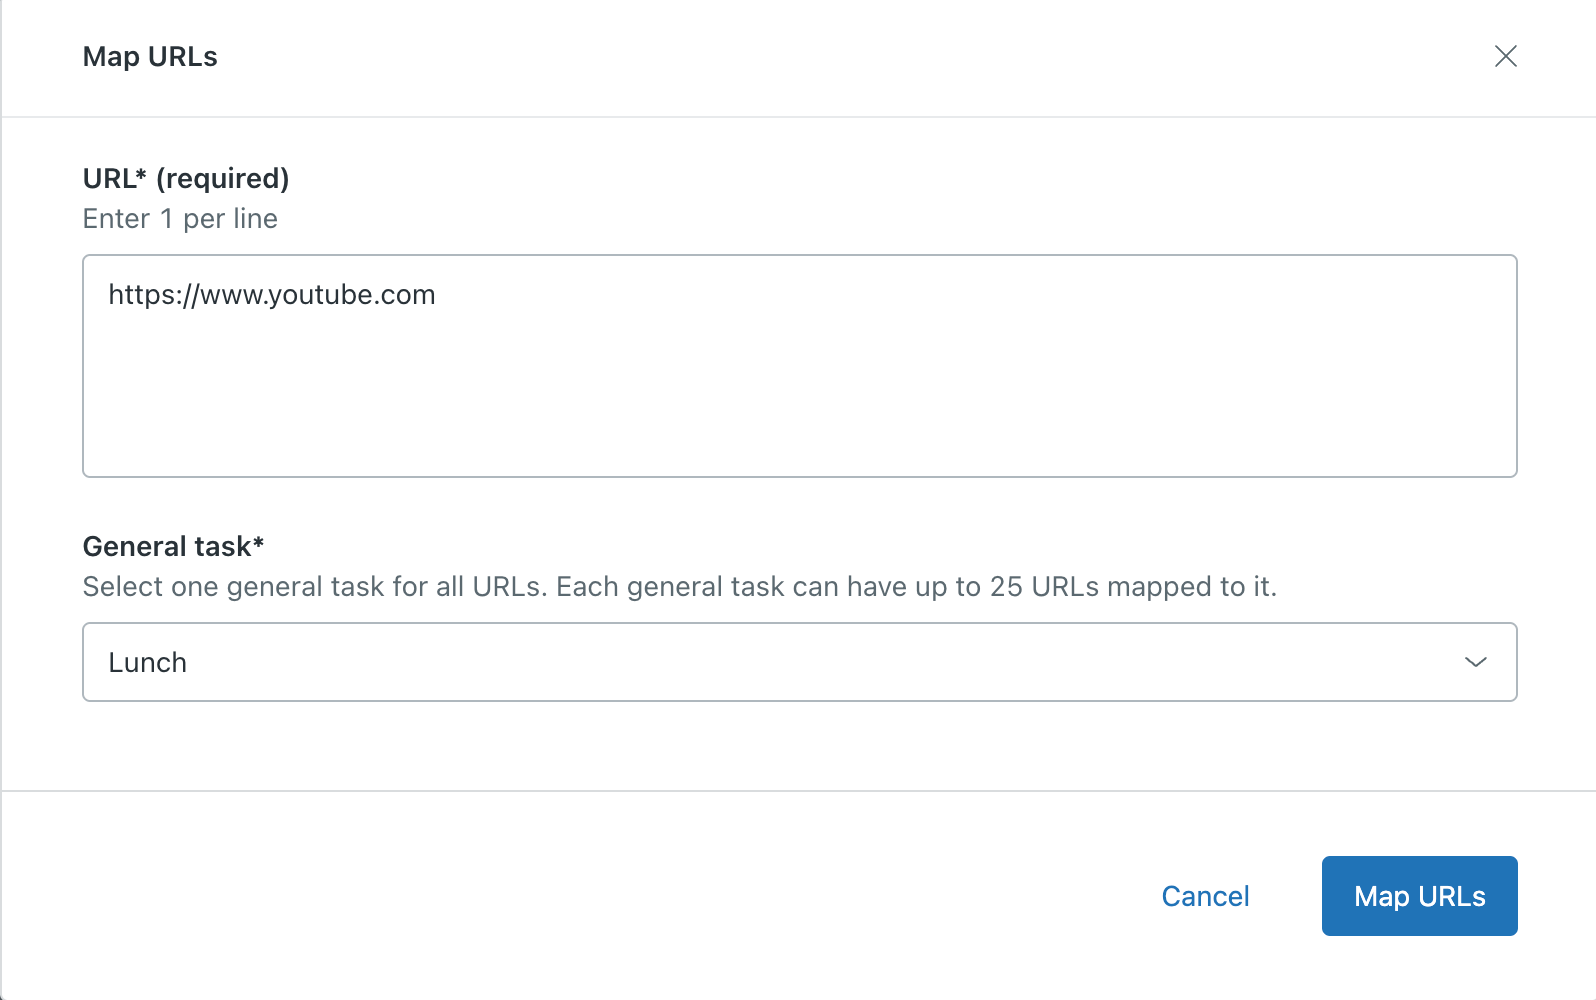
For example, you might want to add https://www.youtube.com/ to your "Away" or "Lunch" general task. Every time an agent visits YouTube, their time will be tracked as away or lunch in WFM.
If you're using unified agent statuses instead, the agent’s status can automatically update to Away or Lunch in the Agent Workspace in Support.
Agents can install the Zendesk time tracker extension from the Google Chrome web store. They must sign in to the extension after installation, and we recommend selecting Keep me signed in to ensure that they stay logged in even after closing their browser.
![]()
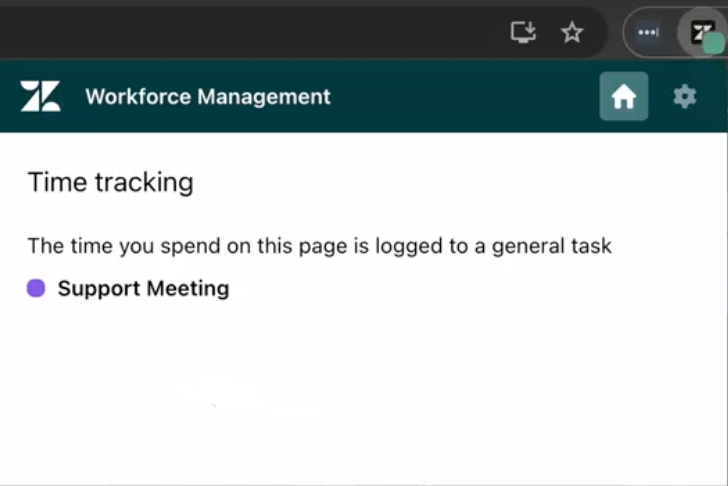
When agents visit a website with a mapped URL, they can also click the WFM icon in Support to see the general task or agent status associated with the time they spend on that page. This will automatically continue until the agent signs out of Zendesk.
If agents sign out or their session expires, tracking pauses until they sign back in.
Mapping URLs for extension tracking
You must be a Zendesk WFM admin or a team member with permission to map URLs for extension tracking.
To map URLs for extension tracking
- In Workforce management, click
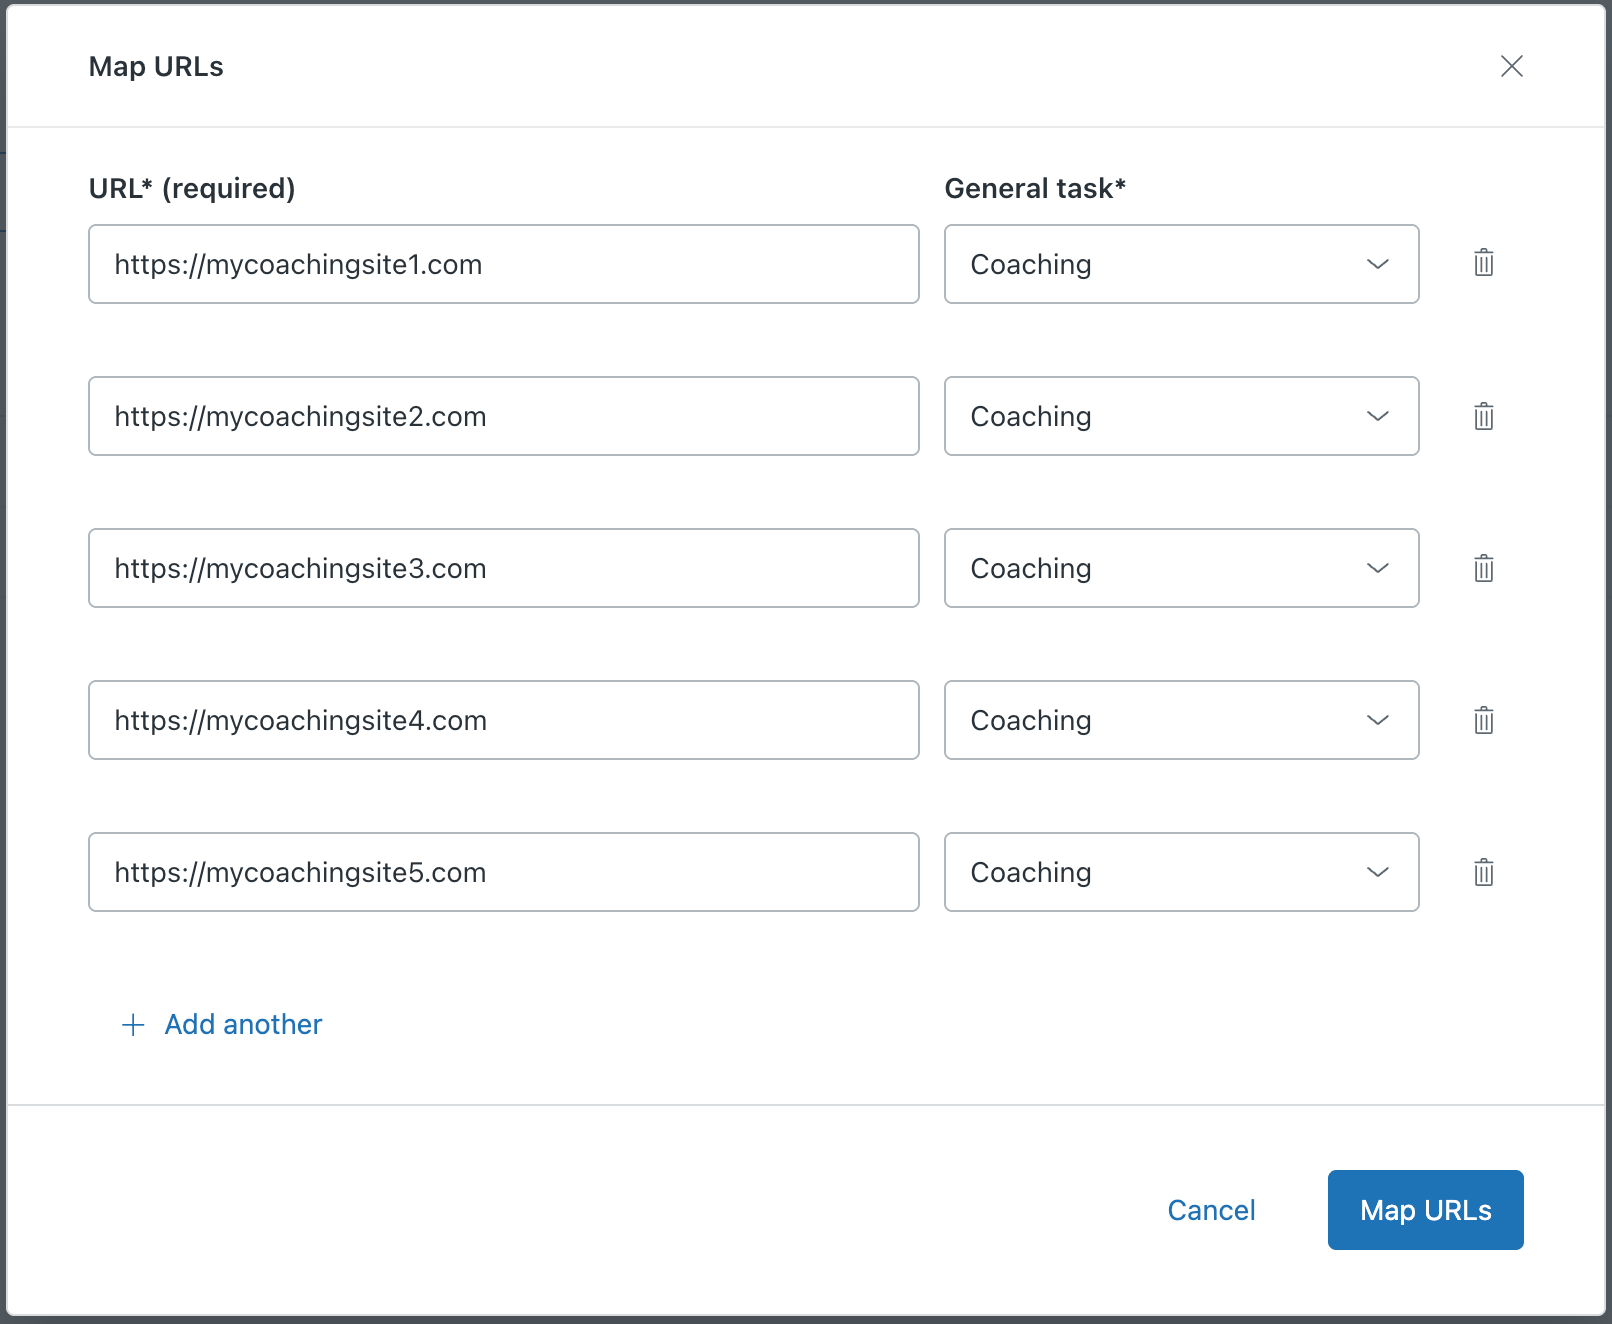
Settings in the sidebar, then select Extension tracking. - Click Map URLs, then enter the URLs you want to map.
You can map up to 25 URLs to each general task or status.
- Select one general task or agent status for the URLs.
Note: When you map a URL to a unified agent status or general task, WFM automatically adds a wildcard to the end of the URL. For example, if you define www.zendesk.com, it's stored as www.zendesk.com/* and every page on that domain is tracked. If multiple mapped URLs match an open page, the system uses the longest matching URL to log the activity and provide the most precise tracking information. - (Optional) If you've entered multiple URLs, click Next and verify that
each URL is mapped to the correct general task or agent status.

- When you've finished entering URLs and mapping them to the appropriate general task or status, click Map URLs.
Configuring extension tracking settings
You can configure various settings that control how the extension manager works. These settings affect only team members who have the Zendesk time tracker extension installed in their browser.
You must be a Zendesk WFM admin to configure extension tracking.
To configure extension tracking
- In Workforce management, click
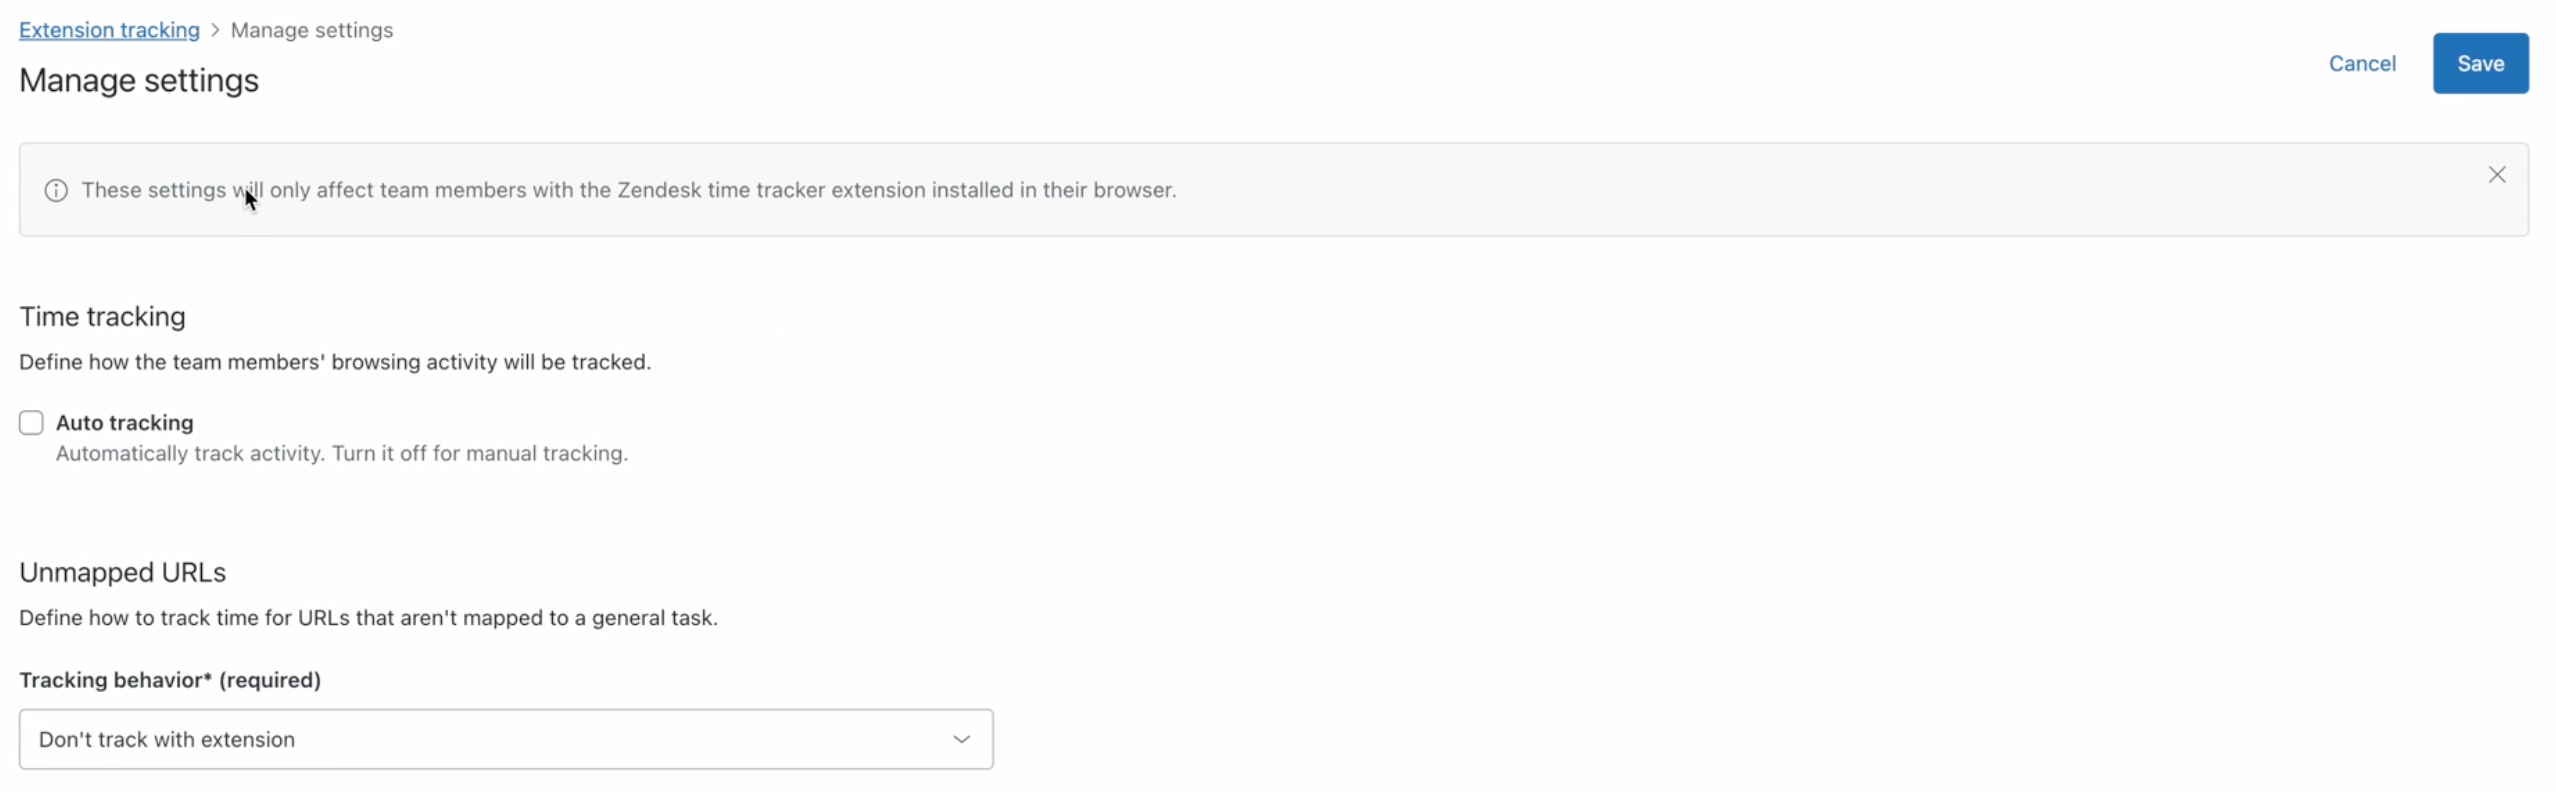
Settings in the sidebar, then select Extension tracking. - Click Manage settings.
- Under Unmapped URLs, define how time is tracked for URLs not assigned to
a task.Tracking behavior options include:
- Don't track with extension (default): Don't track any time spent browsing unmapped URLs.
-
Track as specific general task or Track as specific agent
status:
From the dropdown list, select the general task or agent status to which unmapped URLs will be assigned.
- Track as untracked: If you're using general tasks, you can track and label any time spent browsing unmapped URLs as untracked.
- Under Tracking, configure the following options as required:
-
Auto tracking: Select this option to automatically track your
team member's browser activity while they’re signed in to Zendesk.
If you turn off this option, agents must manually click the extension to start and pause tracking.

-
Update agent status: If you’re synchronizing unified agent status for Zendesk
WFM, this option is selected by default, allowing the
extension to automatically update the agent status in Support. Deselect
this option so the extension can no longer update the agent status in
Support.
- All mappings: This option is also selected by default, allowing the extension to automatically update the agent status in Support for all mapped URLs.
- Only selected mapping: Select this option to adjust which URLs update the agent status in Support on the extension tracking page, either individually or in bulk.
- Update agent status for all unmapped URLs: Select this option to update the agent status in Support when browsing unmapped URLs and to label it as untracked time.

-
Auto tracking: Select this option to automatically track your
team member's browser activity while they’re signed in to Zendesk.
- Click Save.
Managing extension tracking URLs
When managing extension tracking URLs, you can:
- Edit mapped URLs.
- Update URLs mapped tasks or statuses individually or in bulk.
- Turn on or off automatic statuses updates.
- Delete mapped URLs.
Editing mapped URLs
You can edit configurations for your extension mapped URLs.
To edit extension tracking URLs
-
In Workforce management, click
Settings in the sidebar, then select Extension tracking.The Extension tracking page is displayed showing any URLs that have been configured for general tasks or agent statuses.

- Click the options menu icon (
) next to the URL, then click
Edit. - Enter a new URL or change the mapped status or general task.

- If you’re mapping agent statuses, select or deselect Update agent status to allow or stop the extension from automatically updating the agent status in support when agents visit this URL.
- Click Save.
Changing URLs mapped tasks or statuses in bulk
You can change mapped URL tasks or statuses individually or in bulk in the status mapping table.
-
In Workforce management, click
Settings in the sidebar, then select Extension tracking.The Extension tracking page is displayed showing any URLs that have been configured for general tasks or agent statuses.
- Select the URLs you want to change the mapping for.

- In the toolbar that appears at the bottom of the page, click Change agent status or Change general task.
- Select the new status or general task.
- Click Save.
Turning on or off automatic statuses updates for URLs
If you're synchronizing unified agent status for Zendesk WFM for Zendesk WFM, you can also turn on or off automatic status updates in Support for multiple URLs in bulk.
-
In Workforce management, click
Settings in the sidebar, then select Extension tracking.The Extension tracking page is displayed showing any URLs that have been configured for general tasks or agent statuses.
- Select the URLs you want to turn on or off automatic statuses updates
for.

- In the toolbar that appears at the bottom of the page, click Status update.
- Select Turn on status updates or Turn off status
updates.

- Click Save.
Deleting mapped URLs
You can delete mapped URLs.
To delete mapped URLs
-
In Workforce management, click
Settings in the sidebar, then select Extension tracking.The Extension tracking page is displayed showing any URLs that have been configured for general tasks or agent statuses.
- Select the URLs you want to delete.
- In the toolbar that appears at the bottom of the page, click Delete.
- Confirm you want to delete the URLs by clicking Delete URL.