Verified AI summary ◀▼
Entity detection helps you identify key information in tickets, like product names, by highlighting them for quick action. This feature enhances automated workflows and reporting, allowing you to better prioritize and route tickets. You can create entities using custom fields, add synonyms, and configure detection settings, including misspelling detection, to improve accuracy in identifying important details within customer interactions.
Customer requests often contain specific pieces of information that your agents need to identify and act on in order to solve requests. Entity detection, which is part of intelligent triage, helps you define and detect this information in tickets and messaging conversations so your tickets are automatically updated with actionable details.
With entity detection, your agents can identify and act on important information more quickly and easily. You can also improve automated workflows and reports by using the detected information to better deflect, route, and prioritize tickets.
This article contains the following topics:
Related articles:
About entity detection
An entity is a piece of information that is meaningful for your business, such as a product name. To detect this important information in each of your tickets, define entities by:
- Creating an entity to represent the piece of information you care about.
- Associating the entity with an existing custom field to represent its details. For instance, add an entity with a drop-down custom field named Product Line that contains values such as Camera Model A, Camera Model B, and so on.
- Adding synonyms to entity values so that intelligent triage can detect more variations.
When entities are detected, their values are highlighted in blue within tickets, making it easier for agents to scan for important information.

Technical information about entity detection
Entity detection works by identifying individual words separated by spaces. For example, the entity value “Mondo” will be recognized in “Mondo Phone3” but not in “MondoPhone3,” where words are combined without spaces. As a result, entity detection works best in languages that use spaces to separate words.
For an entity to be detected, the ticket’s language must match the language in which the entity was created. For instance, an entity created in English will not be detected in Spanish tickets.
Entity detection works on all channels supported by intelligent triage. It can't be turned on or off for only certain channels. Detection works on ticket subjects and public comments, and only public comments have highlighted entity values. Internal notes aren't detected, but entity values there are still highlighted.
Creating and configuring an entity
Admins can create an entity in Admin Center using existing custom ticket fields.
To create and configure an entity
- In Admin Center, click
 AI in the sidebar, then select Intelligent triage > Entity.
 - Click Add entity.
- Under Select field type, click either Drop-down,
Multi-select, or Regex.
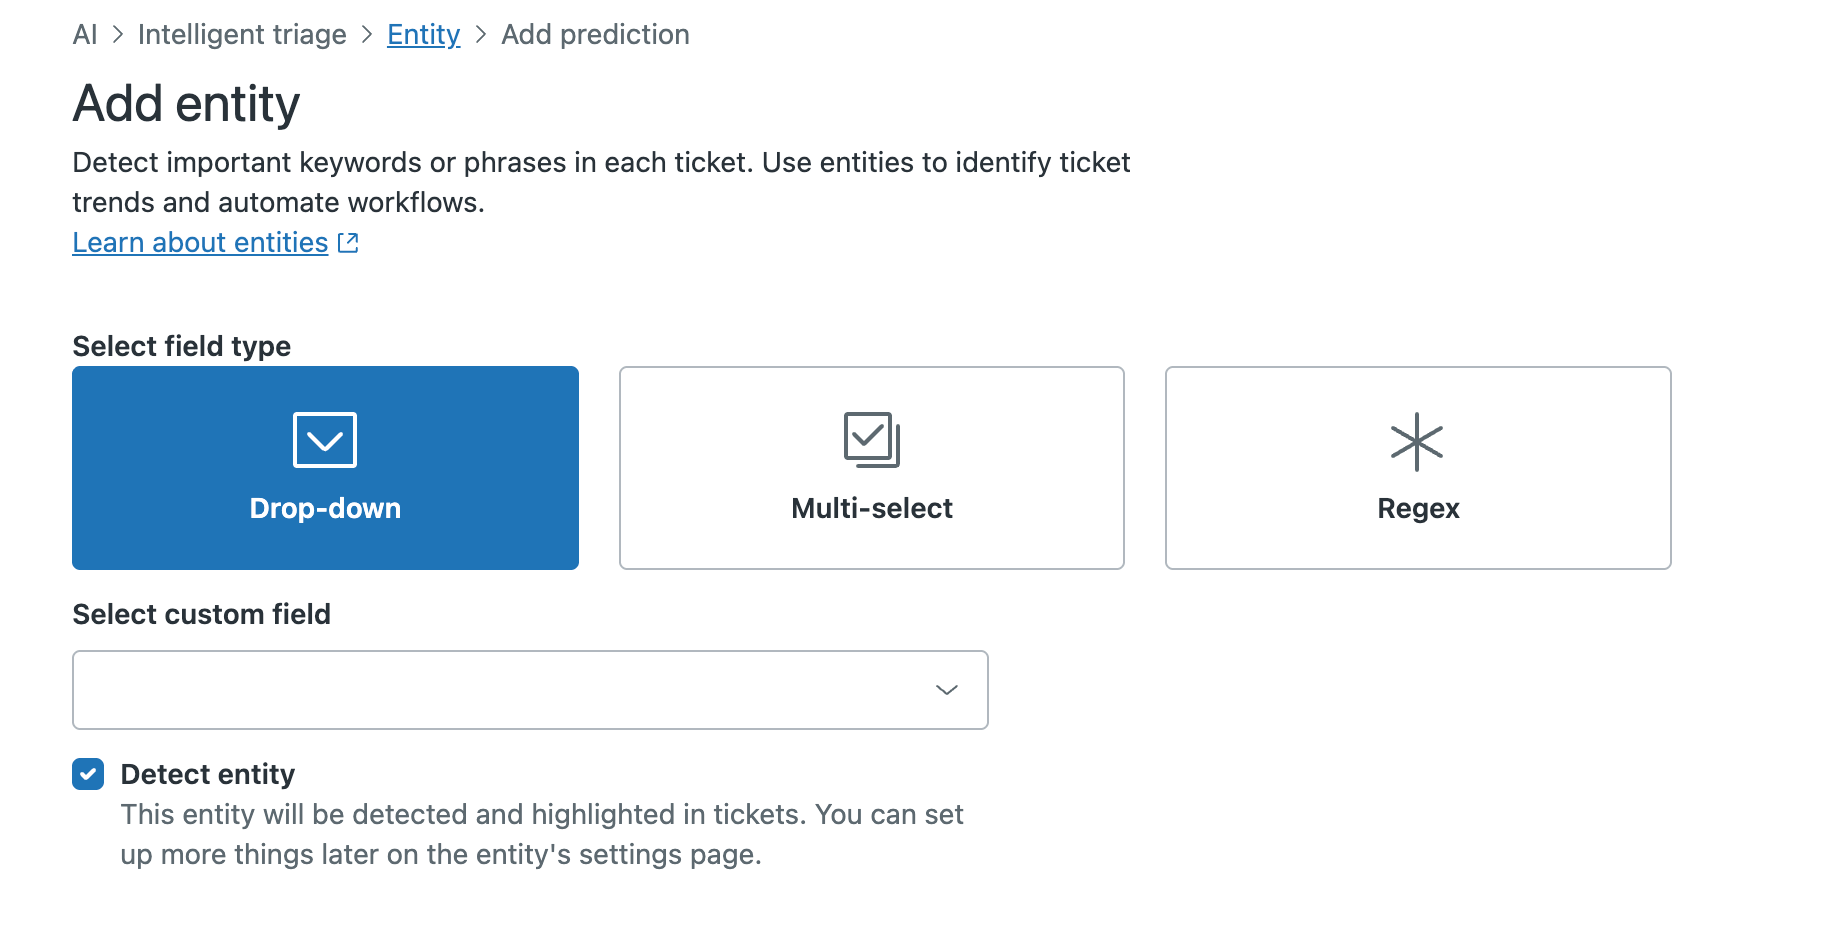
- Under Select custom field, select a custom field.
See Creating custom ticket fields if you need to create a new field.
- Detect entity is selected by default. Deselect this checkbox if you don't want to detect and highlight this entity in tickets yet.
- Click Create entity.The entity's settings page opens. The options on the page will differ depending on which type of custom field your entity is associated with:
- If you created an entity associated with a drop-down or multi-select
custom field, the page displays the entity's values.
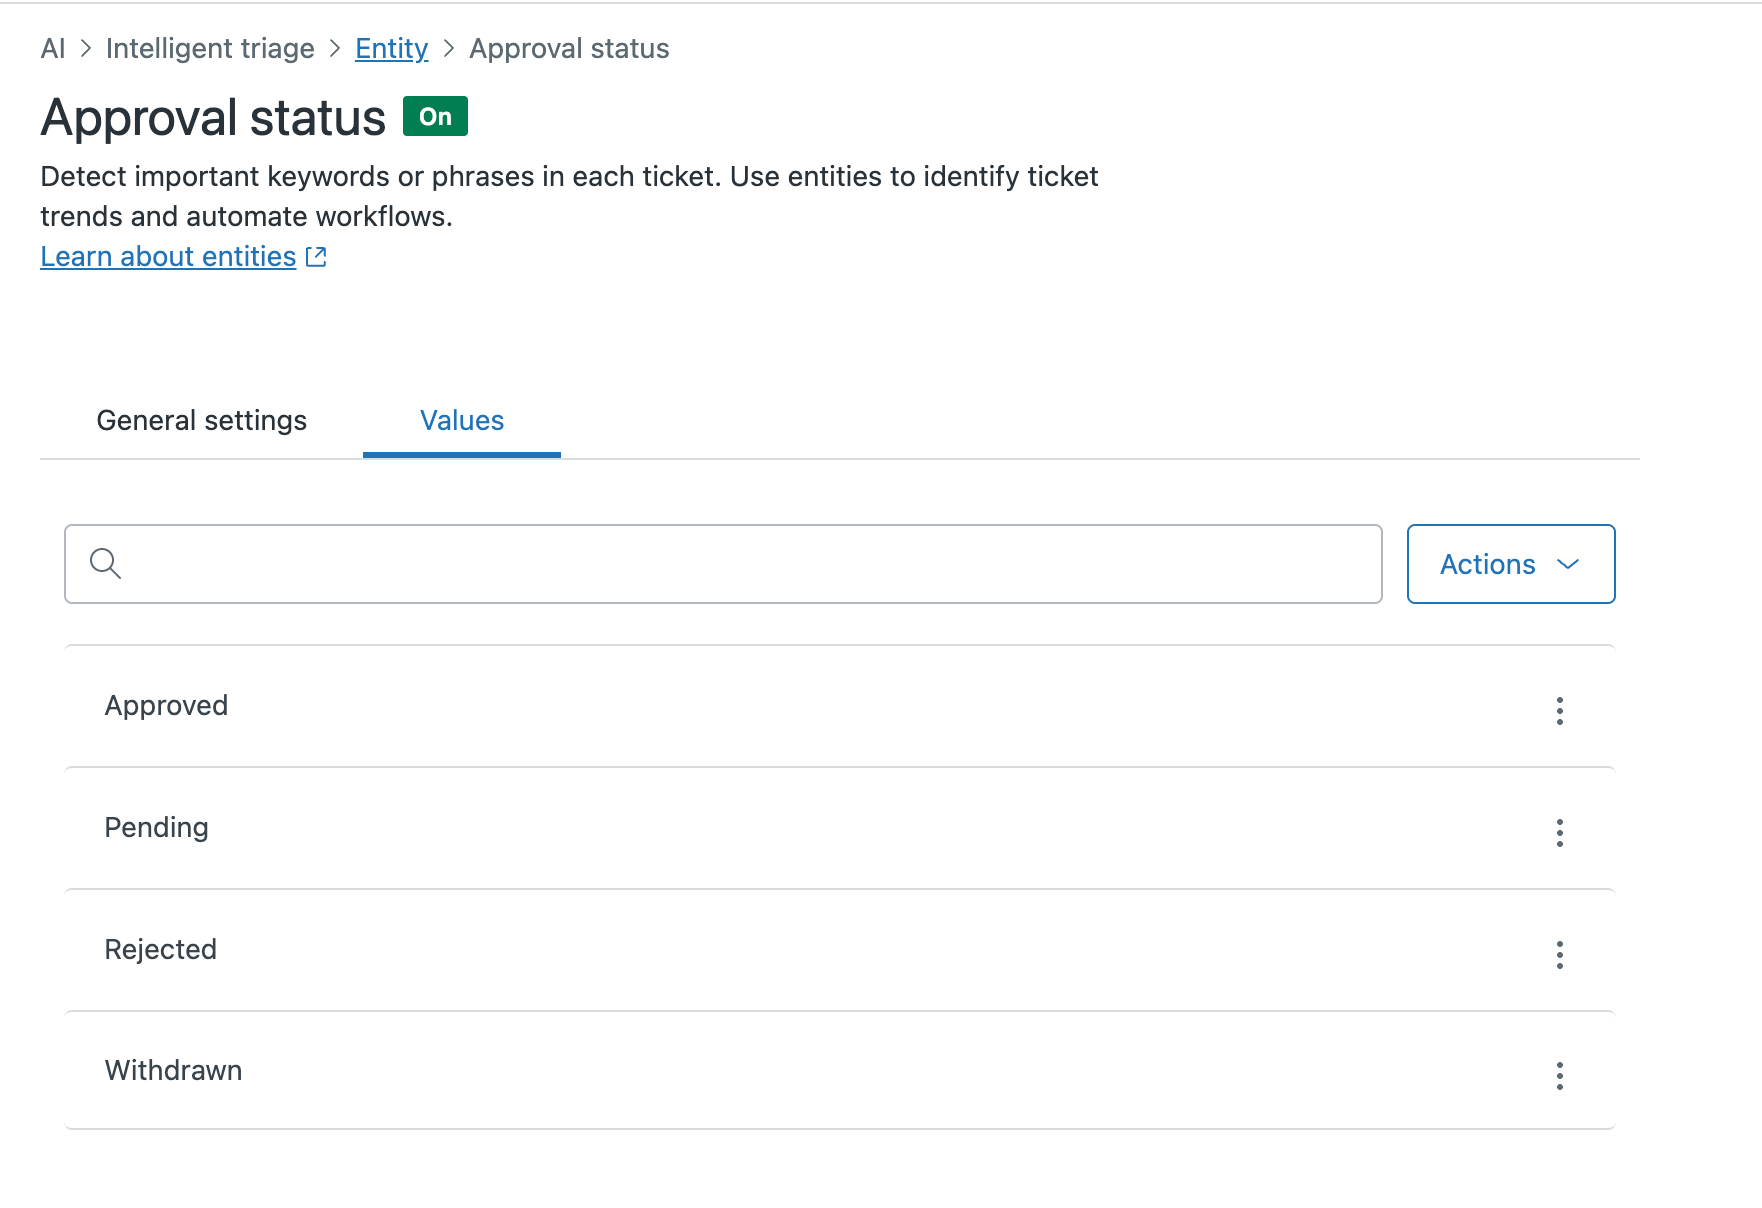
From this tab, you can optionally add synonyms to the field values.
- If you created an entity associated with a regex custom field, then
the regular expression (regex) appears under Validation.
You can enter text in the Test detection field in the right panel to check if the entity will be detected.

- If you created an entity associated with a drop-down or multi-select
custom field, the page displays the entity's values.
- Click Manage settings.
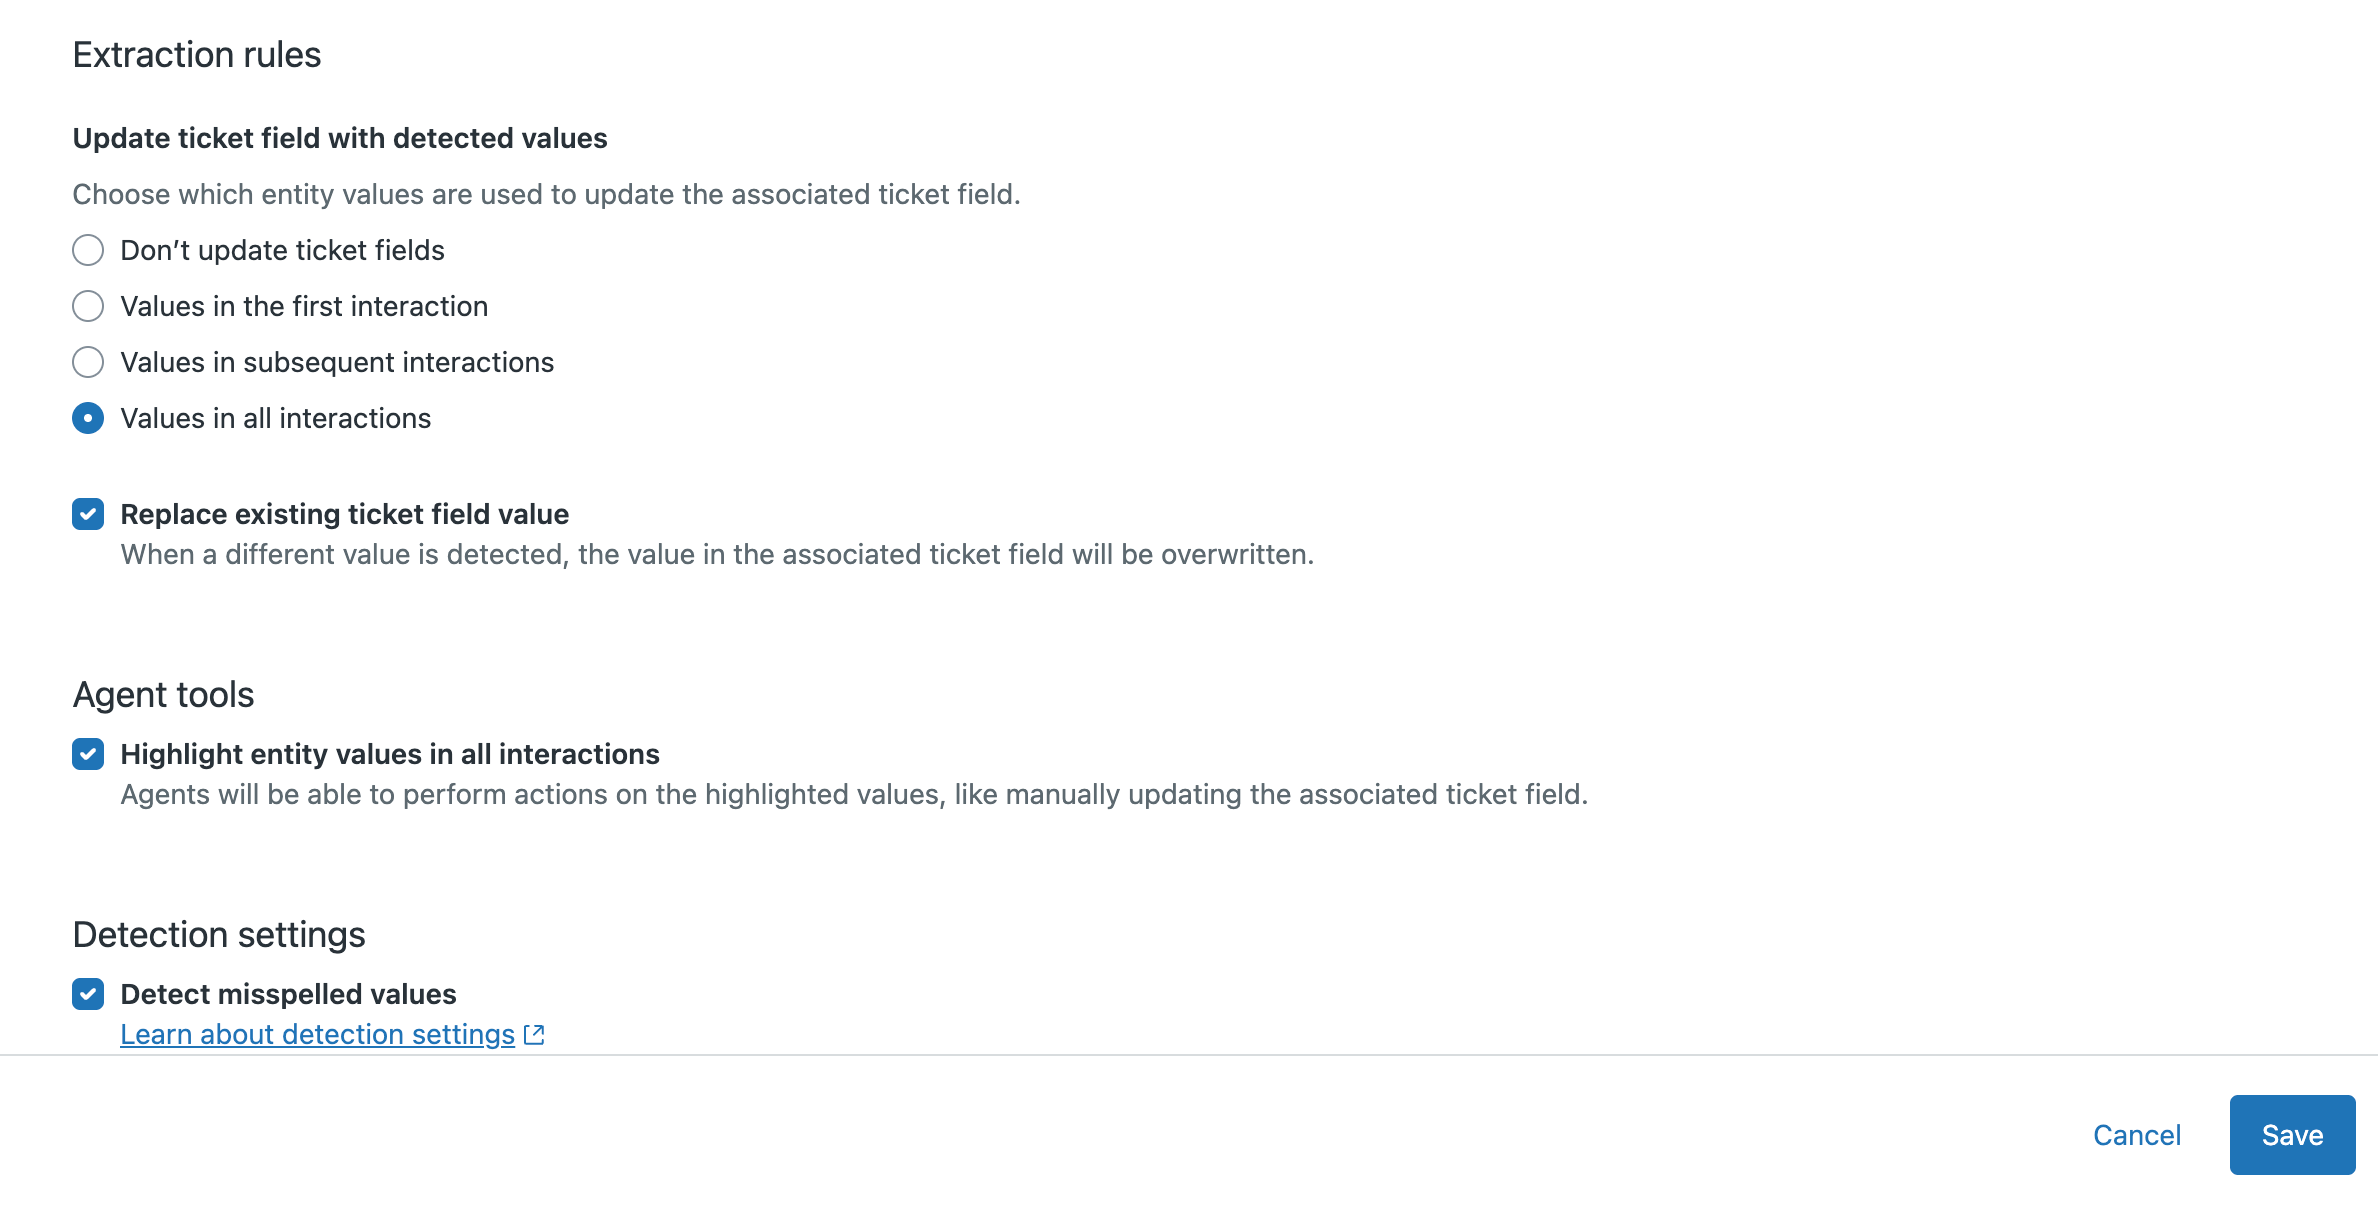
- Set the Extraction rules. Under Update ticket field with detected
values, configure the behavior of the ticket field associated with the
entity by selecting one of the following options:
- Don’t update ticket fields: The ticket field is not automatically populated with any value. An agent must manually populate it by clicking update.
- Values in first message only: The ticket field is populated with the value detected in the ticket’s subject, first comment, or a conversation’s first message. Subsequent comments or messages do not automatically update the ticket field value.
- Values in subsequent messages only: The ticket field is initially populated and subsequently updated with the value detected in any ticket comment or message except for the first one.
- Values in all interactions: The ticket field is initially populated and subsequently updated with the value detected in any ticket comment or message. This option is set by default when you first create the entity.
- Under Agent tools, select Highlight entity values in all messages
if you want entities to be highlighted in blue in tickets and messaging
conversations. When this option is selected, agents will also be able to take action on highlighted
entities.
Note that light agents can't view highlighted entity values.
- Under Detection settings, select Detect misspelled values if you
want to allow the system to find misspelled entity values.
This setting is available for entities associated with drop-down and multi-select fields.
Misspelling detection:
- Only works if the first letter matches the entity value.
- Doesn't work on patterns shorter than six letters.
- Allows up to two errors per word, including added, missing, misplaced, or replaced letters.
- Might not work well in languages where a single character change results in a different meaning.
- Click Save.
The entity is created. When the entity is detected in tickets, the associated custom ticket field is populated or updated depending on how you've configured the ticket field behavior.