With the new article editor, you have access to enhanced editing tools, source code improvements, and advanced article components, such as HTML blocks, summaries, and more. In addition, you can take advantage of newly released features, such as AI article translation if you have the Copilot add-on, that are only available with the new article editor.
To ease your transition to the new article editor, it's important to understand the transition timeline, reason for the transition, and how to troubleshoot issues you may encounter.
- Comparing the legacy editor and new editor frameworks
- About the new article editor features
- Understanding the timeline for transitioning to the new article editor
- Filtering articles by migration status
- Switching between article editors (existing articles only)
- What to expect after the transition ends
- Troubleshooting issues when transitioning to the new article editor
Comparing the legacy editor and new editor frameworks
The legacy editor was built using an HTML approach, which worked much like an enhanced text box in your browser. Whenever you formatted text, these actions directly manipulated the content as HTML. Behind the scenes, typing or formatting was translated into messy (or sometimes inconsistent) markup, heavily influenced by your browser and whatever content was pasted in the editor.
The new editor takes a structured data model approach. This means that it translates content into a structured data model, where each piece of content is an object with defined properties, attributes and relationships. This model separates content from data attributes, which is what provides the new editor with so much of its flexibility, security, and ability to integrate with advanced features and tools.
As with any migration to a more advanced platform, there are transition issues and workflow modifications that must be addressed and resolved. Because the legacy editor was built on HTML instead of the more powerful objects, you could customize and add any HTML you wanted in the article editor. As you transition your articles to the new editor, you may find that some of this code is no longer supported, and as a result, your content is wrapped in an HTML block for its protection. Or, you may find that you now are working with tables, images, or other article editing elements in a different way.
This article will help you plan for, identify, and troubleshoot transition issues that you may be experiencing. To begin, take time to understand the transition plan and timeline, and how much time you have to migrate your existing articles and prepare for working in the new article editor.
About the new article editor features
Enhanced article editing tools
The article editor includes new editing tools designed to streamline and enhance your content creation process. You can access the new article editing tools by creating or editing an article in your help center, then using the new article editor toolbar to access the tools.
The following image shows the location of new or updated tools on the new article editor toolbar.

Source code improvements
- HTML blocks - Previously available only in content blocks, HTML blocks are available in the article editor as an insertable article component. See Article components below.
-
Cleaner code when using content blocks - Previously, when you
placed your cursor above a content block in the article editor, you
could only see the HTML code for the text above the content block. To
see the code below the content block, you had to go back into the editor
and place your cursor below the content block. This issue is now
resolved, and you can now view the article source code both above and
below the content block, regardless of your cursor position.
Content blocks are identified with an ID number in article source code. With this improvement, you can now see the source code both above and below the content block ID in the HTML view.

Article components
- Embed: If your video is hosted on one of the supported hosting services, you can embed the file directly from the new article editor toolbar. See Inserting videos and embedded files in articles and content blocks.
- HTML blocks: You can use HTML blocks to quickly access and edit complex HTML code in your articles. HTML blocks let you work with blocks of code that would otherwise not be editable within the article editor, and to display them in a safe manner within your help center. See Using HTML blocks to edit code in content blocks.
- Horizontal line: You can insert a horizontal line in the article editor to visually separate groups of content with a divider. See the Help center editor toolbar reference.
- Article summaries: You can insert the article summary component into your help center article to display a concise description of the article content in a shaded box at the top of your article. If you have the Copilot add-on, you can generate the article summary using AI. Otherwise, you can type your summary in the text box. See Adding article summaries to knowledge base articles.
Understanding the timeline for transitioning to the new article editor
The transition from the legacy article editor to the new article editor has four phases, from May 22, 2025 through mid-year 2026. Throughout the phased transition, new and existing articles will gradually move from the legacy editor to the new article editor.
Once an article has been migrated to the new article editor, it will no longer open or be editable in the legacy editor. This applies to restoring previous versions as well. When you restore a previous version of an article that was created in the legacy article editor, the article will still open in the new article editor. You can't restore the legacy article editor, even if the article you're restoring was edited and published using the legacy editor.
Refer to the following table for a summary of the transition information shown in the diagram above.
| Period | Article type | |
|---|---|---|
| Existing articles | New articles | |
|
New Editor GA Q2 2025 |
Open in the legacy editor. You can save in the new editor and switch back as needed. |
Open in the new editor. You can revert to the legacy editor if needed. |
|
Transitionary period Nov 3, 2025 - Jan 11, 2026 |
Open in the new editor. You can switch between the new and legacy editors until you click Save and migrate. After migrating, the article only opens in the new editor. |
|
|
New articles - New editor only Jan 11, 2026 - Mar 31, 2026 |
Open in the new editor. You can switch between the new and legacy editors until you click Save and migrate. After migrating, only the new editor is available. |
Open in the new editor without the option to revert to the legacy editor. |
|
Legacy editor sunset Q2 2026 Transition complete Mar 31, 2026 |
Open in the new editor without the option to revert to the legacy editor. | |
Filtering articles by migration status
-
In Knowledge admin, click Manage articles
(
 ) in the sidebar.
Your All articles list opens by default.
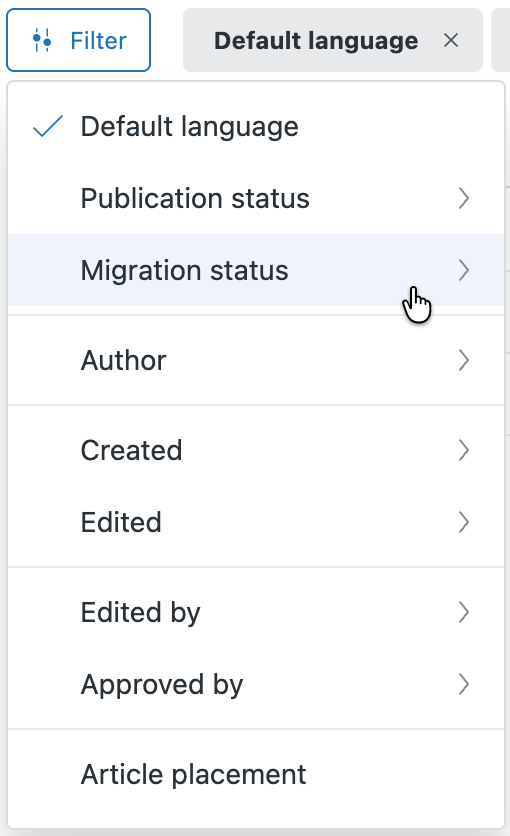
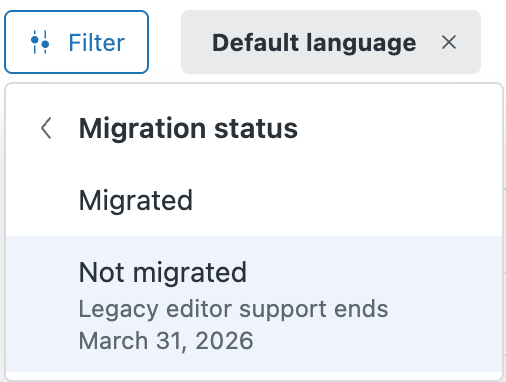
- Click Filter, then select Migration status.

- Select one of the following filters:
- Migrated: Show existing articles that have been migrated to the new article editor. Migrated articles can't be switched back to the legacy editor.
-
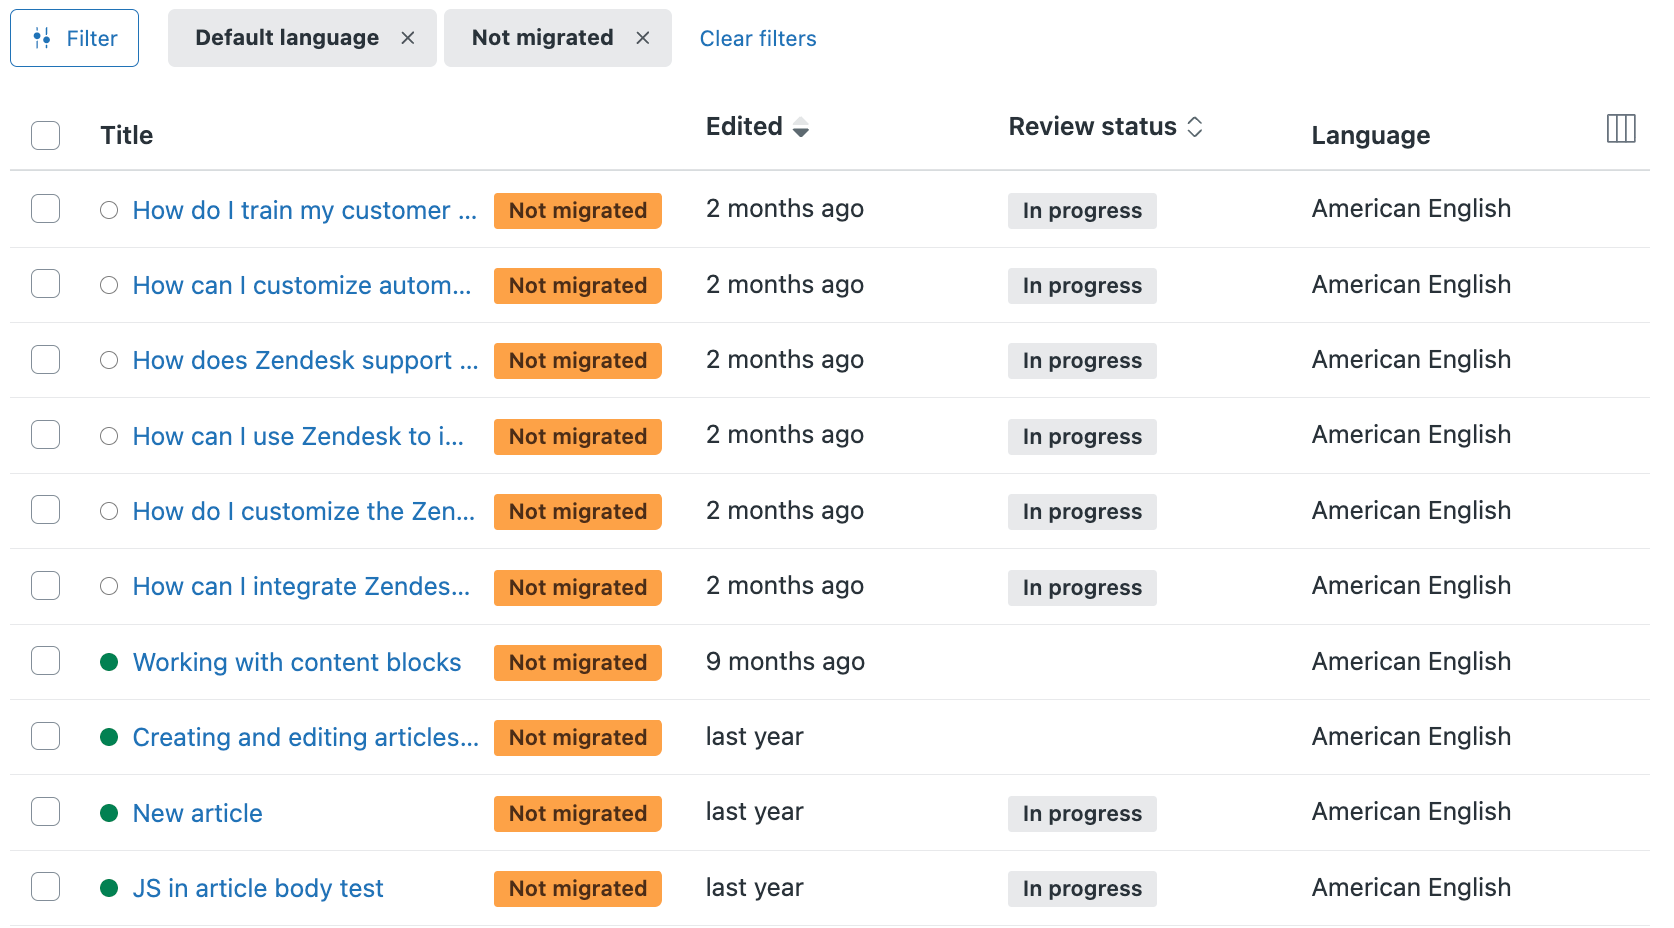
Not migrated: Show existing articles that are currently saved
in the legacy editor and have not yet been migrated to the new
article editor. You
have until March 31, 2026 to migrate these articles.

The article list shows only those articles matching the filter you selected.

Switching between article editors (existing articles only)
When editing an existing article, you can switch between the article editors as much as you like before you save and migrate the article. The article is migrated to the new article editor only after you select Save and migrate from the Save menu in the lower right side of the editor.
To verify which editor an article is using, refer to the indicator that appears on the article editor header. You can also click this indicator to open an information message with a link to switch to the legacy editor. The example below displays an article in the new editor.

- In your help center, navigate to the existing article you want to edit, then
click Edit article in the top menu bar.
The article opens in the new editor.
- If the article doesn't appear as expected and you want to switch back to the
legacy editor, then in the banner that appears at the top of Article
settings, click Switch to legacy editor and continue editing in the
legacy editor. Otherwise, continue to the next step.Note: The option to switch to the legacy editor is only available for existing articles until March 31, 2026. New articles open in the new article editor and cannot be switched to the legacy editor.
- To save the article in the new editor, click Save and migrate in the article footer.
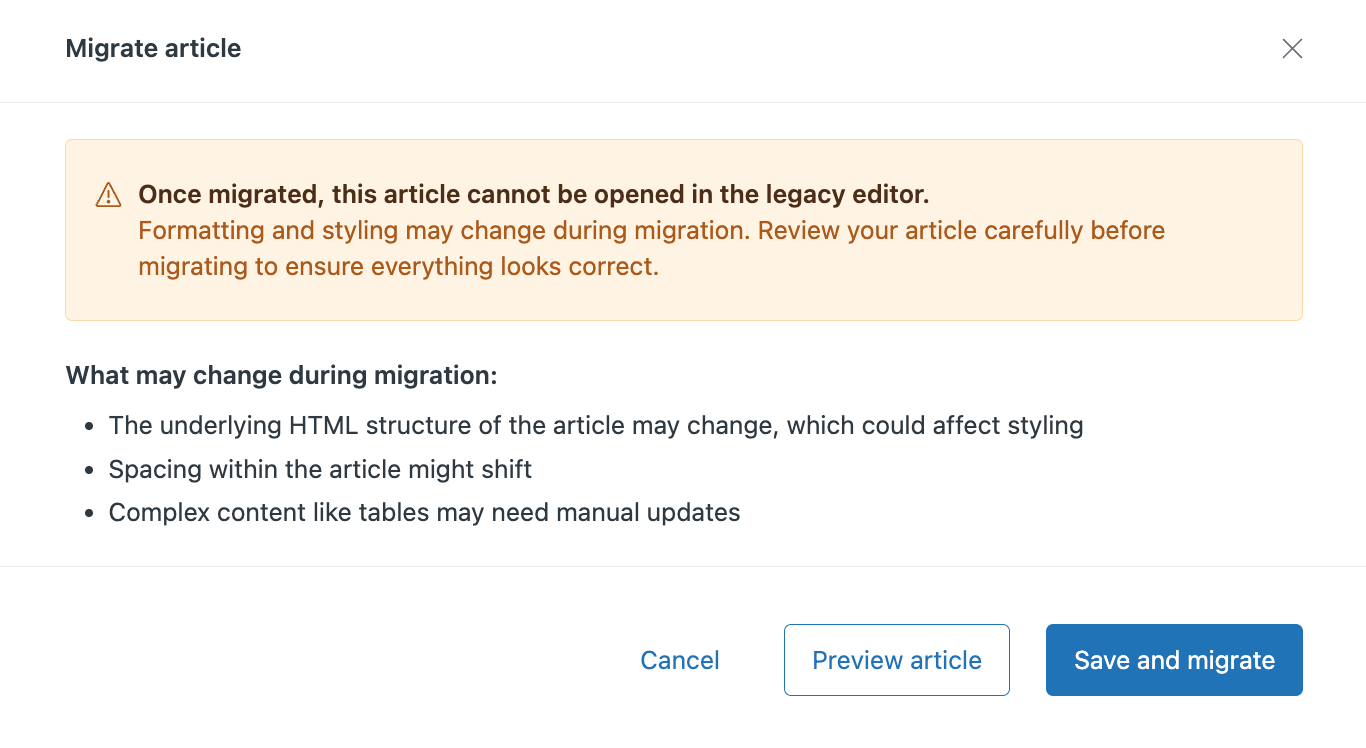
- Review the information provided in the Migrate article modal, then take the
following actions:
- Click Preview article to view the article in a new browser tab.
- Click Save and migrate to permanently migrate the article to
the new editor.Note: Once you save an article from the legacy editor to the new article editor, the article is migrated. If you attempt to view a migrated article in the legacy editor, you may experience display issues or compatibility problems, as the legacy editor is not built to understand the new format.

What to expect after the transition ends
The transition to the new article editor will be complete on March 31, 2026. After this date, you'll still have access to all of your articles, but they'll open in the new editor without an option to revert to the legacy editor. All references to the legacy editor will be removed, and the new article editor will be the only available article editor.
If you haven't migrated your existing articles to the new editor by the end of the transition, you'll still have access to those articles but will only be able to view and edit them in the new article editor.
Because HTML blocks protect custom code incompatibilities between the legacy and new editor, your articles should appear correctly when published. However, custom code that is incompatible with the new editor will be wrapped in an HTML block to protect the code. To learn more about how to work with HTML blocks in the new editor, see Using HTML blocks to edit code in content blocks and Troubleshooting issues with HTML blocks in the new article editor.
Troubleshooting issues when transitioning to the new article editor
- Troubleshooting formatting issues in the new article editor
- Troubleshooting issues with links in the new article editor
- Troubleshooting issues with tables in the new article editor
- Troubleshooting issues with HTML blocks in the new article editor
- Troubleshooting issues with images and videos in the new article editor
