When you add a supported language to an advanced AI agent, you have the option to duplicate all the replies you've already created in another language. Duplicating replies saves you time because you don't have to recreate them from scratch in the new language.
However, you still need to translate the duplicated replies from their original language into the newly added language. You can translate all of the replies for a given language, including templates and system replies, by exporting and then importing an Excel spreadsheet.
This article contains the following topics:
- Exporting a translation spreadsheet
- Entering translations in the exported translation spreadsheet
- Importing the filled-in translation spreadsheet
Related articles:
Exporting a translation spreadsheet
You can export an Excel spreadsheet of your reply content in a given language and use it to enter translations for a new supported language.
You can export translations for all replies, or for a single reply. Exporting all replies is recommended whenever you add a new supported language or make widespread changes to multiple replies. Otherwise, consider exporting a single reply.
Exporting all replies for translation
You can export the content for all replies from the language settings page in an advanced AI agent.
To export all replies
- In AI agents - Advanced, select the advanced AI agent you want to work with.
- Click Settings in the sidebar, then select AI agent settings.
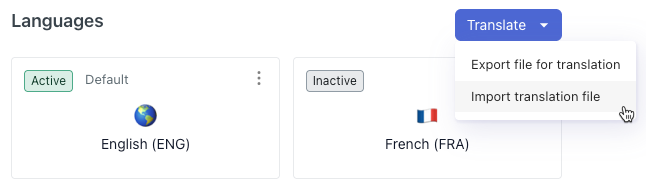
- Select the Languages tab.
- Click Translate and select Export translation file.
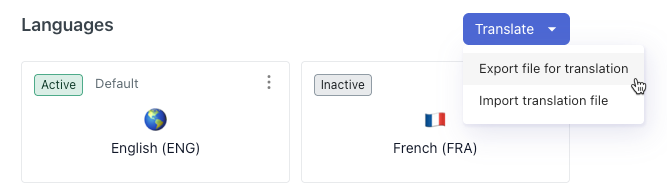
The Export window appears.
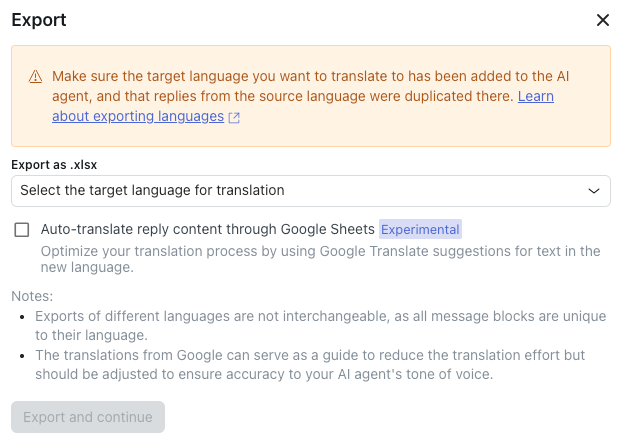
- In Export as .xlsx, select the language you want to create
translations for.For example, if you've already created replies in English and now you want to add German translations, you would select German.Note: Exports of different languages are not interchangeable, as all message blocks are unique to their language.
- (Optional) Select Auto-translate reply content through Google
Sheets if you want machine-generated translations to be
automatically populated in the spreadsheet for you.
The Google translations serve as a starting point to reduce your translation effort. However, you should still review the translations and adjust them as necessary to match your AI agent's tone of voice.
- (Optional) If you selected the auto-translate option, in Language of reply content before translation, select the source language.
- Click Export and continue.
The file is exported and automatically downloaded to your computer.
Exporting a single reply for translation
You can export the content for a single reply from within the dialogue builder.
To export a single reply
- In AI agents - Advanced, select the advanced AI agent you want to work with.
- Open the dialogue in the source language for the reply you want to translate.
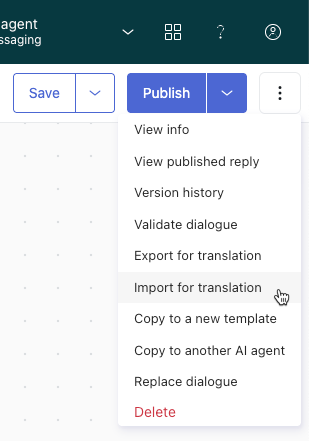
- In the upper-right, click the options menu (
 ) and select Export for
translation.
) and select Export for
translation.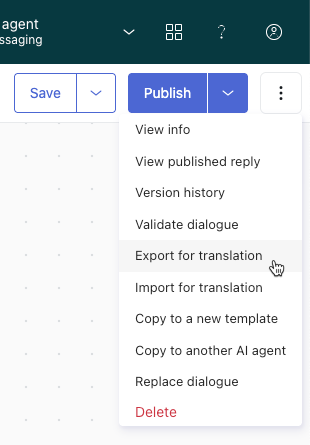
The Export window appears.
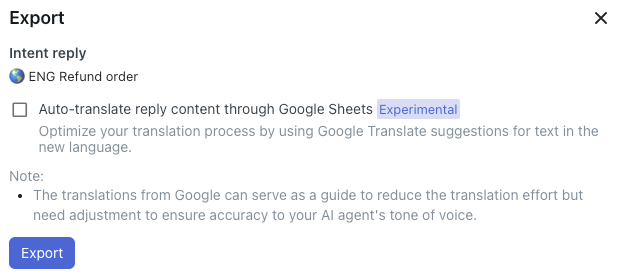
- (Optional) Select Auto-translate reply content through Google
Sheets if you want machine-generated translations to be
automatically populated in the spreadsheet for you.
The Google translations serve as a starting point to reduce your translation effort. However, you should still review the translations and adjust them as necessary to match your AI agent's tone of voice.
- (Optional) If you selected the auto-translate option, in Language of reply content before translation, select the source language.
- Click Export.
The file is exported and automatically downloaded to your computer.
Entering translations in the exported translation spreadsheet
After you export the translation spreadsheet, you need to enter your translations. You might do this yourself, work with a third-party translation service, or use the automated Google Sheets translation functionality.
To enter translations in the spreadsheet
- Open the spreadsheet you exported above.
Each reply is listed on a separate tab, which includes the following columns:
-
Type (DO NOT EDIT): The type of message. Possible values
include:
- nodeText: Includes AI agent messages, escalation text, team availability text, and carousel content.
- nodeAnswerOption: Includes customer message button text options.
- intentName: Includes use case names. Don't translate this type.
- replyDescription: Includes descriptions of replies.
- ID (DO NOT EDIT): A combination of the reply ID and the block ID, if applicable. This is how the system is able to import the translated content into the correct place.
- Language ID (DO NOT EDIT): The ID of the source language used for the translation.
- Original string (DO NOT EDIT): The text that exists for the source language.
- Translated string: Where you enter the translated content for the new language.
-
Type (DO NOT EDIT): The type of message. Possible values
include:
- In the Translated string field, enter your translations.Note: Don't enter translations for rows with a type of intentName.Tip: As you work through your translations, color-coding your spreadsheet can make the process easier. For example, you can highlight the rows that still need to be translated to make tracking progress simple.
- Save the spreadsheet.
Importing the filled-in translation spreadsheet
After you've finished entering translations in the exported spreadsheet, it's ready to be imported. Importing the spreadsheet populates the replies in the new supported language with your translated content.
You can import translations for all replies, or for a single reply.
Importing translations for all replies
You can import translated content for all replies from the language settings page in an advanced AI agent.
To import translations for all replies
- In AI agents - Advanced, select the advanced AI agent you want to work with.
- Click Settings in the sidebar, then select AI agent settings.
- Select the Languages tab.
- Click Translate and select Import translation file.
The Import window appears.
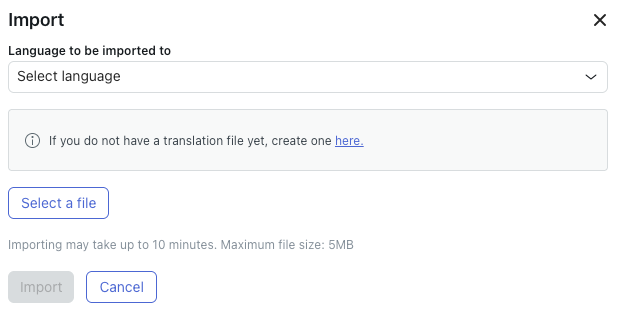
- In Language to be imported to, select the language you created translations for.
- Click Select a file and select the file you entered your translations in.
- Click Import.
The import process can take up to 10 minutes.
Importing translations for a single reply
You can import translated content for a single reply from within the dialogue builder.
To import translations for a single reply
- In AI agents - Advanced, select the advanced AI agent you want to work with.
- Open the dialogue in the target language for the reply you want to translate.
- In the upper-right, click the options menu () and select Import for
translation.
The Import translations window appears.
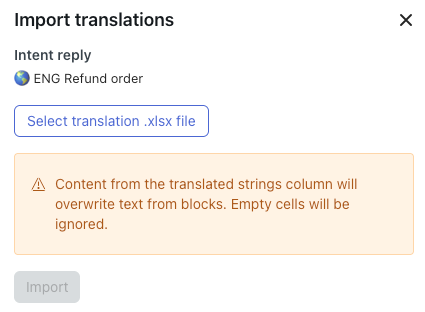
- Click Select translation .xlsx file and select the file you entered your translations in.
- Click Import.
The translated content is imported into the dialogue.