Summary: ◀▼
You can edit intelligent triage topics to match your team’s language, restore a topic name to its default, or activate and deactivate topics as your needs change. Edited topic names and descriptions still support ticket classification, but triggers and tags do not update automatically. Deactivated topics stop being detected on new tickets, though they still appear in Explore reports.
As part of intelligent triage, your account includes a prebuilt list of default topics specific to your industry that classify what a ticket is about. To address your specific business needs, you might also create custom topics or accept suggestions for new topics that intelligent triage provides based on your ticket data.
You can edit and manage default topics, suggested topics, and any custom topics you create by editing names and descriptions. Intents can also be deactivated and activated as needed.
To manage any duplicate or overlapping topics, see Resolving topic conflicts.
This article contains the following topics:
- Editing topic names and descriptions
- Restoring a topic name to its default value
- Deactivating or activating a topic
Related articles:
Editing topic names and descriptions
You can edit an topic’s name or description in any supported language to better reflect the terminology preferred by your organization.
Intelligent triage continues to detect tickets based on the original topic, even after its been edited. Because of this, you should only edit topic names to make small adjustments to an topic’s terminology, not updates that completely change the meaning of an topic.
- Existing ticket triggers that use the Ticket > Intent condition will not be updated with the new name.
- Any associated tags using the topic's name will not be updated with the new name.
To edit a topic name or description
-
In Admin Center, click
 AI in the sidebar, then select Intelligent triage > Topic.
- (Optional) Change the language by clicking Actions > View language and select the language you want to edit topics for.
- Browse, search, or filter the list to find the topic you want to edit.
- Hover your mouse over the topic, click the options (
 ) icon, and select Edit topic.
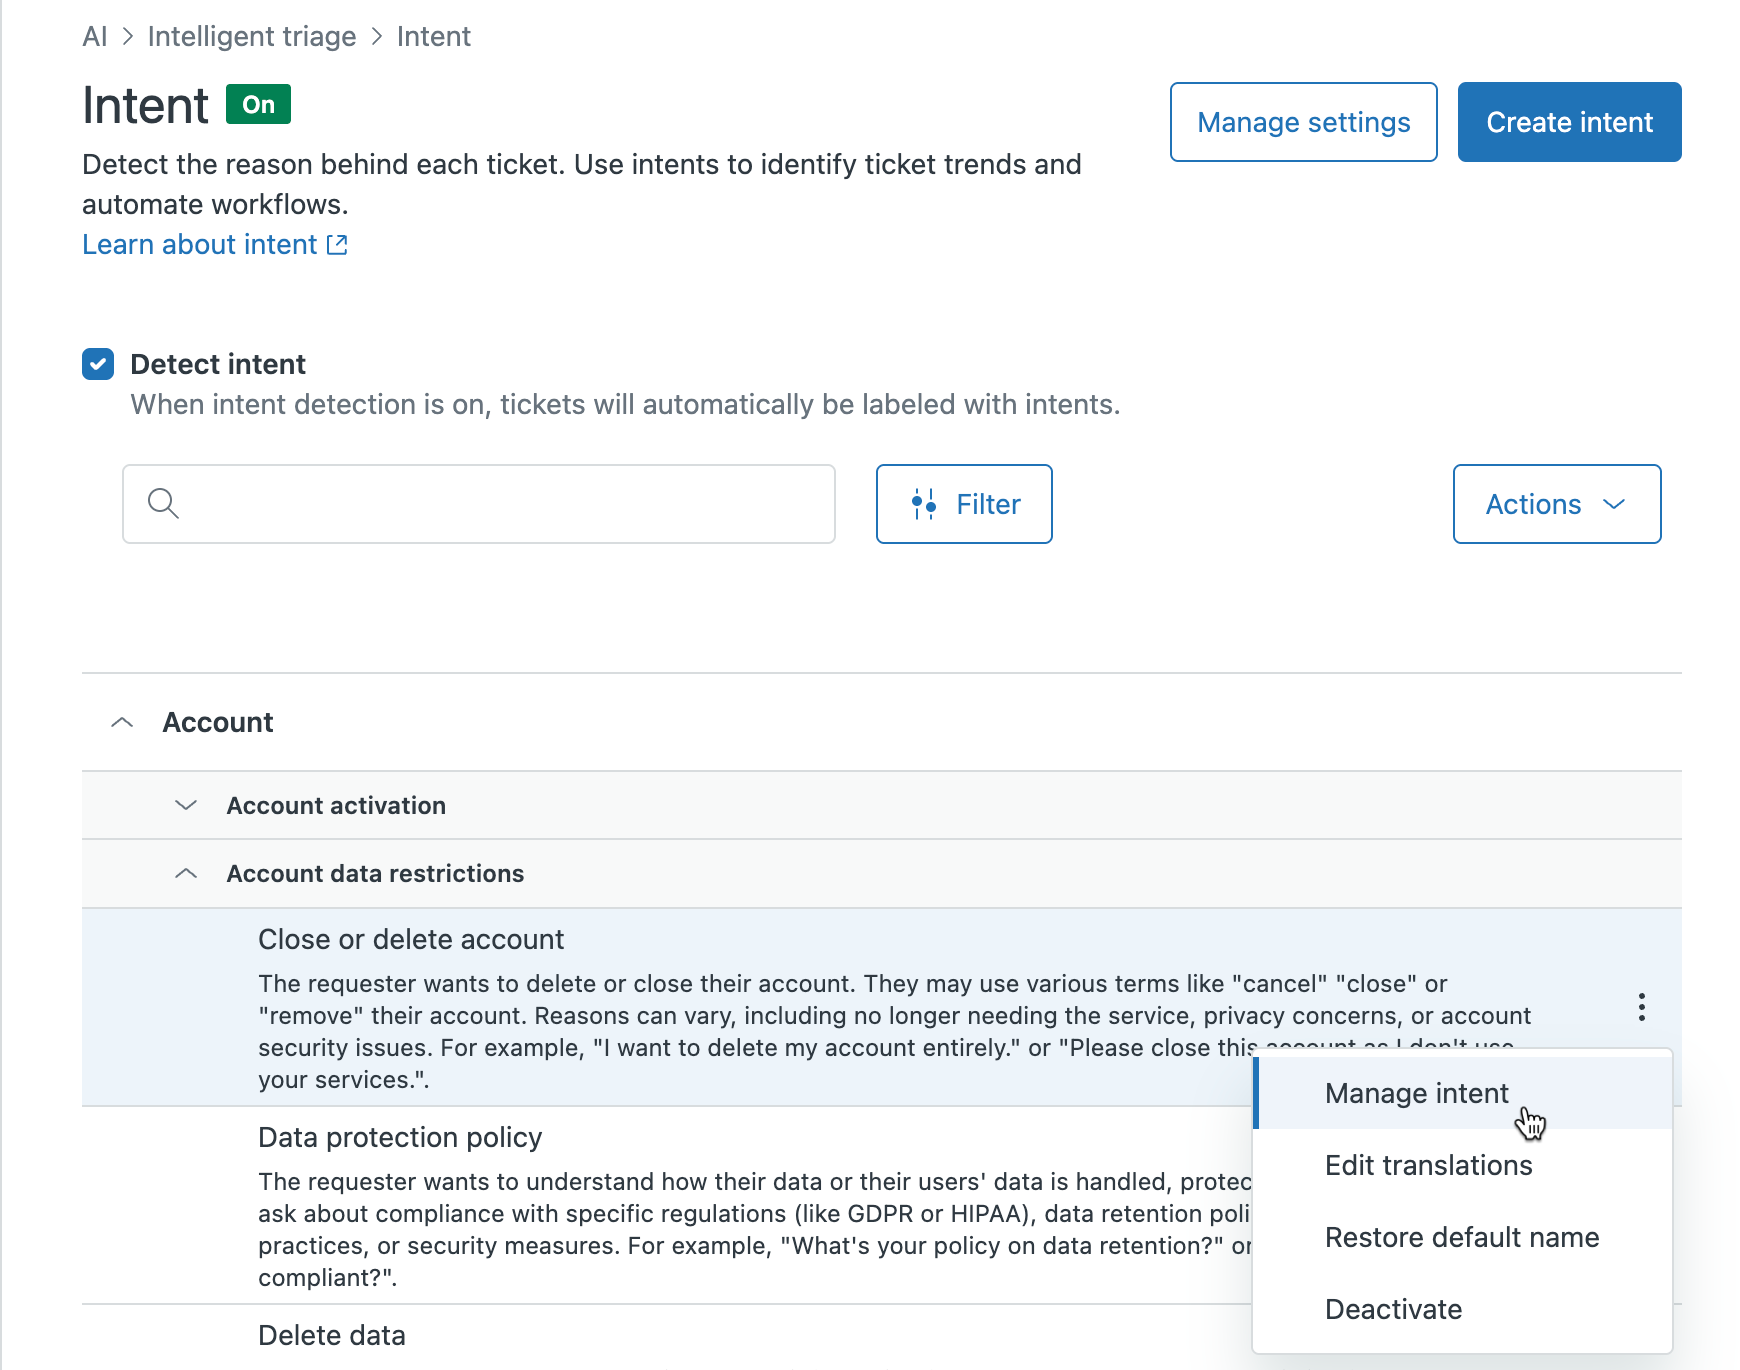
- Update the Name or Description of the topic.

- Click Save changes.
The topic is automatically marked with an Edited label to let you know that it has been changed from its original name.
Restoring a topic name to its default value
If needed, you can also restore an edited topic's name to its default name.
To restore a topic name to its default value
-
In Admin Center, click
AI in the sidebar, then select Intelligent triage > Topic.
- Browse, search, or filter to find the topic you want to restore.
- Click the options () icon, and select Restore default
name.
Deactivating or activating a topic
You can deactivate both default and custom topics that aren’t useful for your account anymore.
Zendesk may deactivate topic values if the topic is no longer available or relevant to your account. Intent values may also be reactivated by Zendesk if they become relevant again.
You can reactivate topics values as needed but can’t reactivate topics that were deactivated by Zendesk.
When you or Zendesk deactivates a topic, the topic will no longer be detected in new tickets. If you have any business rules, such as triggers, view or automations, that are based on the deactivated topic, they will stop working. Deactivated topics still appear in Explore reports.
To deactivate or activate a topic
- In Admin Center, click
AI in the sidebar, then select Intelligent triage > Topic.
- Browse or search to find the topic you want to deactivate or activate.
- Hover your mouse over the topic, click the options () icon, and select Activate or
Deactivate.
- Confirm your selection by clicking either Activate topic or Deactivate
topic.

The topic’s status is updated in the topic list. Deactivated topics are labeled “Inactive”. If you’ve activated a topic, the “Inactive” label is removed.
