With unified navigation, Zendesk provides a consistent, unified interface for navigating across products and features. This interface significantly reduces the learning curve required for admins and agents to use Zendesk products. It also helps agents and admins with their day-to-day work by providing a consistent, simplified approach to navigation.
This article contains these sections:
Key features of unified navigation
This section describes key features of unified navigation that work across products, including the product menu, side navigation, search fields, and more.
The following video gives you an overview of unified navigation.
Introducing Zendesk's unified navigation[3:15]
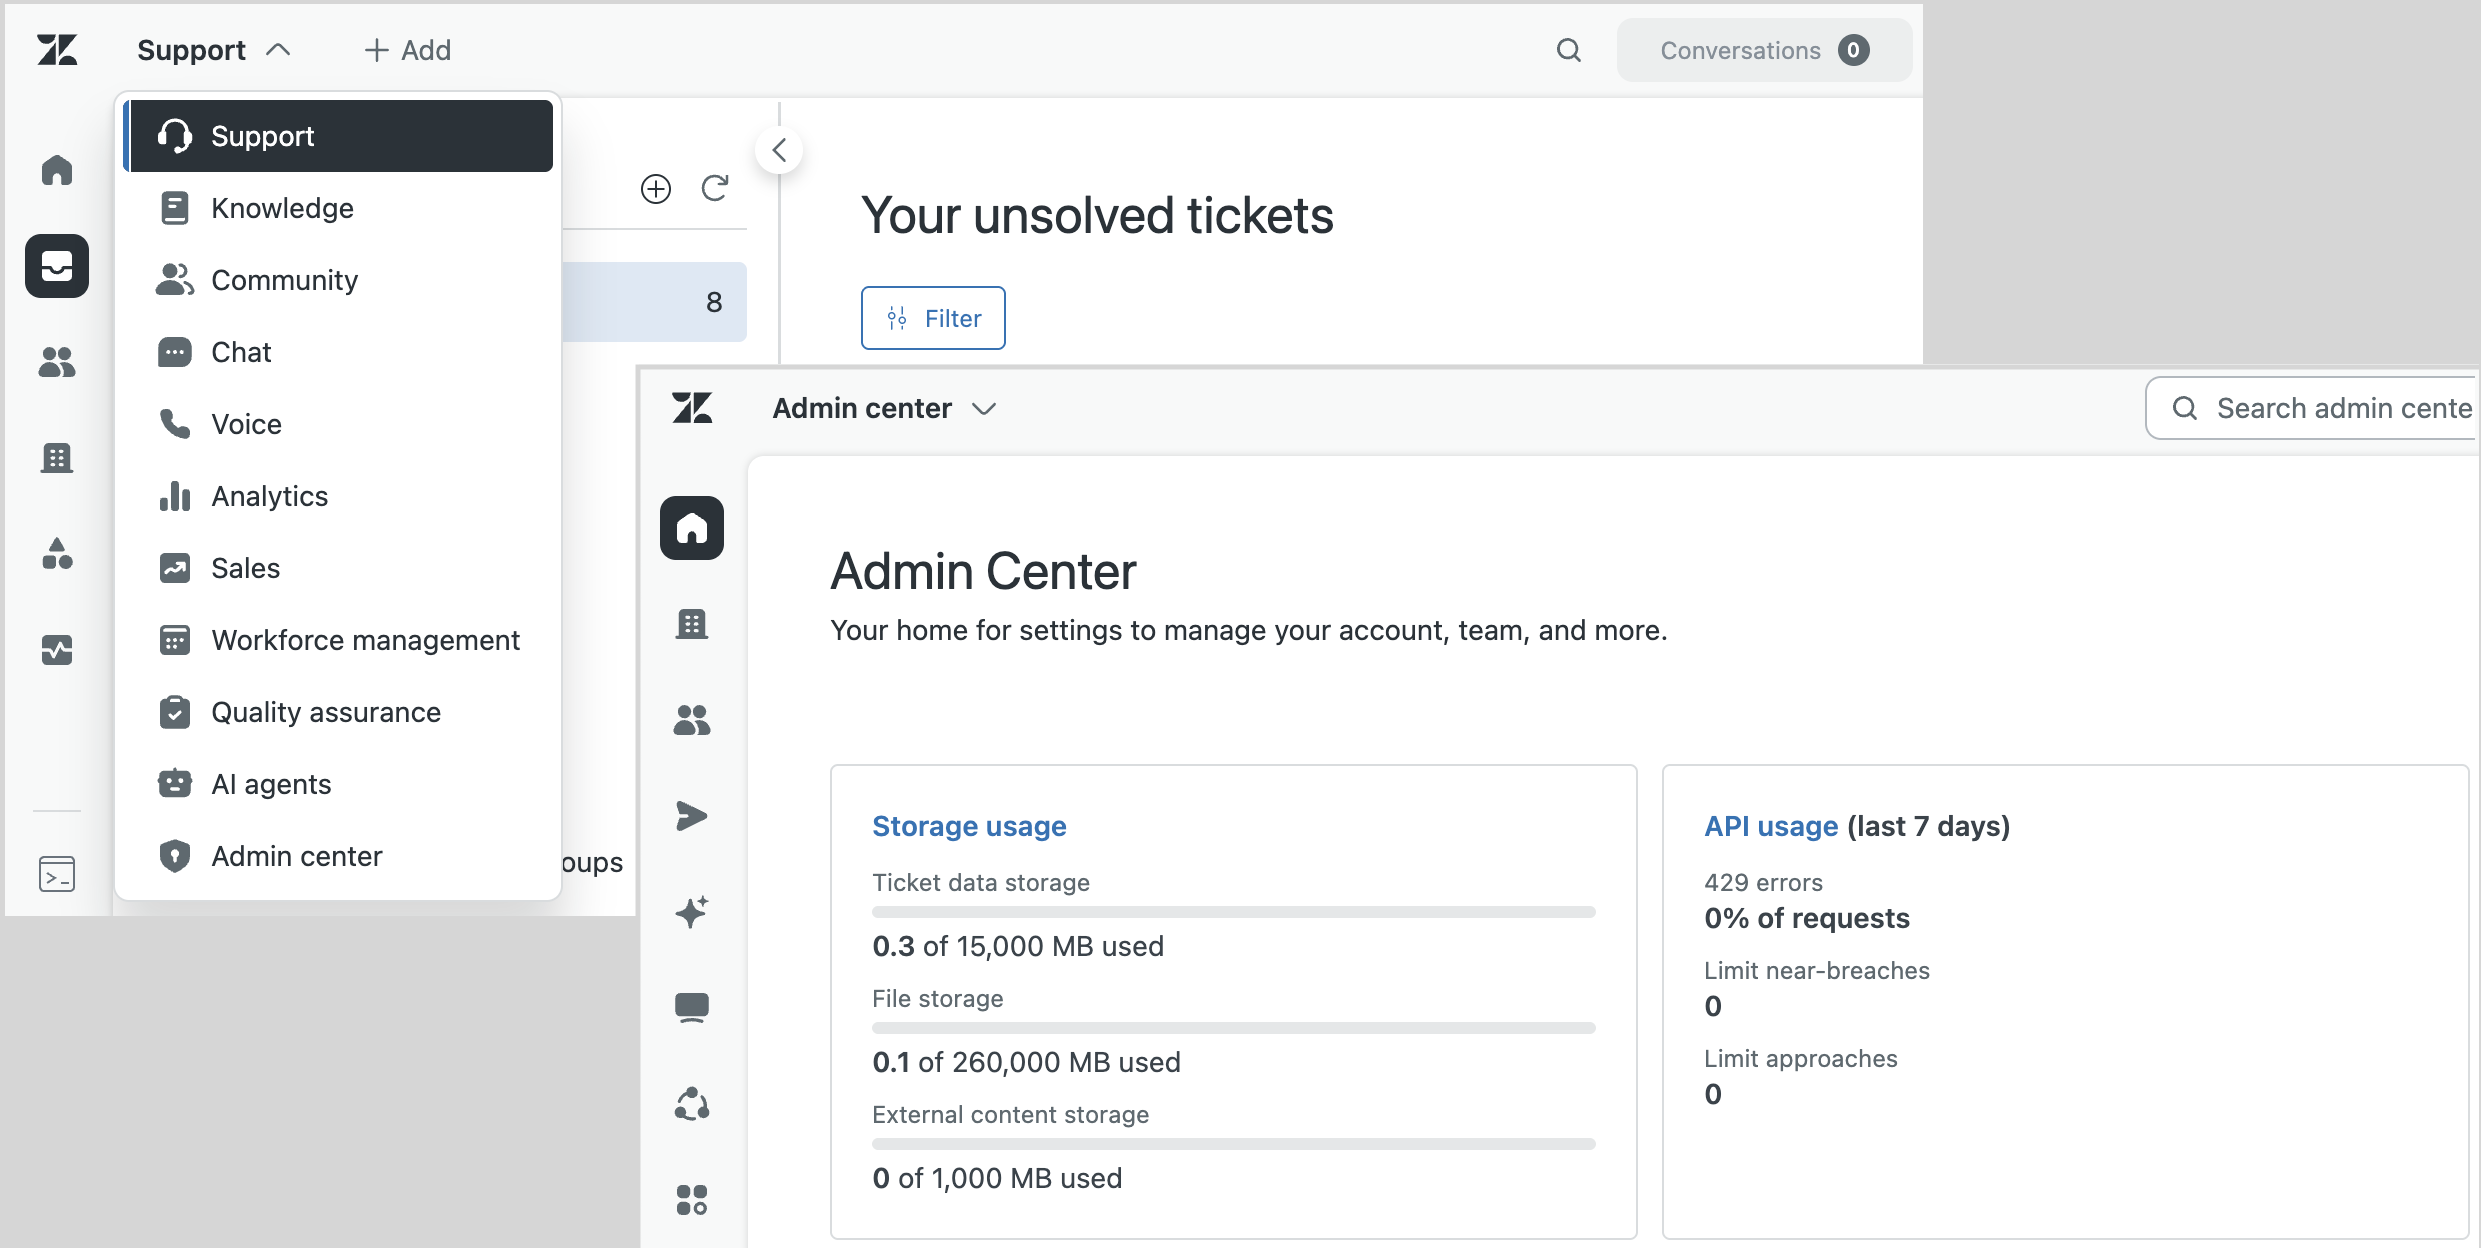
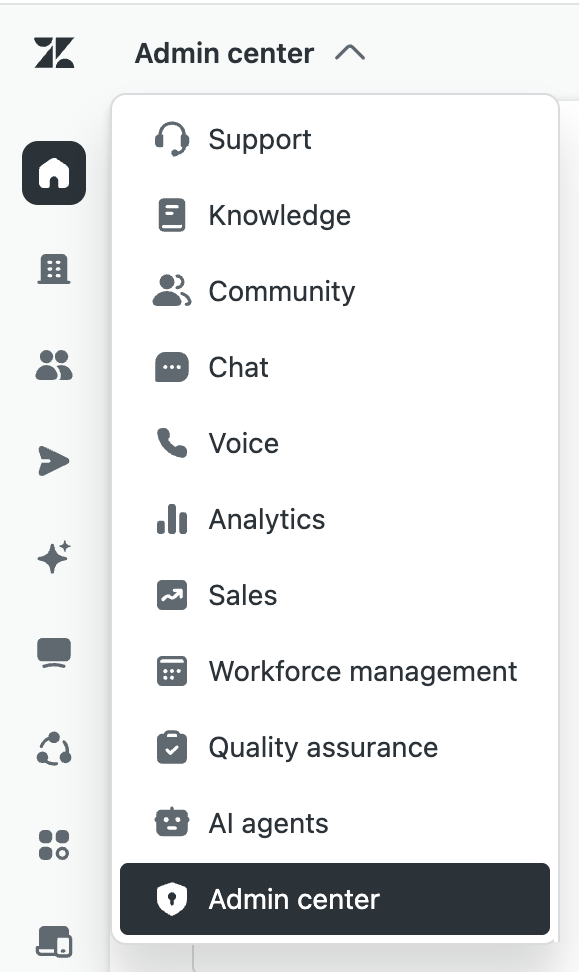
Using the product menu
To switch among products, the product menu appears in the same location within each Zendesk product. It’s located next to the side navigation panel within each product, making it easy to reach. See Switching among Zendesk products.
Using side navigation
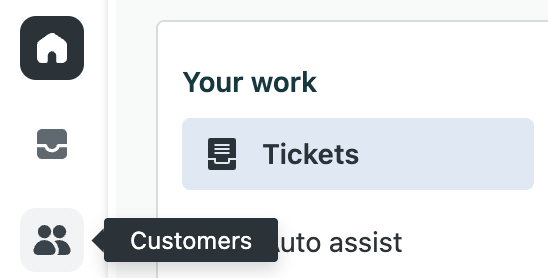
Navigation within each product is controlled by a side navigation panel that appears in a consistent location across products. The navigation panel includes icons you can click to quickly open specific areas of the product. This topic includes examples for side navigation in Support, but similar navigation options are available in other Zendesk products.
To navigate within a product
- Click an icon in the side navigation to switch between different
areas of the product.
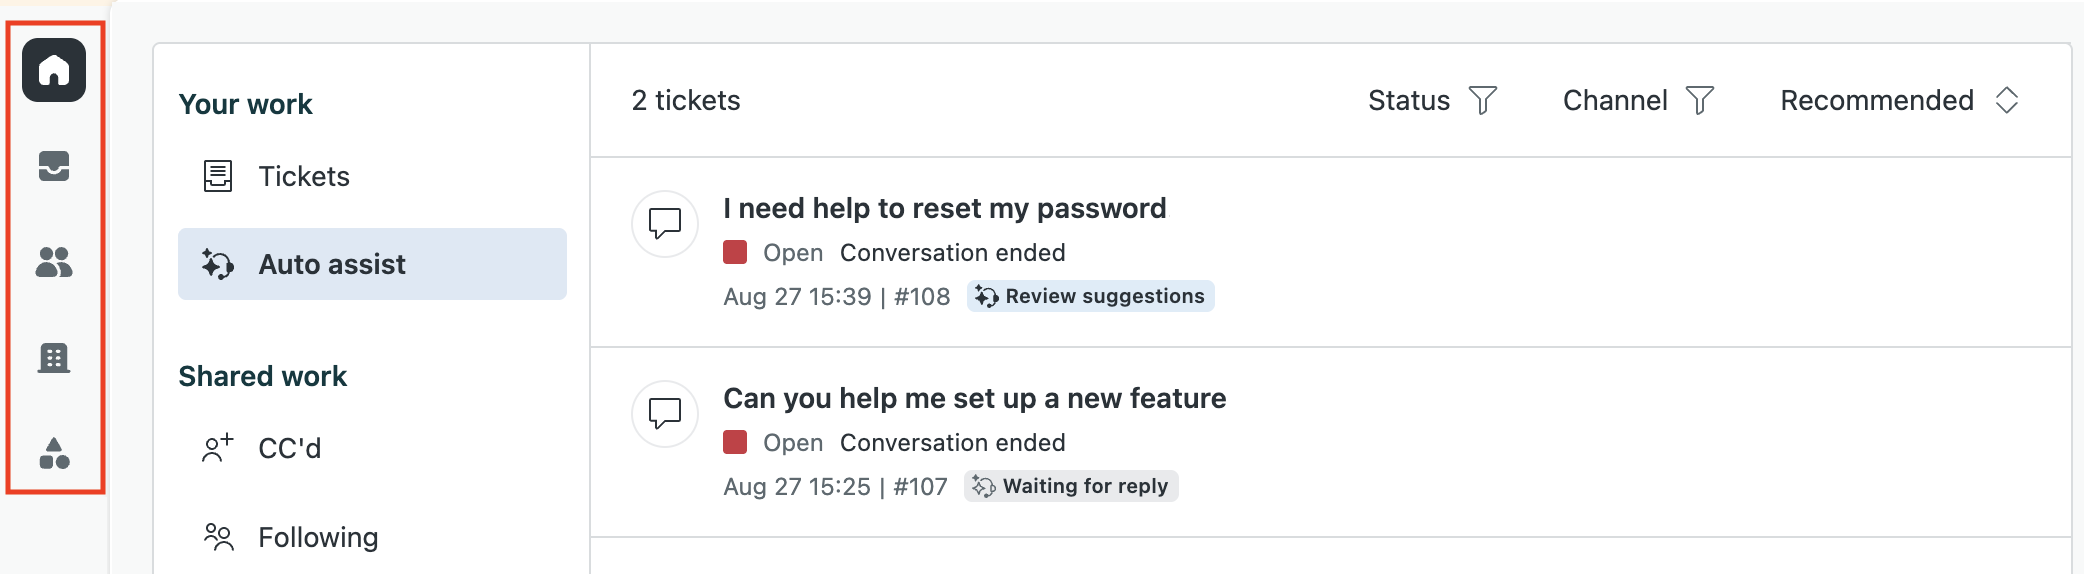
By default Support has side navigation icons for Agent Home, Views, Customers, Organizations, and Custom Objects Records. You may see additional icons depending on what features and add-ons are installed. The Reporting icon and the Admin icon have been removed. Instead, you access analytics and Admin Center exclusively through the product menu.
Each navigation icon includes a tooltip to help guide you.
- To see the tooltip, hover your mouse over the icon.
For a list of the default navigation icons in each product, see Unified navigation icons.
Using search fields
Where applicable, the Search field appears in a consistent location at the top of the page for each product that includes search. You don’t need to hunt for it.


To search within a product
- Enter a search term in the Search field.
As you type, matches for your search term appear below the search field.
- Select a match to complete the search, or press Return.
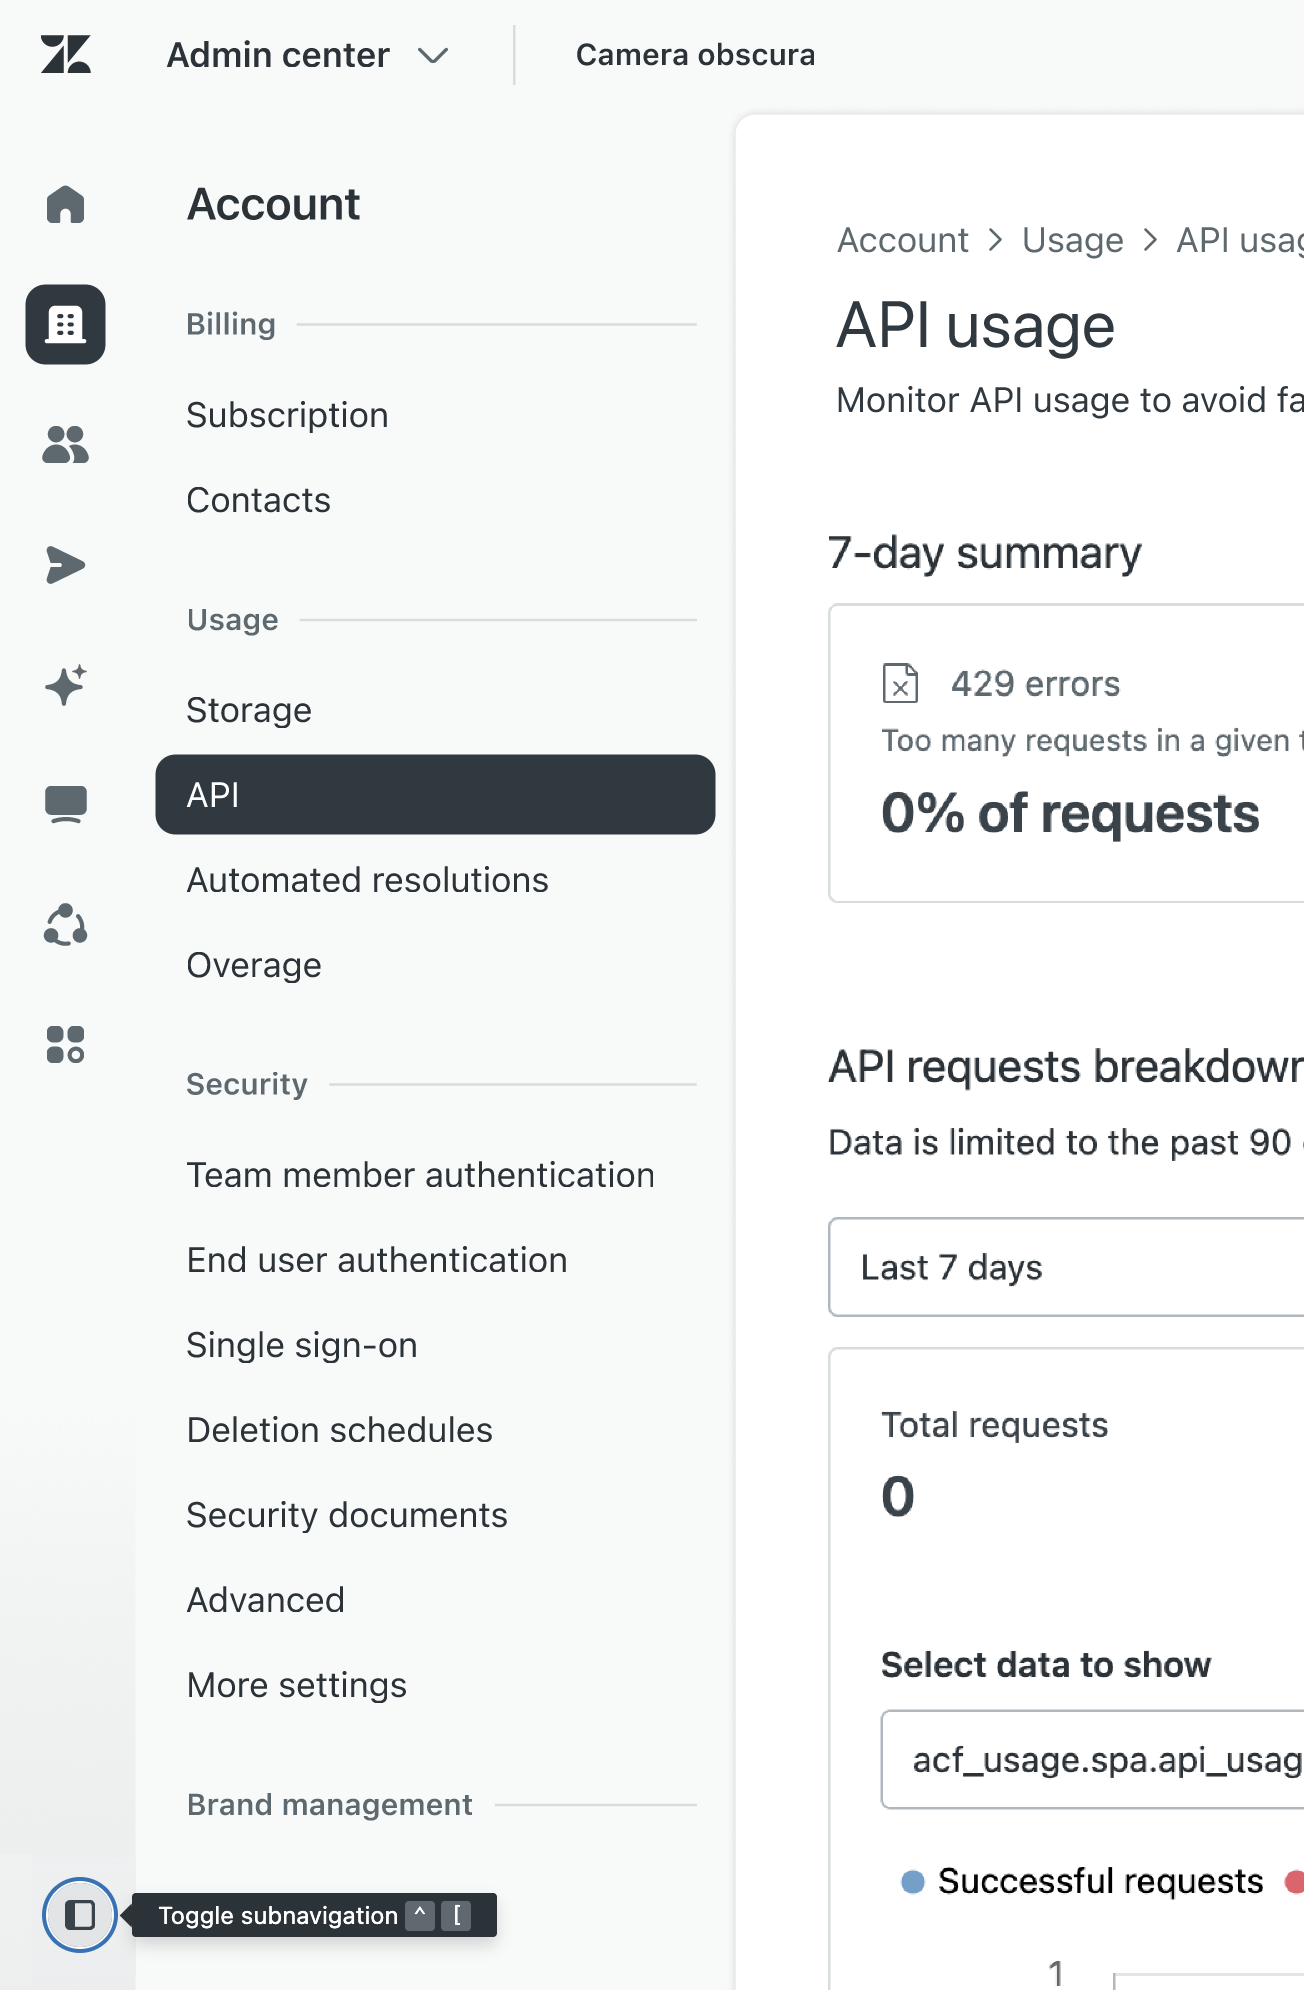
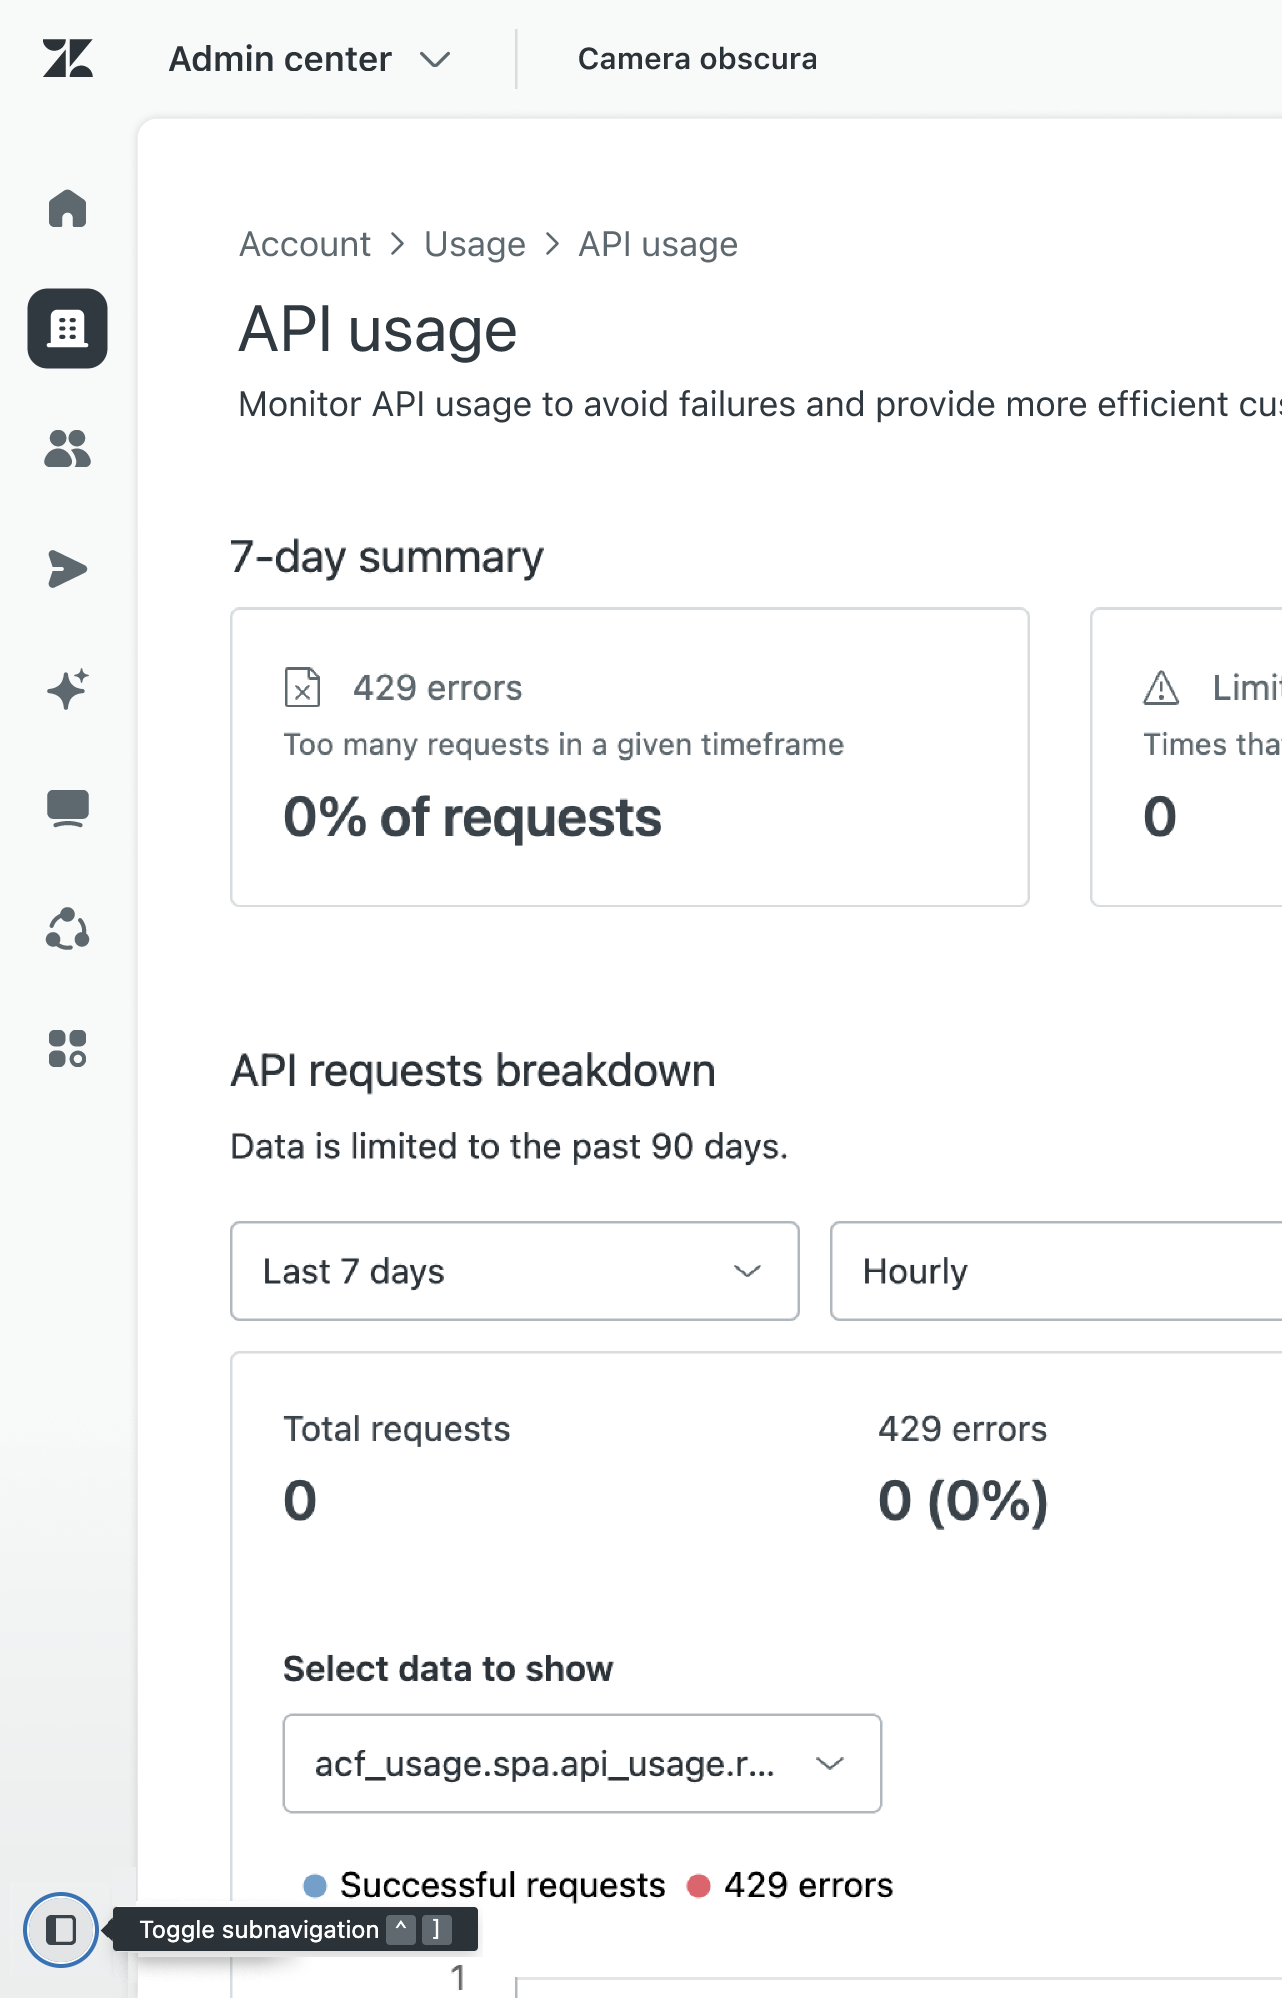
Showing and hiding sidebar navigation
Admin Center includes show and hide controls at the bottom of the navigation panel, giving you more room if needed to do your work.
To show or hide sidebar navigation
- Click the sidebar icon (
 ) at the bottom of the navigation
panel to show or hide second-level navigation controls.
) at the bottom of the navigation
panel to show or hide second-level navigation controls. - You can also use keyboard shortcuts to show and hide the sidebar
navigation. Display the tooltip next to the sidebar icon () for details.
| Expanded navigation | Collapsed navigation |
|---|---|
 |
 |
Unified framework for user profiles
While still maintaining product-specific details, user profiles have the same look and feel across products, making them easy to reference and use.
Navigation badges
To highlight new features and other changes, unified navigation includes badges to tag pages with special features and options in your account. You’ll see badges for New features, early access program (EAP) releases, and Trial options.
![]()
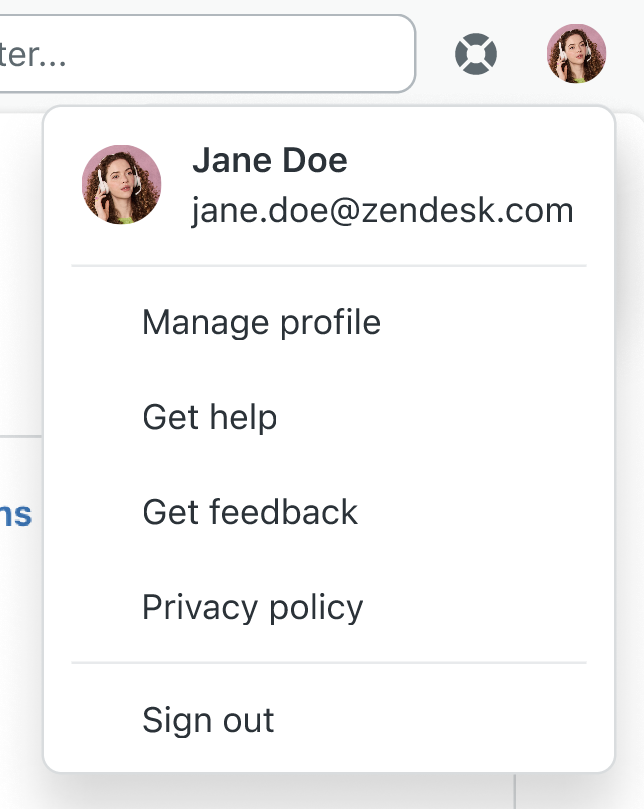
Getting help
Admin Center and Support include access to resources that help you set up your Zendesk account and learn about Zendesk features, so you can start serving your customers faster.
- To get help, click the help icon (
 ) at the top of the page.
 A list of setup instructions appears. You can use help to:
- View step-by-step setup guides with tutorial videos.
- Find links to articles, community posts, and training courses.
- Search articles in the Zendesk help center.
Note: Customers with access to admin copilot can click the admin copilot icon ( ) instead of the traditional
help panel icon () to get help.
) instead of the traditional
help panel icon () to get help.
Unified navigation icons
These tables show the default unified navigation icons for Zendesk
products and include the tooltip associated with each icon. Icons are
unified to represent similar functions across products, making it easier to
quickly recognize navigation points. For example, the people icon (![]() ) and the settings icon (
) and the settings icon (![]() ).
).
![]()
![]()
Navigation features in Support
In addition to the unified top-level navigation across products, Support also includes navigation features that make it easier for your agents to manage ticket conversations. See below for details.
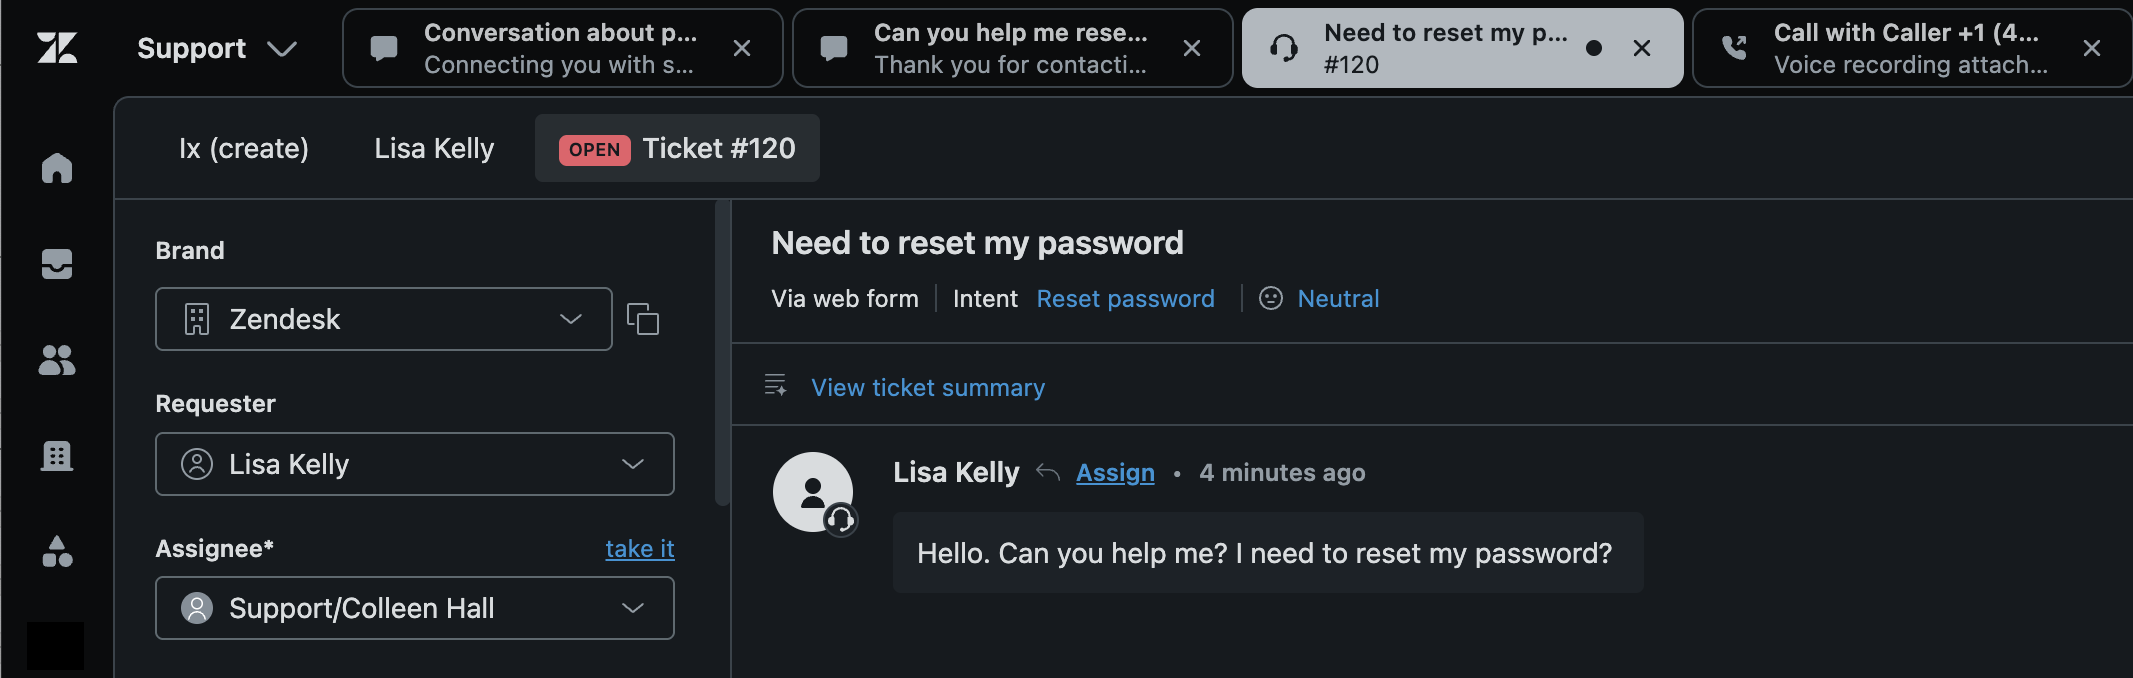
Highlighted ticket tabs
Agents often work on multiple tickets at the same time. Support highlights the ticket you’re currently working on so it’s easier to see.
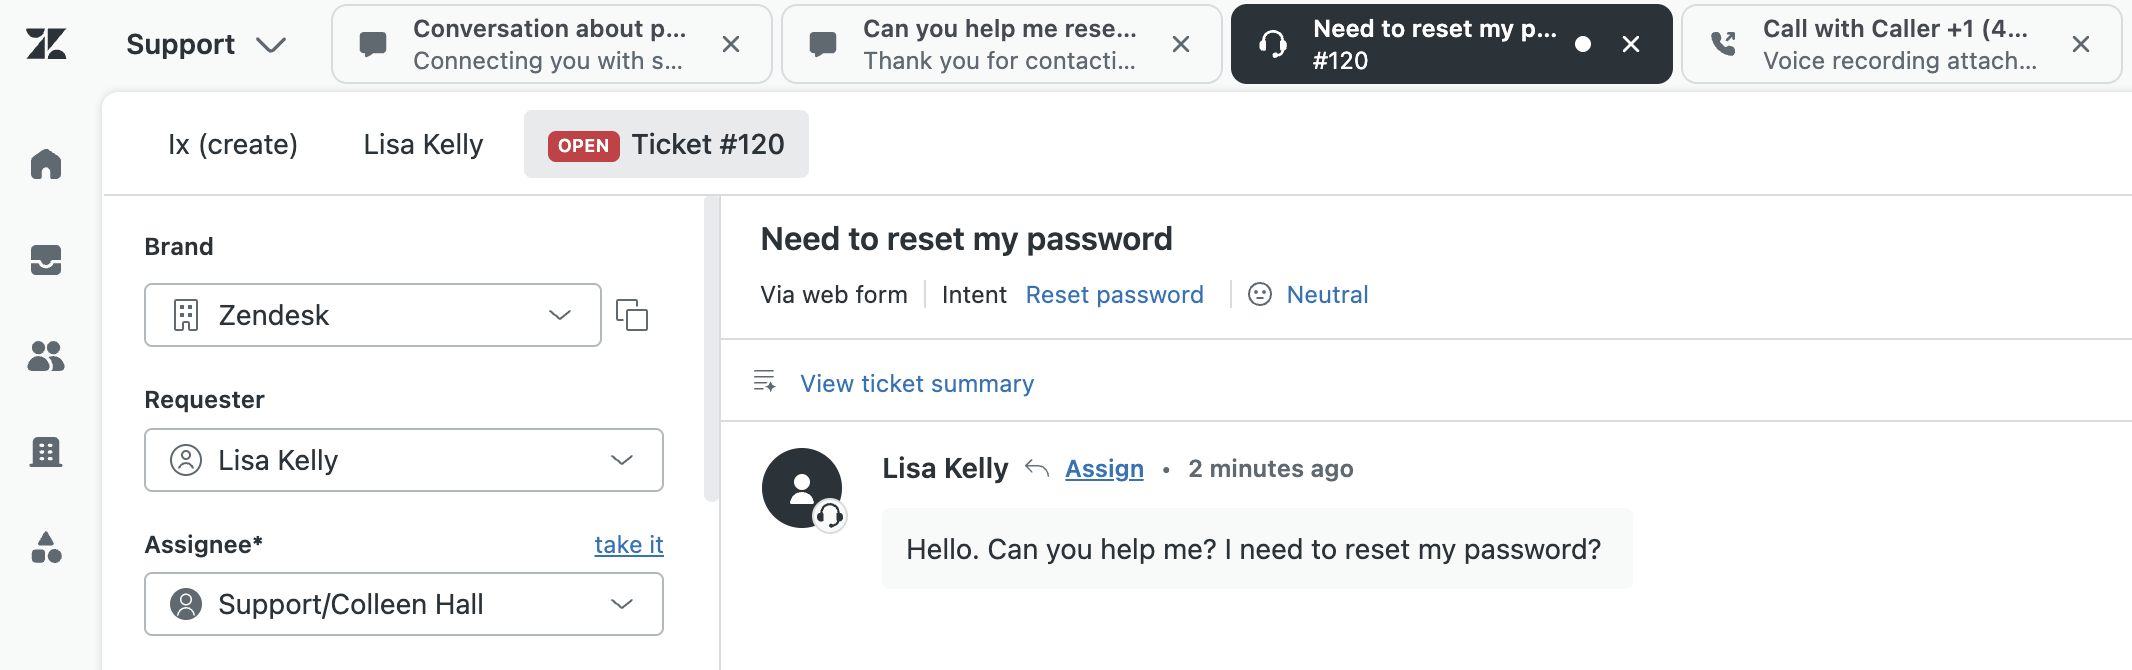
Highlighting works for both light and dark mode in the ticket interface.
Reordering ticket tabs
To help you manage conversations in the ticket interface, you can reorder the ticket tabs using drag-and-drop. For example, you might want to move ticket tabs from important customers to the left so you can easily access and respond to them.
To reorder ticket tabs
- Click the tab you want to move.
- Hold down the mouse button and drag the tab across the top ticket bar to a new location in the tab order.
- Release the mouse button.
- You can continue to drag-and-drop the tabs until they are in the order you’d like.
Viewing ticket overflow
When you have a large number of tickets open that don’t fit across the top ticket bar, you’ll see new ticket tabs open in an overflow options menu. You can use this menu to access open tickets or perform other tasks. By adding open ticket tabs into the options menu, it prevents the width of the ticket tabs from compressing and making the tabs unreadable. Tickets in the overflow menu can be moved to any tab position using drag-and-drop as well
To view the ticket tab overflow
- Click the options menu icon (
 ) in the top bar.
 A list of additional tabs you have open appears.
Use this menu to select tickets or other types of tabs you have open. For example, end-user profiles.
In addition to the overflow menu, to help save room at the top of the
ticket interface, the Support label in the product menu changes to a
simple headphone icon (![]() ) when you have a lot of tabs open.
) when you have a lot of tabs open.
| Support label (full) | Support label (collapsed) |
|---|---|
 |
 |
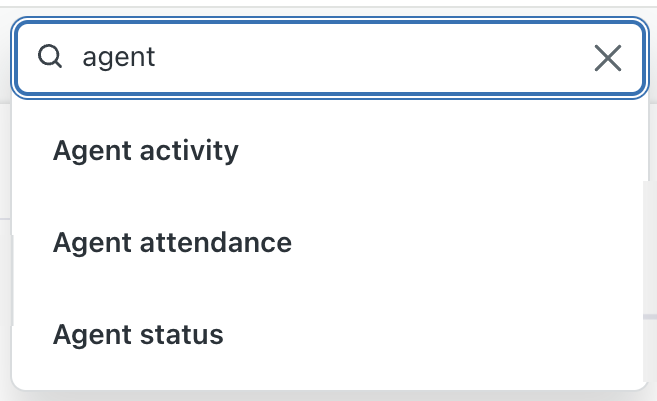
Navigation features in Workforce management
In addition to the unified top-level navigation across products, Workforce management (WFM) also includes changes to the navigation and sub-navigation menus to make it easier for admins to manage their WFM accounts.
| Unified navigation menu | Sub-navigation menu | Menu locations before unified navigation |
| Monitoring | Agent activity | Agent folder > Agent activity |
| Agent status | Agent folder > Agent status | |
| Agent attendance | Agent folder > Agent attendance | |
| Performance boards | Agent folder > Performance boards | |
| Dashboards | Home > Dashboards | |
| Reporting | Reports | Reports > Reports |
| Forecasting | Active forecast | Forecast > Active forecast |
| Forecast scenarios | Forecast > Forecast scenarios | |
| Forecast vs Actuals (EAP) | Agent folder > Forecast vs actual (EAP) | |
| Scheduling | Schedule | Schedule > Schedule |
| Unassigned shifts | Schedule > Unassigned shifts management | |
| Time offs | Schedule > Time off management | |
| Shift trades | Schedule > Shift trades management | |
| People | Team members | Settings > User management |
| Teams | Settings > Organization structure > Teams | |
| Roles and permissions | Settings > Roles and permissions | |
| Settings | Workstreams | Settings > Organization structure > Workstreams |
| General tasks | No change | |
| Agent statuses mapping | This option replaces "General tasks" when unified agent status synchronization is turned on. | |
| Locations | Settings > Organization structure > Locations | |
| Time off reasons | Settings > Organization structure > Time off reasons | |
| Extension tracking | No change | |
| Automations | No change | |
| Audit logs | Name change only. From "Audit log" to "Audit logs" | |
| Account settings | No change |
Unified navigation limitations
The following are some limitations for unified navigation across products. Zendesk is working to fix these issues in future releases.
- Not all products have unified navigation. Unified navigation for Chat, HyperArc, and Zendesk for Contact Center will be available at a later date.
- When you activate or deactivate unified navigation, it can take up to 24 hours for the unified navigation menus in Quality assurance and AI agents to turn on or off.