Recent searches
No recent searches
How to migrate tickets and related data from CSV to Zendesk

Posted Feb 06, 2019
Importing data from another help desk to Zendesk while preserving support history is crucial for maintaining strong customer relationships and delivering exceptional service.
This article outlines the steps required to seamlessly import your tickets, including agents, contacts, and other associated data, from a CSV file into Zendesk using the Help Desk Migration service.
Help Desk Migration, an official Zendesk solution partner, provides data migration services tailored to companies seeking to transition their data from one help desk platform to another. It's worth noting that there is a fee associated with using the automatic data migration tool. However, you have the opportunity to test it free of charge before making a payment decision.
Benefits of migrating data with Help Desk Migration
- Your data relationships are meticulously preserved throughout the migration process.
- Enjoy the flexibility of importing an unlimited number of rows in a single file, accommodating even large datasets.
- You can import all critical data, ensuring that nothing important is left behind during the migration.
- Take advantage of the ability to conduct unlimited migration tests to ensure a seamless transition.
Help desk records you can import
You can import the following help desk records using this data migration tool:
- Groups
- Agents
- Companies
- Contacts
- Tickets
- Ticket comments
- Tags
- Attachments
- Standard and custom fields
You also can import Knowledge Base objects, including:
- Categories
- Folders
- Articles
Preparing data for migration
To begin the migration process, it's essential to organize your data into the following CSV files:
- CSV file with tickets
- CSV file with ticket comments
- CSV file with Knowledge Base.
When preparing your files, please ensure they meet the following requirements:
- File Size Limit: Keep each file under 1GB in size.
- Include Headings: All files must have a heading row that clearly labels each column.
- Delimiter: Use a comma as the delimiter to separate data within each row.
- Attachments: For importing attachments, provide publicly accessible URLs for each attachment. If there are multiple attachments, separate them with commas.
- Multiline Data: When dealing with data that spans multiple lines, such as Tags, Attachments, or Description, enclose the content within double-quote marks (").
- Language Flexibility: The information you're importing can be in any language, but the headers in the heading row must be in English.
- Capitalized Headers: Begin all headers with a capital letter for consistency and readability.
How to prepare the Tickets.csv file
Here are the data fields and their requirements for the ticket CSV file:
- TicketId - required
- Subject - required
- Tags - optional
- DepartmentName - optional
- Description - required
- Type - required
- Status - required
- Priority - required
- AgentEmail - required
- AgentName - required
- ContactEmail - required
- ContactName - required
- ContactPhone - optional
- CompanyName - optional
- CreatedTime - required. (Use YYYY-MM-DD HH:MM:SS time format)
- UpdatedTime - required. (Use YYYY-MM-DD HH:MM:SS time format)
- ClosedTime - optional. (Use YYYY-MM-DD HH:MM:SS time format)
- Attachments - optional.
Importing custom fields
To migrate custom fields, use the appropriate tags in the column header. Here are the tags you should use for different custom field types:
- _select - dropdown (e.g., product_select)
- _date - time (e.g., due_date)
- _integer - number (e.g., TicketInternal_integer)
For other types of custom fields, you can use the _textArea tag.
Importing ticket comments
To import ticket comments along with your tickets, you need to provide them in a separate file, which should contain the following headers:
- CommentId - optional
- TicketId - required
- AuthorEmail - required
- Public - required (Use 0 for private and 1 for public comments)
- Body - required
- CreatedTime - required (Use YYYY-MM-DD HH:MM:SS time format)
- Attachments - optional
For tickets with multiple comments, arrange them as follows in the file:

How to import files to Zendesk
When your files are prepared and ready, follow these steps to begin your import on the Help Desk Migration website:
1. Go to the Help Desk Migration website. Select CSV as your data source. Upload your CSV files. You can choose from the following options:
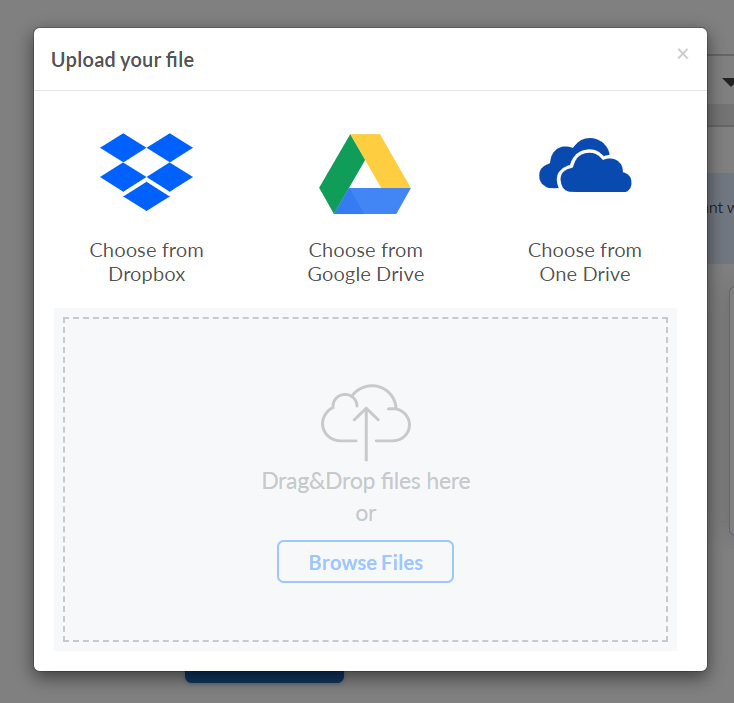
If you do not need to import knowledge base articles, you can utilize our sample data to pass the source step. Later, when you are selecting which data you want to migrate, simply skip the option for Knowledge Base objects. This allows you to focus solely on the data that is relevant to your migration process.
2. Select "Zendesk" as the target platform and provide your company's Zendesk URL.
3. Choose which specific records you want to migrate and proceed to map the ticket fields, ensuring that your data aligns correctly with Zendesk's structure.
4. Initiate the Free Demo Migration to obtain a quote and verify that the data has been migrated accurately. You can review the migration results by following the guidelines provided in the linked guide.
5. If you are satisfied with the results of the Free Demo Migration, you can proceed to complete your data transfer.
Once you've initiated the migration of all records, you can simply close the tab and continue with your daily activities. We will send you an email notification once the entire import process is completed.
However, please exercise patience during this period and refrain from merging, editing, or deleting any of the imported data. Making changes to the data during this phase can result in irreversible alterations. It's advisable to wait for the migration to conclude before safely working with your data in the new platform.
If you have any questions or require assistance throughout the migration process, please do not hesitate to contact Help Desk Migration. Our team is here to provide support and address any inquiries you may have. Your successful data migration is our priority, and we are ready to assist you every step of the way.
2
14 comments
Brett Bowser
Thanks for sharing :)
1
Migration Support
Always welcome, Brett!
Hope we can help somebody!
1
Chris Stewart
Can this also work for updating existing tickets?
If I have a list of Zendesk tickets, can I do an upload to edit/update them? To add an additional tag without creating new tickets or changing anything else?
0
Brett Bowser
Hey Chris,
I can't speak for the integration mentioned above, however, it may be worth taking a look at our Managing Tickets in Bulk article which I've linked for you.
You can also use the Zendesk API to update your tickets in bulk and add the appropriate tag.
Hopefully, the developer of the integration can comment back here and point you in the right direction using their app.
Cheers!
0
Migration Support
@..., @... is right!
The best way to add tags to existing tickets is to use Bulk feature in Zendesk.
1
Chris Stewart
Hi Brett & HDM,
Thanks for the response.
Unfortunately the Bulk feature isn't really an option as I cannot create a view to filter for only the tickets I need to edit at this time since they don't have any other identifiers at this time - hence the tags I need to add to separate them out.
We're looking at an automated solution in the future, but was hoping for an easy win in the interim. Thanks anyways!
0
Darlene Magaway
Hi there! Thank you for this post. I just would like to know if this has 100% accuracy as to moving the data (tickets, contact info,)?
Our company is looking into moving back to zendesk and we are seeking help on how to move our data from the previous CS platform to zen faster and more accurate. Any help suggestions and repsonses aside from this article is highly appreciated. Thanks ahead!
0
Grão Direto
How can I link a ticket with a specific group via *.csv import ?
0
Jason Schaeffer
Thanks for reaching out! You may want to look into a 3rd party app to accomplish this. I will link an example for this below:
https://www.zendesk.com/apps/support/275742/import-app/
This is not native to Zendesk but they may be able to customize to your needs when executing the Import.
I hope that helps!
-1
anitha
How can we ensure the SLAs of the open tickets we are migrating from JIRA to Zendesk are also migrated? If it cannot be migrated, what is the work around ?
0
Natalia Tomchyshyn
Unfortunatelly, SLA settings can't be imported. You can set them up only for the new tickets. For the old ones, there's an option to migrate information about SLA timing into private comments. Thus, this workaround depends on the tools used for SLA in Jira.
0
Usman Khan
Can we import CSV without help-desk?
1
Natalia Tomchyshyn
Yes, Usman, you need to upload your CSV files into Migration Wizard and connect the desired help desk, ITSM, or ticketing system. Then the process as a default migration -- adjust fields, run a Demo to test, check results and set a Full Migration.
1
Michael Tomar
Another option to integrate Zendesk with CSV is Skyvia. It is freemium and has a very intuitive UI.
-1