Summary: ◀▼
You can manage calls from the call console or ticket call controls by putting customers on hold, muting yourself, using live call transcripts, transferring calls, adding participants for conference calls, and ending calls. The article also explains how to use queue and agent availability to route calls, handle warm transfers, and complete wrap-up after the call.
Agents can manage calls from the call console or the call controls in the ticket. The call console is particularly useful when you navigate away from your ticket in the Agent Workspace as it has a link to the ticket as well as the call controls. You can place the call on hold, mute your microphone, access the live call transcript, transfer the call, make a conference call, and end the call.
This article contains the following topics:
- Putting calls on hold or muting yourself
- Using live transcripts
- Transferring calls
- Making a conference call
- Ending a call
Related articles:
Putting calls on hold or muting yourself
During a call, you might want to put the customer on hold or mute your microphone so you can consult with colleagues or search for information.
To put a call on hold
-
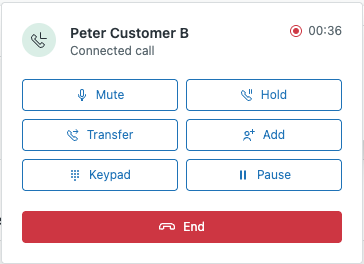
In the call console, click the Hold icon (
 );
);
- Or, in the ticket call controls, click the place on hold icon ().
When you put a customer on hold, they are moved into a system-controlled flow where they cannot hear you and you cannot hear the customer. Depending on your configuration, the customer will hear: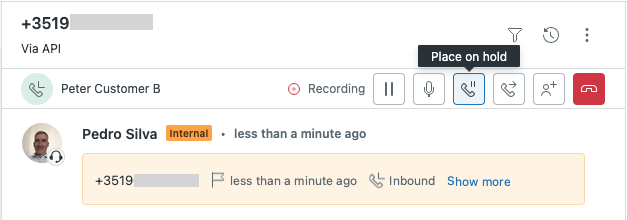
-
Custom Audio: Music or helpful tips relevant to their specific issue.
-
Information Loops: Periodic updates or reminders about required documents while they wait.
-
To mute yourself
-
In the call console, click the Mute icon (
 );
); -
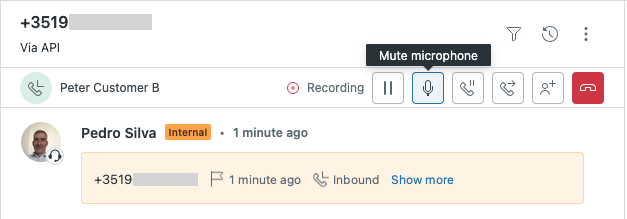
Or, in the ticket call controls click the mute microphone icon (
).
The customer hears nothing from your end, but you can still hear them.
Use this for short pauses where you need to listen for the customer to finish a task or to prevent them from hearing background noise while you look up info.
Using live transcripts
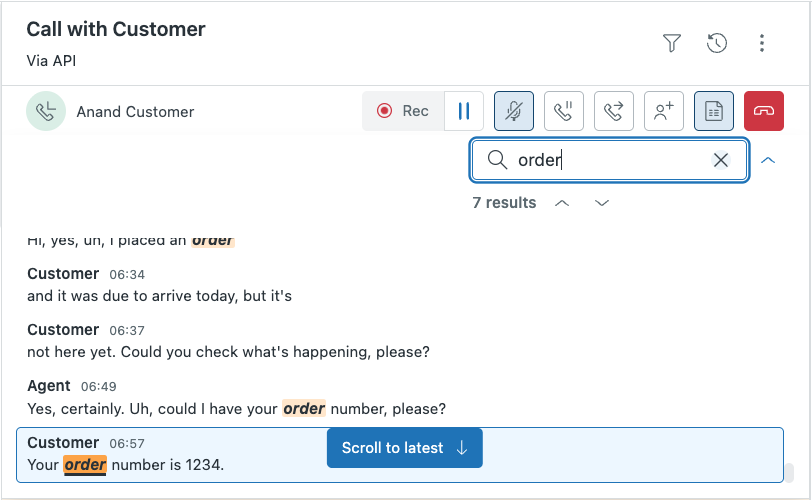
If your admin has turned on live call transcription, you have access to a real-time text version of a voice call while the conversation is in progress. The transcript shows speaker labels (Agent or Customer), timestamps from the start of the call, and automatically scrolls to show the most recent conversation.
You can use the transcript to review what has been said and search for details to check information during the call without interrupting the conversation.
To use live transcripts during an ongoing call
-
In the ticket call controls, click Show transcript (
 ).The transcript panel opens in the ticket, below the controls, showing the most recent part of the conversation and updates automatically as the conversation continues.Note: Show transcript is only available after someone speaks the first sentence.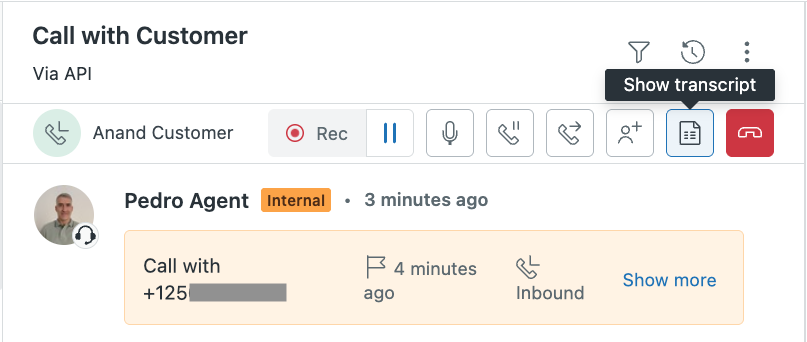
-
Click the expand icon (v) in the upper-right corner of the transcript panel to access the whole conversation.
The transcript auto-scrolls to show the latest conversation. - (Optional) Scroll up and down to review the whole conversation.
- (Optional) Click Scroll to latest at the bottom of the panel to access the current conversation.
-
To find a specific topic, search in the upper-right corner of the transcript panel and enter a keyword or phrase.
It's a case-insensitive search that supports partial matches. This allows you to jump to relevant parts of the conversation and check specific details. For example, information about an "account", "order" or "error message".
The transcript highlights all instances of the search term. If there are multiple matches, use the arrows to move between matches.
- Click Hide transcript () to close the
transcript panel.
Ending the call also closes the transcript panel.
Transferring calls
When you need to transfer a call, this will place the call on hold while the transfer occurs. Zendesk provides agent and queue availability to help you route calls efficiently and set accurate customer expectations.
To transfer a call
-
In the call console, click the Transfer icon (
 ) or, in the ticket
call controls, click the transfer call icon ().
) or, in the ticket
call controls, click the transfer call icon ().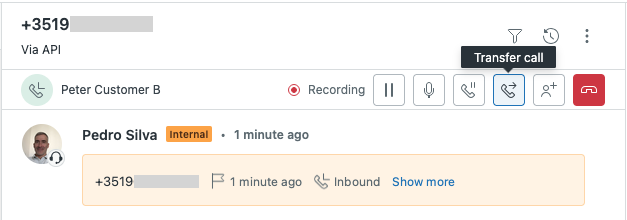
The customer can still hear you.
-
(Optional) Use the search box to find a specific agent, queue, or external number by name.
-
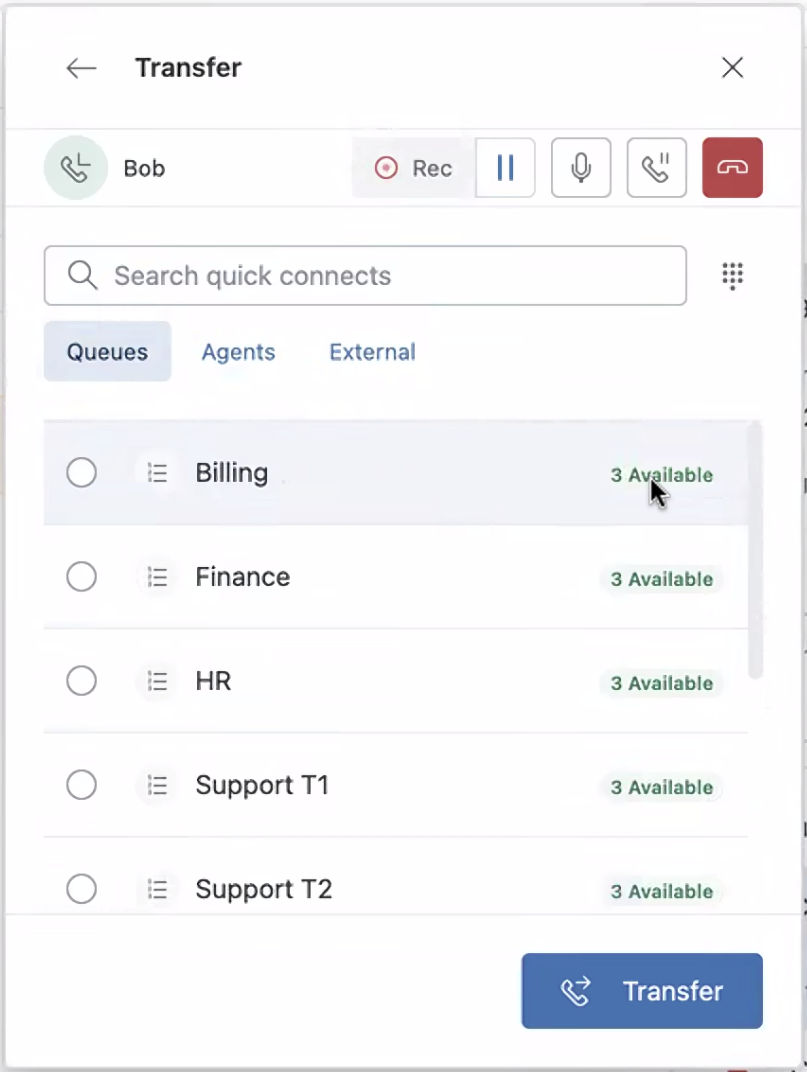
Review the status and availability information of queues and agents.
Use this information to set customer expectations about wait times.Tip: To refresh the status and availability information, start over the transfer.For queues, check the availability status and wait time:
-
Available (green): Shows the number of agents ready to take calls in this queue.
-
Est. wait <minutes>:<seconds> (orange): All agents are busy. Shows estimated wait time for the customer. For example, "Est. wait 01:43" means the customer would wait approximately 1 minute and 43 seconds before being transferred to an agent of that queue.
The estimated wait time is calculated based on the contact's position in queue, the rate at which contacts are being connected to agents or disconnecting, and a correction factor that improves accuracy over time.
-
Unavailable (grey): No agents are available in the queue.
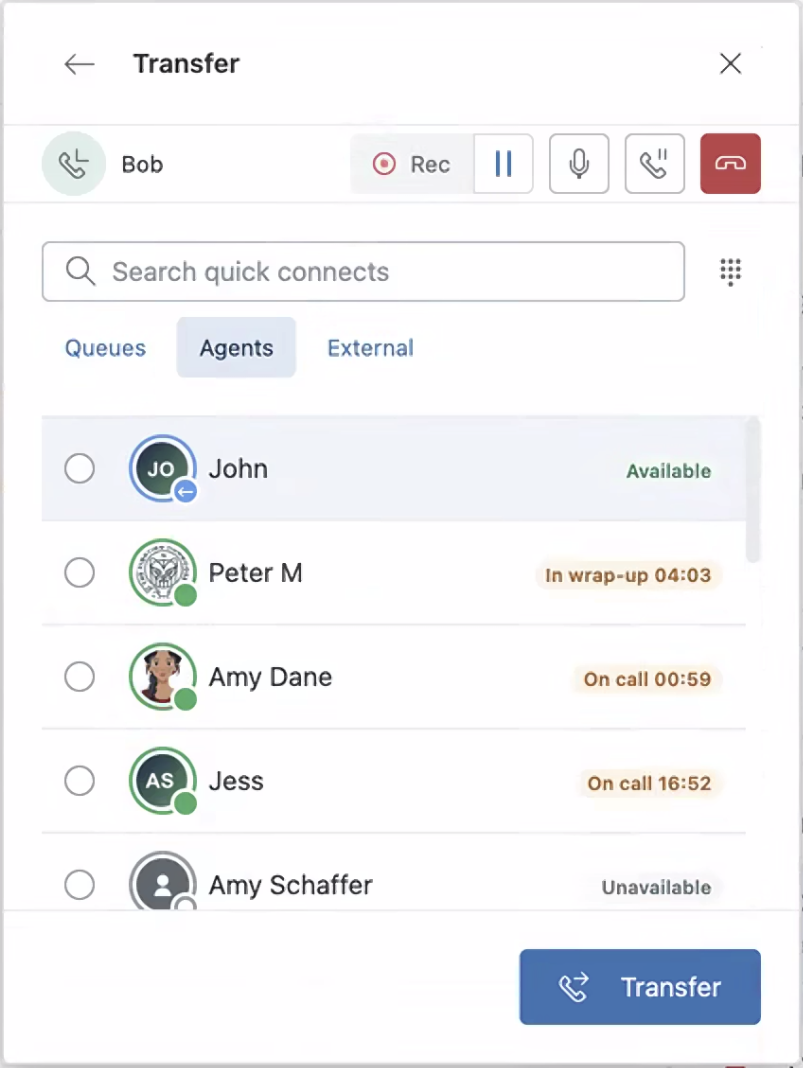
For agents, hover over each avatar to review their agent status, the standard statuses being: Online (green), Away (orange), Transfers only (blue), and Offline (grey).
The information next to each agent’s name is their Amazon Connect availability, to receive calls:
-
Available (green): Agent is online and can receive calls
-
On call <minutes>:<seconds> (orange): Agent is on a call. The timer shows call duration (for example, "On call 00:04" means 4 seconds into the call)
-
In wrap-up <minutes>:<seconds> (orange): Agent is in after-call work. The timer shows the remaining wrap-up time.
-
Unavailable (grey): Agent cannot take calls.
Note: If an agent is on a call, their status might be online because when an agent takes a call the system doesn’t change their status.For external numbers, no status information is displayed
-
-
Select the agent, queue, external contact or dial the contact using the number pad.
The options for transferring your call are as follows:
- Queues: A list of the call queues with available agent count, estimated wait time, or unavailable status.
- Agents: A list of agents with Zendesk status and Amazon Connect availability.
- External: A list of external telephone numbers configured as quick connects (without status information).
For Queues and Agents, results are automatically ordered by availability (from most to least available)
-
(Optional) If you decide not to proceed with the transfer or want to start over the transfer, click the close icon (X).
Alternatively, click outside the transfer window.
-
Click Transfer.
This will automatically put the customer on hold. For more information, see Putting calls on hold or muting yourself.
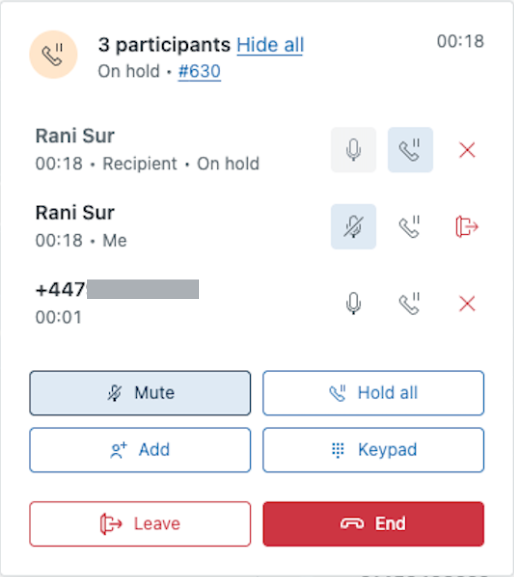
- (Optional) Do a warm transfer.
While the customer is on hold, you can speak with the new participant. If needed, you can also add other participants before you leave the call, see Making a conference call.
- (Optional) Click the hold icon () next to the customer
participant.
Before you leave the call you can also speak with the customer.
-
Click Leave or the leave icon (
 ) next to your name
to leave the call.
) next to your name
to leave the call.This will automatically put you in wrap-up mode and the customer will remain on the call with the other participants.
Making a conference call
You can add participants to an ongoing call.
To add participants to a call
-
In the call console, click Add or in the ticket controls click the add icon (
 ).
). -
Select the participant you want to add to the call or enter their number using the dial pad.
- Click Add participant.
After you add the first participant, the customer is automatically placed on hold.
- (Optional) Repeat steps 2 and 3, as necessary.
-
(Optional) Speak with the new participants before resuming the call with the customer.
-
Click the hold icon (
) to take the
customer off hold and resume the call.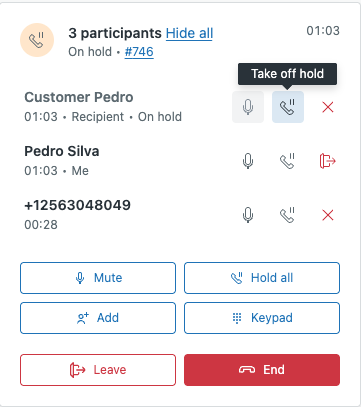
Ending a call
You can end a call manually by hanging up. If the customer you're talking to hangs up first, the call ends automatically.
To end a call
-
In the call console, click End or, in the ticket call controls, click the end icon (
 ).
).
-
Enter data on all required ticket fields and add notes to the ticket associated with the call.
-
Click Finish wrap-up to conclude the work.
If your agent settings have an after call work timeout, you can let that time run out to conclude the work.
If configured, copilot will run and add data such as AI summarization, intent and sentiment to the ticket.