Summary: ◀▼
You can view and download invoices, update your business or invoice address, and manage who receives invoices for your account. Only account owners and billing admins have access to these billing tasks. Adding invoice recipients doesn't require an agent seat, allowing you to ensure the right people, like your Finance team, get invoice copies each billing cycle.
Invoices for most Zendesk products are managed in Admin Center. This article describes how to use Admin Center to view and download invoices for your Zendesk account, change the invoice address, and add or remove invoice recipients. For more information on billing, see Billing FAQ and resources.
You must be the account owner or a billing admin to perform these tasks. If you are an administrator, agent, or another individual (for example, an accountant) without access to Zendesk invoices, ask the account owner or a billing admin for help. For example, the account owner can download an invoice and email it to you. The owner can also add you to the list of invoice recipients.
This article contains the following topics:
Viewing invoices
All account owners and billing admins can view and download invoices for their Zendesk account.
To view invoices
-
In Admin Center, click
 Account in the sidebar, then select Billing > Invoices.
An Invoices page appears with a list of your latest invoices.
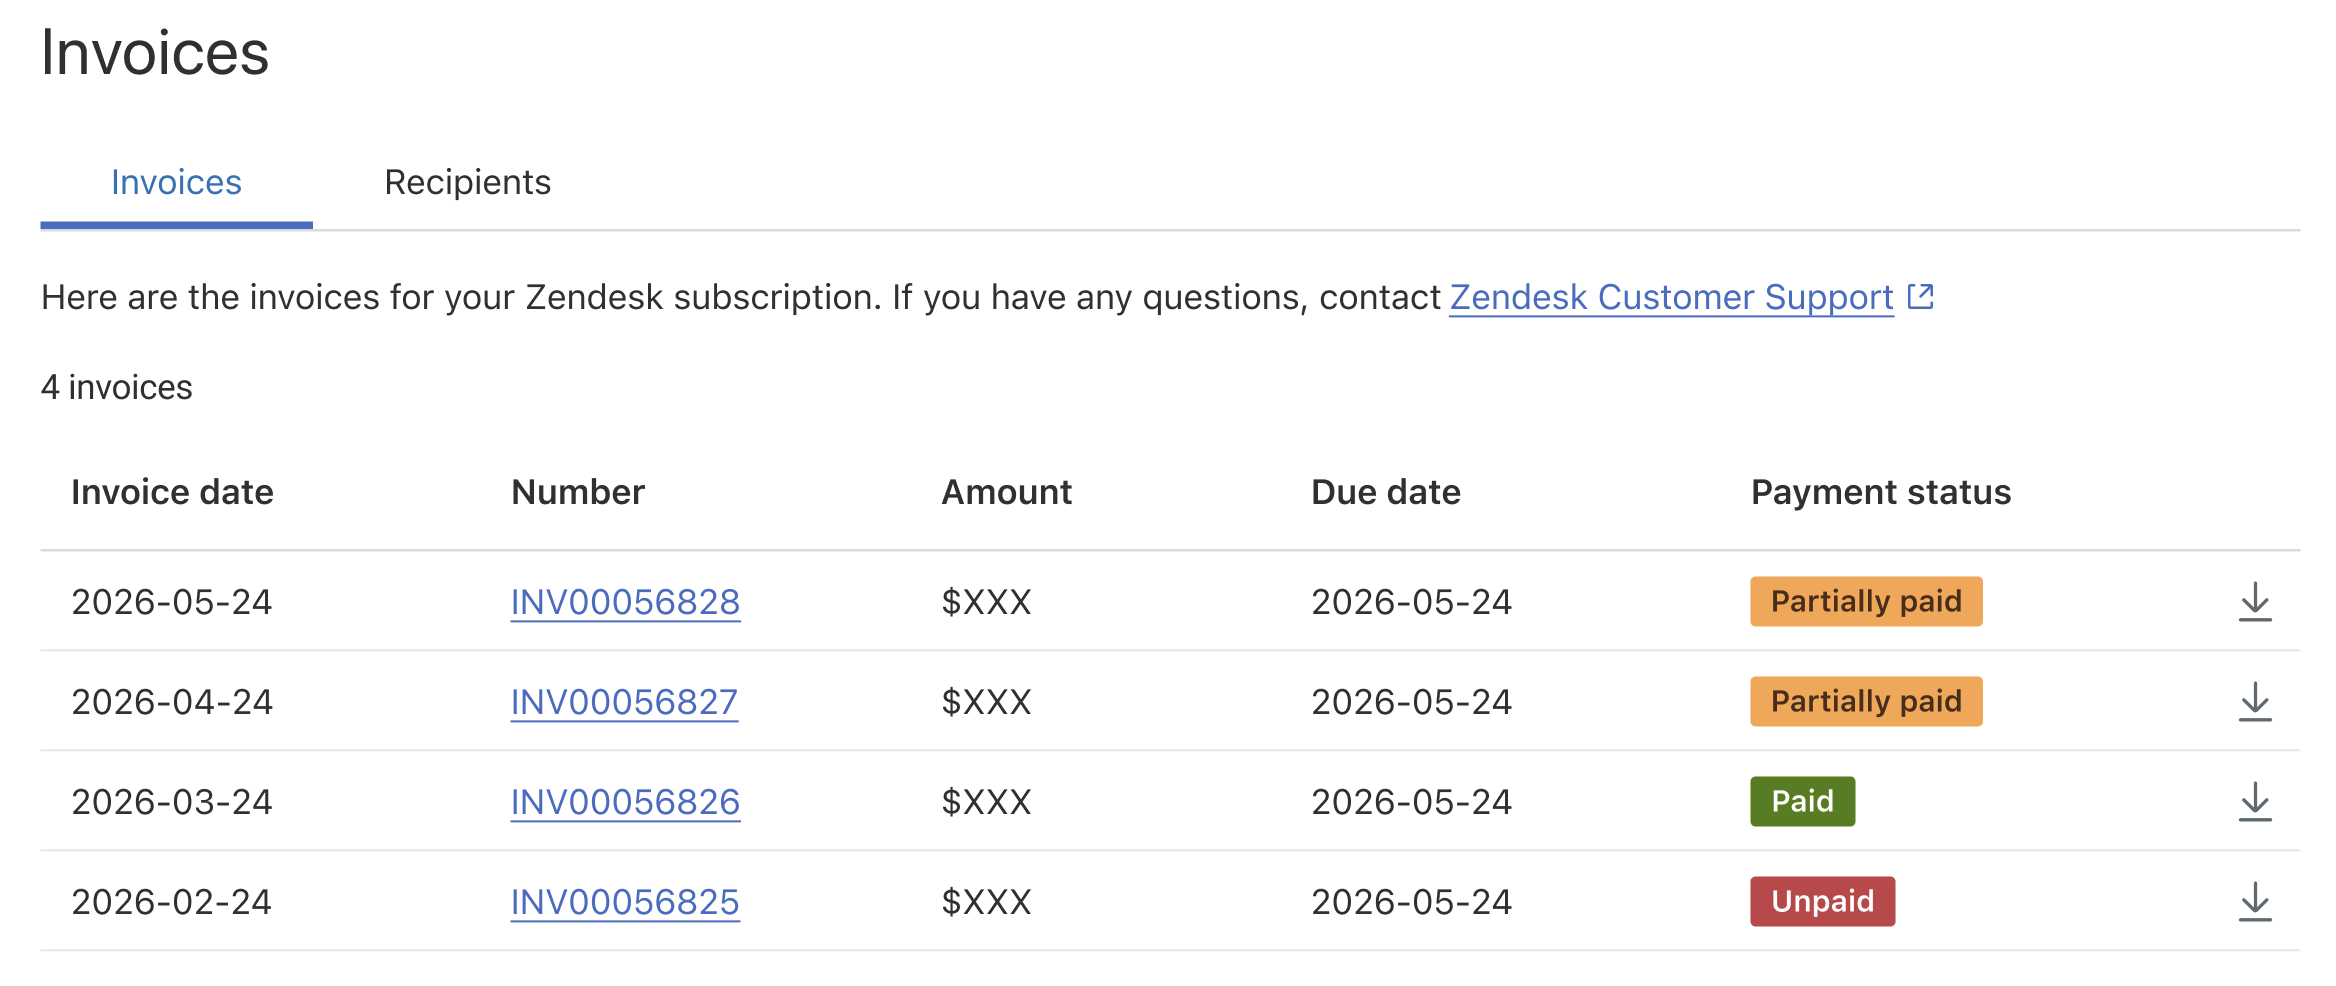
The invoice list includes the invoice date, invoice number, invoice amount, and due date. It also includes the payment status for each invoice. Payment status can be Paid, Unpaid, Partially paid, Processed, or Refunded.
- Click an invoice number to view invoice details.
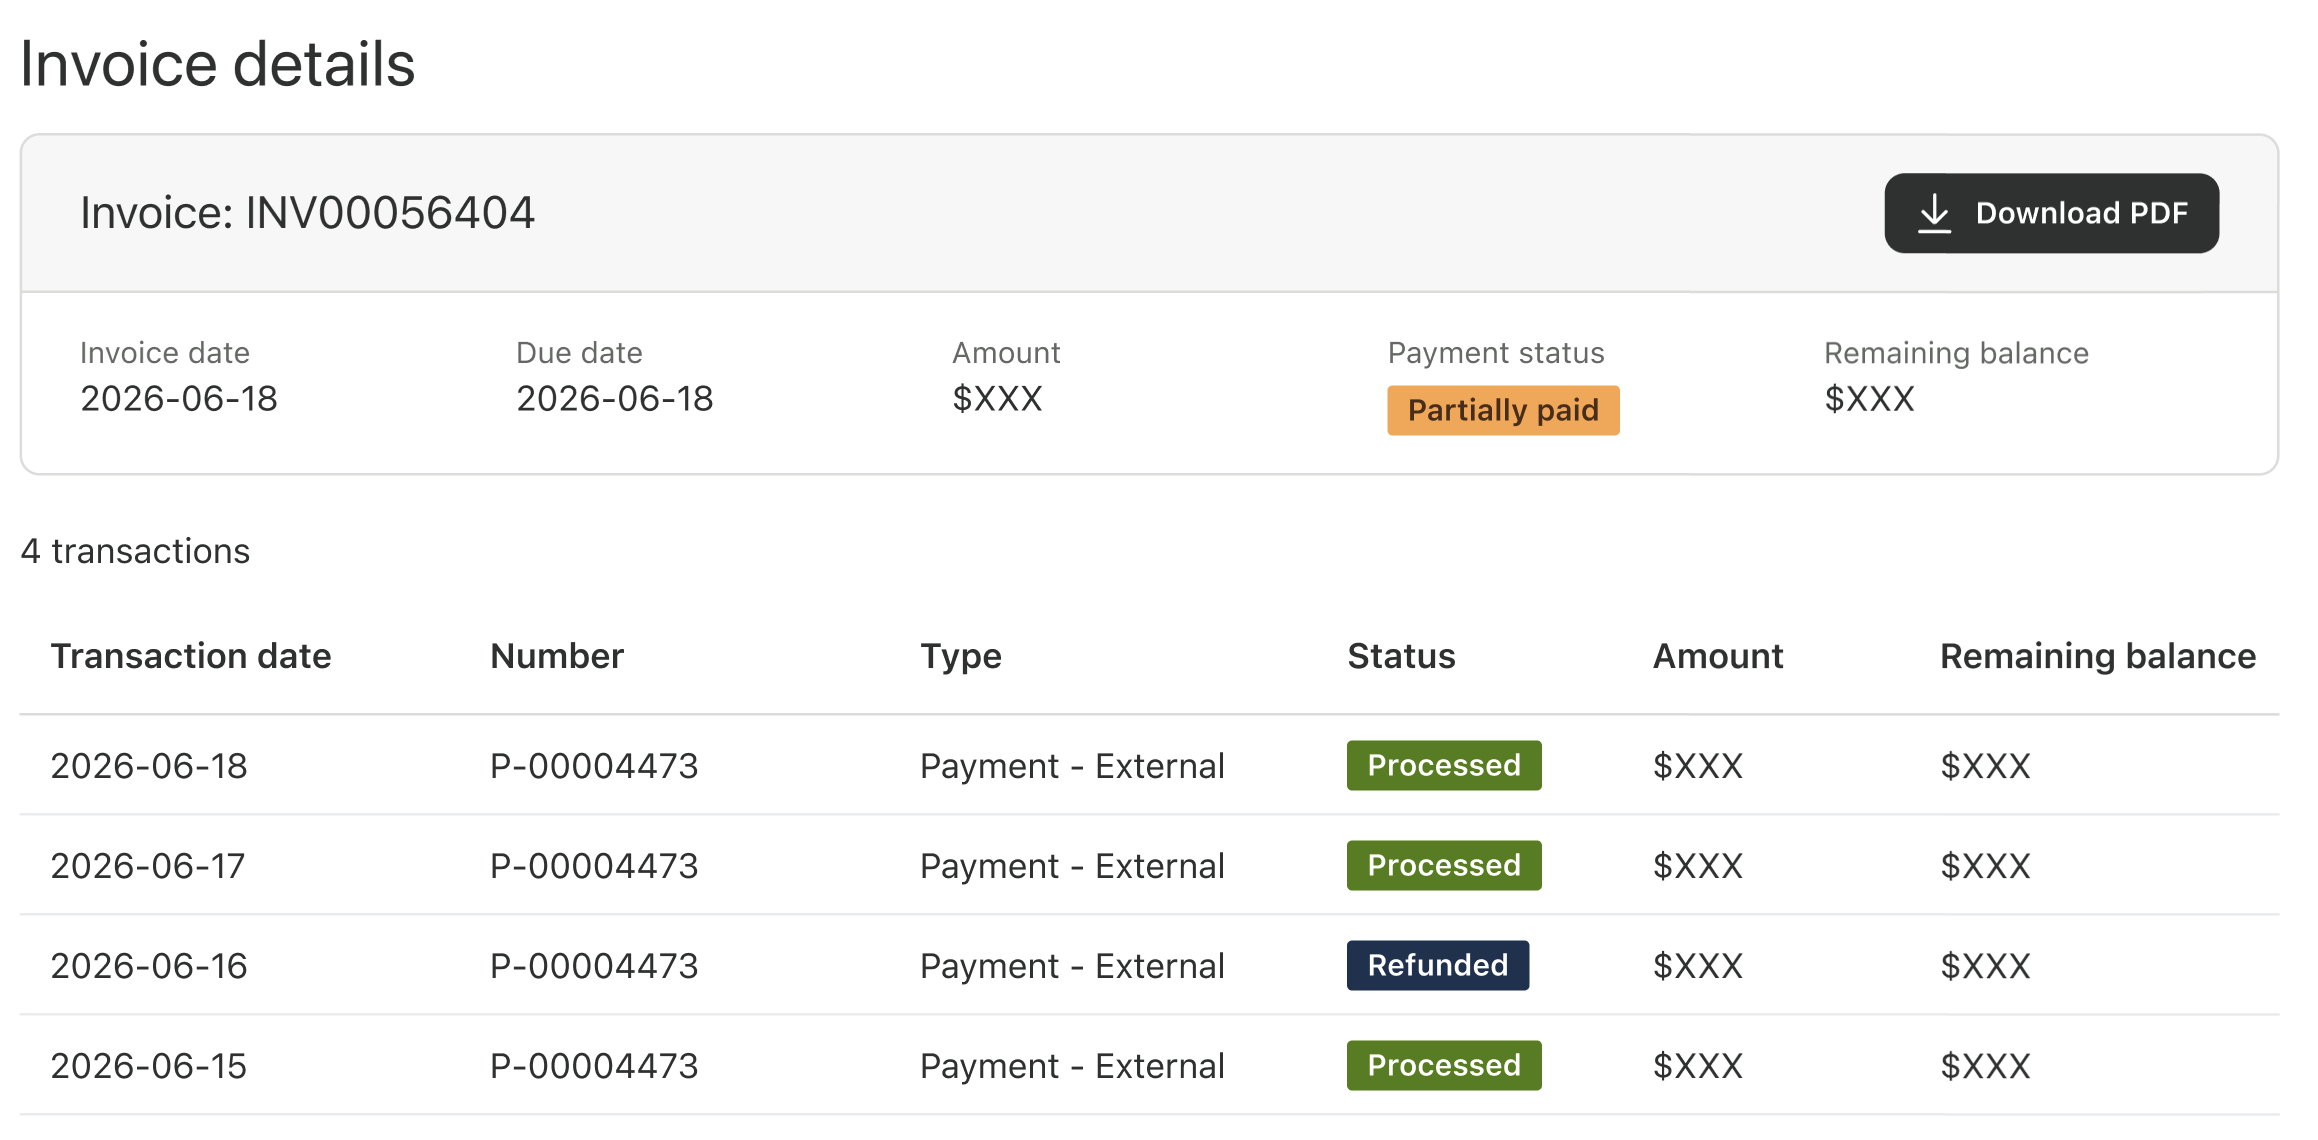
Invoice details include all transactions associated with an invoice, including payments, credit memos, refunds, and write-offs. Each transaction listed includes the transaction type, status, applied amount, and the remaining invoice balance after each transaction.
- Click Download PDF to download a copy of the invoice.
Payment instructions are included on the invoice, including Zendesk wire transfer details.
Changing the invoice address
The business details address (also known as the "sold to" address) on your Zendesk account is the address where your business is physically located. If your business relocates, account owners and billing admins can update this address. If you aren't using electronic payments, your business details address is the same as your invoice address. All invoices will be sent to this address.
For existing customers on electronic payment, you can have an invoice address (also known as the "bill to" address) that is separate from the business details address. The invoice address specifies where invoices should be sent for payment.
To change the business details address
- In Admin Center, click
Account in the sidebar, then select Billing > Payment.
- Under Business details, click Edit.
You can have only one Business details address for your account.
- Save your changes.
To change the invoice address
- In Admin Center, click
Account in the sidebar, then select Billing > Payment.
- Under Payment method, click Edit.
- Enter your payment details and address.
Any information you change will appear on all invoices moving forward. Invoices issued before the update will not change.
- Save your changes.
Adding or removing invoice recipients
Account owners and billing admins can edit the list of users who receive invoices for every billing cycle. For example, an account owner may want to make sure the Finance department at their company receives a copy of each invoice. Adding a user to receive invoices does not require the use of an agent seat.
To change invoice recipients
-
In Admin Center, click
Account in the sidebar, then select Billing > Invoices.
A Recent Invoices page appears with a list of your latest invoices. It also includes your current invoice address and the names and email addresses of everyone who receives a copy of invoices for your Zendesk account.
- To update a recipient, click the Recipients tab, then click Edit.
- To add a recipient, click Add new.
- Enter the recipient's name and email address, then click Save.
- To remove a recipient, click X next to the name of the recipient, then click Save.