You can access your tickets in the Zendesk Support mobile app. Which tickets you see, and how you interact with them, is determined by the permissions applied to your account.
When the new agent experience is turned on, the mobile app is compatible with the Agent Workspace and offers a streamlined interface that makes it simpler to view ticket information.
If you haven’t turned on the new agent experience, see About the legacy Support mobile app.
This article contains the following topics:
- Accessing the ticket list screen
- Creating a ticket
- Replying to a ticket
- Manually assigning a messaging ticket
- Editing ticket properties
- Managing tickets
- Viewing and editing requester profile information
Related articles:
Accessing the ticket list screen
The ticket list screen opens by default on both iOS and Android devices, with the most recently used view displayed:
| iOS | Android |
|---|---|
 |
 |
To access the ticket list screen from another screen
-
iOS users: In the bottom toolbar, tap the Tickets icon (
 ).
).Android users: Tap the back arrow (
 ) until the Ticket screen
appears.
) until the Ticket screen
appears.
Creating a ticket
If you have permission to create tickets, you'll see the create ticket icon on your screen.
To create a ticket
- Tap the Create ticket (
 ) icon to open the New ticket screen.
 - If you have multiple brands, select a brand in the multi-brand selector and then tap the check mark (iOS) or OK (Android).
- Tap Subject and enter a title for the ticket.
- Tap Requester and search for a user to designate as the ticket requester. If you don't select a user, you will be set as the requester. You can add a new user by entering an email address and tapping Add as new.
- Tap Assign and select an assignee from the list.
- Tap Enter a description and add a short explanation of the
problem.
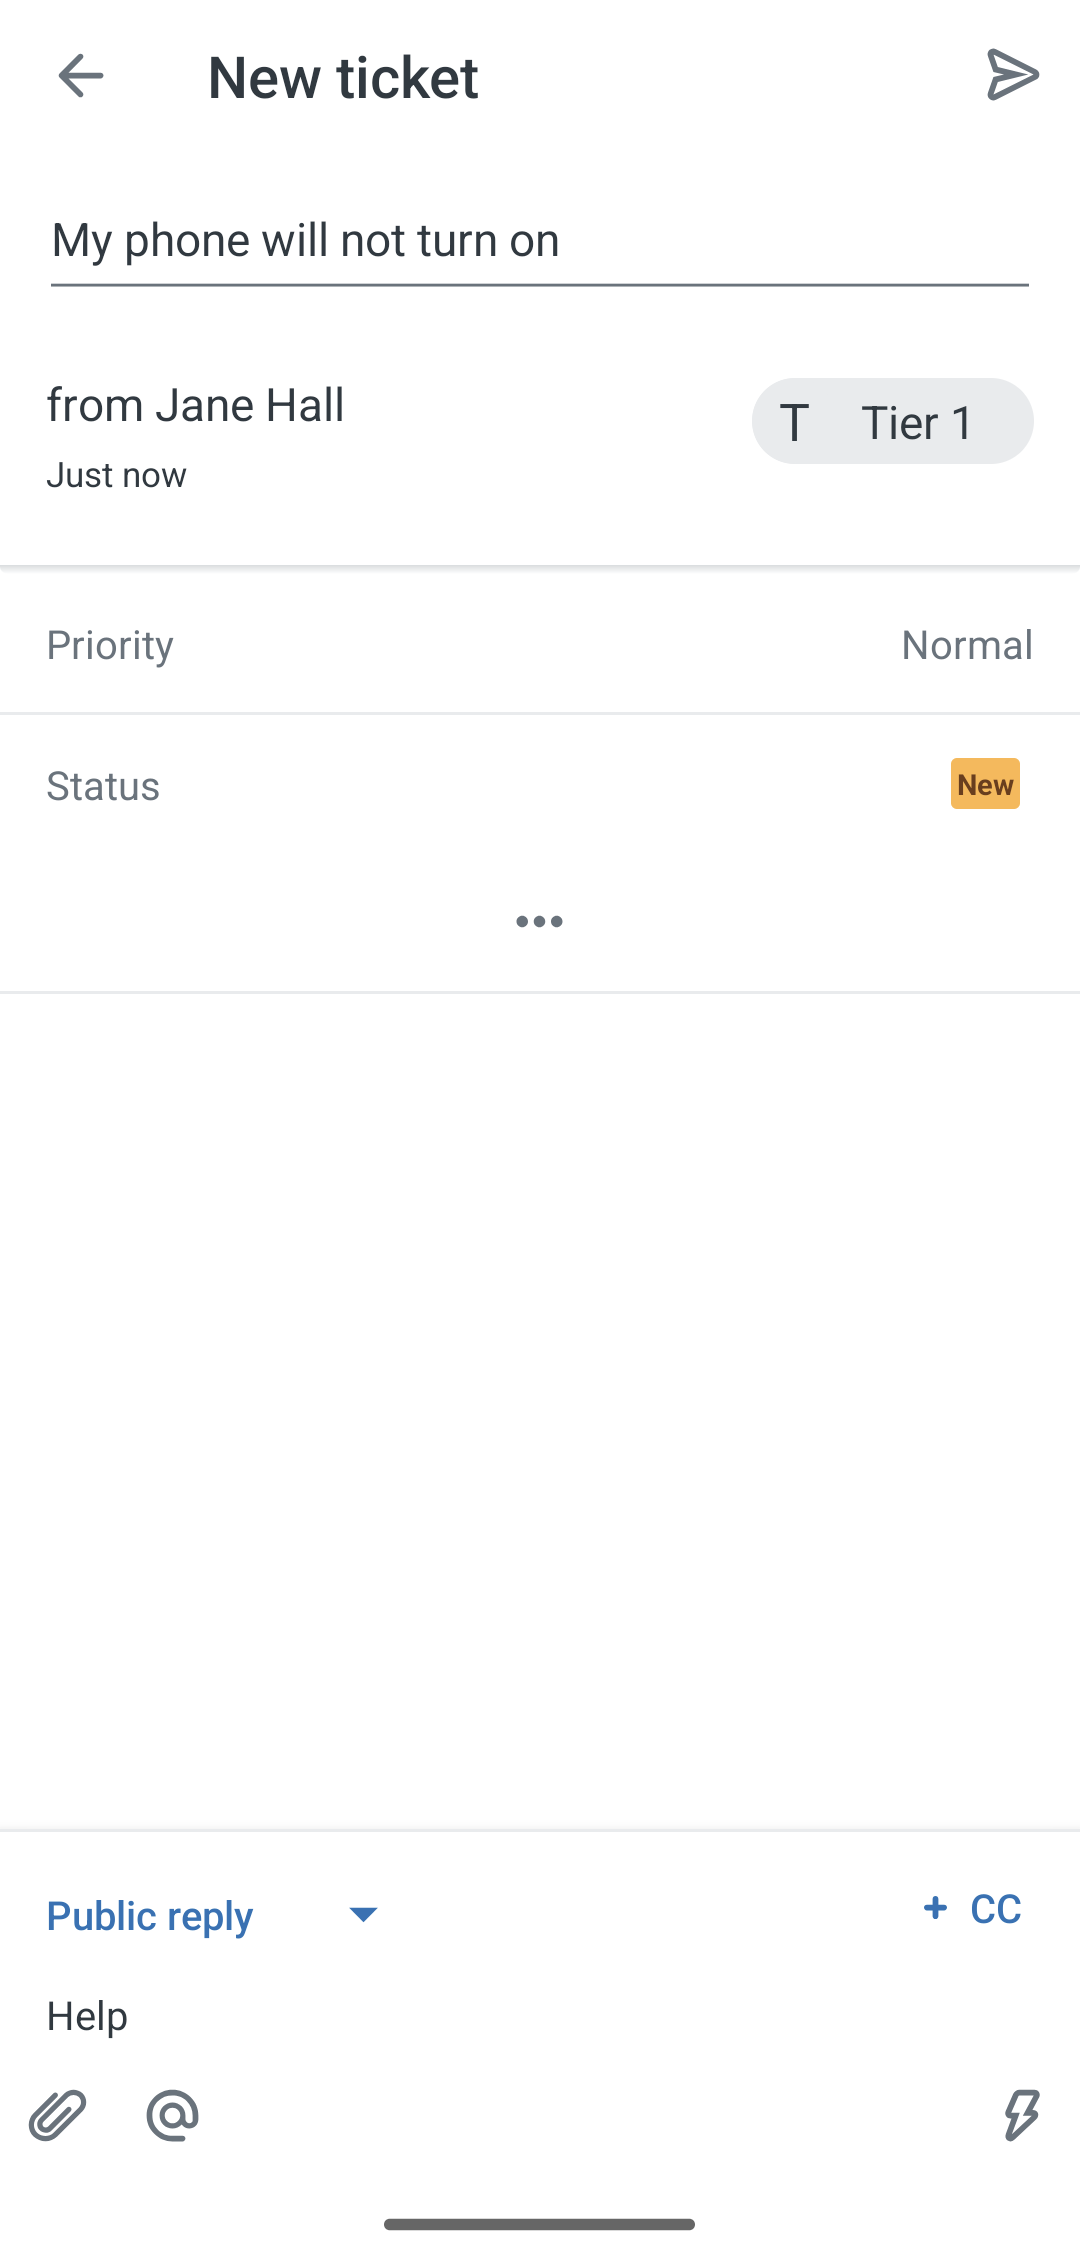
- Tap the remaining property fields to enter information as needed.
- Tap the Submit ticket (
 ) icon to save and submit the ticket.
Viewing and replying to email side conversations
To view and reply to email side conversations
- Tap a ticket to open it from the ticket list screen.
- Tap the side conversations (
 ) icon in the upper-right.
If the ticket has existing side conversations, you'll see them in a list. Side conversations from any channel other than email appear dimmed and can't be viewed in the app.
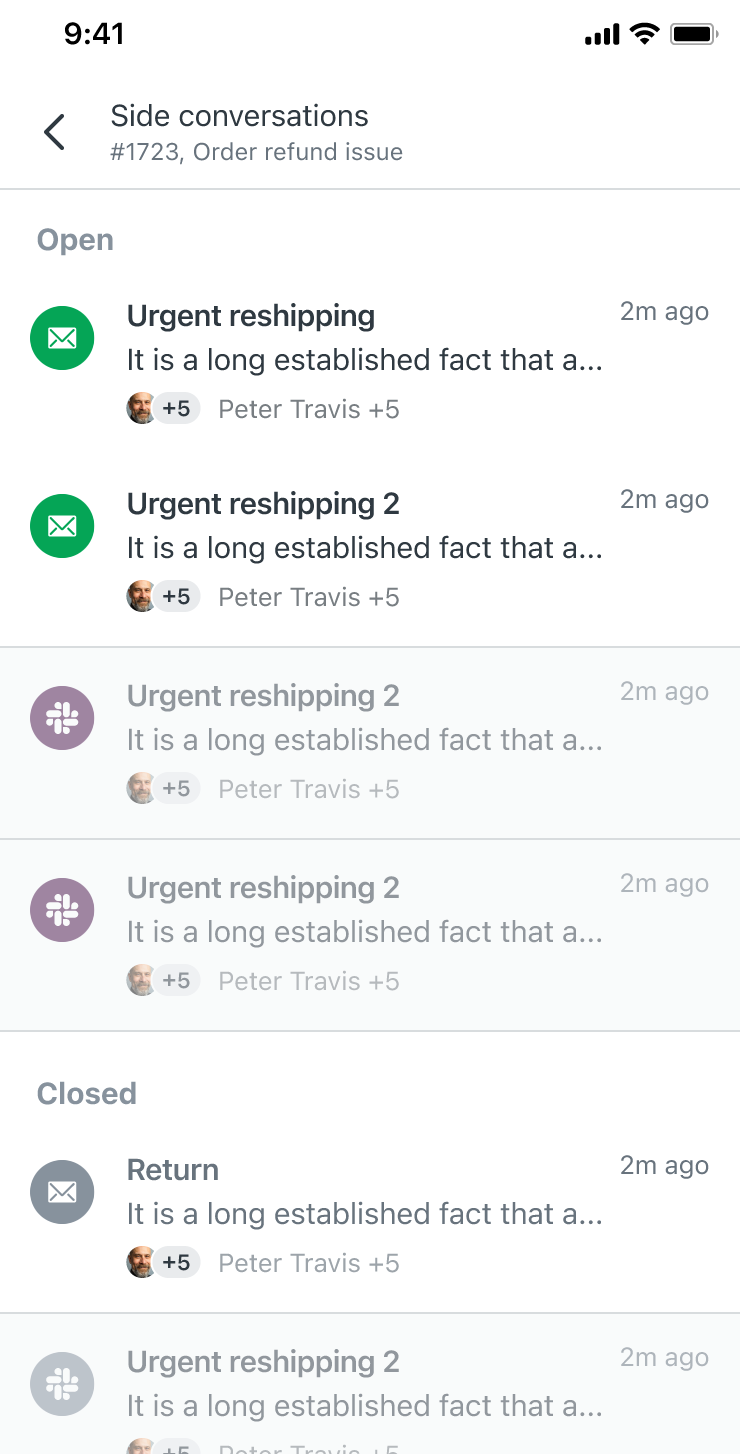
- Tap an email side conversation to open it.
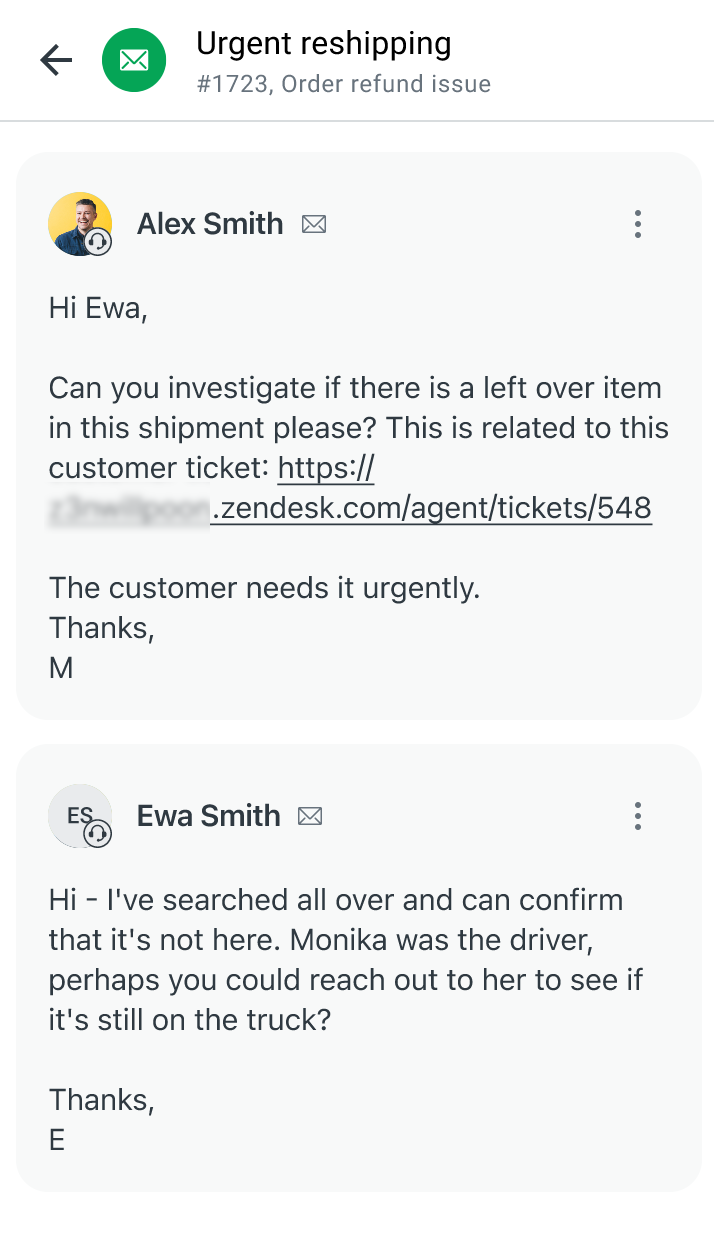
- Tap in the composer to reply to the side conversation.
 Note: You can't change the recipient or add CCs to the side conversation.
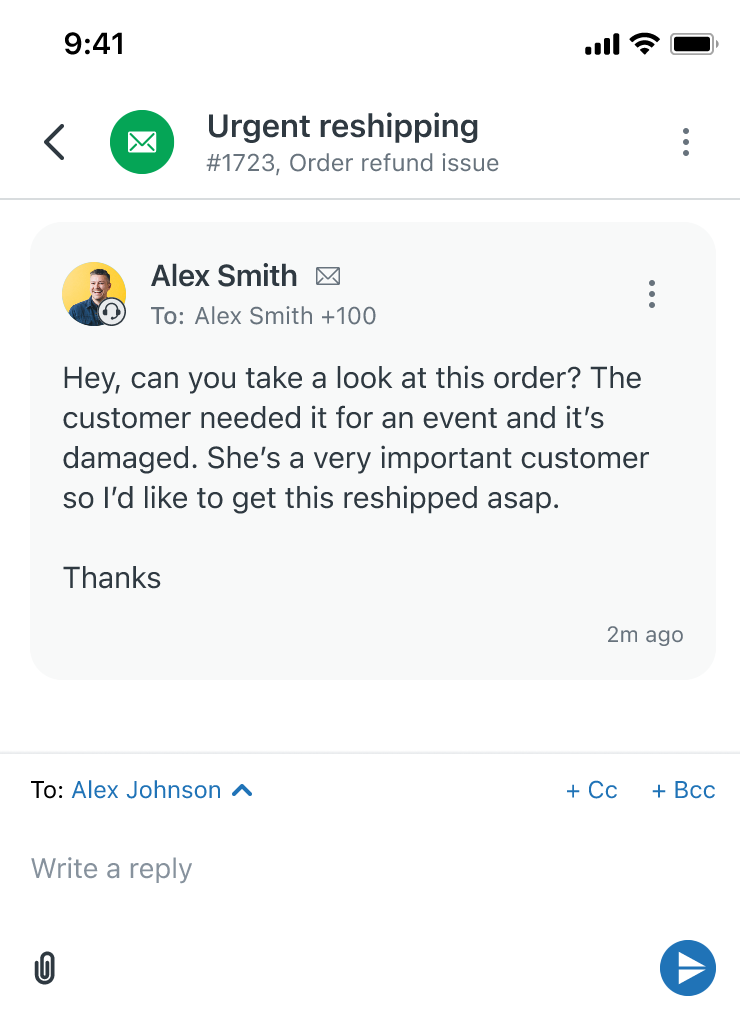
Replying to a ticket
You can reply to a requester or ticket over the messaging or email channels. You can also reply with an internal note that's visible only to other agents.
- Open a ticket from the ticket
list screen.
Ticket information is split into two tabs:
- Conversations: Displays the latest replies, emails, or messages in a conversational layout.
- Details: Lets you view and update ticket information, such as tags, assignee, and requester information.
- On the ticket's Conversations tab, use the channel switcher to select the channel you want to send the message through.
- Tap the composer text box and enter your message.

- To attach files or images, tap the paper clip (
 ) icon to open your device's file manager and select an
image or an attachment.
) icon to open your device's file manager and select an
image or an attachment.
You can also take a picture with your device's camera by tapping the camera (
 ) icon.
 - If you're replying by email and want to add CC's to the ticket, add them by
tapping on the (
 )icon.
 - If you're replying with an internal note, tap the at (
 ) icon to mention colleagues.
To learn more about CCs and @mentions, see Using CCs and followers and Using @mentions.
- To apply a macro, tap the macro icon beside the composer and select the macro you want to apply.
- To update a ticket's status, select a status from the status picker.
- When you're done, tap the submit (
 ) icon.
Manually assigning a messaging ticket to yourself
You can manually assign messaging tickets to yourself from the Notifications tab.
To get notifications about new tickets that have been created on your account, make sure that you enable notifications for all new tickets in the notification settings in the app (see Configuring notifications).
To manually assign a messaging ticket
- From the Notifications tab, tap on a ticket that is not yet assigned to you.
- On the ticket's Conversation tab, tap Take it.

The ticket is now assigned to you and you can reply to the requester. See Replying to a ticket.
Viewing and editing ticket properties
You can view and edit ticket properties on a ticket's Details tab. This tab displays additional ticket information, such as tags, assignee, requester information, and custom fields (except for lookup relationship fields).
You can also view ticket metadata from a ticket's Conversations tab.
To edit ticket properties
- From a ticket's Conversations tab, swipe left or tap the Details
tab.
iOS Android 

- Tap the property you want to change.
A dialog appears and guides you through the process of changing or updating the property.
Note: You can submit multiple changes at once. If you've drafted a reply to the requester and also want to change the status and assignee of the ticket, and add a tag to it, you can do so by making all the changes and then tapping the submit ( )
icon. - Tap the submit icon ( ).
Viewing ticket metadata
You can view metadata in a ticket, including when it was sent, via what channel, and by whom.
- On a ticket's Conversations tab, tap the message in the ticket
whose metadata you want to view.
The message's metadata displays.
Managing tickets
You can manage a ticket from its Options menu.
To manage a ticket
- On a ticket's Conversations tab, tap the Options menu (
 ) icon in the upper-right corner.
 - Select any of the following options:
- Mark the ticket as spamNote: Marking a ticket as spam moves it into the Suspended Tickets view.
- Delete the ticket
- Share the ticket
- Follow the ticket
- Mark the ticket as spam
Viewing and editing requester profile information
You can view and edit a requester's profile information on a ticket's Conversations tab.
To view or edit a requester's profile information
- On a ticket's Conversations tab, tap on the requester's avatar in the upper-left
corner of the screen or on their avatar inside the conversation.
The requester's profile information displays. You can edit the information as needed.
iOS Android 

You can also tap on another agent's profile in the conversation to display their profile and associated tickets, but you can't edit this information.