If you add an AI agent to your messaging channel, the messaging response is deactivated and replaced by the AI agent's standard responses.
This article contains the following sections:
About the messaging response
- Basic greeting for customers
- Request for information about their support needs
- Message letting the customer know they’re being connected to a live agent
Without any configuration, the default messaging response appears to end users as follows.
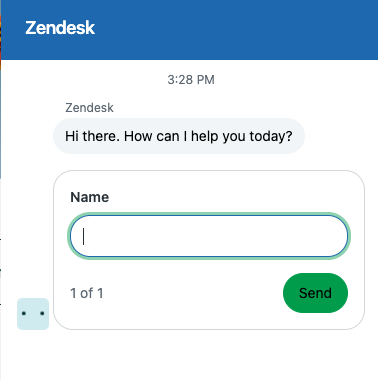
Behind the scenes, agents are notified that a support request has been received, and they can accept the request and begin responding to the conversation.
You can apply a schedule to the messaging response so that you can set different responses during business hours and outside of business hours. Otherwise you can set one message that will always be sent.
If you want to add an AI agent to your channel, you can do that at the bottom of the Responses section, instead of setting the messaging response. In that case, the messaging response is deactivated and replaced by the AI agent's standard responses.
The default messaging response does not support automatic translation or dynamic content in custom ticket fields, so to use those features you should add an AI agent.
Setting the messaging response and business hours schedule
The default messaging response includes a basic greeting for customers, a request for information about their support needs, and a message letting them know they’re being connected to an agent.
You can apply a schedule you've created so that you can set different responses during business hours and outside of business hours. If you do not apply a schedule, customers receive the same response regardless of the time or day they contact you in your messaging channel.
To customize the messaging response and set a schedule
- In Admin Center, click
 Channels in the sidebar, then select Messaging and social >
Messaging.
Channels in the sidebar, then select Messaging and social >
Messaging. - Click the name of the channel you want to edit.
- Scroll down, then click the Responses section to open it.
- If you want to apply a business hours schedule for your messaging channel,
under Business hours, select a saved schedule.
If you haven't created a schedule and would like to, click Manage schedules to set up a schedule now.
Note: Schedules are not available on Team plans, but you can use out of office triggers to manage basic responses. - In the Response during business hours section, update the following,
whether you've applied a business hours schedule or not:
- First message: Enter the text that appears when a customer launches the Web Widget.
-
Customer details: Select the information you want to request
from the customer before handing them off to an agent. You can
request the customer's name or email address, or use custom text or
drop-down ticket fields to gather information. If you use custom
ticket fields you've created, keep in mind:
- Permissions for ticket fields must be set to Editable for end users. When a field is included in an Ask for details step, end users are required to submit a response, regardless of the requirement configuration on the permissions page.
- Nested drop-down fields are not supported.
- Blank selection values are not displayed as options in the dropdown.
When these fields are presented to the customer during a conversation, the composer is not available until the customer enters the required information. If you're using authentication for messaging, signed-in users aren't asked for their name or email address.
- Follow-up message: Enter the text that appears after the customer submits their details.
- If you've applied a business hours schedule, click the Outside business hours tab, then update the first message, customer details, and follow-up message.
- Click Save.