Summary: ◀▼
Use the web crawler to index public external content for help center search and agent knowledge without developer help. You can crawl an entire site or specific URLs, apply URL filters, run multiple crawlers, and keep content searchable by source. The crawler supports adaptive crawling for JavaScript content, follows internal links only, and can keep previous results if a sync fails.
The web crawler lets you crawl and index external content for use wherever you use external content in your Zendesk account without developer resources. You can set up multiple crawlers to crawl and index different content in the same or different websites. You can also crawl a list of specific URLs without having to crawl an entire site.
When users perform a search in your help center, relevant external content discovered by the crawler is ranked and presented on the search results page, where users can filter the results and click the links to view the external content link in another browser tab.
About the web crawler
You can create up to 50 web crawlers to crawl and index external content in the same or different websites. Content from crawled websites and pages within websites are made available wherever you use external content in your Zendesk account. External sites that you want to crawl must be public (non-authenticated).
- Crawl the entire site, the crawler automatically discovers links from the configured start URLs, then uses them to crawl all pages within that site.
- Limit your crawl to individual pages, you can specify up to 500 URLs that you want to crawl. The Sync only specified URLs option is automatically selected if you enter more than one URL. However, if you enter just one starting URL, you can still manually select this option to restrict the crawl to a single page. If you enter a sitemap, this option is deselected and disabled, as the crawler must crawl all pages within the sitemap.
When you create a new crawler, the name that you assign to the crawler will be used to create the Source value. Source values are used as filters in your help center search. If you want to change the name later, you can always edit or assign a different source name. See Managing web crawlers.
You can use a simple crawler setup or you can choose to configure advanced settings that let you create URL filters that fine-tune your crawler setup. You an create URL filters that will either include or exclude specific URLs based on specific wildcard patterns. See Creating URL filters to scope webstite syncs.
After the crawler is configured it runs periodically. If a sitemap is accepted as an input to the start URL, the crawler follows the instructions on the sitemap. Otherwise, the crawler discovers links automatically by following links on the top level page to visit the secondary pages and ingest their content. The crawler continues in this manner, visiting each linked page, and then following the links to the next page in the site hierarchy. This continues until the crawler has either crawled all linked content four levels deep or the entire site, whichever comes first. The crawler only follows links that lead to pages within the site domain; no external pages are visited.
Web crawlers index content that is in the page source on the initial page load, even if it's hidden by a UI element, such as an accordion. Web crawlers can also use adaptive crawling to capture content that requires JavaScript to render. Before processing each section of a website, the crawler automatically samples a small number of pages and compares results between a standard fetch and a full browser render. If the browser render captures significantly more content, the crawler switches to browser mode for that section of the site. This means different parts of the same website can be crawled in different modes. For example, a static blog section might use standard fetching, while a dynamic app section uses browser rendering. This process happens automatically with no configuration required.
If the crawler fails to collect information from a website during a regularly scheduled crawl (for example, if the website is down or if there are network issues), the help center will retain the results from the previous crawl, which will continue to be searchable in the help center.
Setting up a web crawler
- The web crawler does not work with websites that use gzip file compression encoding. You will not see search results from these sites.
- A crawl-delay will not be respected by the web crawler when set on external site robots.txt records.
- The changefreq tag doesn't affect the web crawler in any way.
To set up the web crawler
-
In Knowledge admin, click Settings (
 ) in the sidebar.
- Click Search settings.
- Under Crawlers, click Manage.
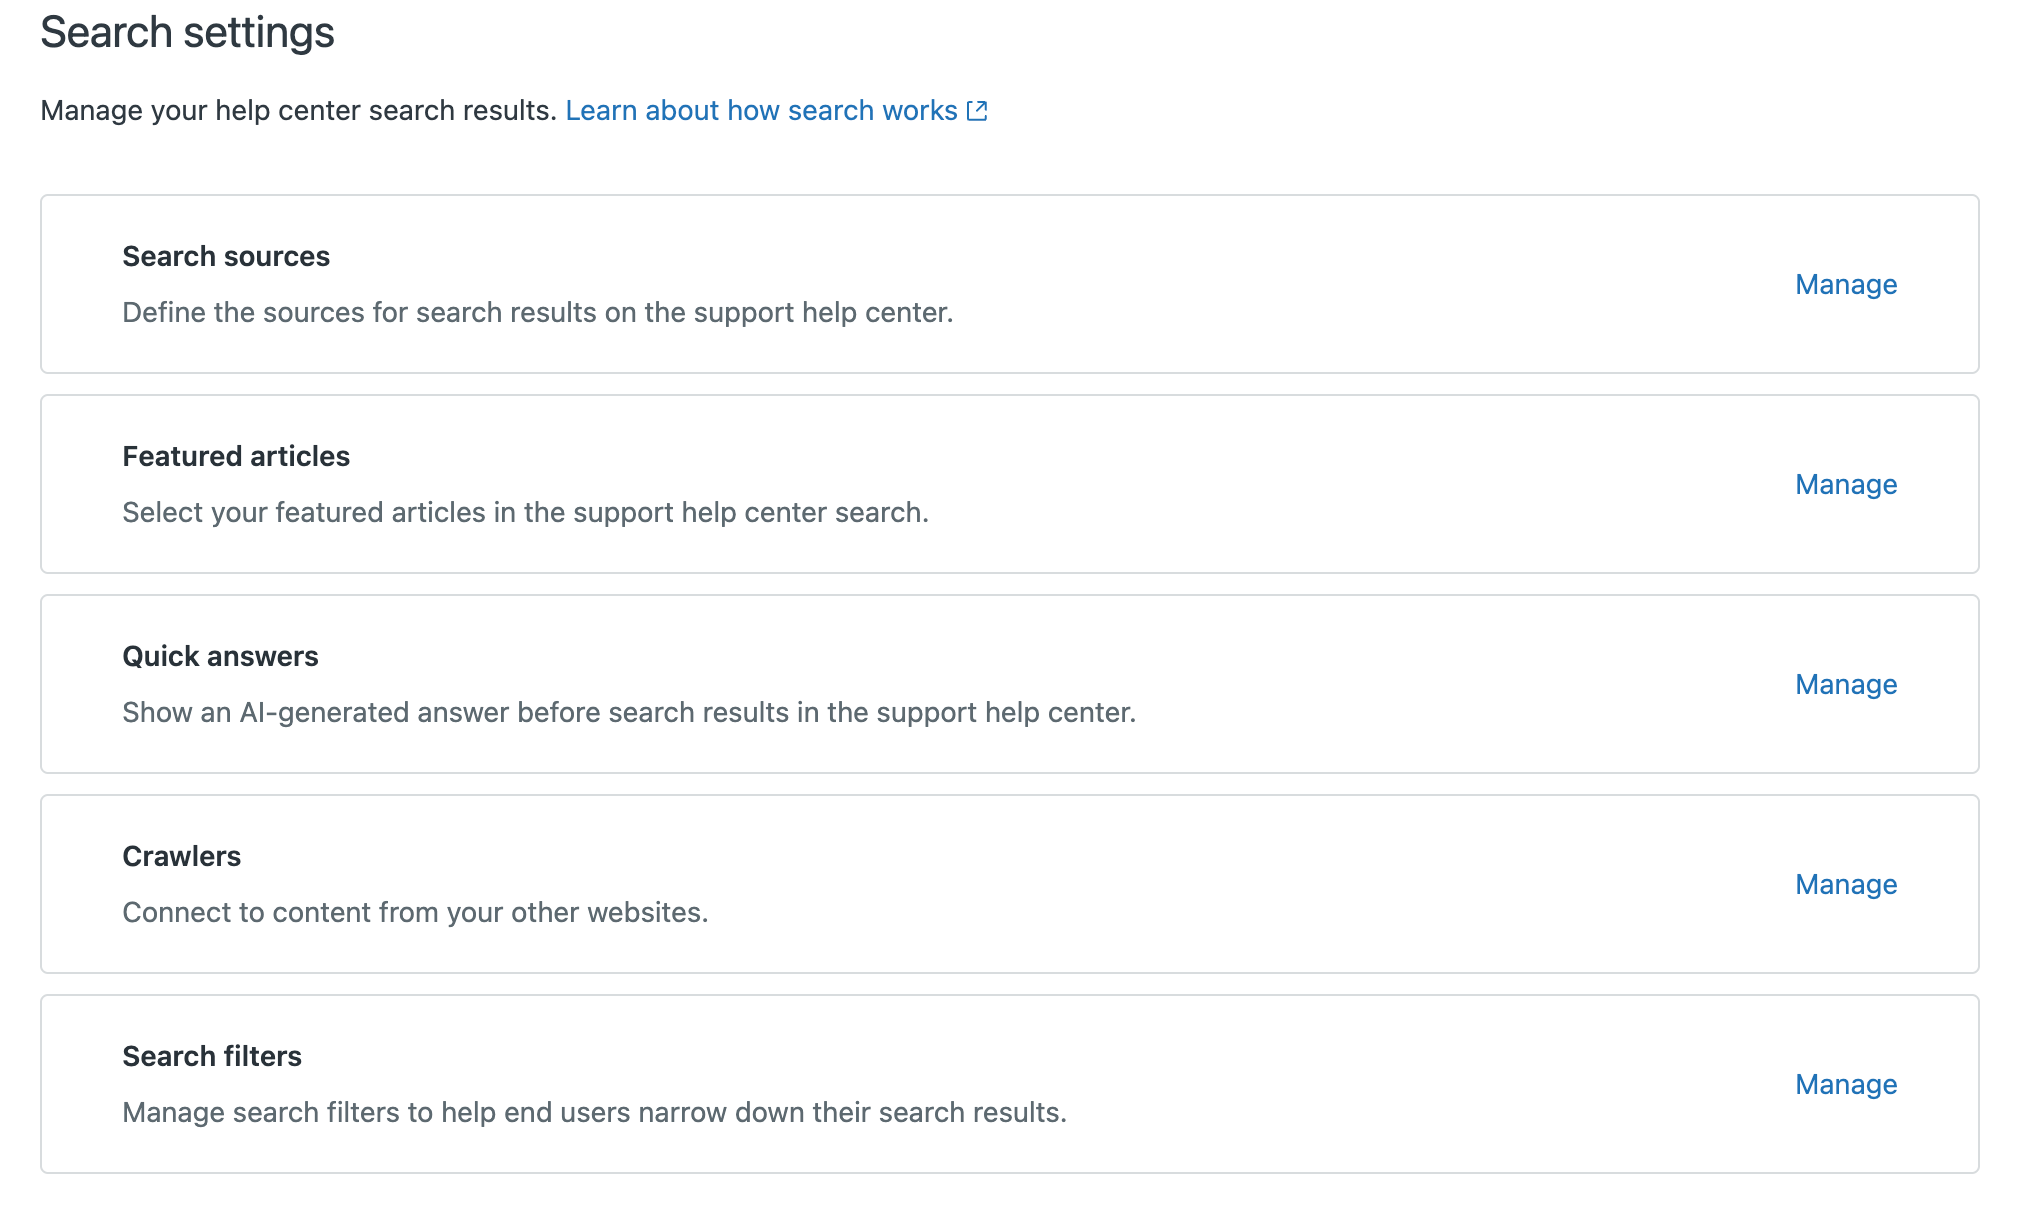
- Click Add Crawler.

- Click Continue.
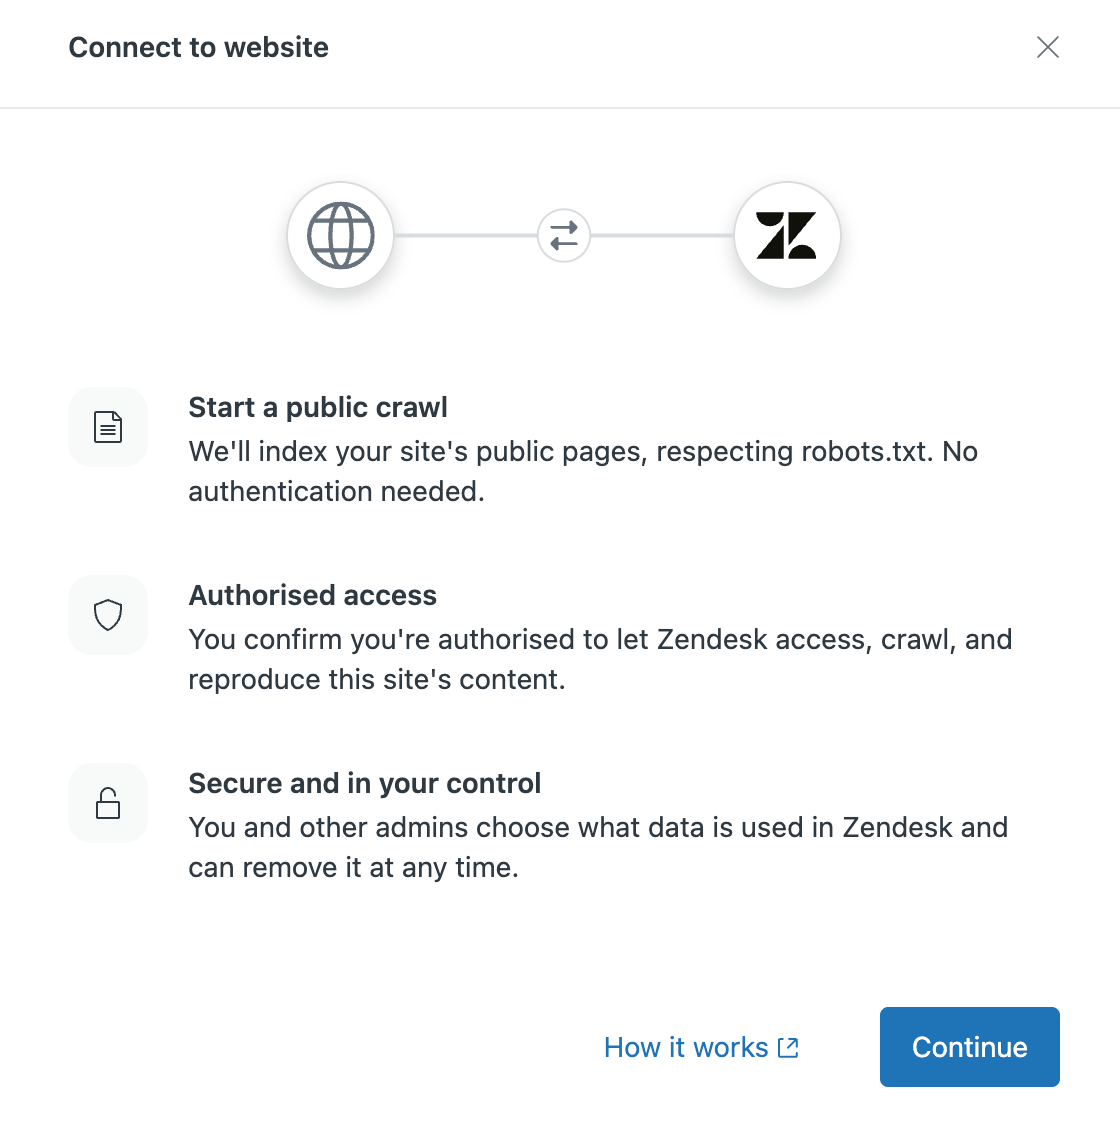
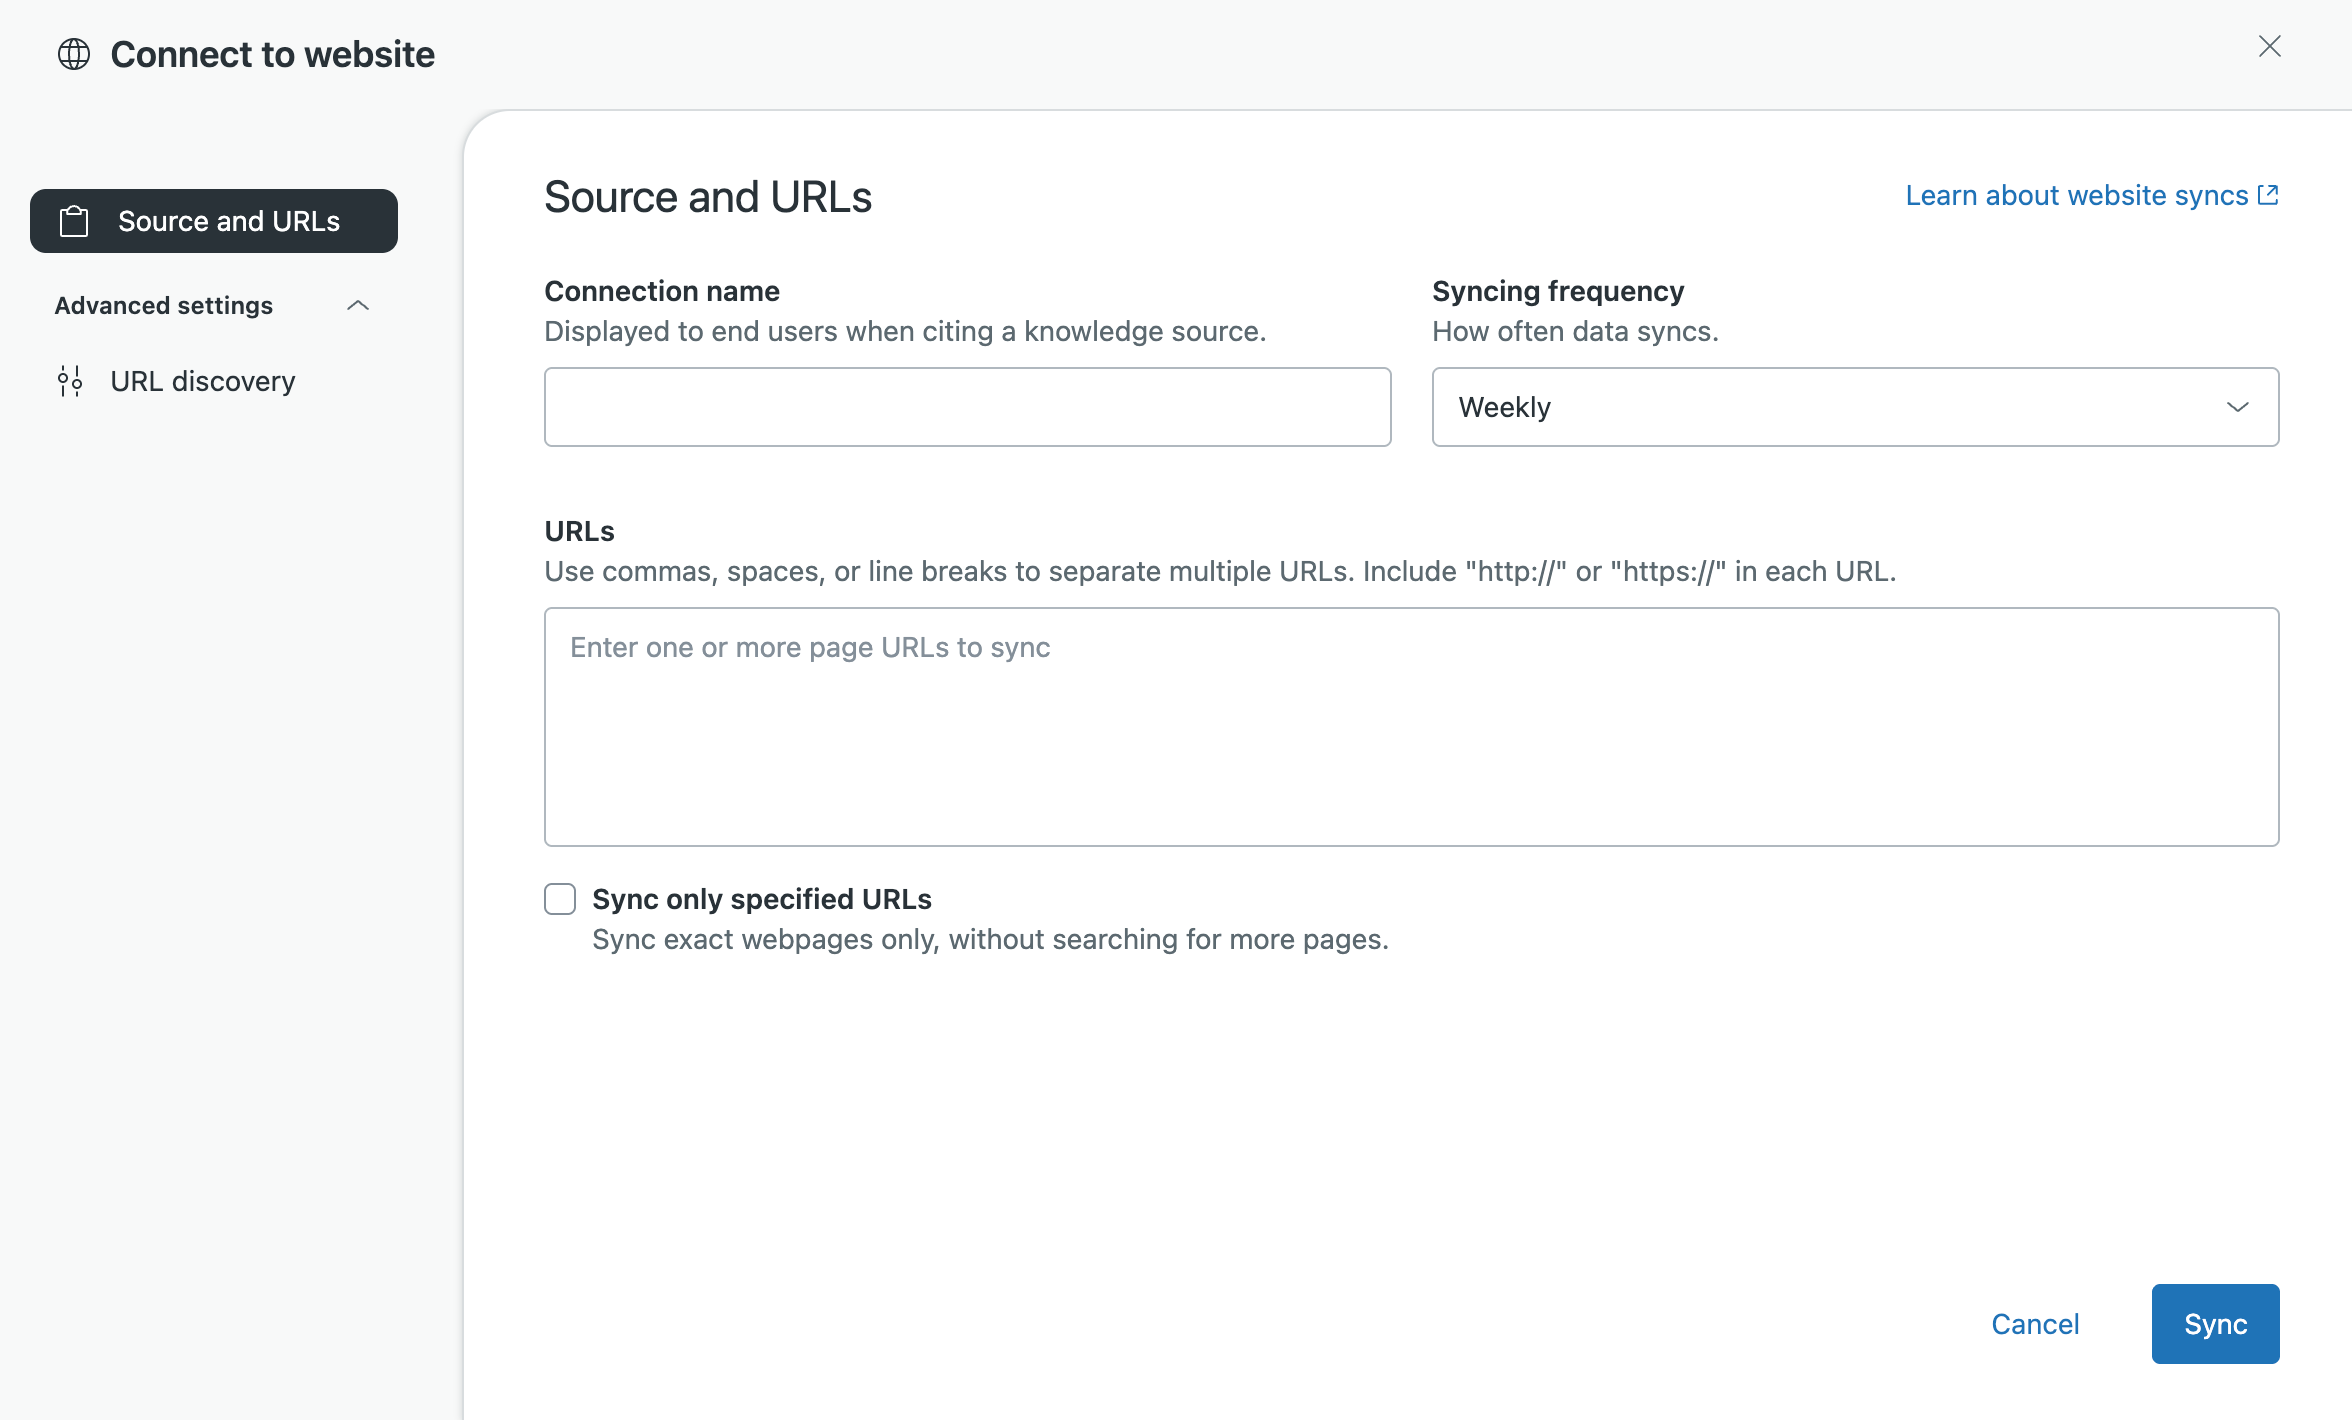
- In the Source and URLs tab, configure the following:
- Connection name: Identifies your web crawler on the crawler management list, and is used to create the search source value used as the filter in your help center search.
- Syncing frequency: Interval at which the web crawler runs and syncs data to your Zendesk account. You can either accept the Weekly default setting, or select Never (for a one-time sync), Daily, or Monthly.
- Configure the following to specify the pages you want to crawl:
- URLs: Enter the URLs for the domain/pages that you want to crawl (for example, test.com/faq.htm). You can enter up to 500 URLs in this field.
-
Sync only specified URLs: Specify whether you want to
crawl only the URLs you specified or all URLs inside the
specified pages.
- Select the check box if you want to crawl only the URLs that you entered. For example, if you entered example.com in the URL field and selected this checkbox, the crawler will only crawl and index the example.com page.
- Deselect the check box if you want to crawl every page linked to the URLs you entered. For example, if you entered example.com and deselected this checkbox, the crawler will crawl and index the example.com page and all pages linked within that page.
- (Optional) To add URL filters that will include or exclude specific URLs
based on specific wildcard patterns:
- Click the Advanced settings tab and toggle on Look for
more URLs while syncing.
 Note: For more information about URL filters and how to create them, see Creating URL filters to scope website syncs.
 -
If you want to only crawl pages that
- Match the wildcard patterns you create, select Limit sync to specific patterns and add the patterns you want to sync, then enter the URLs and wildcards you want to include in the URLs field.
- Do not match the wildcard patterns you create, select Exclude specific patterns from syncing and enter the URLs and wildcards you want to exclude in the URLs field.
- Click the Advanced settings tab and toggle on Look for
more URLs while syncing.
- Review the Summary banner to verify your settings and make adustments
if necessary.

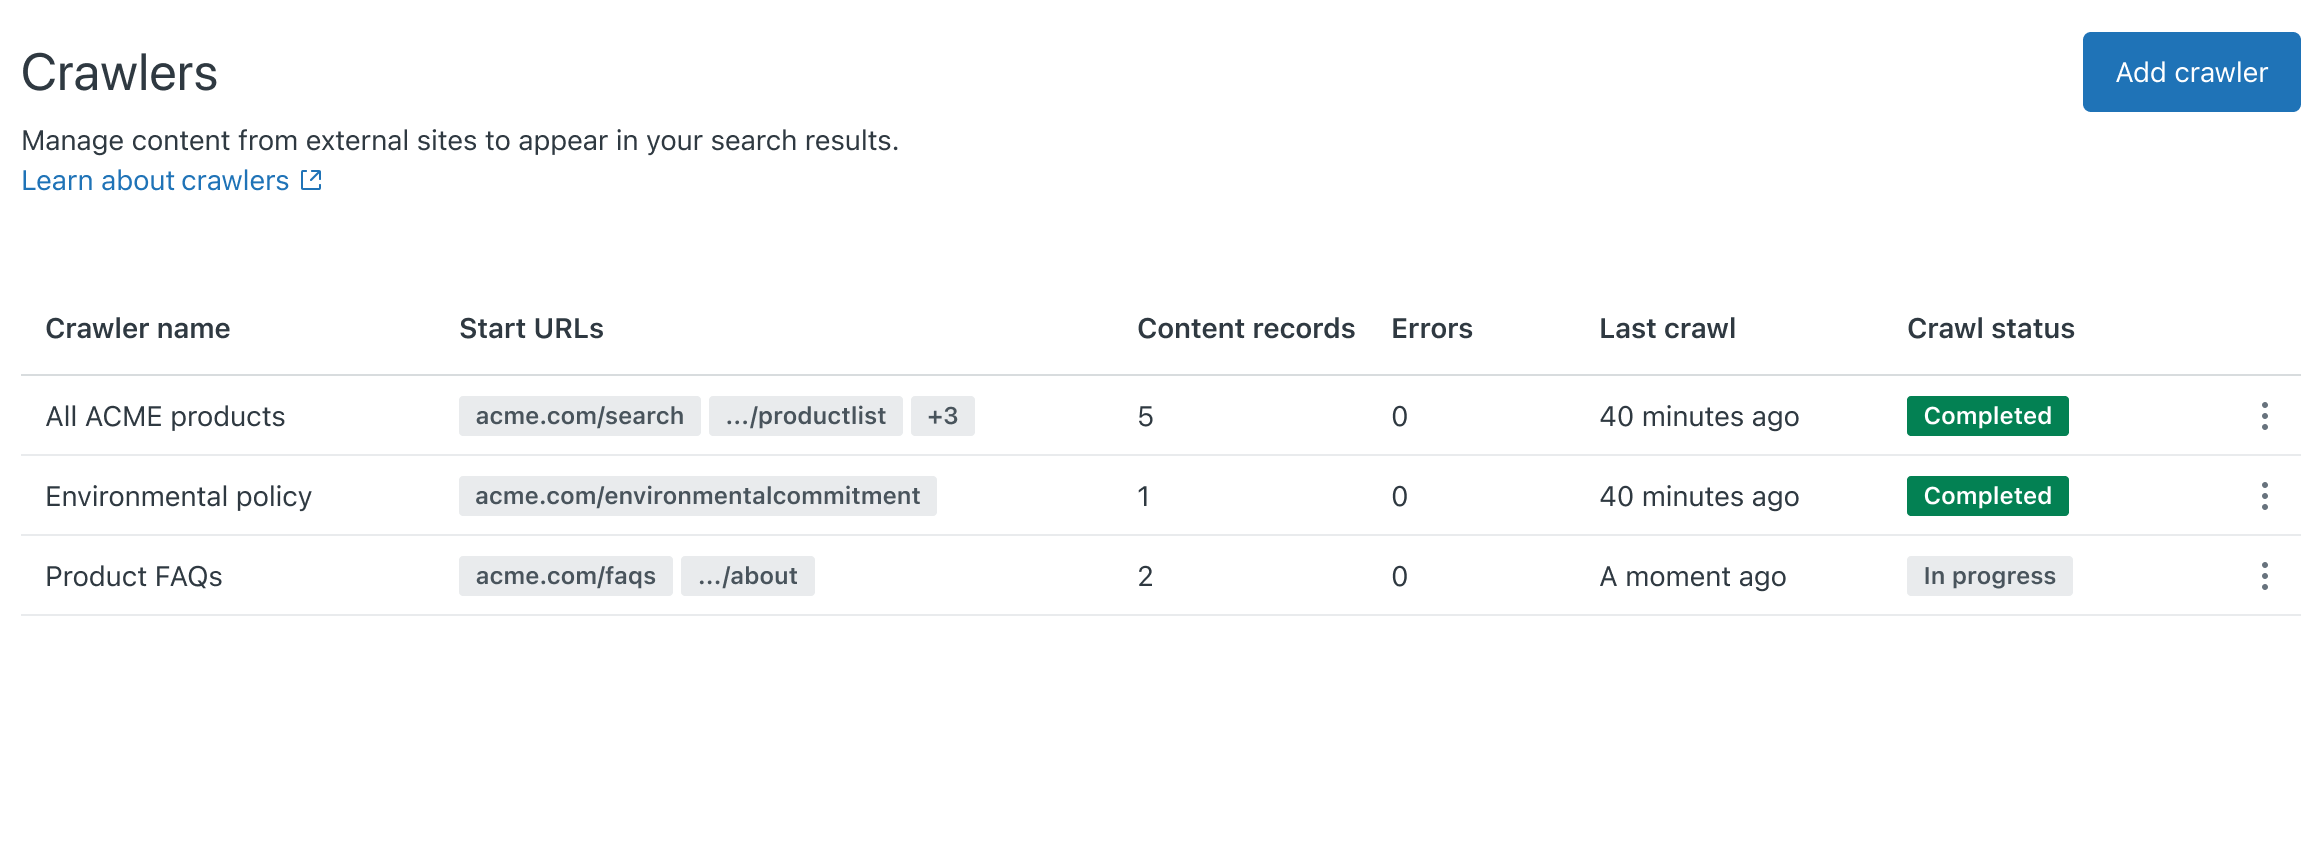
- Click Sync. The web crawler is added to the Crawlers page and the crawler begins to crawl the pages and index its content. The crawler will run at intervals defined in the syncing frequency field (see Step 6 above). If the crawler fails, the crawler owner will receive an email notification with troubleshooting tips to help resolve the issue. The crawler will try again periodically.Note: Zendesk/External-Content is the user agent for the web crawler. To prevent the crawler from failing due to a firewall blocking requests, whitelist (or allow-list) Zendesk/External-Content.
- Help center search, then you need to select the content that you want to include and exclude in help center search results. See Including external content in your help center search results.
- Knowledge section of the context panel for agents, see Configuring Knowledge in the context panel.