Verified AI summary ◀▼
Create workspaces to tailor your review process. Use a single workspace for uniform criteria and simplicity, ideal for small or flat teams. Opt for multiple workspaces to separate departments, apply varied criteria, and support complex team structures. Customize settings like members, hashtags, and thresholds to suit your needs. This flexibility helps you manage conversations and improve performance.
A workspace allows reviewers to review conversations using one set of criteria.
All accounts have one default workspace. Once given access to Zendesk QA, all new users are automatically assigned to the account’s default workspace. However, they can also work in other workspaces.
If you create multiple workspaces, you can segment users and define different review criteria for each workspace.
This article contains the following topics:
Related articles
Deciding on one or multiple workspaces
There are good reasons to configure Zendesk QA to use a single workspace or multiple workspaces. Understanding the benefits of each option can help you optimize for your team's workflow and review processes.
Benefits of a single workspace
- Sharing a consolidated workspace works well for teams that measure performance in the same way, such as small teams, teams with a flat hierarchy, and teams where everyone works across the range of conversations.
- A single workspace applies the same criteria for everyone.
- A single workspace provides simplicity and consistency for admins and reviewers in setting up and performing the same types of reviews for the same types of agent.
- A single workspace provides a single, consolidated dashboard. This works best for small departments or teams with only one help desk instance. Within that dashboard, segment your team into smaller groups as needed.
Benefits of multiple workspaces
- Workspaces provide a way to keep different help desk instances or departments separate. For example, Support, Sales, and Customer Success can each have their own workspace.
- Multiple workspaces work better for complex team structures, such as sub-teams or category-based teams like those organized by channel, tier, topic, or client type.
- Multiple workspaces can apply different rating criteria depending on the users. This can provide more or different insights.
- Multiple workspaces can be used to provide different types of reviews on the same agents. For example, peer reviews and manager reviews, self-reviews and manager reviews, reactive and proactive reviews.
Creating workspaces
Admins can create new workspaces and manage settings for all workspaces. Workspace managers can configure settings only for the workspaces they manage. See Understanding roles and permissions in Zendesk QA.
To create a new workspace
- In Quality assurance, click your profile icon in the top-right corner, then select Users, bots, and workspaces.
- In the navigation panel, click the create workspace icon (+) next to Workspaces to create a new workspace.
- Enter a unique name for the workspace.
- Click Create workspace.
Within each workspace, you can configure the following settings:
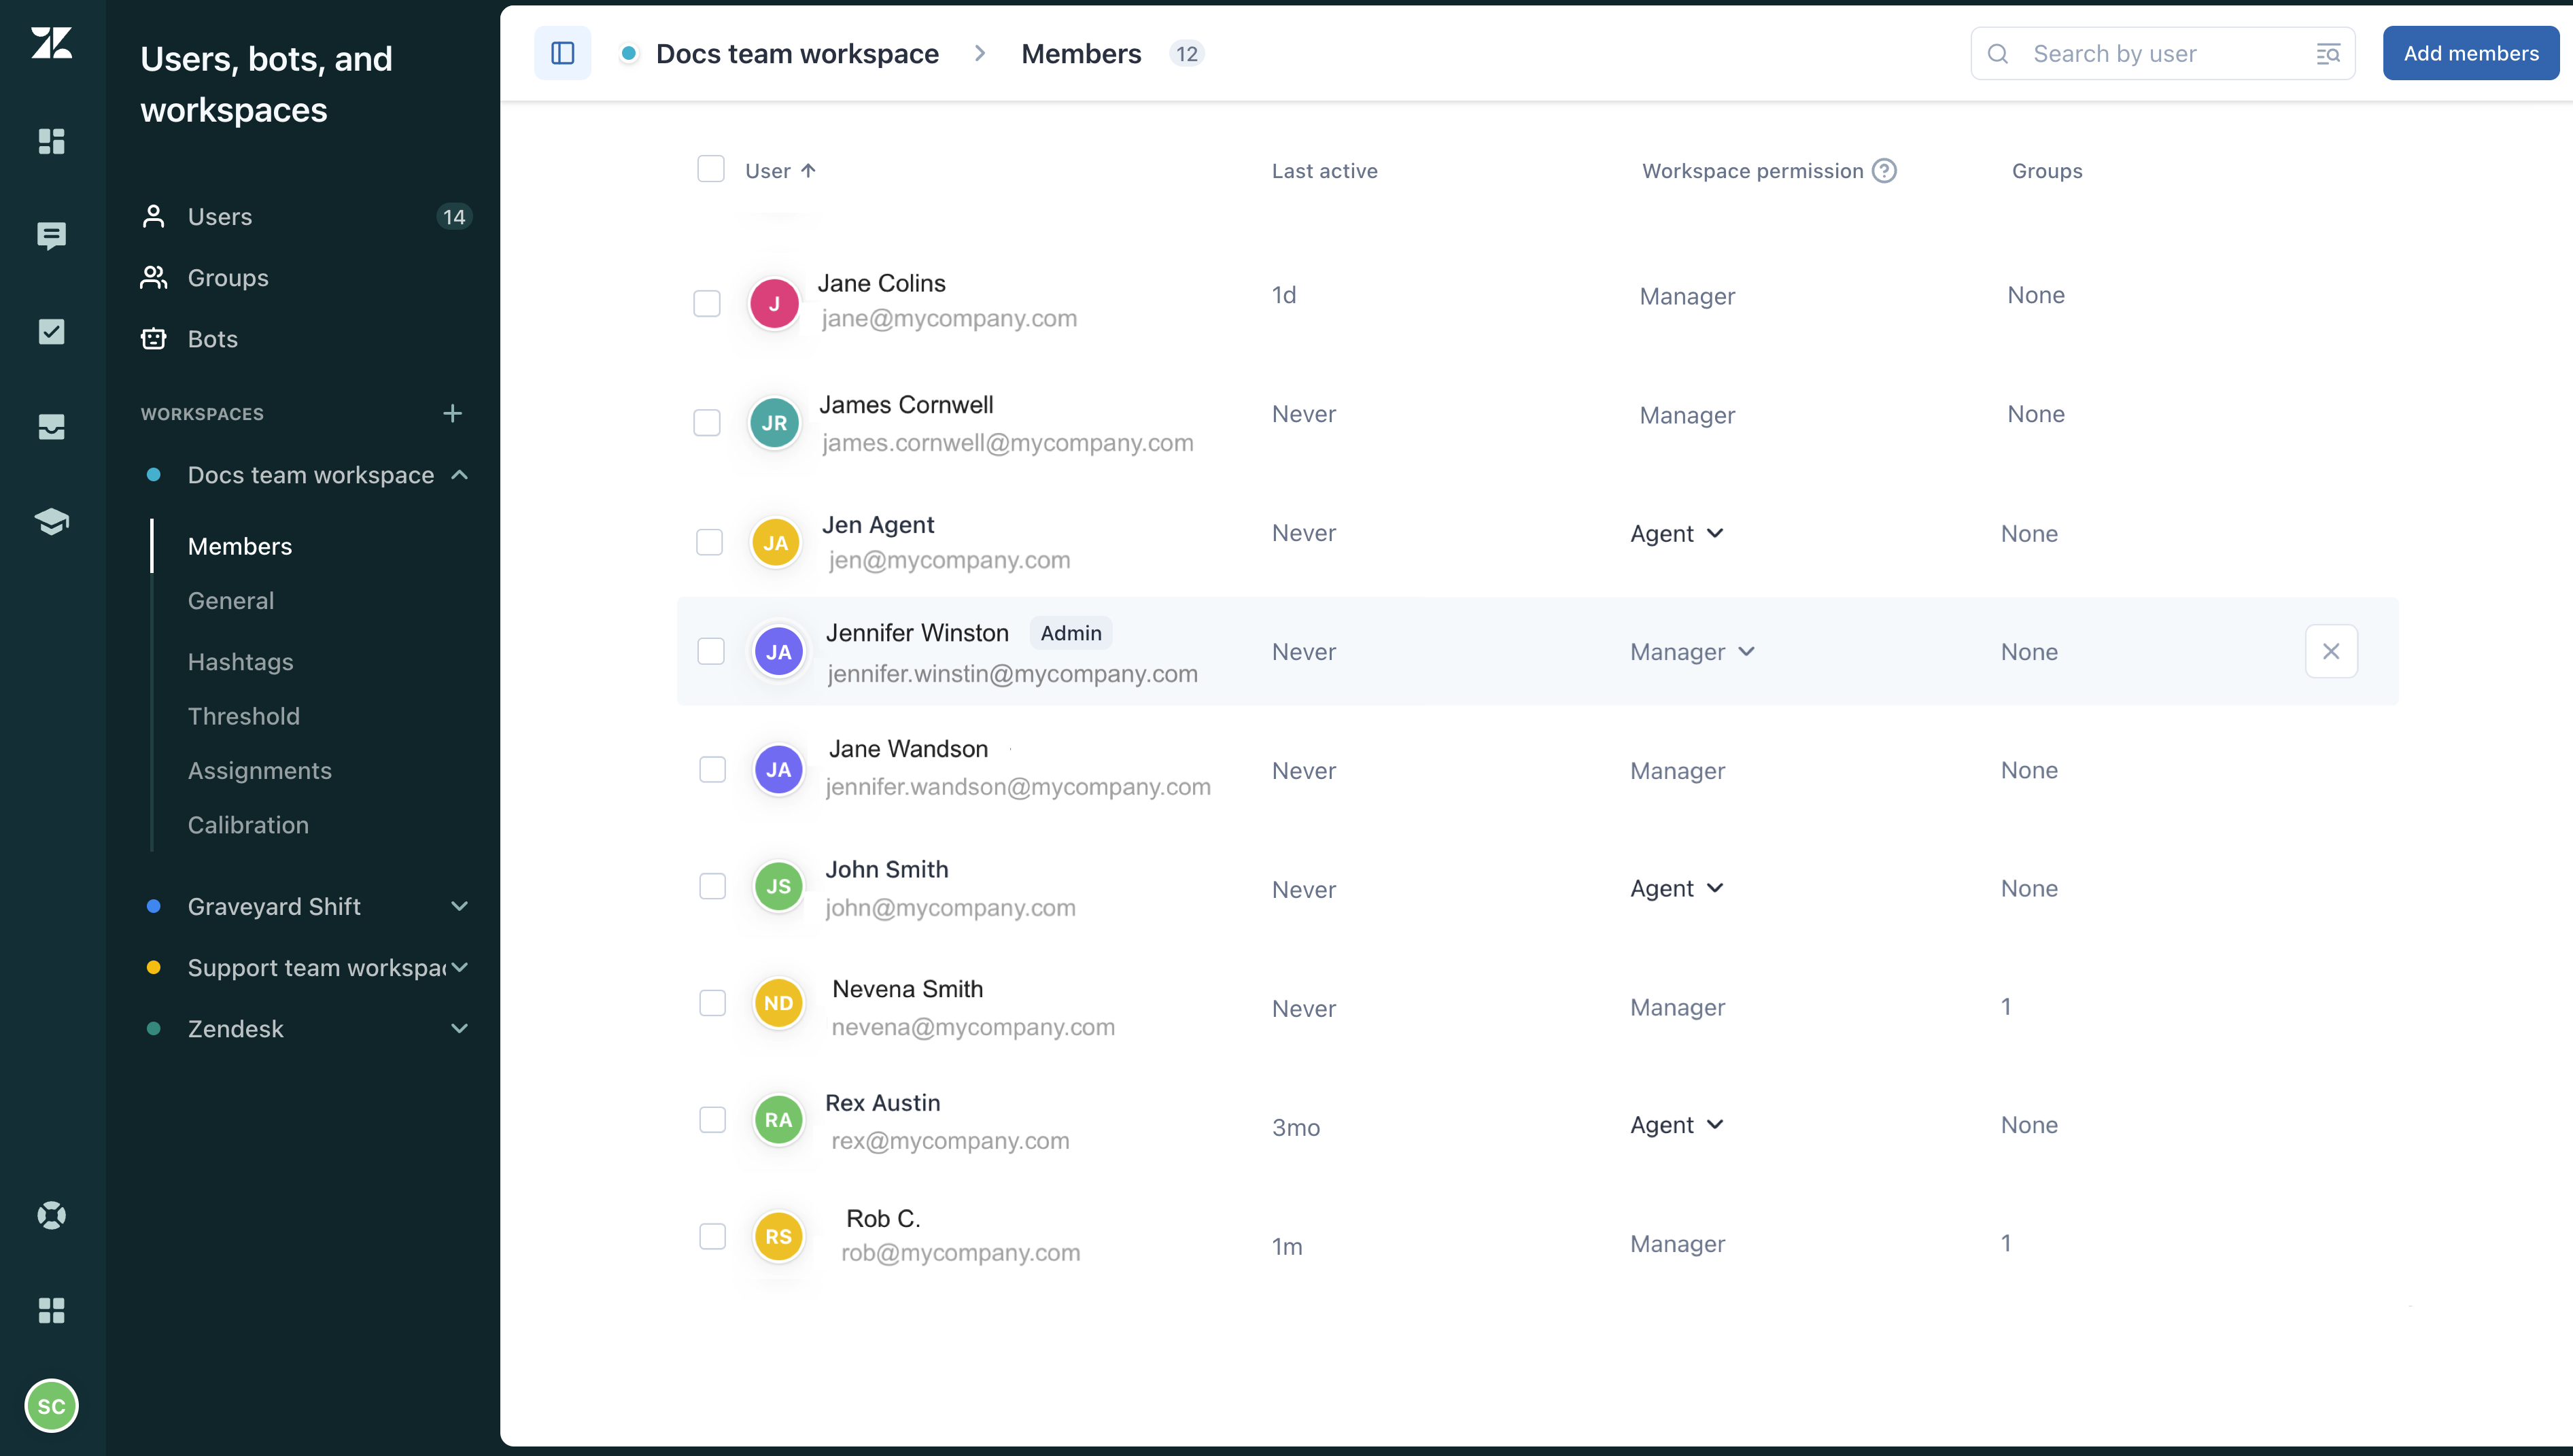
- Members: Add or remove users from the workspace and change their permissions for that workspace. See Managing workspace members.
- General: Set or edit the workspace name and representative color, turn unbiased grading and self-reviews on or off, and select the default reviewee. See Managing workspace’s general settings.
- Hashtags: Manage custom hashtags and track their usage. See Adding custom hashtags to Zendesk QA comments.
- Threshold: Set the overall QA goal for the workspace. Scores below the threshold appear in red, while scores above it appear in green. See Setting a performance reporting threshold in Zendesk QA.
- Assignments: Set up automatic assignment of conversations based on specific conditions. See Setting up assignments in Zendesk QA.
- Calibration: Ensure consistent feedback by having reviewers rate the same conversations and comparing their evaluations. See Setting up calibration in Zendesk QA.