Verified AI summary ◀▼
Configure the Jira app to create and view linked issues from tickets. Customize project access, add or remove fields in the sidebar, and adjust the issue creation form. Manage attachments, linked issues, and automation settings. Temporarily disable the app during setup without disconnecting accounts. This integration does not support Jira Data Center or Server.
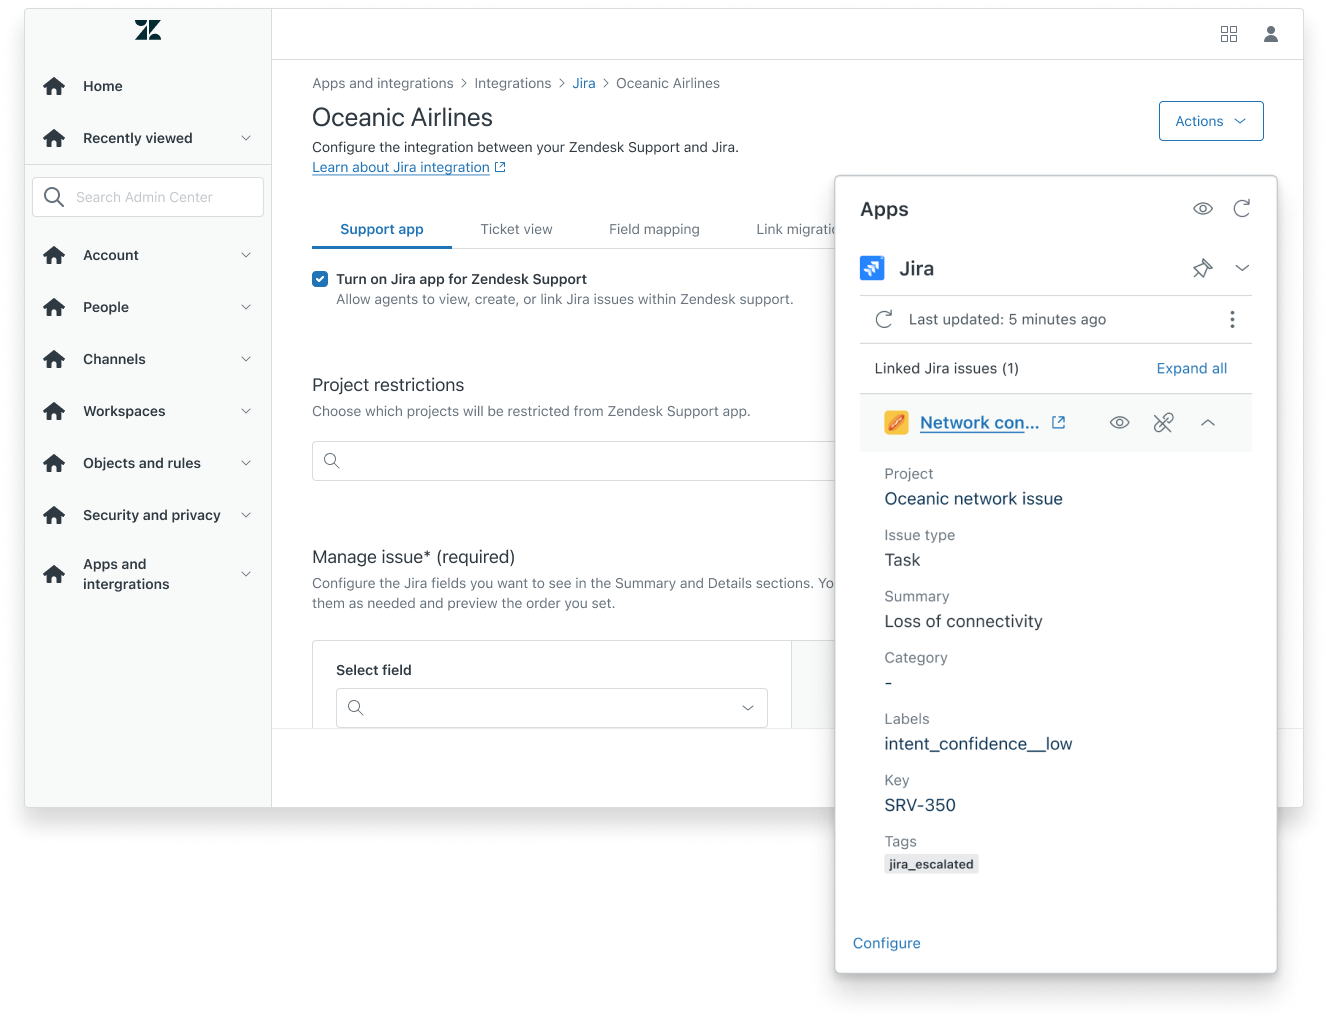
As described in Using the Jira integration for Zendesk, the Jira app for Zendesk Support allows agents to create and view linked Jira issues from a ticket in Zendesk. The app is available to agents in Zendesk after you've connected your Jira instance to Zendesk.
Admins can configure the app to customize and enhance the integration to suit their company's needs. The app can also be turned on or off to support flexible management during setup.
This article contains the following topics:
Including Jira projects
Zendesk admins can configure the Jira app to include specific projects, so that when an agent tries to create or link a Jira issue, only those projects will be available. This feature is particularly useful if you'd only like to permit ticket creation for certain projects.
To include Jira projects in the app
- In Admin Center, click
 Apps and integrations in the sidebar, then select Integrations >
Integrations.
 - Click the Jira link.
- If you have multiple connections, click the name of the connection you are setting up.
- On the Support app tab, select which projects to allow ticket creation in the
Allowed projects field.
If you'd rather select only the projects to exclude, select those projects in the Restricted projects field. This option is useful if you only need to exclude a small number of projects, such as internal projects.
You can only use one option at a time: Allowed projects or Restricted projects. These fields cannot be used together. If you're looking for a specific project that isn't immediately visible in the drop-down list, you can start typing its name to find it quickly.
- Click Save.
Adding and removing Jira fields from the app sidebar
With a ticket open in Zendesk, users can access the Jira app in the right sidebar. If
the app is not displayed on the right side of the Agent Workspace, agents can click
the Apps icon (![]() ) in the context panel to open it.
) in the context panel to open it.
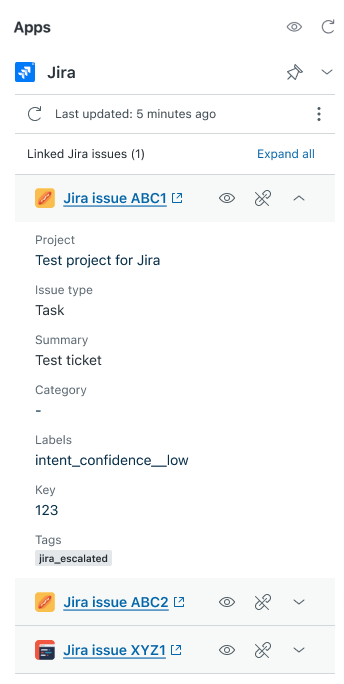
Zendesk admins can customize the app to display the Jira fields most relevant to agents handling tickets. This configuration process involves adding the desired Jira fields to the app and organizing them within the Summary and Details sections of the sidebar.
To add Jira fields to the app sidebar
- In Admin Center, click
 Apps and integrations in the sidebar, then select Integrations >
Integrations.
 - Click the Jira link.
- If you have multiple connections, click the name of the connection you're setting up.
- In the Manage issue section, select the field you'd like to add in the Select
field menu, then click Add field.
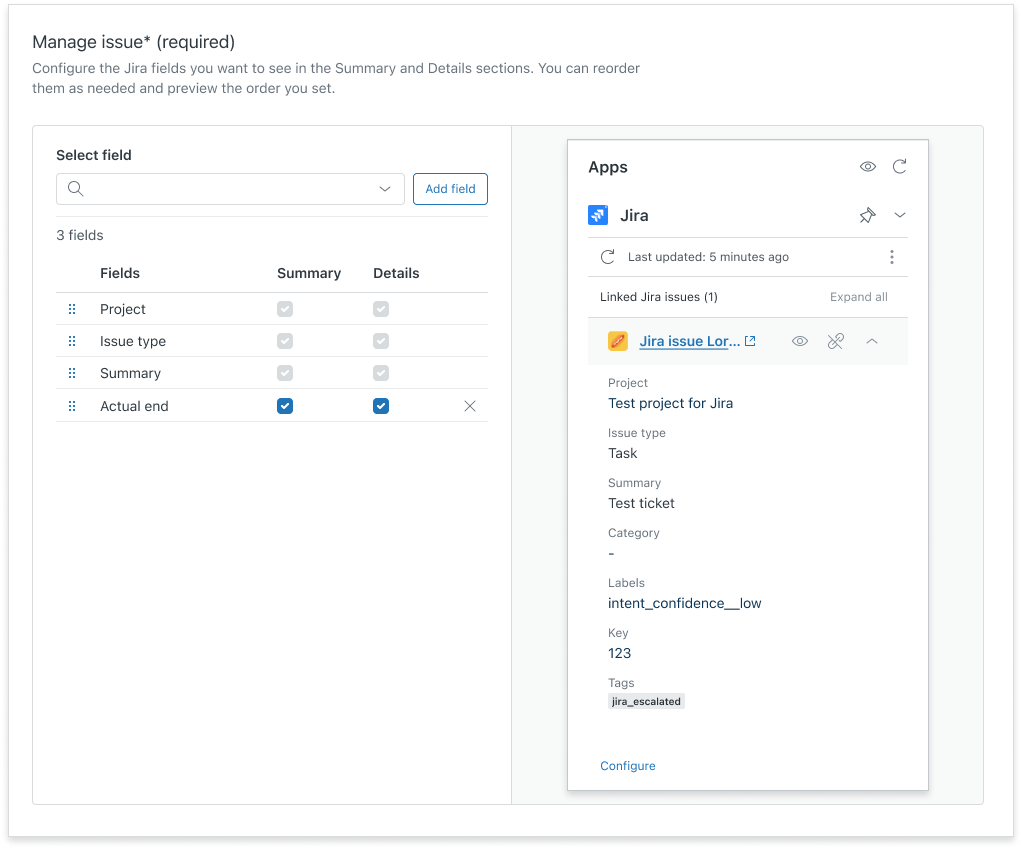
- Select where to display the field in the sidebar: the Summary and/or
Details section.
If a field is selected but grayed out, it means that the field is already added to the section by default and can't be removed.
- To reorder fields in the sidebar, click
 and drag
them to the desired location. The order represented in the configuration
determines the order in which fields are displayed in the sidebar.
 - Click Save.
The preview pane displays how the added field will appear to agents. Use the preview to determine whether objects need to be adjusted or reordered.
To remove Jira fields from the app sidebar
- In Admin Center, click
 Apps and integrations in the sidebar, then select Integrations >
Integrations.
 - Click the Jira link.
- If you have multiple connections, click the name of the connection you're setting up.
- In the Manage issue section, click the X icon next to the fields to
remove.

If a field is selected but grayed out, it means that the field can't be removed.
- Click Save.
Adding Jira fields to the issue creation form
When creating a Jira issue from a Zendesk Support ticket, agents are asked to enter details about the issue being reported in the Create issue form.
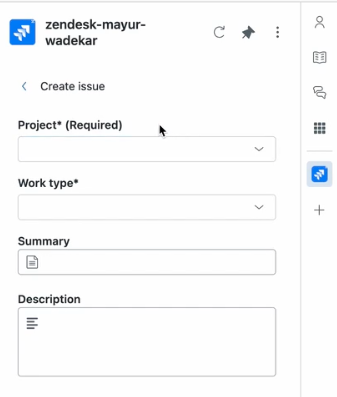
- Project
- Work type
- Summary
- Description
These default fields can't be removed. Zendesk Support admins can add pre-existing or custom Jira fields to this form. Adding fields to the issue creation form makes them visible to all agents when creating issues for the selected project and work type.
Fields marked as mandatory for a selected project and issue type in Jira will always appear by default in the Zendesk sidebar app. These fields are set by Jira and are not configurable in Admin Center. Admins can't remove or reorder these fields within Zendesk.
- In Admin Center, click
 Apps and integrations in the sidebar, then select Integrations >
Integrations.
 - Click the Jira link.
- If you have multiple connections, click the name of the connection you are setting up.
- On the Support app tab, scroll down to the Create issue fields section and click Configure.
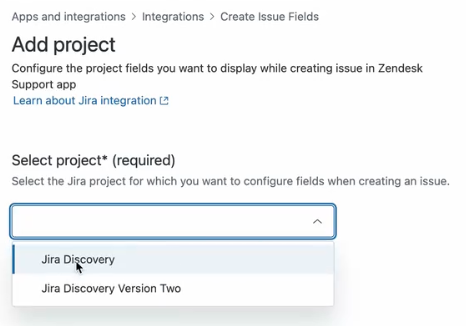
- Click Add project.
- In the Select project field, select the project for which you'd like to
configure fields.
- Expand the issue type for which you'd like to add fields to the issue creation form.
- Use the Select field menu to add fields to the form:
- Select a field in the dropdown menu.
- To make the field required on the Create issue form, select Is Required?.
- Click Add field.
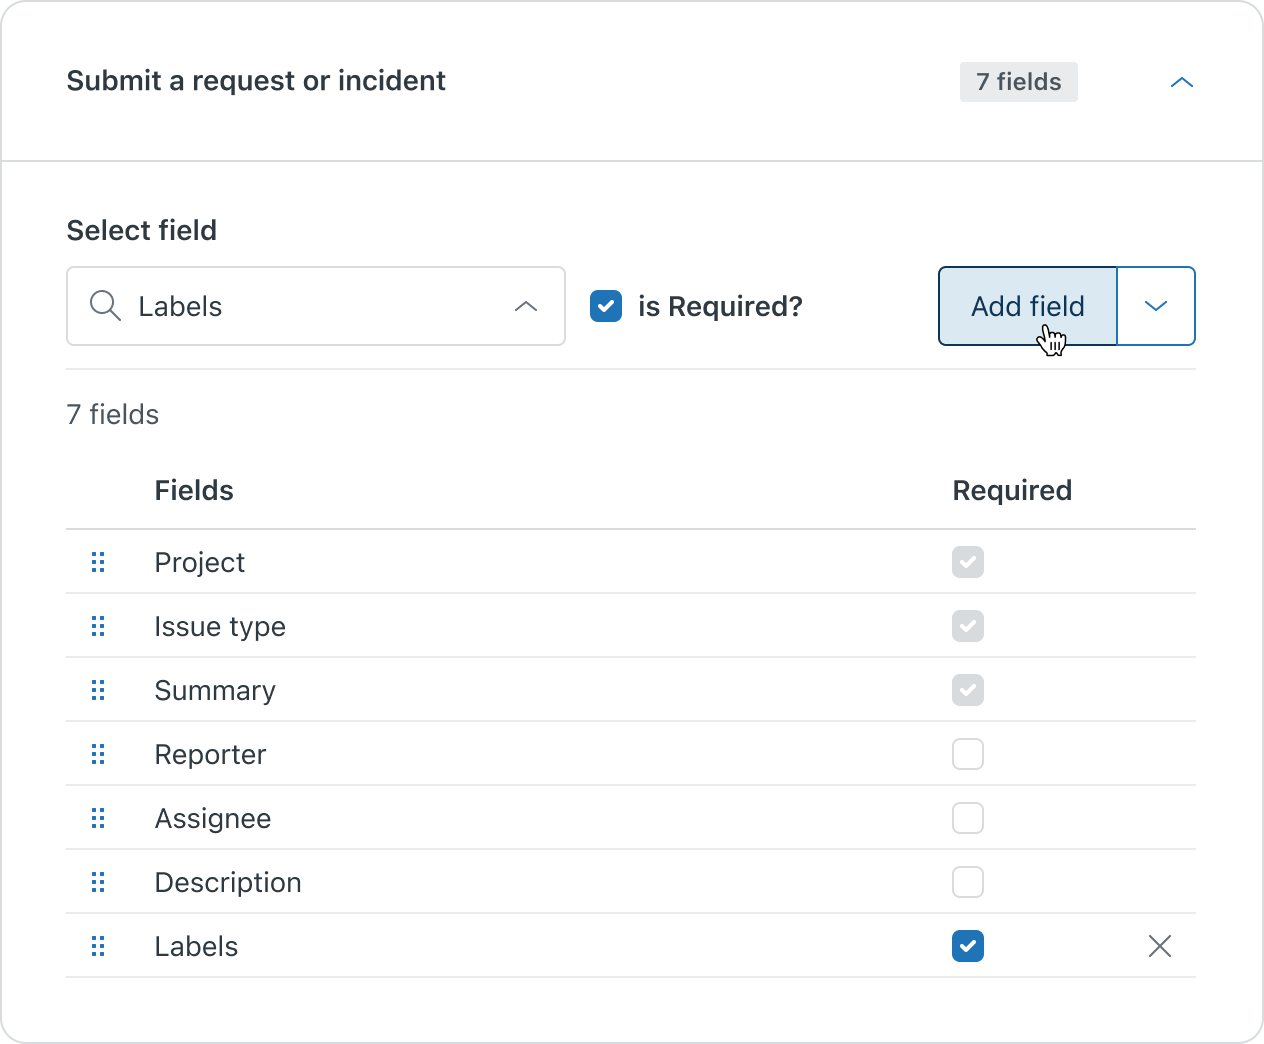
- To reorder fields on the form, click
 and
drag them to the desired location. The order represented in the
configuration determines the order in which fields are displayed on the
form.
 - Click Add.
Configuring attachments, linked issues, and automation
To configure attachments, linked issues, and automation
- In Admin Center, click
 Apps and integrations in the sidebar, then select Integrations >
Integrations.
 - Click the Jira link.
- If you have multiple connections, click the name of the connection for which you'd like to turn off the app.
- On the Support app tab, scroll to the bottom of the page and turn the following
features on or off:
- Allow issue creation allows Zendesk users to create Jira issues from tickets.
- Attachments management in linked issue details allows users to manage attachments within linked Jira issues.
- Automatically add agent as watcher when linking Jira issues
- Allow search for closed issues
- Turn on linked ticket reporting in Jira
- Manage links allows API users to create and update integration links via the API.
- Update ticket status or comments allows API users to sync the status of Zendesk tickets with the status of linked issues in Jira via the API.
- Click Save.
Turning off the app
After connecting your Jira instance to Zendesk, the Jira app is visible to agents in Zendesk by default. You can temporarily hide the app from agents by turning it off. For example, you may want to turn it off while you're configuring it.
Turning the app off doesn't disconnect your accounts. However, agents can't create or link issues.
To turn off the Jira app
- In Admin Center, click
 Apps and integrations in the sidebar, then select Integrations >
Integrations.
 - Click the Jira link.
- If you have multiple connections, click the name of the connection for which you'd like to turn off the app.
- On the Support app tab, deselect the Turn on Jira app for Zendesk Support
checkbox.
When you're ready to turn the app back on, select the checkbox.
- Click Save.