When a customer reaches out for support on a messaging channel, you can configure an AI agent to collect their information and immediately escalate the conversation to a human agent. Use this workflow if you want human agents to provide customer support instead of letting an AI agent respond with AI-generated replies.
This article contains the following topics:
- Understanding the workflow
- Step 1: Create an AI agent
- Step 2: Create a configured action to check the customer’s authentication status
- Step 3: Create a form template to collect the customer’s information
- Step 4: Set your business hours in your AI agent
- Step 5: Edit the welcome reply
- Step 6: Test, activate, and validate
Understanding the workflow
Even if you want human agents to provide support to your customers, you can still benefit from an AI agent. You can configure an AI agent to:
- Greet customers: Every time a customer begins a conversation with your AI agent in the Web Widget, the AI agent’s first response is the welcome message you configure.
- Collect information: The AI agent presents the customer with a form to be filled out. You can configure this form to collect whatever information your human agents will need to solve the customer’s request, such as details about the issue or the customer’s contact information. This saves your human agents time because they already have the necessary information to act on customer requests by the time the requests reach them.
- Escalate requests: The AI agent tells the customer that their request is being sent to your support team. Behind the scenes, human agents are notified that a support request has been received, and they can accept the request and begin responding to the conversation.
Optionally, you can also configure the AI agent to behave differently depending on:
-
Your business hours:
- During business hours, the AI agent can escalate the conversation to a human agent on a messaging channel, where the agent can immediately begin conversing with the customer.
- Outside of business hours, the AI agent can collect the customer’s information and escalate the request as an email ticket to your support team.
-
Customer authentication status:
- If the customer is authenticated, the AI agent won't collect the email and name in the form. However, any other information that needs to be collected can be.
- If the customer isn’t authenticated, you can collect their email and name in addition to any other information that needs to be collected.
This workflow utilizes the AI agent welcome reply, which is a default system reply that’s sent to the customer at the beginning of a conversation. You’ll edit the dialogue associated with this reply to contain the AI agent messages, actions, and forms needed to carry out the workflow described above.
Step 1: Create an AI agent
First, you need to create the AI agent that converses with customers on your messaging channel.
To create an AI agent
- Follow the step-by-step instructions in Creating an AI agent to automatically resolve customer issues.
Step 2: Create a configured action to check the customer’s authentication status
Next, create a configured action that checks the customer’s authentication status. This information is available through the Sunshine Conversations app user object. The Get user CRM action gets the user’s authentication status and saves it as a session parameter for the conversation.
To create a configured action to check authentication status
- In the AI agents workspace, select the AI agent you want to work with.
-
Click
 Actions in the sidebar, then select Configured actions.
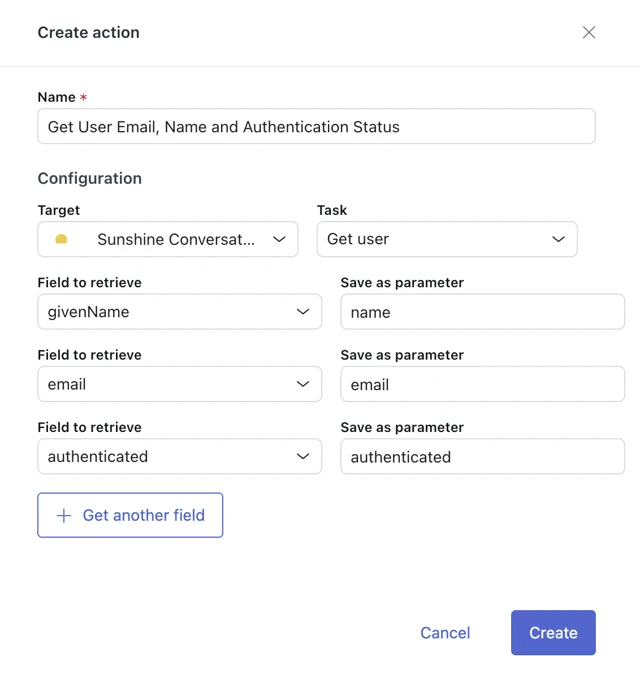
- Click Create configured action.
- In Name, enter a descriptive name for the action, such as Get customer authentication status, name, and email.
- In Target, select Sunshine Conversations.
- In Task, select Get user.
- In Field to retrieve, select authenticated.
- In Save as parameter, enter the name of the parameter the value should be saved as, such as authenticated.
-
Click Get another field and
add parameter information for the
customer’s name:
- Field to retrieve: givenName
- Save as parameter: name
-
Click Get another field and add parameter information for
the customer’s
email:
- Field to retrieve: email
- Save as parameter: email
-
Click Create.
When you add this action in the welcome reply dialogue (described below), the AI agent will fetch the indicated fields from the app user object and save it as session parameters.
 Tip: You can find additional optional configuration for this action in the developer documentation.
Step 3: Create a form template to collect the customer’s information
Create a form template to specify which details to collect from the customer.
Based on their authentication status, the form collects the missing details. For example, an authenticated user means their email is known to be authenticated in the first place, so there’s no need for the form to collect the email again.
You should create two different form templates, one for authenticated customers and one for unauthenticated customers. The form for authenticated customers doesn’t need to include fields for Name and Email, since those details are already known due to the authentication, but it should include fields for any other details you want to collect. The form for unauthenticated customers should include Name and Email, in addition to any other details you want to collect.
Which form template is shown to the customer depends on their authentication status. You’ll configure this when you edit the welcome reply’s dialogue, described later in this article.
To create a form template
- Follow the step-by-step instructions in Creating a form template.
Step 4: Set your business hours in your AI agent
Set operating hours in your AI agent that mirror your business hours. Operating hours define the working hours for your human agents.
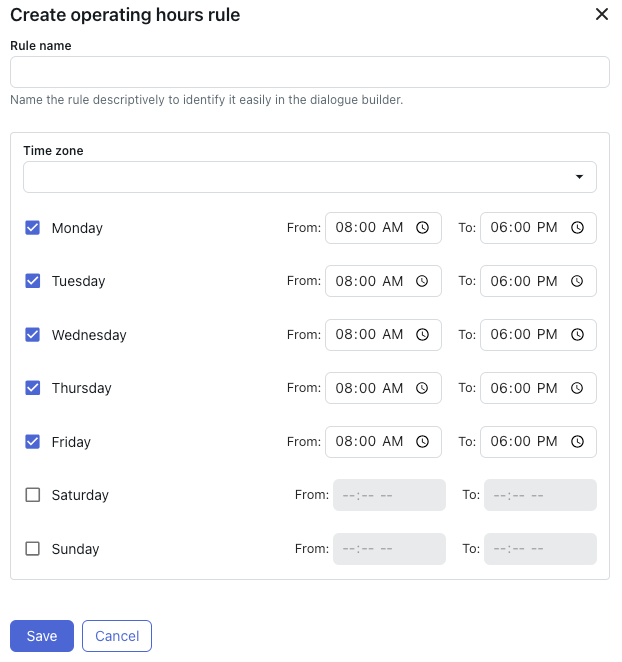
To set your business hours
- Follow the step-by-step instructions in Setting operating hours.
Step 5: Edit the welcome reply
The last setup step is to edit the dialogue associated with the welcome reply. The dialogue contains the AI agent messages, actions, and forms needed to carry out the workflow described above.
To edit the welcome reply
- In the AI agents workspace, select the AI agent you want to work with.
-
Click
 Content in the sidebar, then select Use cases.
- In the list of use cases, select Welcome reply.
- Select the reply for the language you want to edit.
-
Click Edit dialogue.
The dialogue builder opens.
-
(Optional) If you have separate default messaging responses
for different
channels, click the plus (+) icon above the initial AI agent
message block,
select Conditional, and enter
integrationID in the empty
field.
- In the child Parameter block, select is in the first field and enter your first channel’s integration ID in the second field.
-
Click the plus (+) icon under the Conditional field
to add and
configure additional Parameter blocks as needed for
your other
channels.
Tip: You can make it easier to see in the conversation logs which channel’s dialogue branch was followed during a conversation. First, create an action that adds a label with the channel’s name. Then, add the action to each parameter block.
- Click the plus (+) icon above the initial AI agent message block and select Availability.
- In the Availability block, click Select rule and select the operating hours rule you created above.
-
Under the Open block:
- Click the plus (+) icon, select AI agent message, and enter what the AI agent should say to the customer at the beginning of a conversation when human agents are available.
- Click the plus (+) icon underneath the block you just added, select Conditional, and enter authenticated in the empty field.
- In the Parameter block, select Is (boolean) in the first field and True in the second field.
-
Click the plus (+) icon underneath the block you
just added, select
AI agent message, and
enter the template shorthand for
the authenticated users form.
For help finding the template shorthand, see Adding a structured message template in a dialogue.
-
Click the plus (+) icon underneath the block you
just added, and
select Escalation.
- In the first field, enter what the AI agent should say to the customer when escalating them to a human agent.
- In the second field, select Forward to an agent.
- Click the plus (+) icon underneath the Fallback block, select AI agent message, and enter the template shorthand for the unauthenticated users form.
- Click the link icon underneath the Fallback block and then select the Escalation block to link the two blocks together.
-
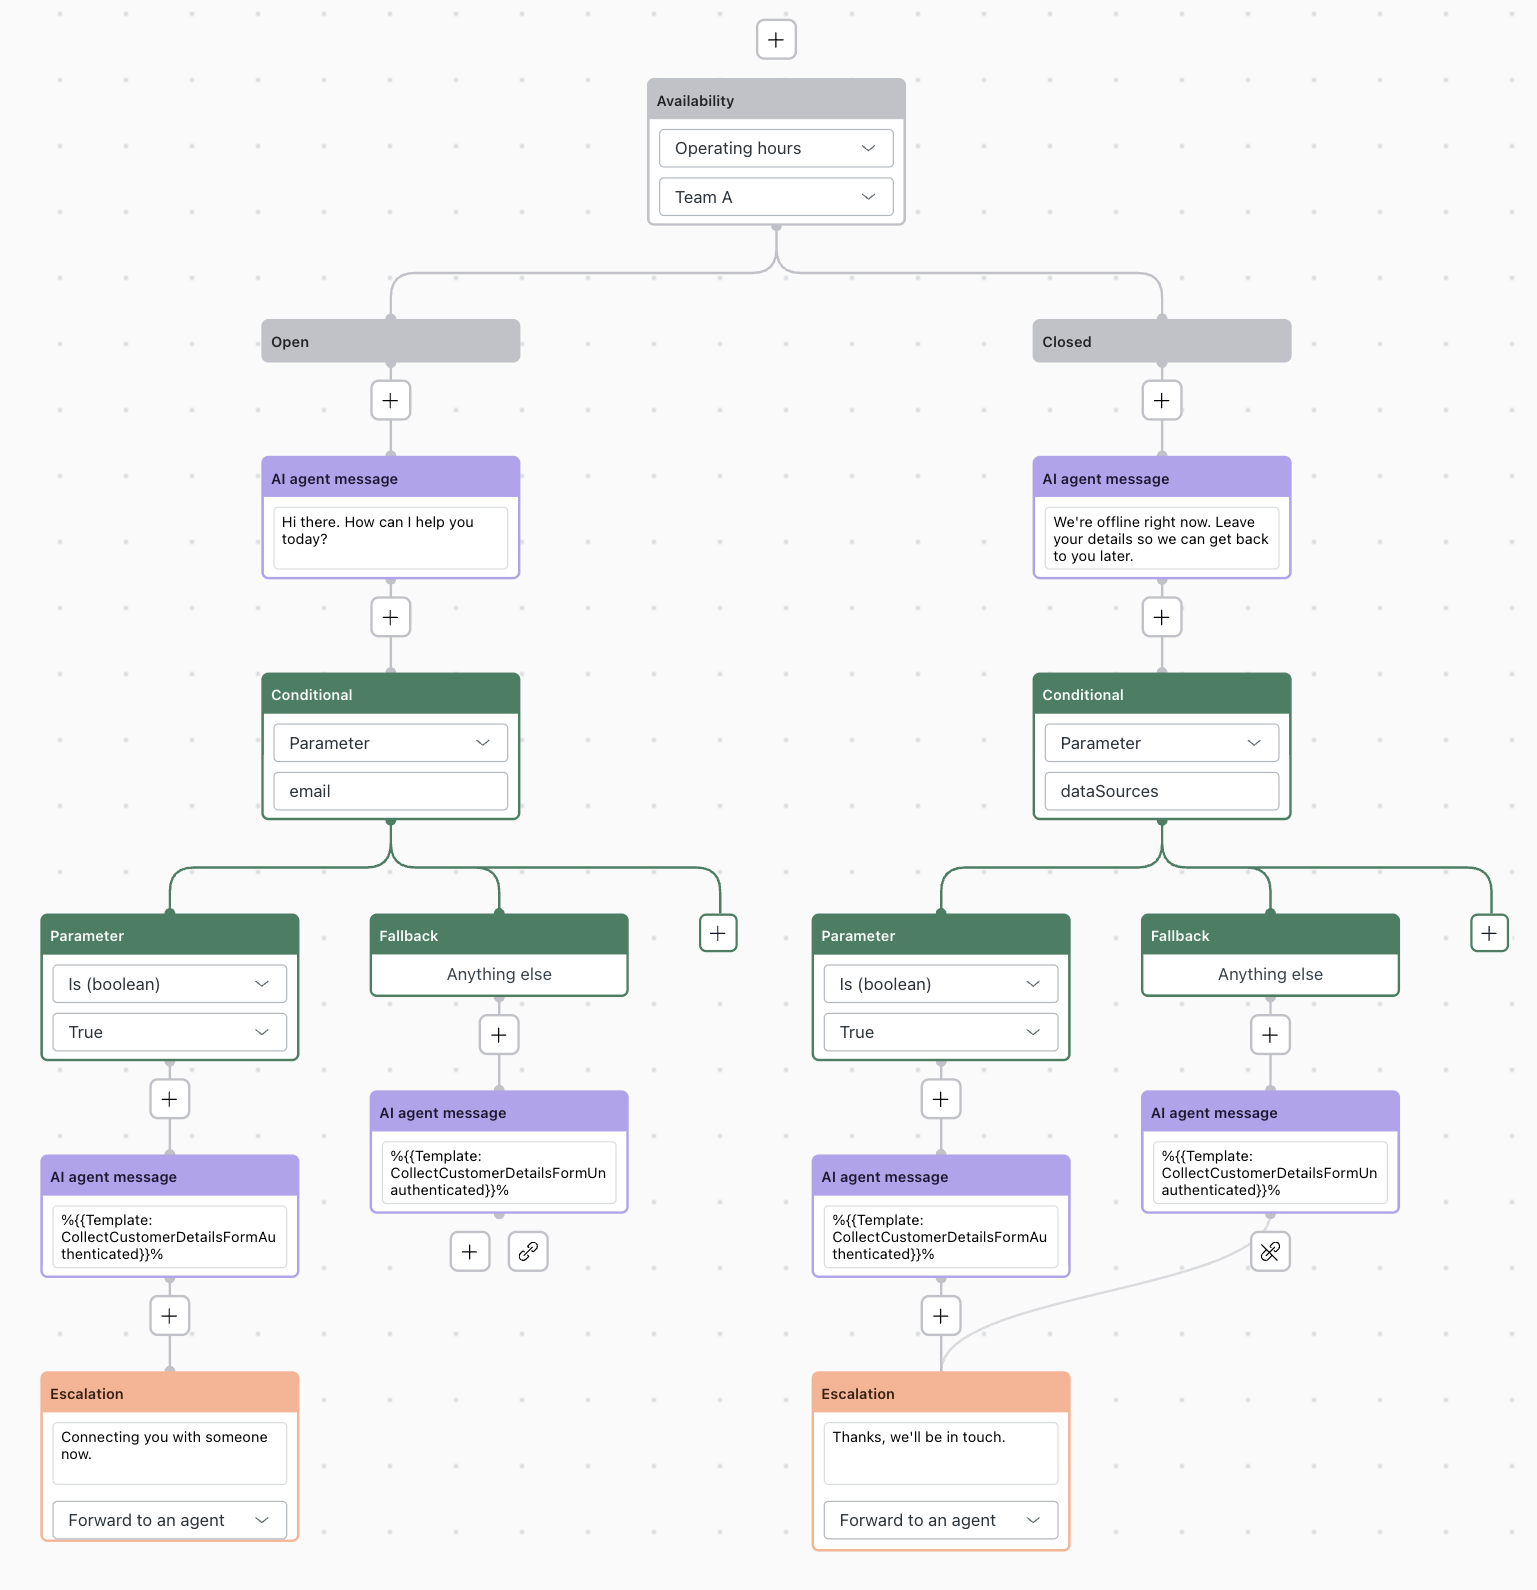
Repeat step 9 for the Closed block to reflect what should
happen when human
agents aren’t available.
At this point, your dialogue should look similar to the following:
- Click Publish.
For additional help with the dialogue builder, see Creating dialogues to define scripted conversation flows for AI agents.
Step 6: Test, activate, and validate
After your AI agent is configured as you want, you should perform three last tasks:
- Test the AI agent before making it live for customers.
- Activate the AI agent on the channels you want it to work on.
- Validate that AI agent conversations are appearing in the conversations log.