Summary: ◀▼
Use cases help you identify what customers are asking about and connect them to the right generative procedure, dialogue, or reply. You can create use cases manually or from AI suggestions based on past conversations, then accept, edit, or reject them. Use categories, status, and segments to organize and target coverage for customer requests like order status, refunds, and returns.
Use cases are the mechanism by which AI agents understand what a customer is asking about and connect them with the right generative procedure or dialogue. Use cases are the topics that your customers need help with, such as order returns or refund requests.
This article contains the following topics:
Related articles:
Creating a use case manually
You create use cases on the Use cases page.
To create a use case manually
- In the AI agents workspace, select the AI agent you want to work with.
- Click
 Content in the sidebar, then select Use cases.
 - Click Create use case.
The Use case dialog appears.
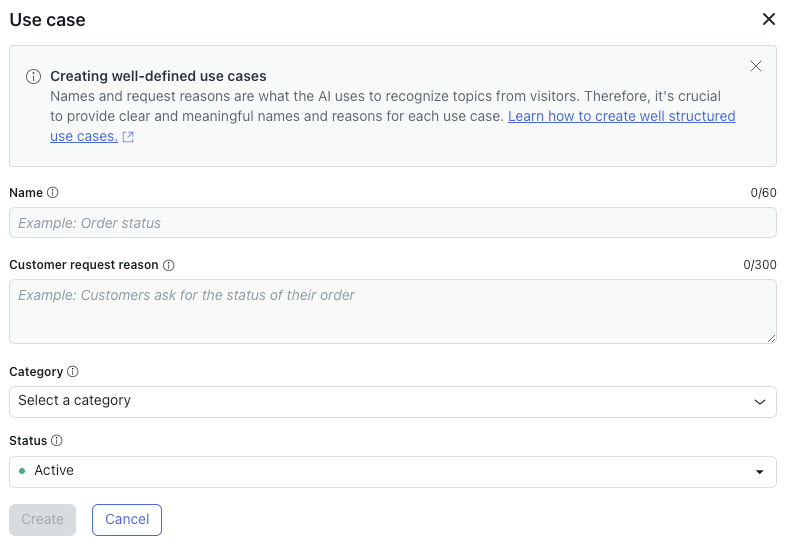
- In Name, enter a short, descriptive name for the use case (for example, "Order status").
- In Customer request reason, enter a short description that identifies
why a customer is reaching out.
For example, "Customer is asking for the status of their order."
- (Optional) In Category, select an existing category, or start typing
to enter a new category and click Add a category.
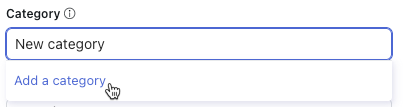
Categories make managing use cases easier, but they don’t affect how an AI agent connects use cases with a customer’s message (only use case names and descriptions do that).
- (Optional) In Status, select Inactive if you don't want your AI agent to begin detecting this use case yet.
- Click Create.
Your use case is created, but it won't begin guiding an AI agent's responses until you perform the following steps:
- For an AI agent with agentic AI: Configure whether the use case should use a procedure or a dialogue.
- For a zero-training AI agent: Create a reply associated with the use case.
By default, your use case applies to all customers. You can restrict your use case with segments so that it applies only to certain customers. See Restricting use cases by segment.
Creating use cases based on AI suggestions
As an alternative to creating use cases manually, you can create them based on AI suggestions. Suggestions are generated based on historical conversations in your AI agent to create use cases specifically tailored to the needs of your customers.
This section contains the following topics:
Generating use case suggestions for the first time
If you haven't generated any use case suggestions before, follow the steps below to get started.
To generate use case suggestions for the first time
- In the AI agents workspace, select the AI agent you want to work with.
- Click
Content in the sidebar, then select Use cases.
- Select the Suggestions tab.
- Click Generate suggestions.
The Generate use case suggestions dialog opens.

- In Report preset, leave Quick selected, or else select
Custom to expand the advanced settings.
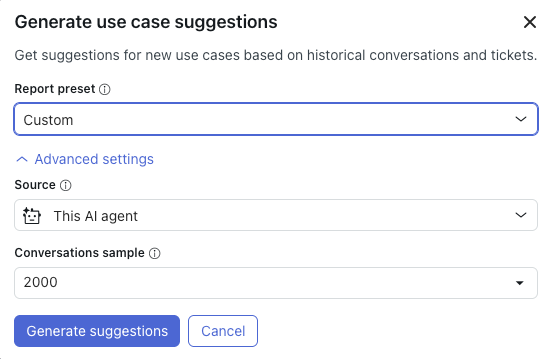
- (Optional) In Source, select one of the following options:
- This AI agent: Historical data from the AI agent you selected above. This data includes only messages that were classified as Not understood.
- Zendesk messaging: (Available only for messaging AI agents.) Historical messaging conversations from your Zendesk account.
- Zendesk Support: (Available only for email AI agents.) Historical email tickets from your Zendesk account. Messaging tickets are not included. This data includes all public comments on email tickets, but does not include private notes.
- (Optional) In Conversations sample, select the number of messages that the system should analyze (500, 1000, or 2000).
- (Optional) If you selected Zendesk messaging or Zendesk Support as your
source, configure the following additional options:
- Group: Enter the group from which conversations should be selected for analysis.
- Tag: Enter the tag that conversations should have to be selected for analysis.
- Click Generate suggestions.
After a few minutes, a suggested use case report appears.
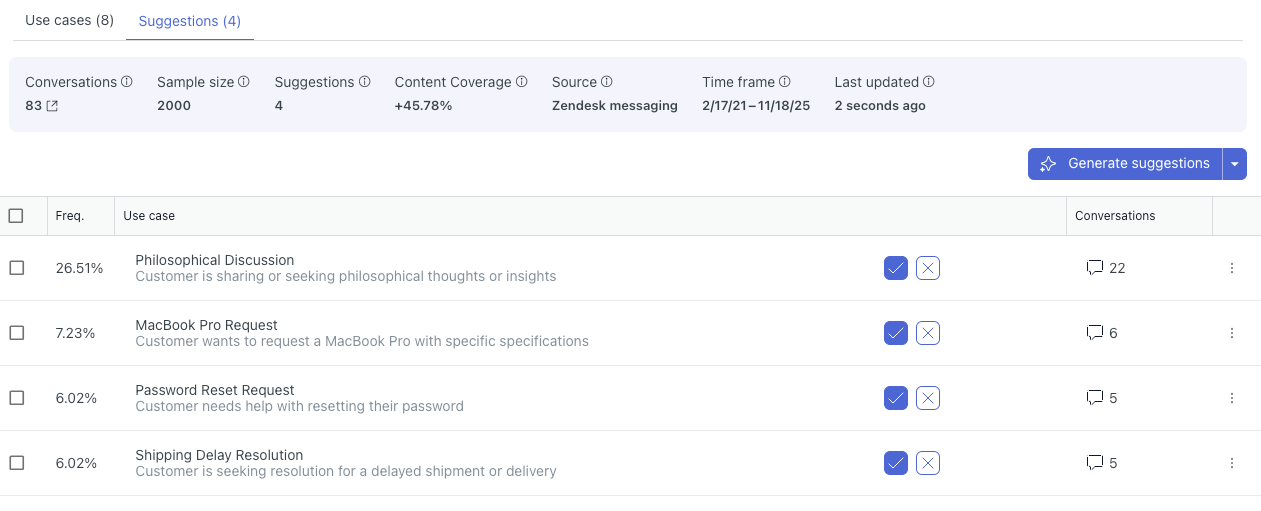
The banner at the top summarizes the following details:
- Conversations: The number of analyzed conversations the suggested use cases apply to.
- Sample size: The number of conversations the report analyzed.
- Suggestions: The number of use case suggestions that were generated.
- Content coverage: The estimated percentage increase in use case coverage for your customer conversations if you create the suggested use cases.
- Source: The source you selected when generated the suggestions.
- Time frame: The time frame the analyzed conversations occurred in.
- Last updated: The last time the use case suggestions were generated.
The following columns include the use case suggestions:
- Freq. (Frequency): Shows the estimated percentage of analyzed conversations that a suggested use case applies to. The higher the frequency, the more important it is to create a use case that covers this topic.
- Use case: Shows a name and description for a suggested use case.
- Conversations: Shows the number of conversations that a suggested use case applies to.
- (Optional) Click the icon in the Conversations column to open the conversation logs for the relevant conversations.
- For each suggested use case, accept it as is, edit it before accepting
it, or reject it altogether:
- To accept a suggested use case, click the checkmark.
The use case is accepted and added to the Use cases tab.
- To edit a suggested use case before accepting it, click the use
case name to open it in a new dialog.
- Edit any of the details as needed.
For help, see Creating a use case manually.
- Click Accept suggestion.
The use case is accepted and added to the Use cases tab.
- Edit any of the details as needed.
- To reject a suggested use case, click the X.
Rejected use cases aren’t suggested again the next time you generate use case suggestions.
- To accept a suggested use case, click the checkmark.
Next, you need to configure whether the use case should use a generative procedure or a dialogue.
Regenerating use case suggestions
If you've already generated some use case suggestions for an AI agent, you can regenerate the suggestions to create use cases based on fresh data. Each time you generate suggestions, new use case suggestions are added to already-existing suggestions.
To regenerate use case suggestions
- In the AI agents workspace, select the AI agent you want to work with.
- Click
Content in the sidebar, then select Use cases.
- Select the Suggestions tab.
- (Optional) If you want to change the settings the system uses when
generating the suggestions, click the arrow next to Generate
suggestions and select Configure report.
Update the settings as needed. For help, see Generating use case suggestions for the first time.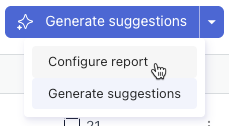
- Click Generate suggestions.
After a few minutes, an updated suggested use case report appears.