Summary: ◀▼
You can monitor your resolution usage with a dashboard that shows current usage and resolution details. Receive notifications when nearing or exceeding limits, and review ticket events or AI conversations for insights.
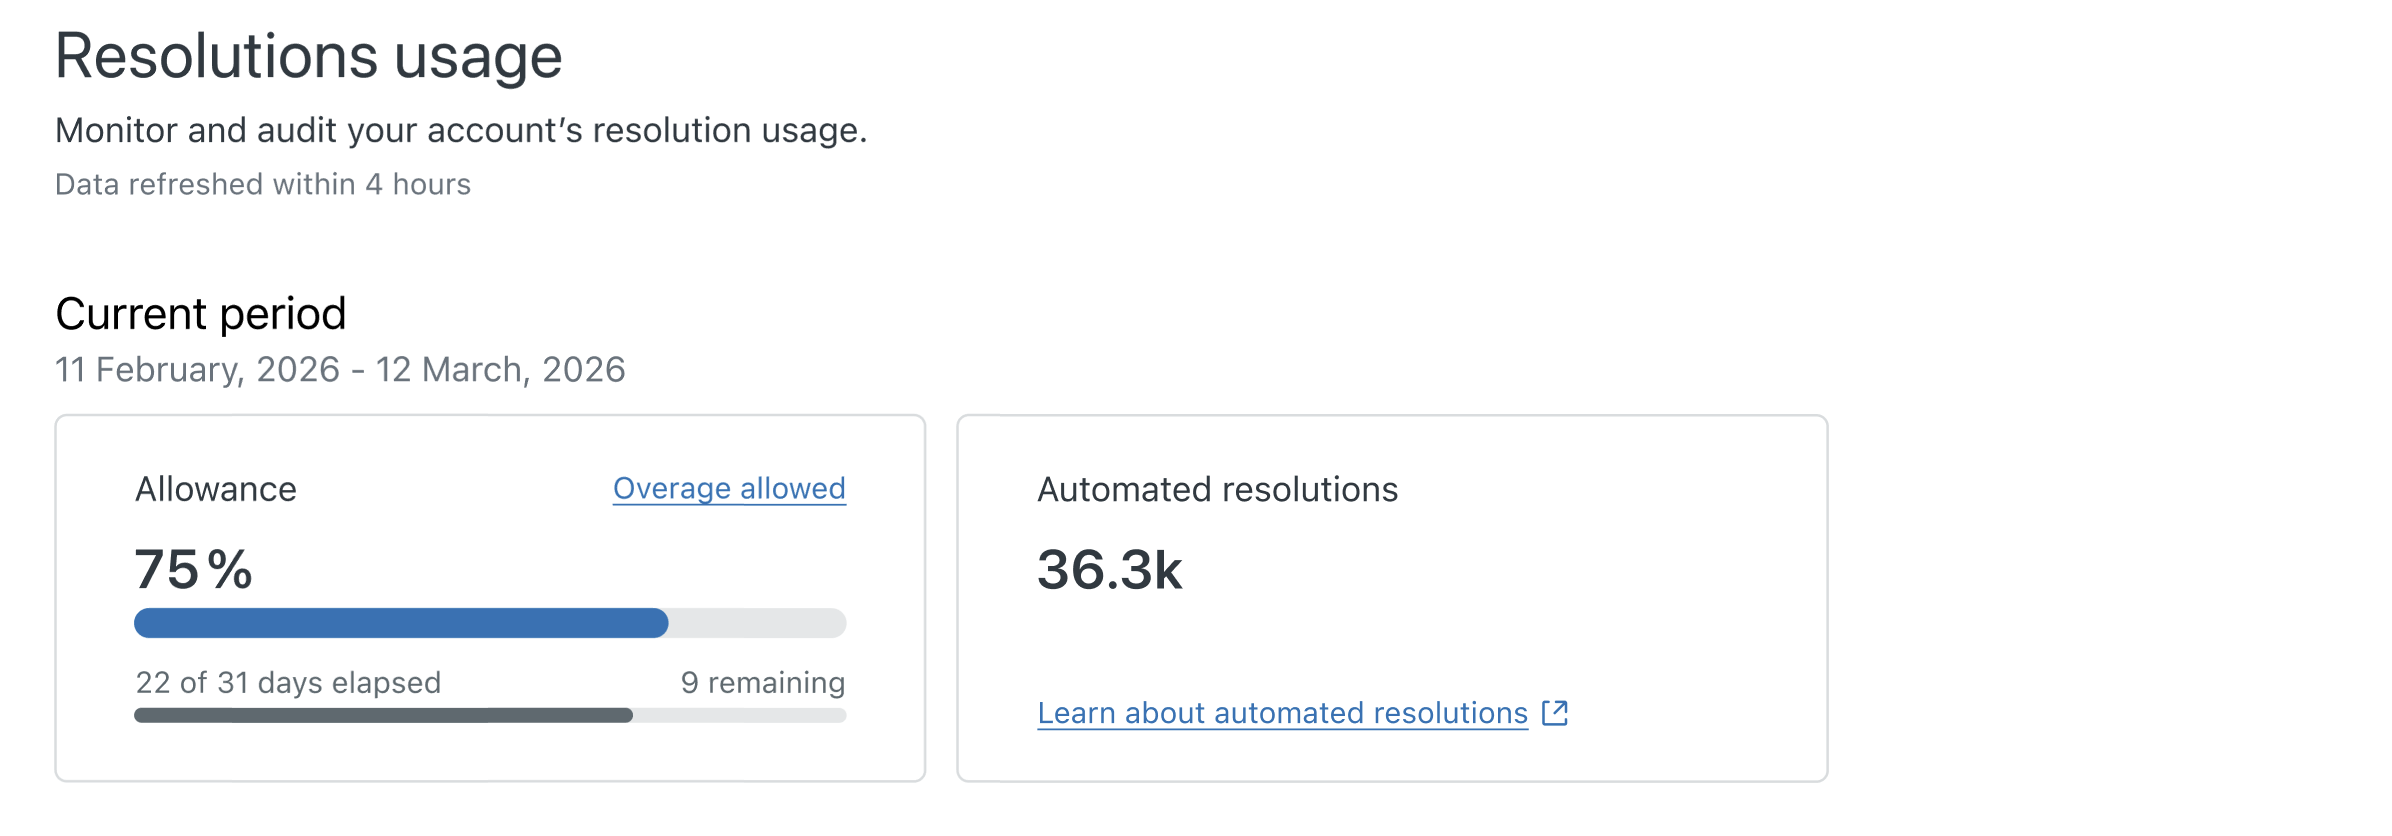
To help you monitor resolution usage on your account, Zendesk provides a resolution usage dashboard. Admins can use this dashboard to view your current usage and compare it against your resolution limits. The dashboard helps you understand how often automation occurs for your ticket resolutions. By viewing automation results in your tickets, you can get ideas on how to increase automation for ticket resolutions.
This article contains the following sections:
- Opening the resolution usage dashboard
- Viewing details for contributing resolutions
- Usage notifications
- Monitoring automated resolutions at the ticket level
- Exporting contributing resolutions
- Disputing an automated resolution tier
Related articles
Opening the resolution usage dashboard
The resolution usage dashboard includes a summary of your usage, along with a chart of resolution usage details. You can view the resolution details by date range.
To open the dashboard
-
In Admin Center, click
 Account in the sidebar, then select Usage > Resolutions.
The resolutions usage dashboard appears.
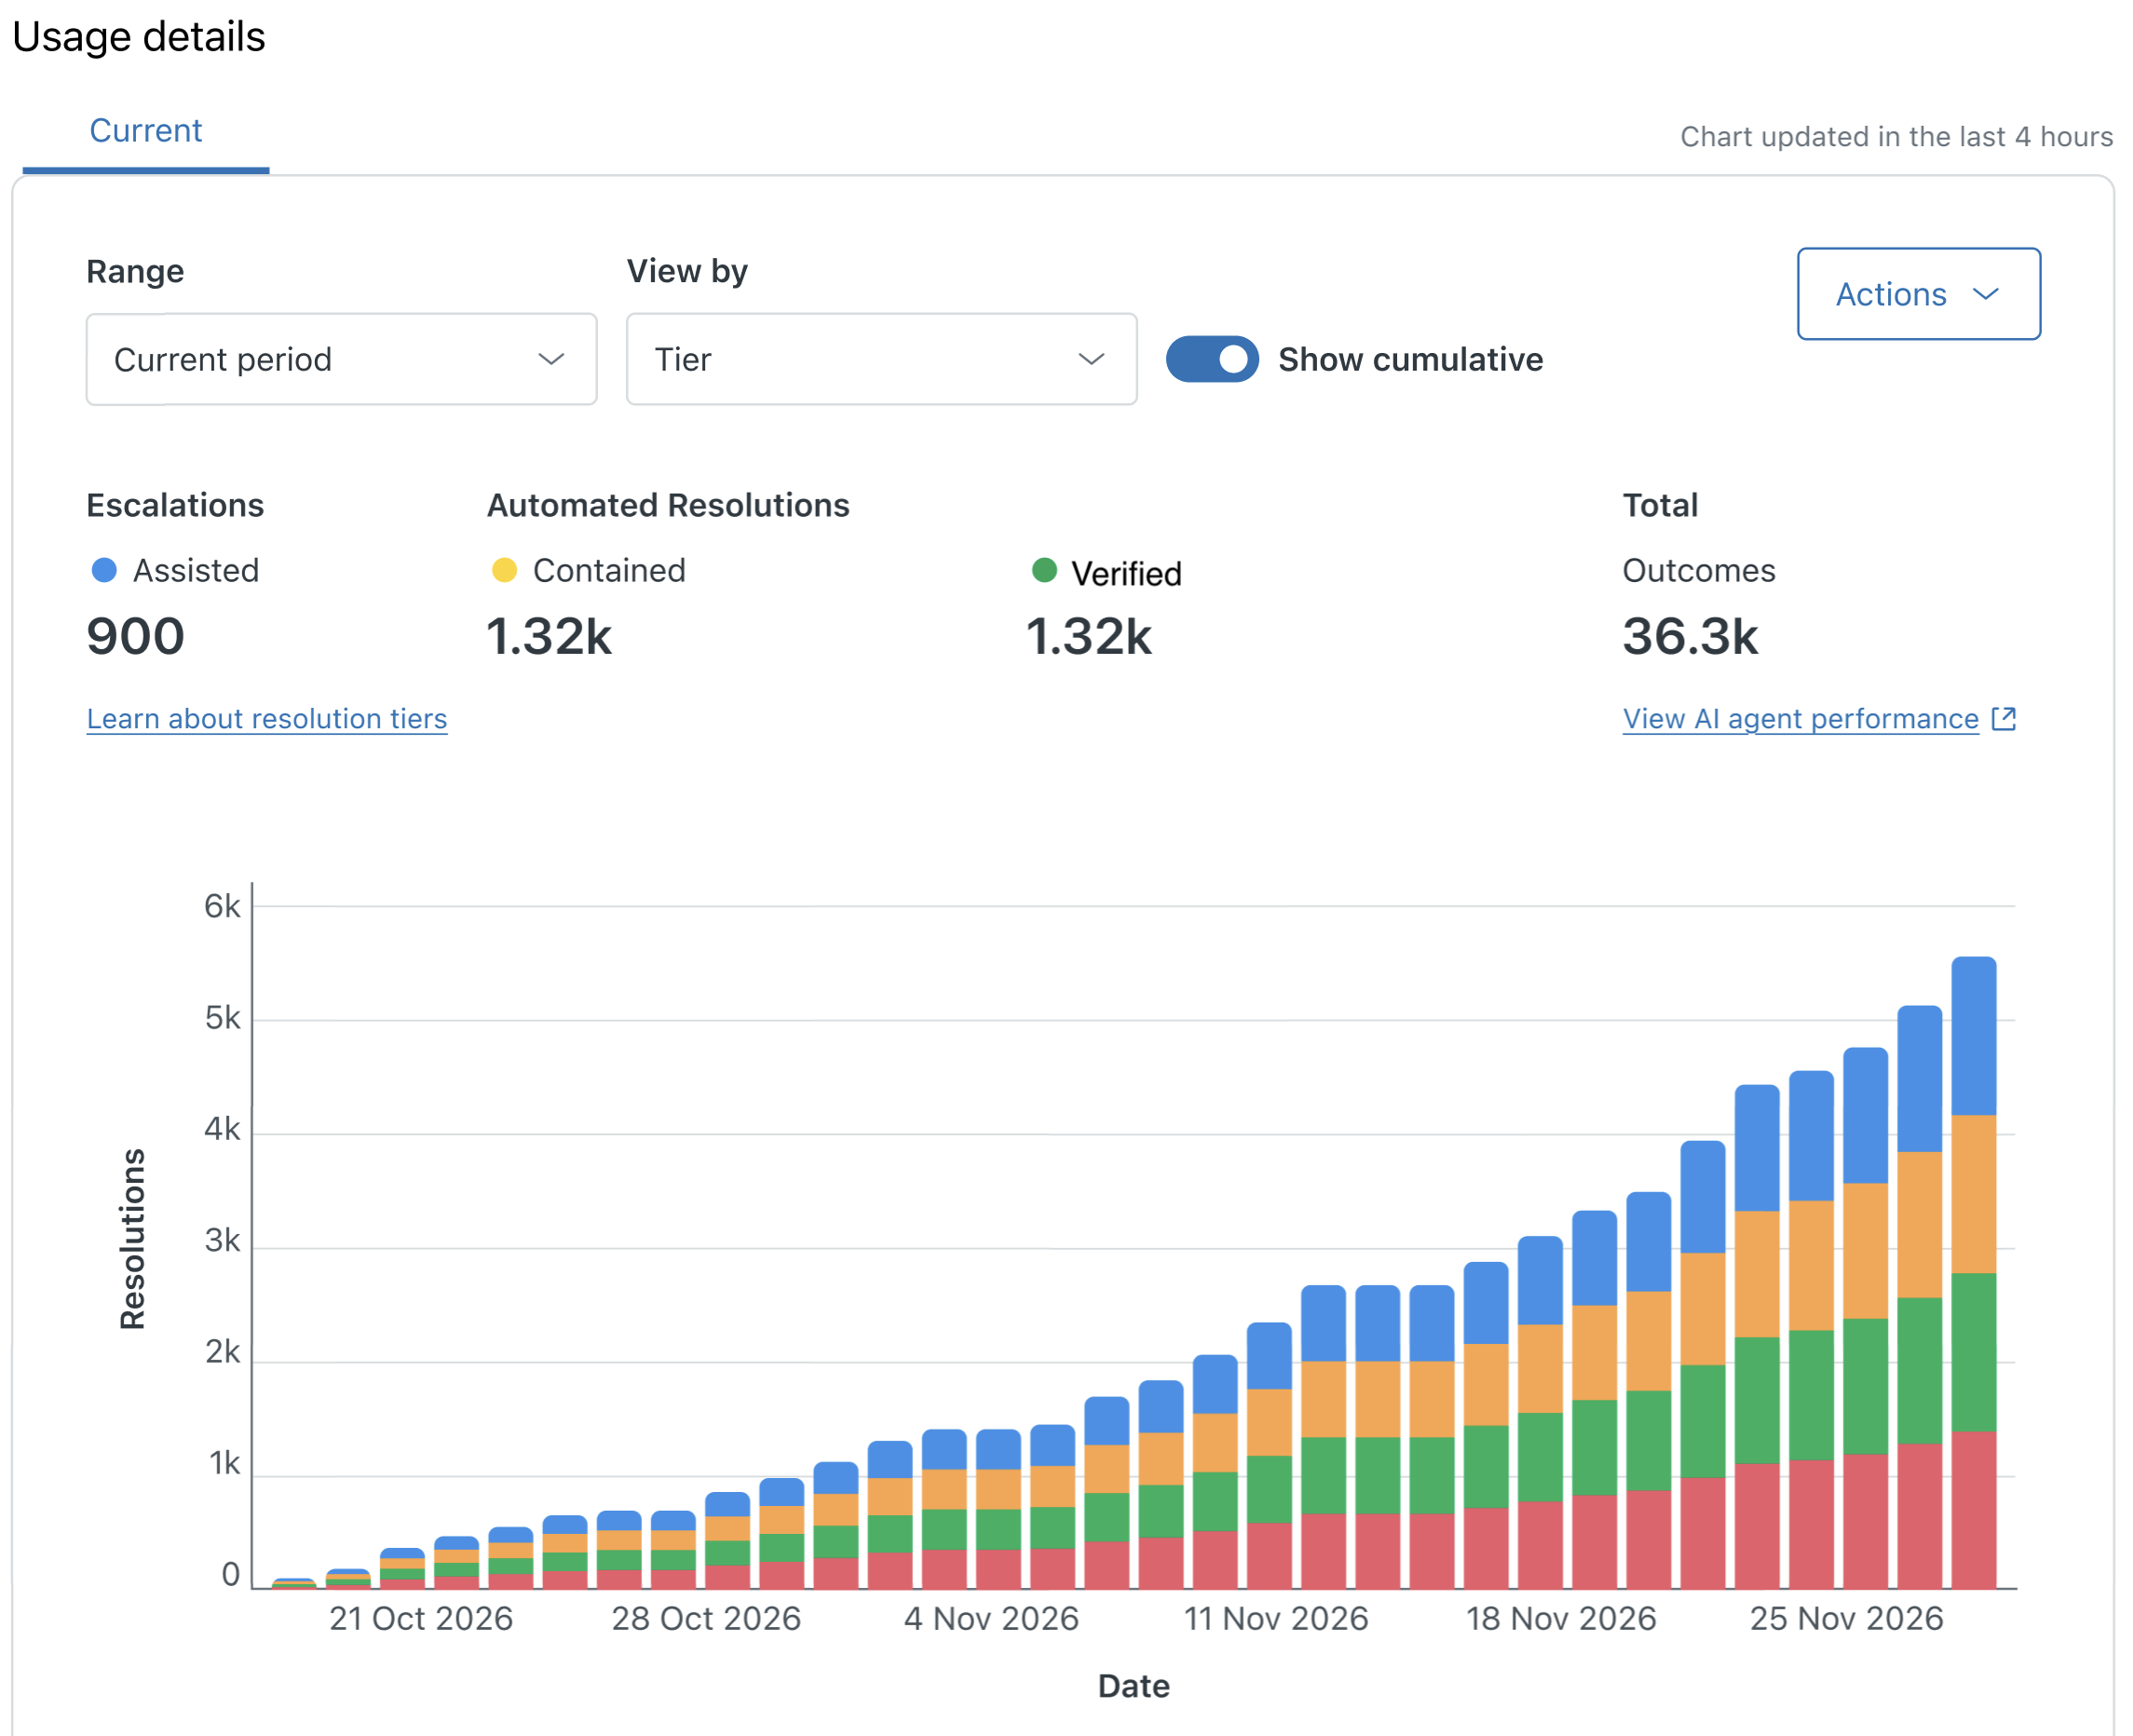
- To filter the usage by date range, click Range and select
an option from the menu.
You can view usage for:
- Last 7 days
- Last 30 days
- Current period
- Custom range
- To filter the usage by resolution tier or brand,
click View by and select an option from the menu.
You can filter by:
- Brand. View all brands combined or select a specific brand.
- Tiers. View All tiers or Assisted escalation, Contained resolution, or Verified resolution.
Viewing details for contributing resolutions
The list of contributing resolutions includes a table with these fields:
- ID: The ID of the ticket associated with the resolution.
- Tier: The resolution tier assigned to the ticket. Values include Assisted escalation, Contained resolution, and Verified resolution.
- Channel group: The type of channel associated with the resolution. Values include Digital or Voice.
- AI agent: The type of AI agent associated with the resolution. Values include Zendesk or Forethought.
- Brand: The ticket brand. For Forethought AI agents, the brand is not applicable.
- Used: The date and time the resolution occurred
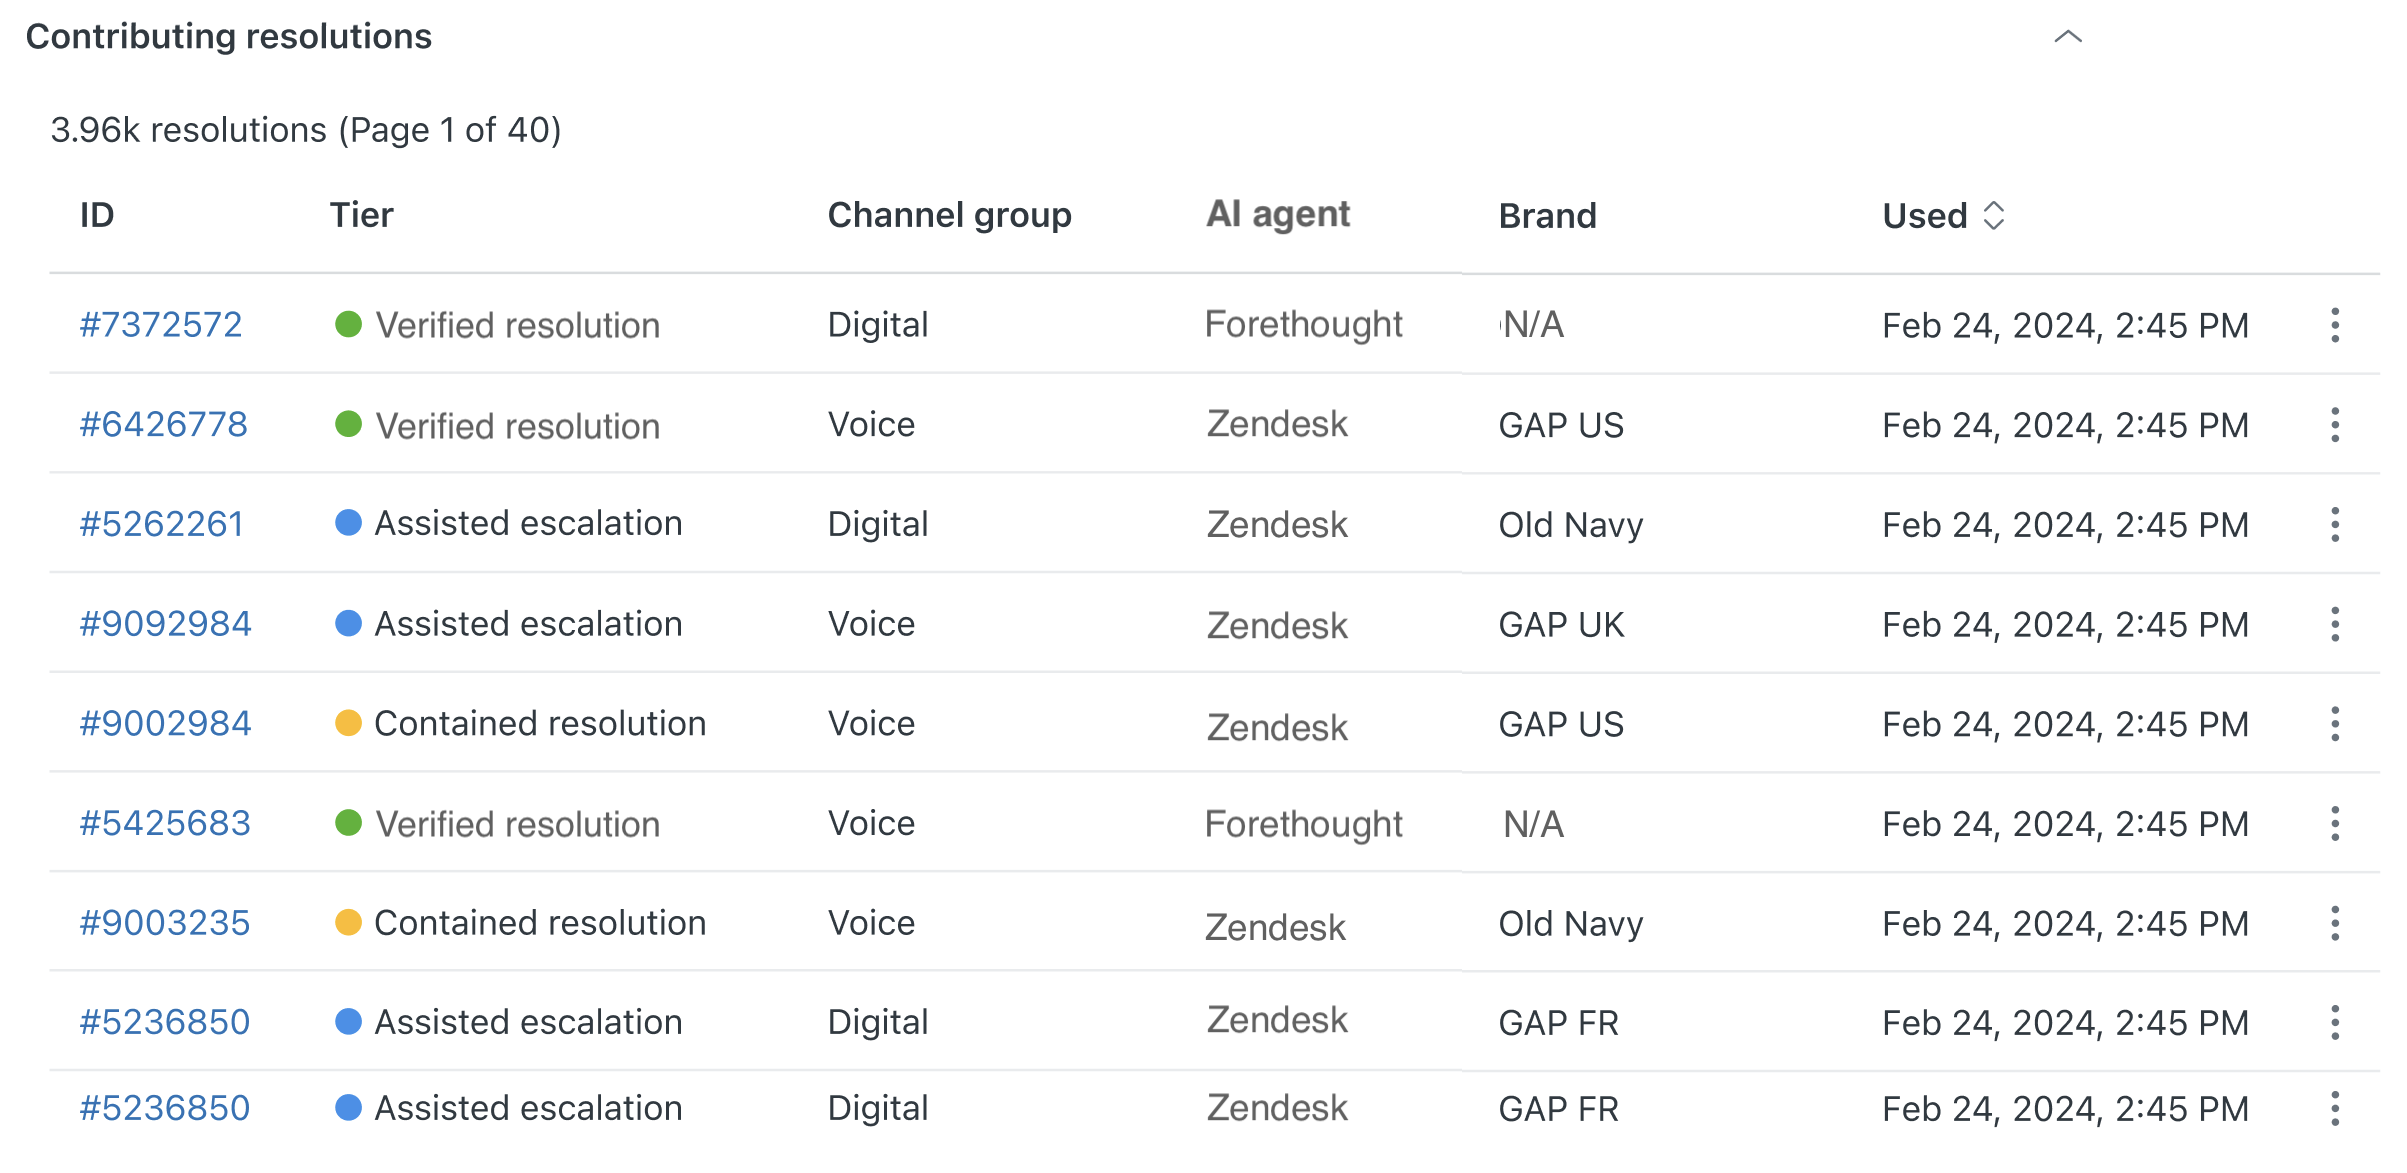
When you filter the dashboard by date range, the resolutions list adjusts to match the tiers showing in the chart.
To view details about a resolution
Use the options menu associated with a resolution to view resolution details. Selections available in the options menu vary depending on the AI agent used to create the resolution.
- In Admin Center, click
Account in the sidebar, then select Usage > Resolutions.
- Click the options menu icon (
 ) next to a contributing
resolution and select View ticket in Support.
) next to a contributing
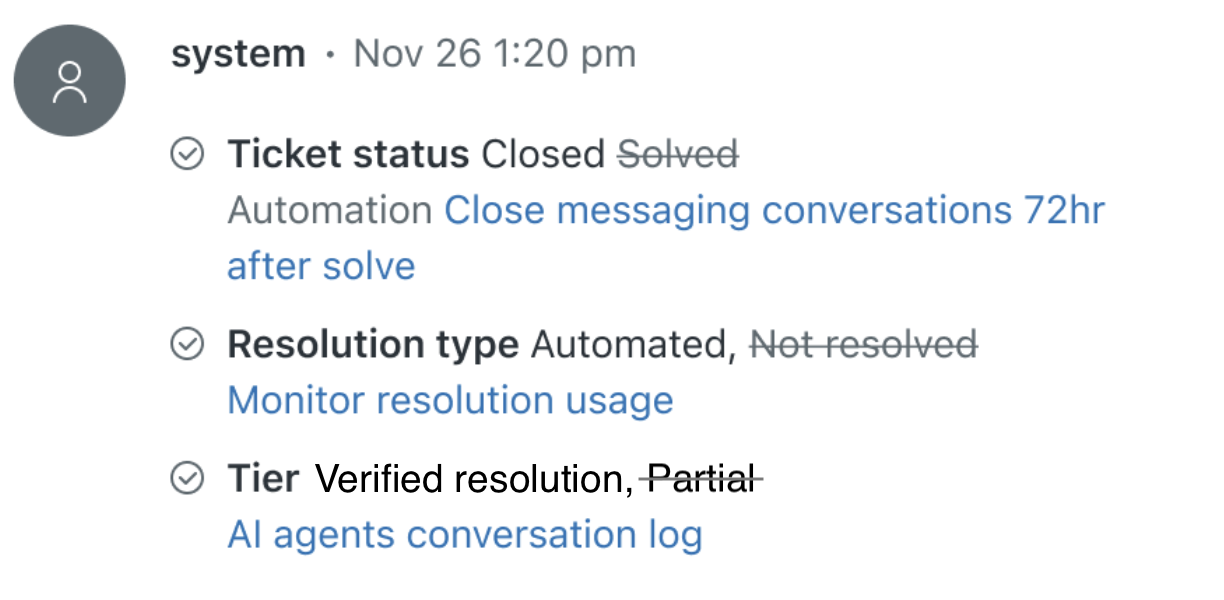
resolution and select View ticket in Support.The ticket associated with the resolution opens in Support. You can view the ticket events to trace how the resolution type was determined.
- Click the options menu icon () next to a contributing
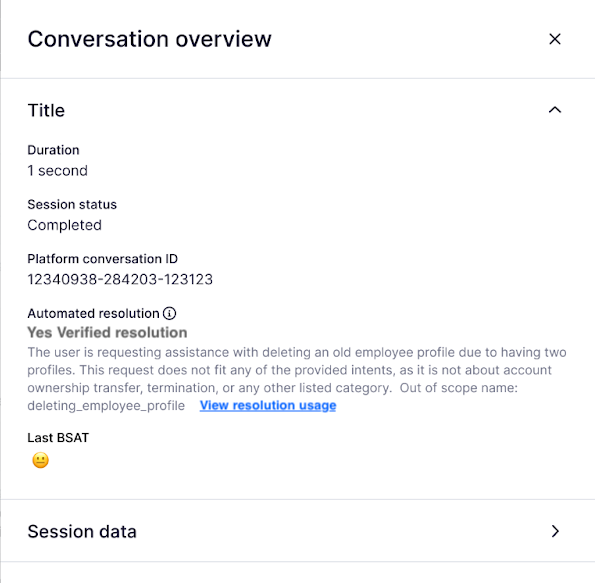
resolution and select View conversation in AI agents.
The conversation overview for the resolution opens in AI agents. See Viewing the conversation logs for AI agents for details.
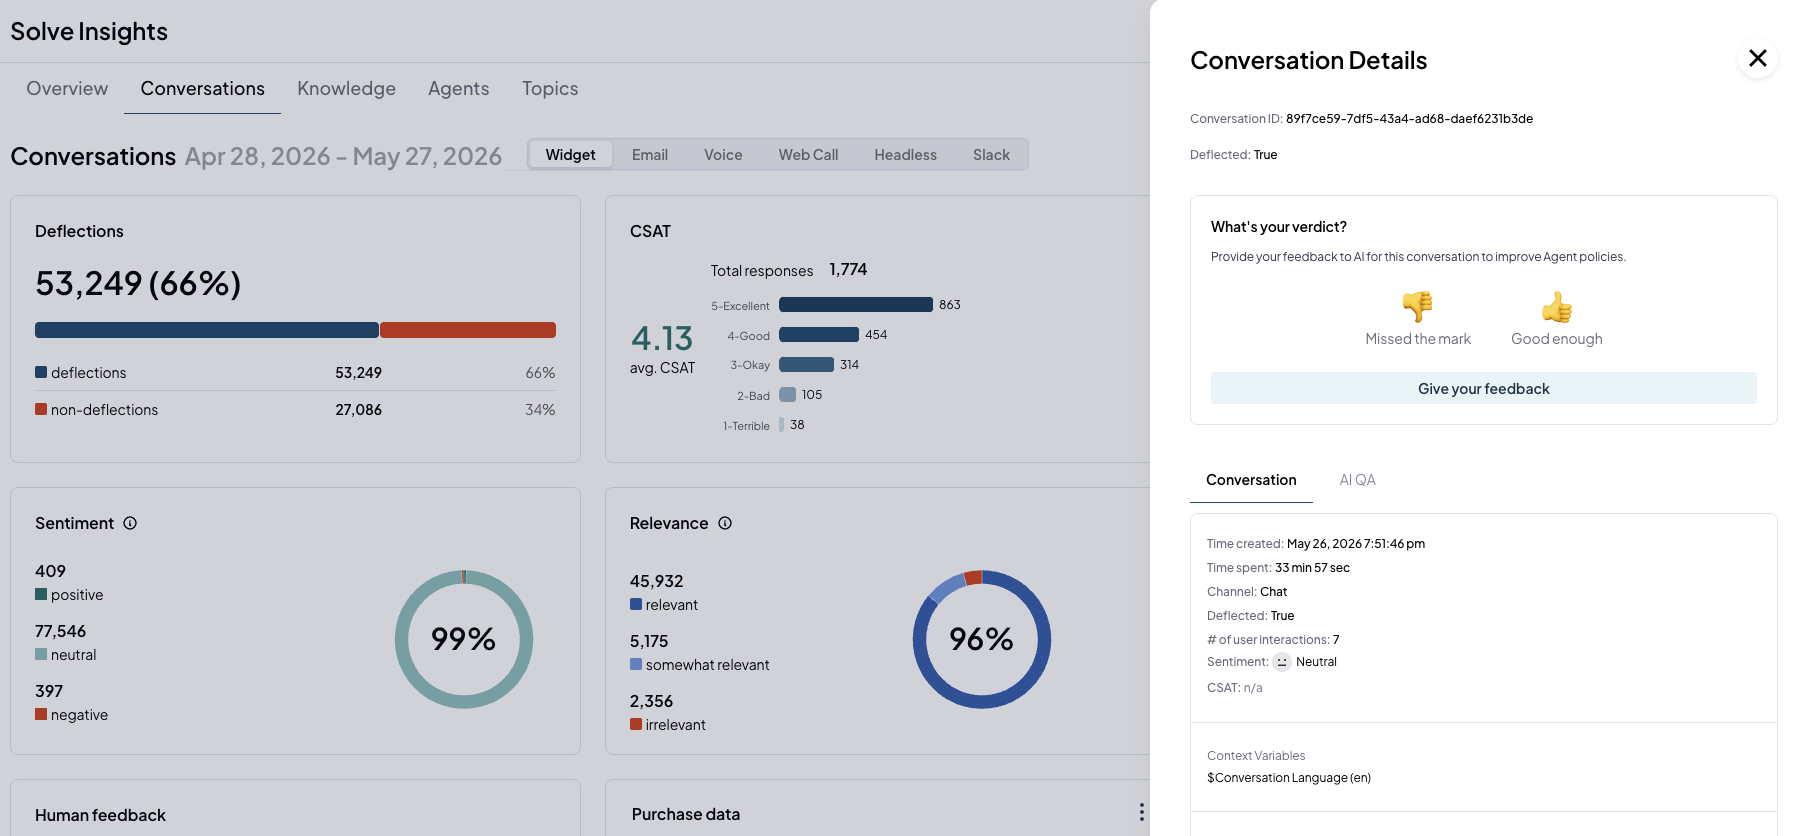
- For customers with a Forethought AI agents
by Zendesk plan, click the options menu icon
() next to a contributing
resolution and select View in Forethought to view
resolution details on the Forethought Solve Insights
dashboard.
Usage notifications
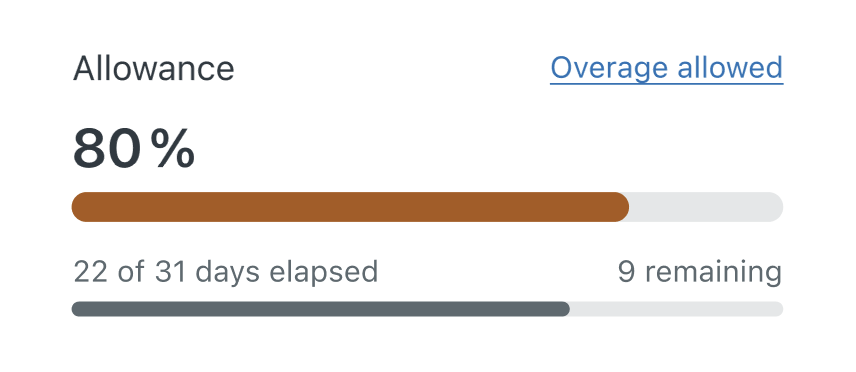
When you have used 80% of your resolutions, you'll receive an in-product warning message and an email notification.
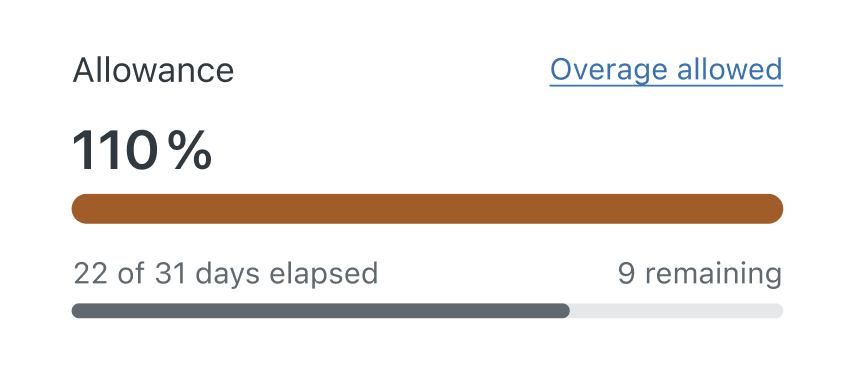
You’ll receive another warning if you go over your resolution usage limit.
When you near your resolution usage limit, you can increase your resolution allowance.
Monitoring automated resolutions at the ticket level
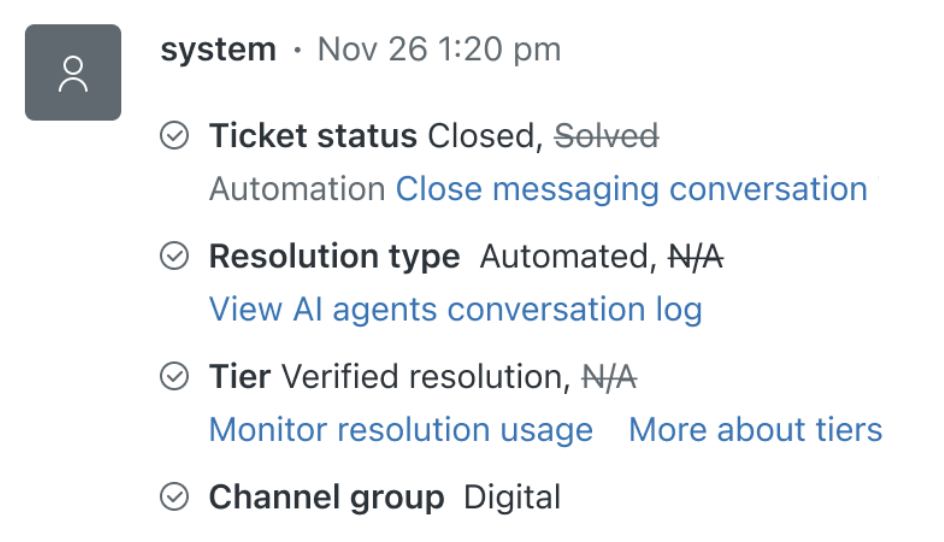
Tickets include helpful indicators when an automated resolution occurs:
- The Resolution type field lists Automated as the value.
- The Resolution tier field shows the level of automation required to solve the ticket. The values are Assisted escalation, Contained resolution, or Verified resolution.
- The channel group field shows the channel group associated with the resolution. This field has a Digital value for email and messaging channels and a Voice value for voice channels.
- In the events view, a system entry notes the date and time the automated resolution occurred.
- These fields can be used when creating custom
reports.
Ticket fields Ticket event log 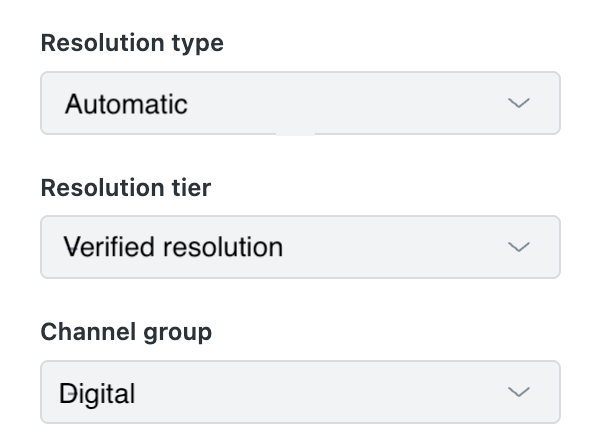
Exporting contributing resolutions
You can export data from the Resolution usage dashboard in CSV format. The contributing resolutions included in the export are based on the date range and view you have set on the dashboard. The exported data includes the following information for each resolution: ticket ID, tier, channel group, brand, resolution timestamp, and cost.
To export contributing resolutions
- In Admin Center, click
Account in the sidebar, then select Usage > Resolutions.
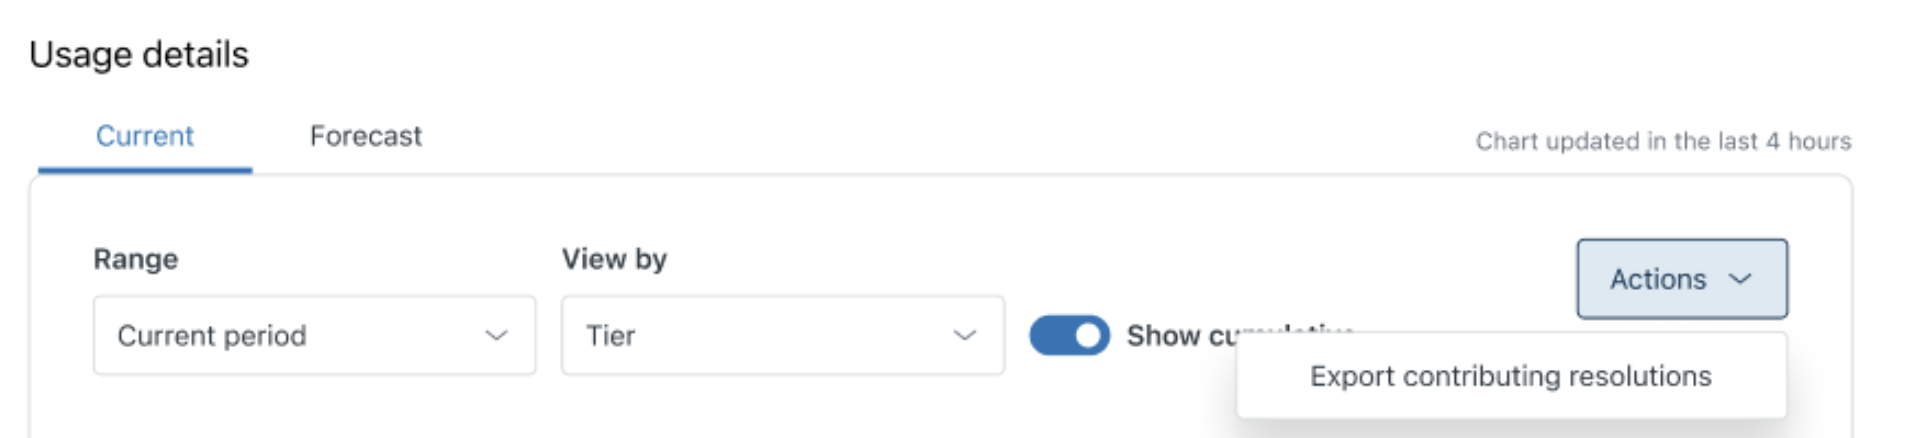
- Select the Range and View by settings for the data you want to export.
- Click the Actions menu, then select Export
contributing resolutions.
The export starts to generate.
You can continue to work in your account while it generates. Zendesk sends you an email with a link to download your CSV file when the export is complete. This link is good for 14 days.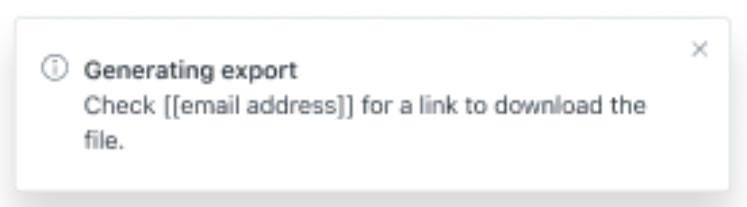
Disputing an automated resolution tier
In some cases, you may disagree with the resolution tier assigned to a ticket. To dispute the assignment, contact Zendesk Customer Support.