Verified AI summary ◀▼
Manage users by organizing them into groups and workspaces. Assign users to workspaces and customize their permissions. Add or remove users from specific workspaces and groups using the Users page.
Users are assigned to the account's default workspace when their Zendesk QA user role is updated in Admin Center. Users cannot be removed from this default workspace.
Admins and workspace managers can organize users within groups, add or remove them from specific workspaces, and define their permissions within the workspace using the Users page in Zendesk QA.
This article contains the following topics:
- Accessing the Users page in Zendesk QA
- Adding users to workspaces
- Removing users from workspaces
- Adding users to QA groups
- Removing users from QA groups
Related articles:
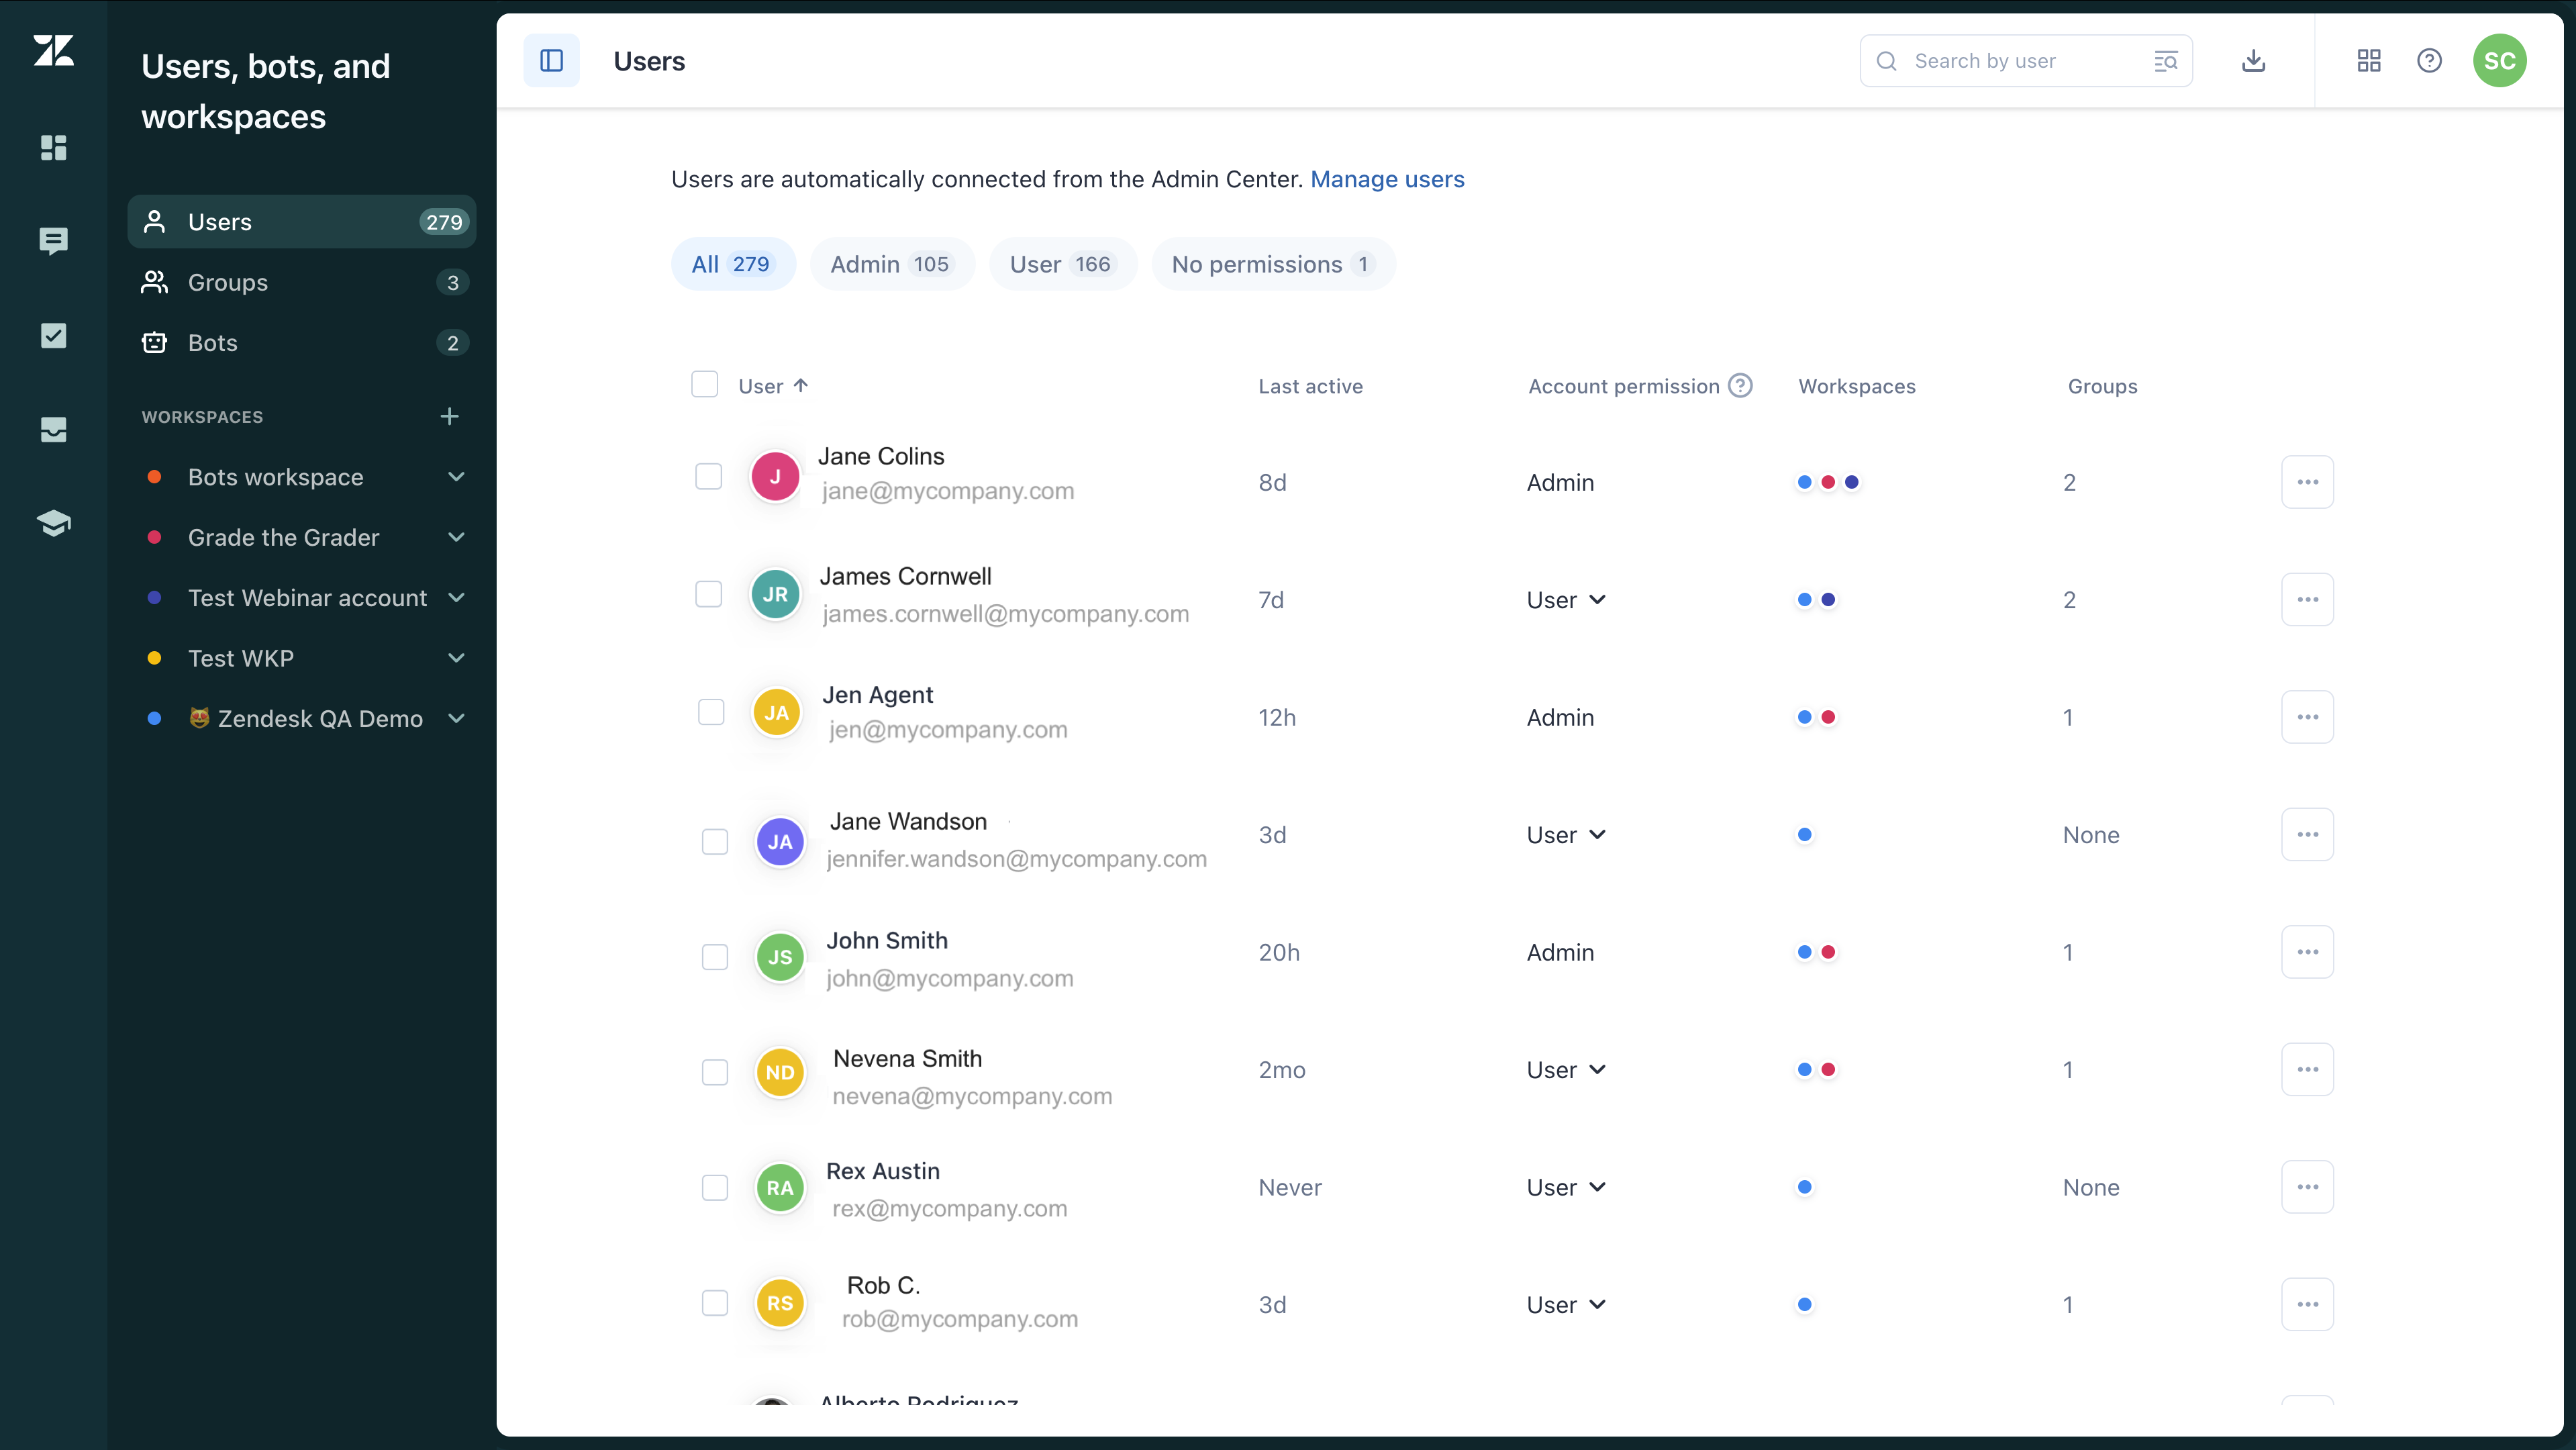
Accessing the Users page in Zendesk QA
The Users page provides a view of the users in your Zendesk QA account, including who they are, their account permissions, the number of workspaces and groups they are assigned to, and when they were last active in Zendesk QA.
On the Users page, admins and workspace managers can define users’ permissions within the Zendesk QA workspaces. Additionally, admins and workspace managers can organize users into groups and add or remove them from specific workspaces.
To access the Users page in Zendesk QA
- In Quality assurance, click your profile icon in the top-right corner, then select Users, bots, and workspaces.
- In the side menu, click Users.
Adding users to workspaces
Users can operate in different workspaces in Zendesk QA. You can review conversations based on the same criteria for all users or, if your business has different departments, such as Support, Sales, and Customer Success, for example, create multiple workspaces to separate these instances.
Users are assigned to the account's default workspace when their Zendesk QA user role is updated in Admin Center. Users cannot be removed from this default workspace.
Admins and workspace managers can add or remove users from other workspaces using the Users page or by accessing each workspace's Members list.
To add users to workspaces on the Users page
- Access the Users page in Zendesk QA.
- Select the users you want to add to specific workspaces.
- In the toolbar that appears at the bottom of the page, click Edit
details.
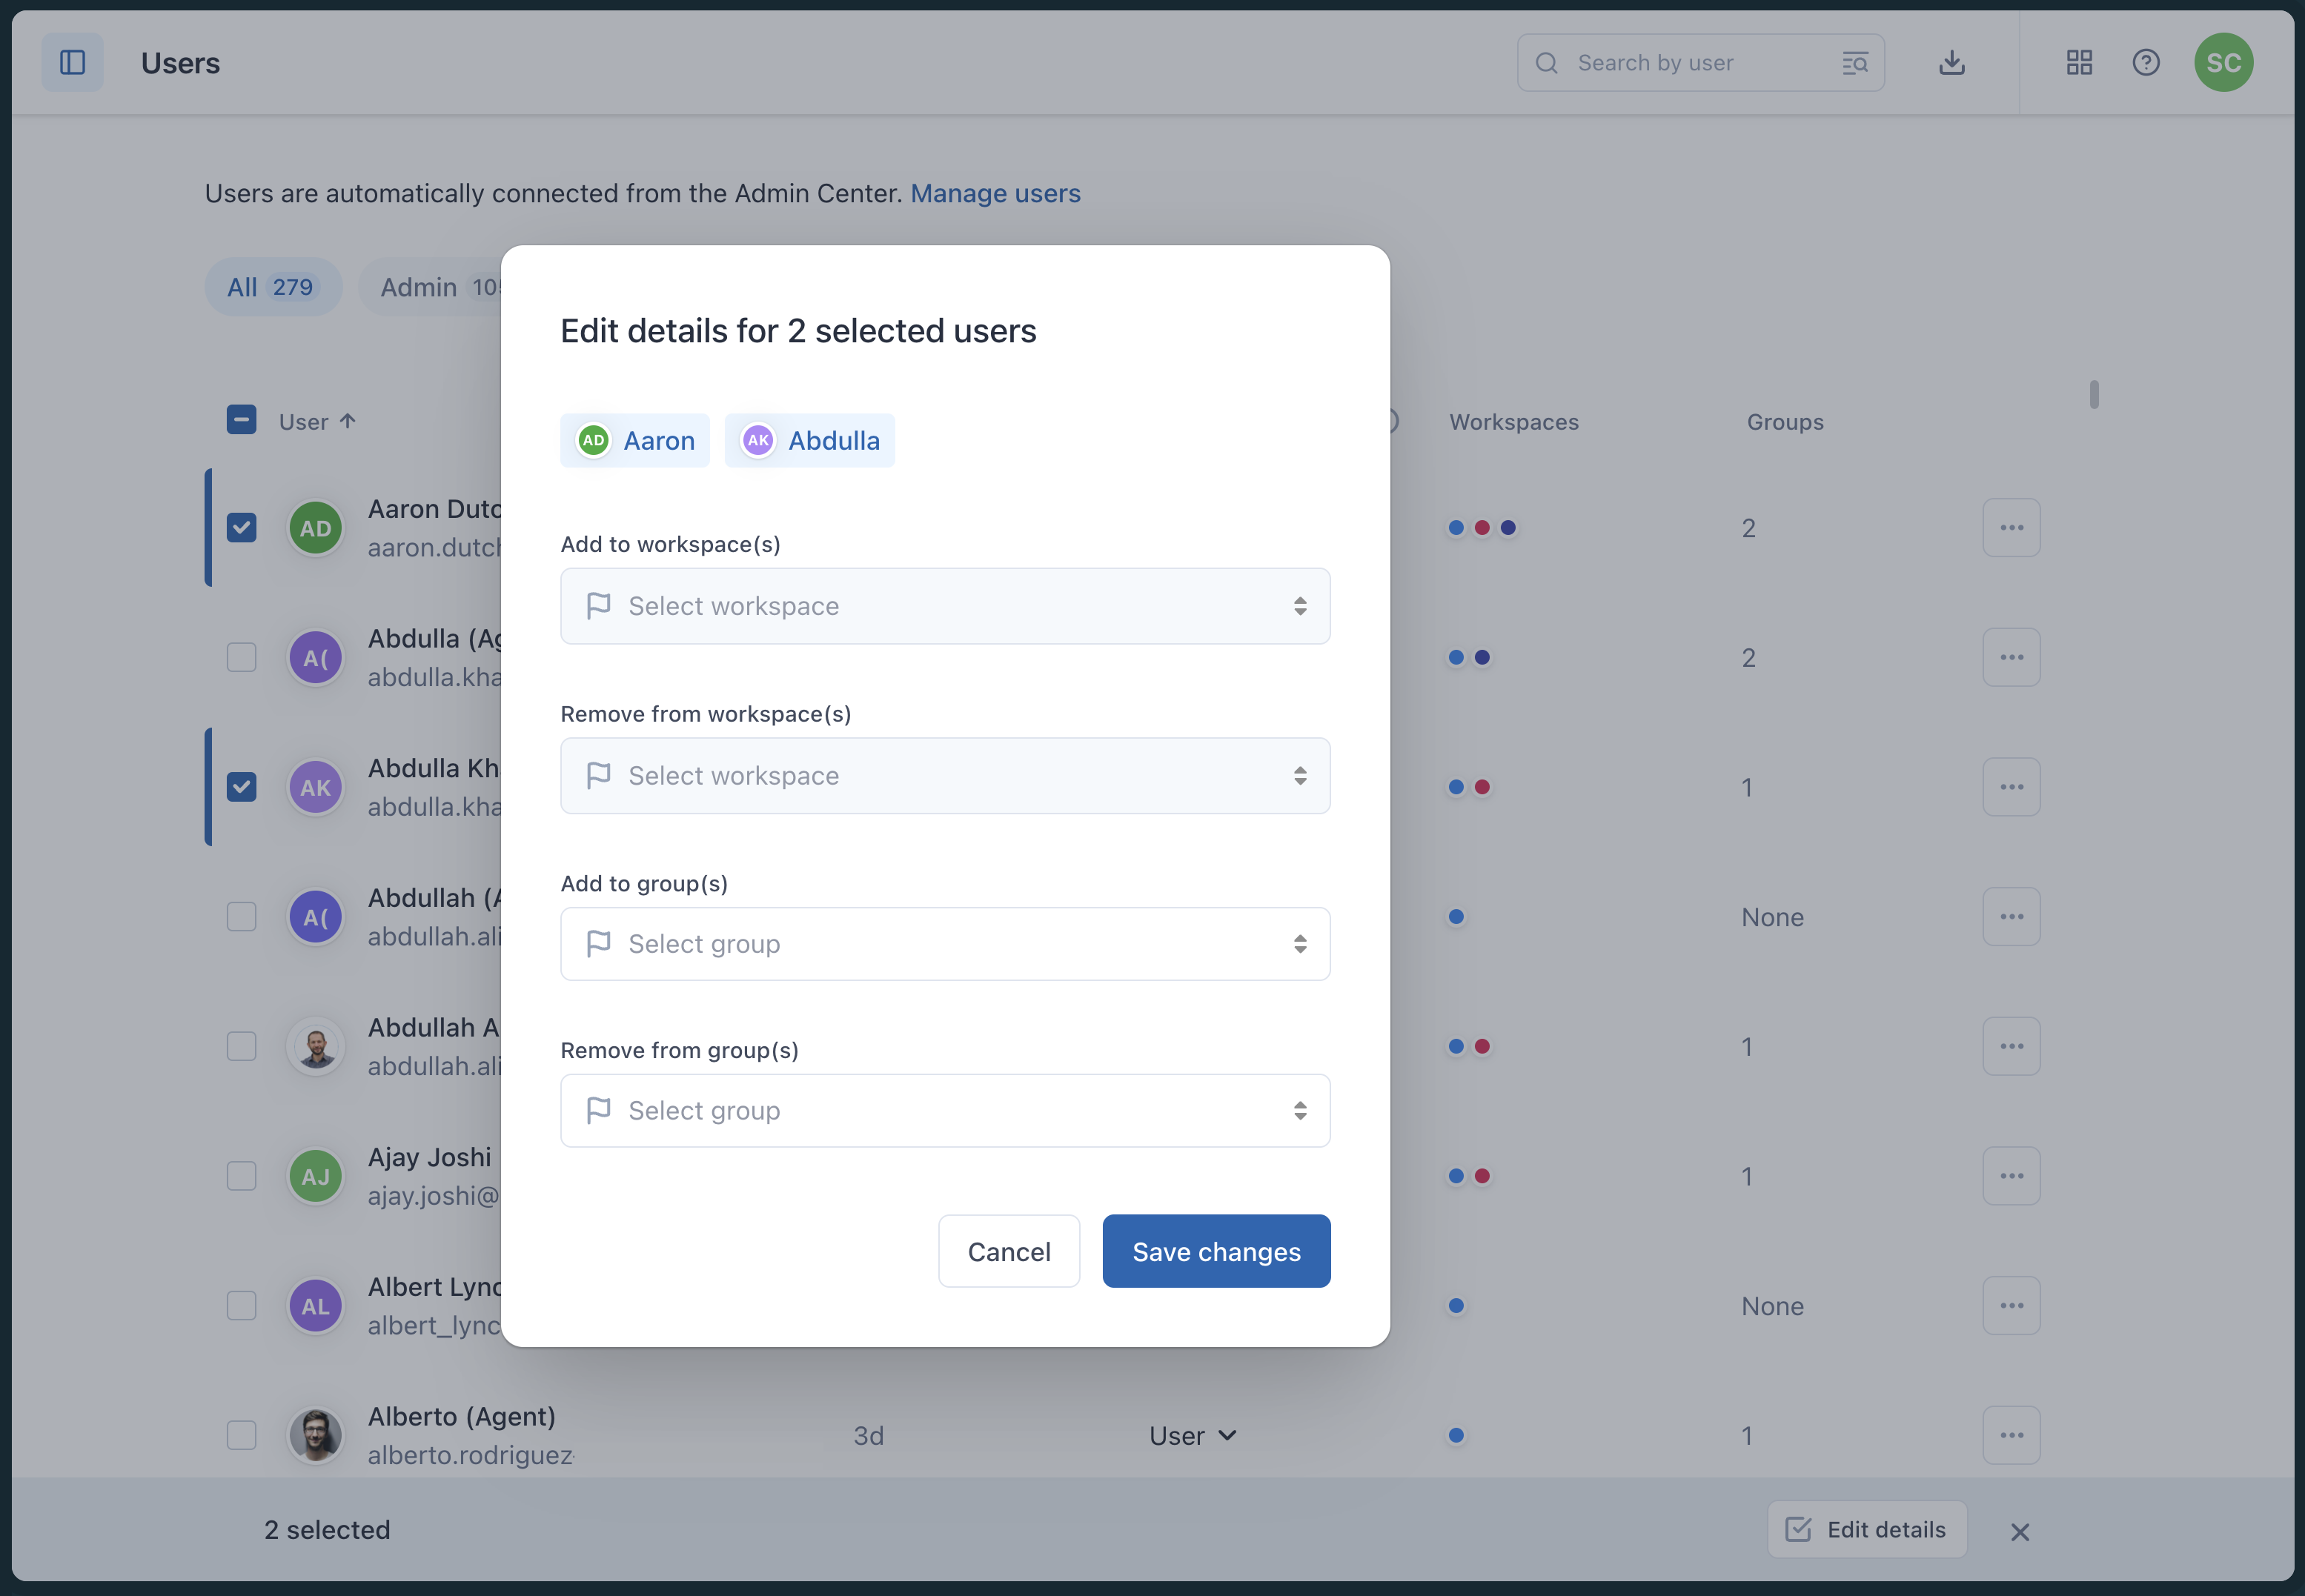
- Select one or more workspaces to add the selected users to.
Enter the beginning of a workspace's name to autocomplete or select from the drop-down menu.
- Click Save changes.
Removing users from workspaces
Users are assigned to the account's default workspace when their Zendesk QA user role is updated in Admin Center. Users cannot be removed from this default workspace.
However, admins and Workspace managers can remove users from all other workspaces using the Users page, or by accessing each workspace's Members list.
To remove users from workspaces using the Users page
- Access the Users page in Zendesk QA.
- Select the users you want to remove from specific workspaces.
- In the toolbar that appears at the bottom of the page, click Edit details.
- Select one or more workspaces to remove the selected users from.
Enter the beginning of a workspace's name to autocomplete or select from the drop-down menu.
- Click Save changes.
Adding users to QA groups
You can create and manage QA groups to organize users according to characteristics such as organizational structure, language, or skill set. While you can add group members individually on the Groups page, on the Users page you can add members in bulk as well as individually.
To add users to QA groups on the Users page
- Access the Users page in Zendesk QA.
- Select the users you want to add to QA groups.
- In the toolbar that appears at the bottom of the page, click Edit details.
- Select one or more groups to add the selected users to.
Enter the beginning of a group's name to autocomplete or select from the drop-down menu.
- Click Save changes.
Removing users from QA groups
You can create and manage QA groups to organize users according to characteristics such as organizational structure, language, or skill set. While you can remove group members individually on the Groups page, on the Users page you can remove members in bulk or individually.
To remove users from QA groups on the Users page
- Access the Users page in Zendesk QA.
- Select the users you want to remove from QA groups.
- In the toolbar that appears at the bottom of the page, click Edit details.
- Select the groups to remove users from.
Enter the beginning of a group's name to autocomplete or select from the drop-down menu.
- Click Save changes.