Summary: ◀▼
You can manage AI spotlight insights to review conversation quality, surface important closed conversations, and focus manual QA on issues like dead air and missing recording disclosures. You can customize system insights, edit exact text-match and prompt-based spotlights, validate or enhance prompts, turn spotlights on or off, and delete them when you no longer need them.
In Zendesk QA, spotlight provides insights into the quality of your conversations and helps you handpick critical conversations for manual review. It automatically surfaces newly synced closed conversations with various out-of-the-box insights to help you identify specific events or signals for further analysis.
Admins and workspace managers can customize spotlight's predefined voice insights and edit the insights they have created.
This article contains the following topics:
- Customizing system spotlight insights
- Editing exact text-match spotlight insights
- Editing prompt-based AI insight spotlights
- Activating a spotlight
- Deactivating a spotlight
- Deleting a spotlight
Related articles
Customizing system spotlight insights
You can customize the following system spotlight insights:
- Dead air: Analyzes moments of dead air in voice conversations that last longer than the set threshold. The default industry threshold is 30 seconds, but it can be adjusted to any duration.
- Recording disclosure missing: Automatically identifies voice calls lacking the mandatory disclosure statement, such as 'This call will be recorded.' It uses a large language model (LLM) to dynamically understand context, eliminating the need for preset phrases. LLM-based AutoQA must be enabled for the Recording disclosure missing spotlight to function.
To customize the Dead air spotlight insight
- In Quality assurance, click your profile icon in the top-right corner.
- Click Settings.
- In the sidebar under Account, click AI.
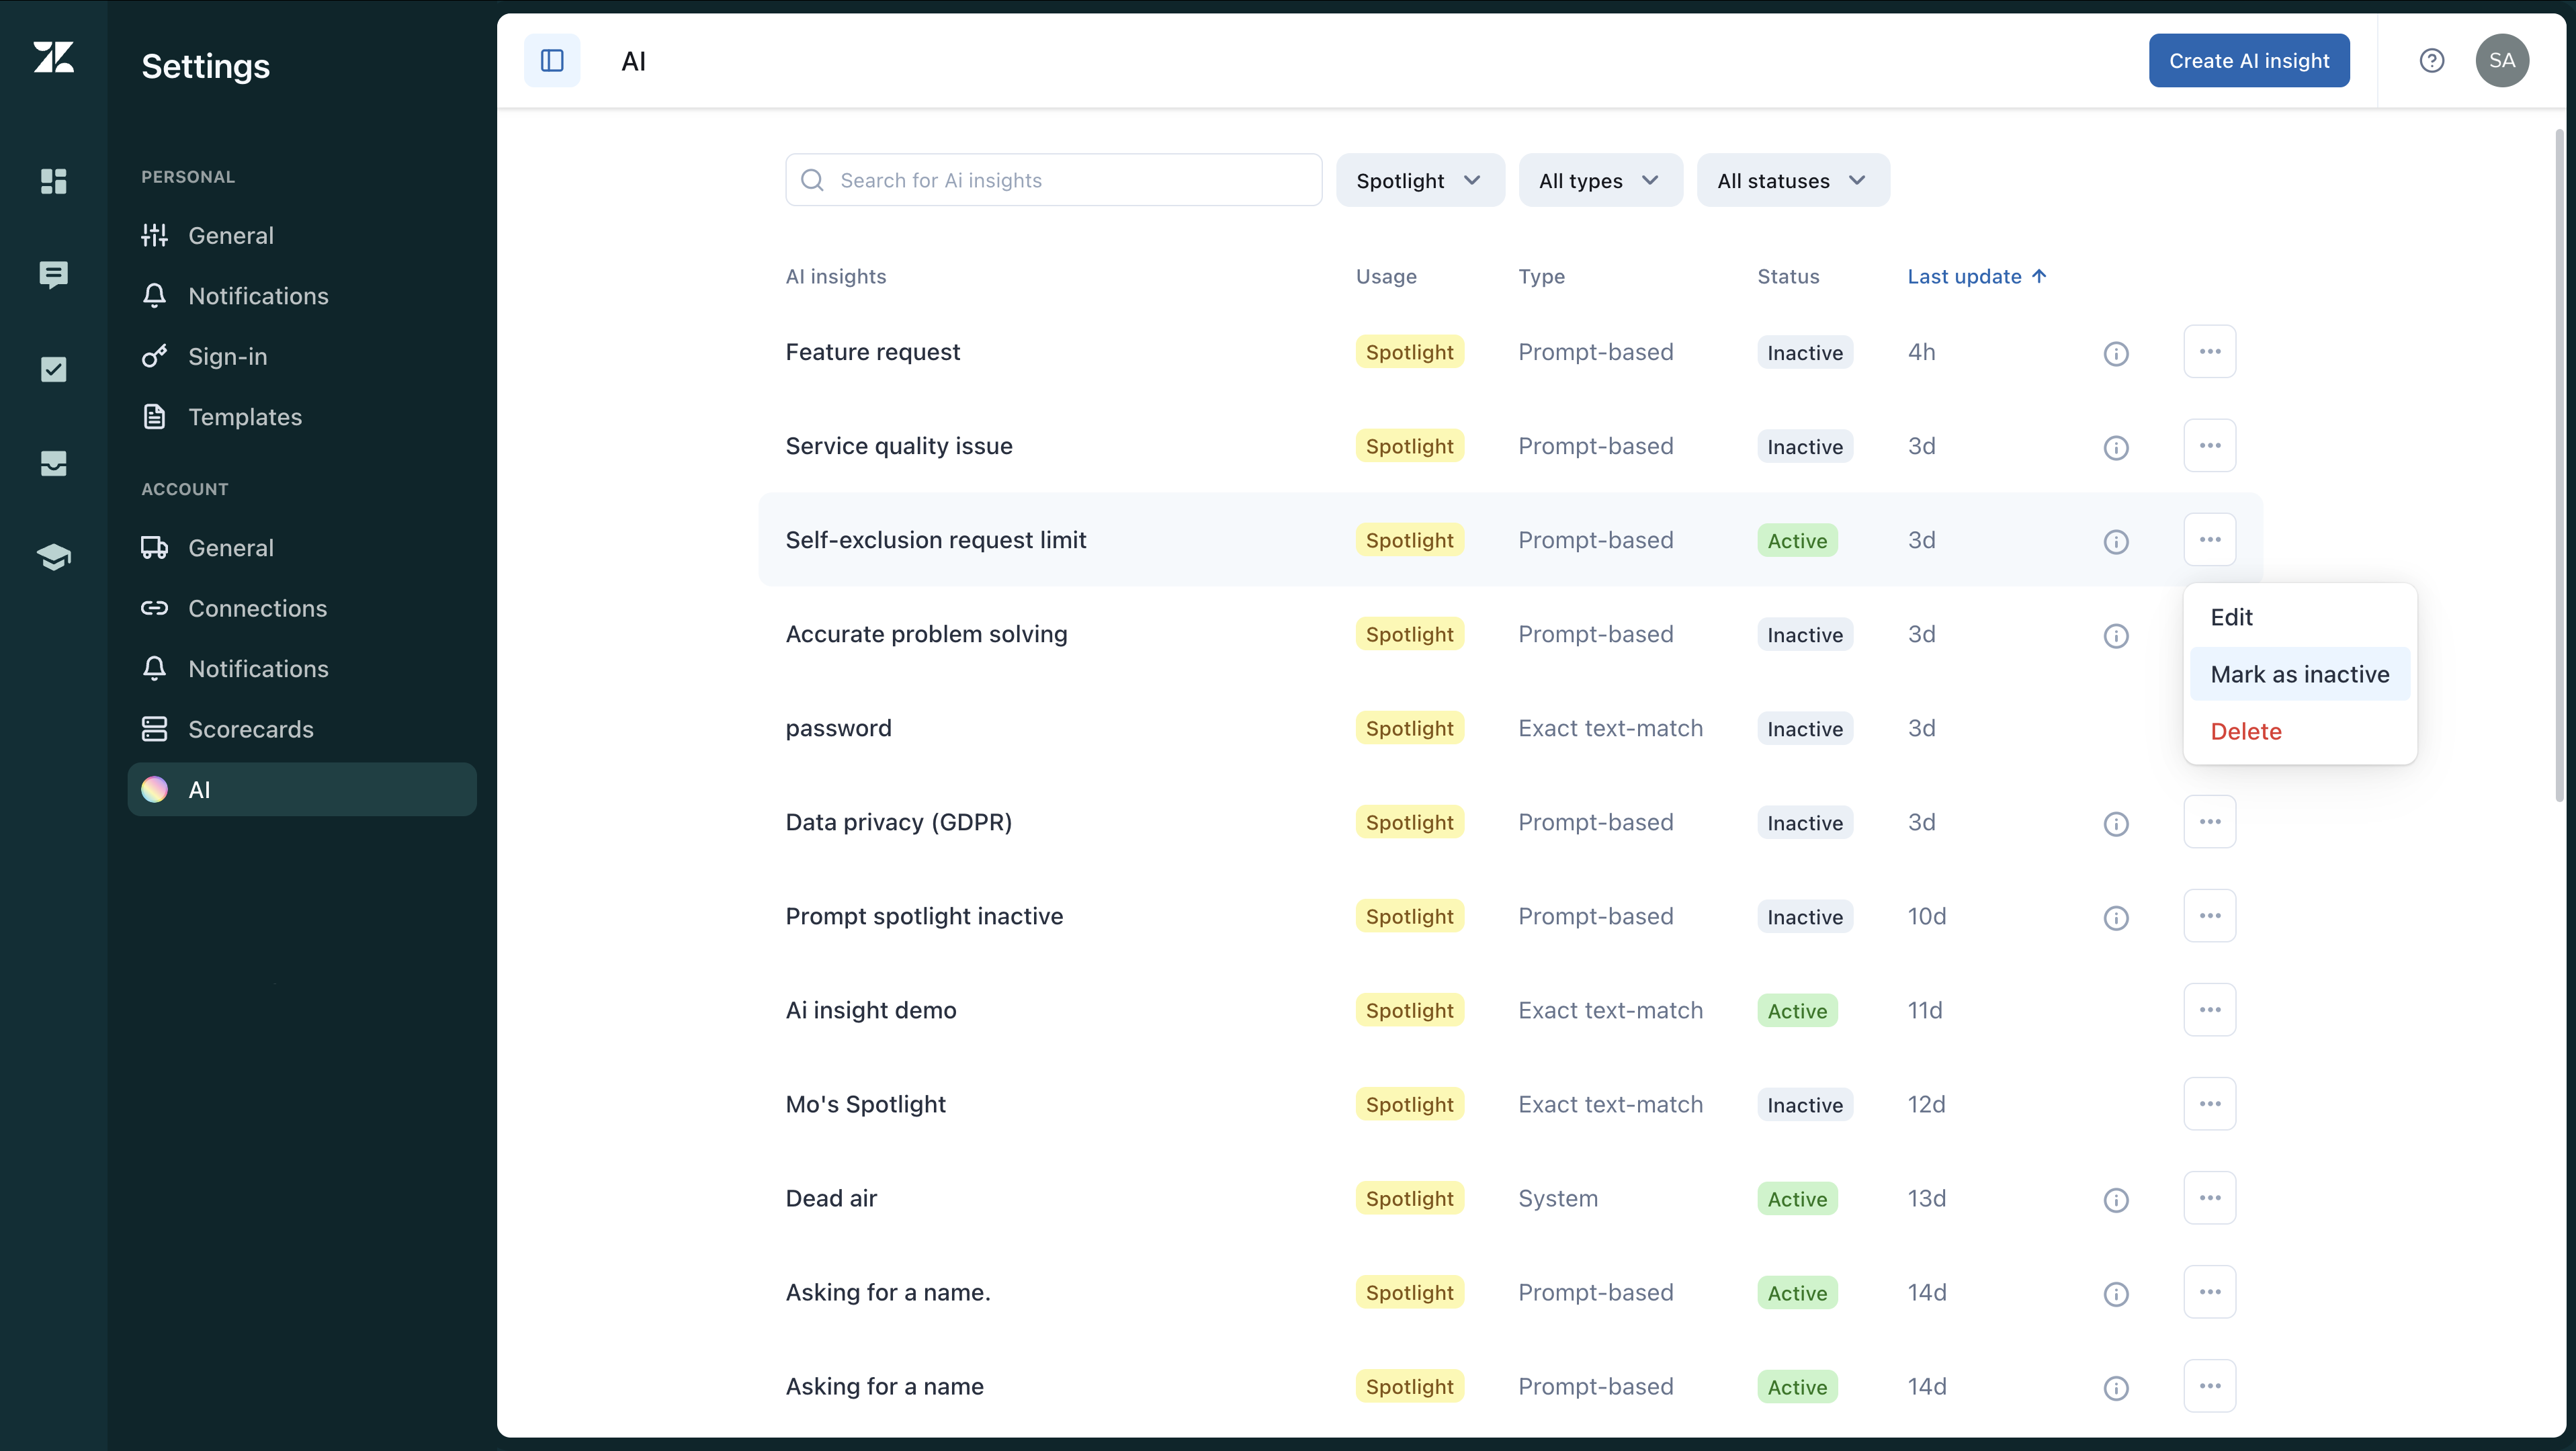
- Under Usage, select Spotlight to display a list of all your spotlights.
- Under Type, select System.
- Click the Dead air spotlight insight to open it.
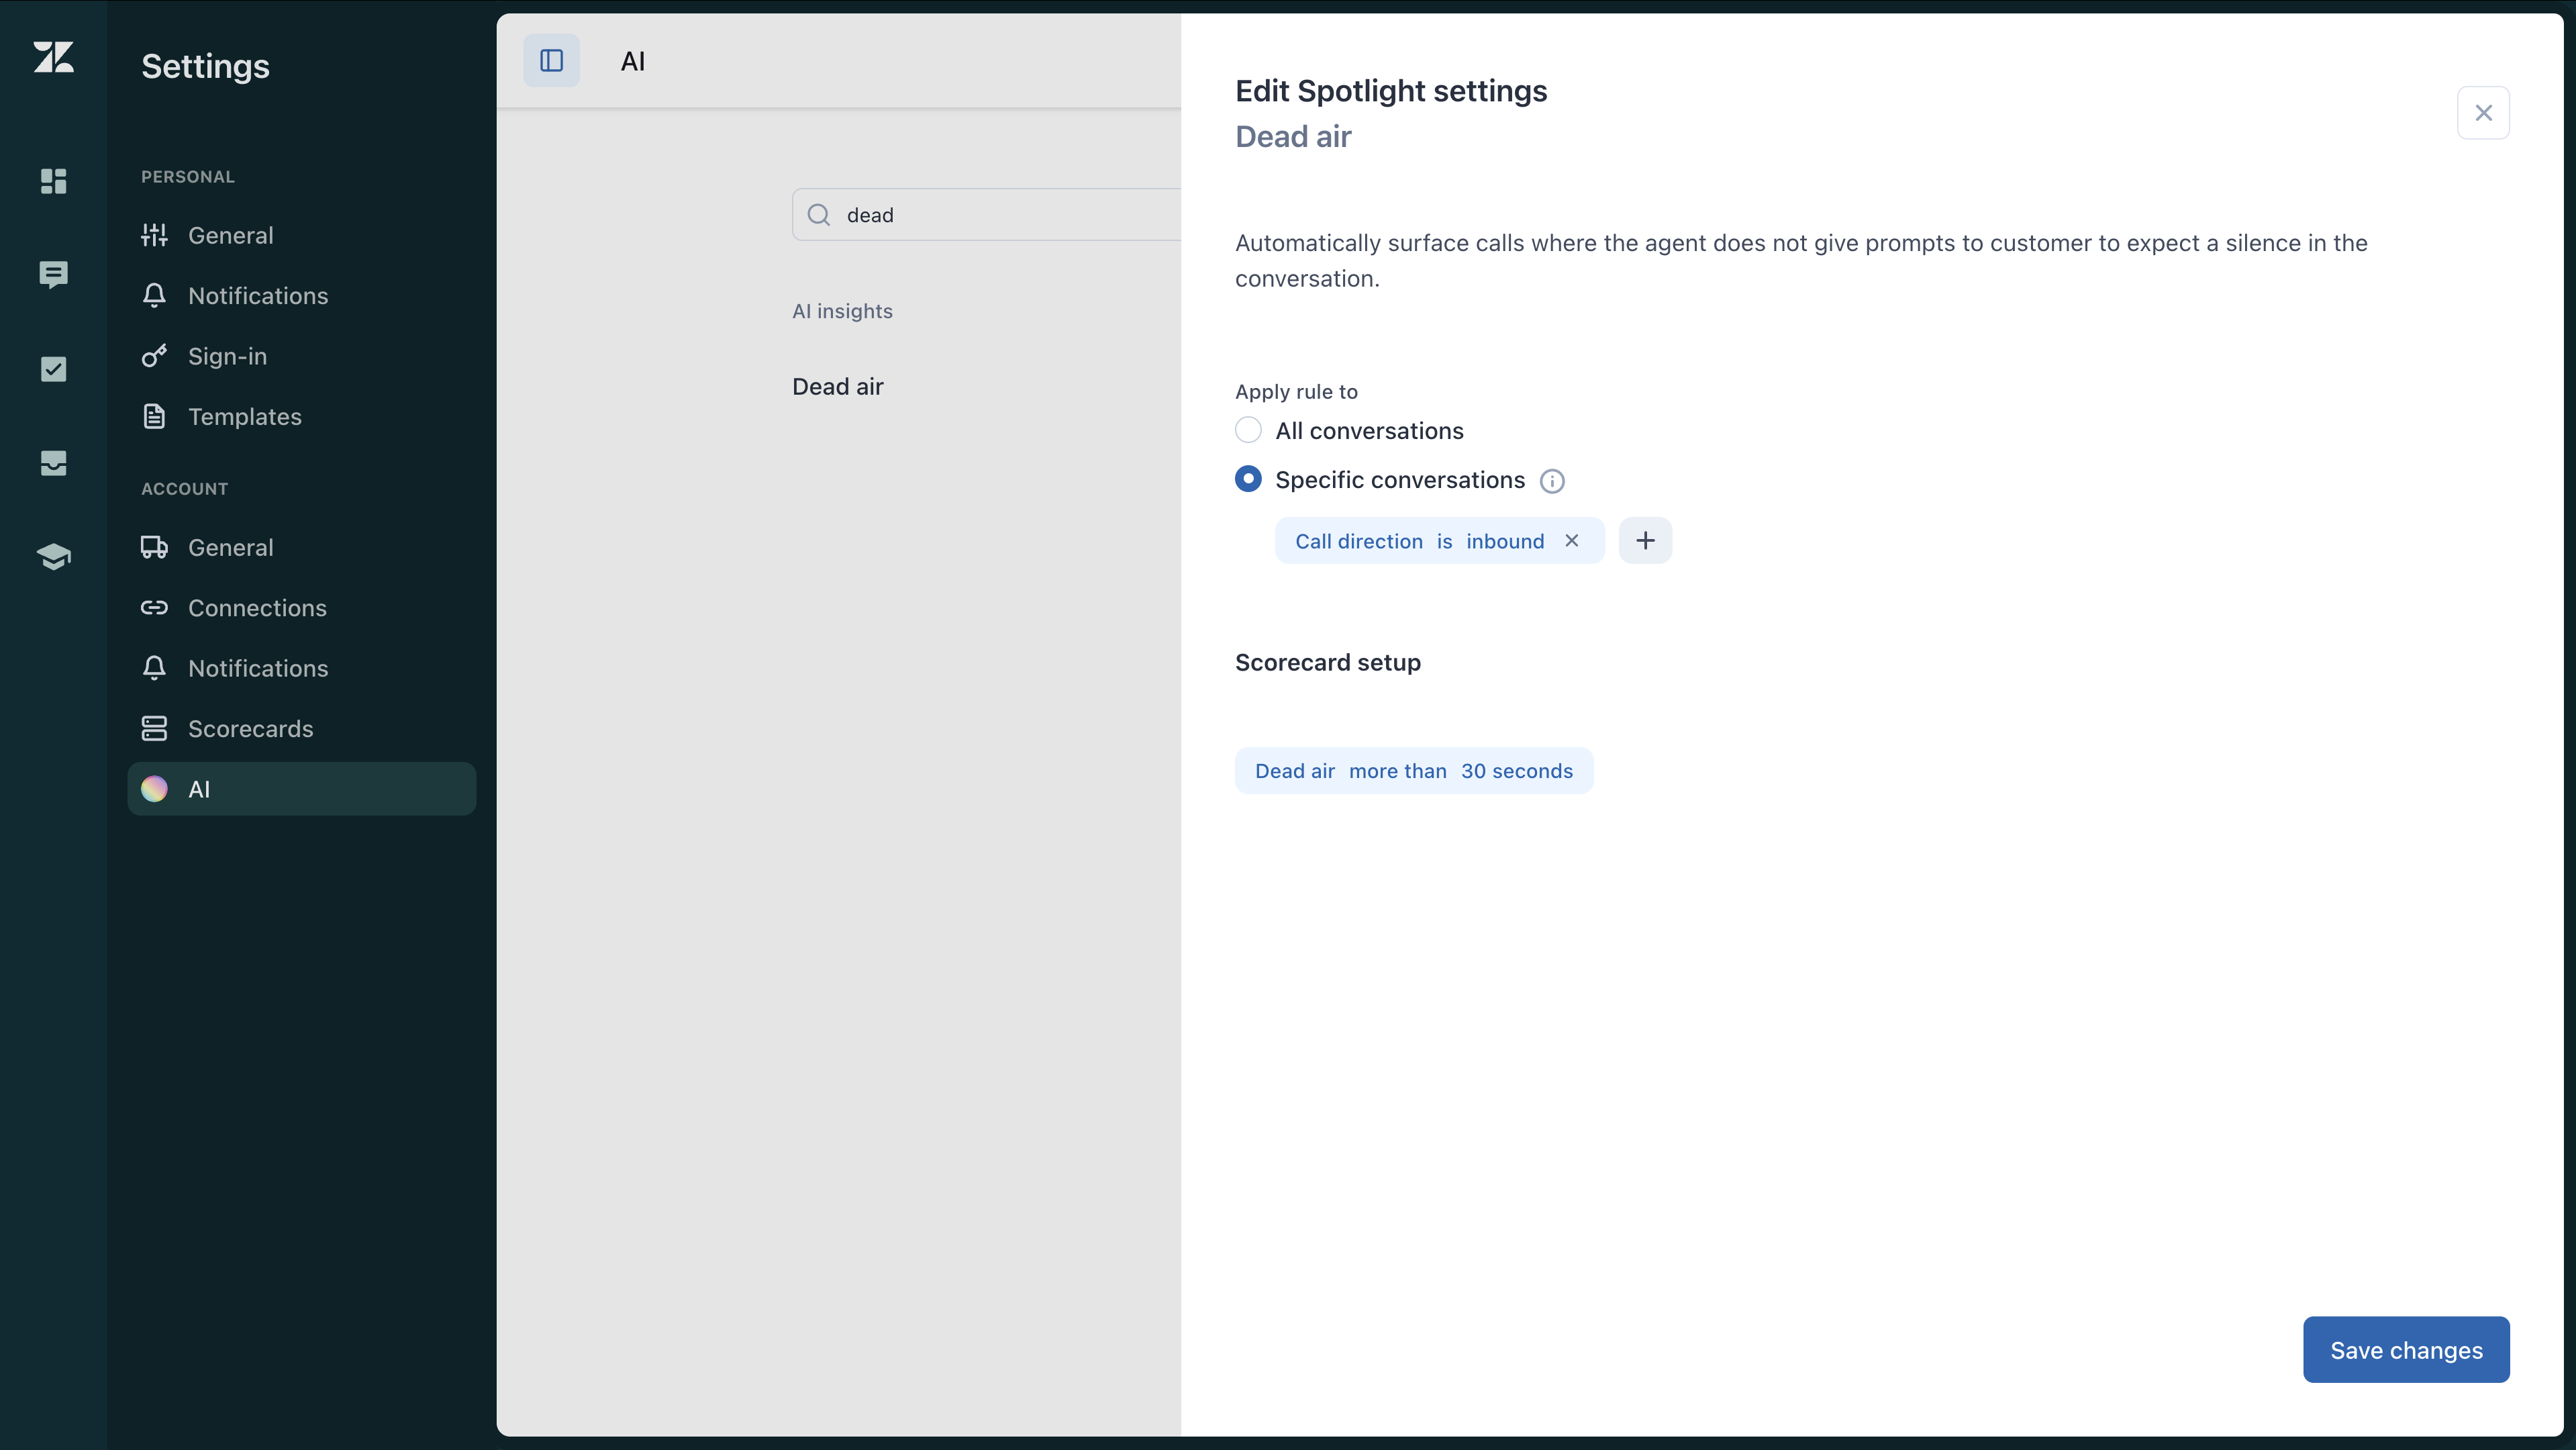
- Select whether the rule applies to All conversations or Specific
conversations.
If you select specific conversations, you must select which of the following conversations the insight applies to:
- Call direction: inbound or outbound
- Conversation brand
- Conversation channel
- Escalation
- Help desk tag
- Language
- Sentiment
- Source type
- Define the maximum Dead air threshold for your calls in seconds.
- Click Save changes.
To customize the Recording disclosure missing spotlight insight
- In Quality assurance, click your profile icon in the top-right corner.
- Click Settings.
- In the sidebar under Account, click AI.
- Under Usage, select Spotlight to display a list of all your spotlights.
- Under Type, select System.
- Click the Recording disclosure missing spotlight insight to open it.
- Select whether the rule applies to All conversations or Specific
conversations.
If you select specific conversations, you must select which of the following conversations the insight applies to:
- Call direction: inbound or outbound
- Conversation brand
- Conversation channel
- Escalation
- Help desk tag
- Language
- Sentiment
- Source type
- Click Save changes.
Editing exact text-match spotlight insights
You can also edit the spotlight insights you have created.
To edit your spotlight insights
- In Quality assurance, click your profile icon in the top-right corner.
- Click Settings.
- In the sidebar under Account, click AI.
- Under Usage, select Spotlight to display a list of all your spotlights.
- Under Type select Exact text-match.
- Click the name of the spotlight insight you want to edit.
- Select whether the rule applies to All conversations or Specific
conversations.
If you select specific conversations, you must select which of the following conversations the insight applies to:
- Call direction: inbound or outbound
- Conversation brand
- Conversation channel
- Escalation
- Help desk tag
- Language
- Sentiment
- Source type
- Click Save changes.
Editing prompt-based AI insight spotlights
Once you have created AI prompt-based spotlight insights, you can edit, enhance, test, or validate them as needed.
To edit prompt-based spotlight insights
- In Quality assurance, click your profile icon in the top-right corner.
- Click Settings.
- In the sidebar under Account, click AI.
- Under Usage, select Spotlight to display a list of all your spotlights.
- Under Type select Prompt-based.
- Click the name of the spotlight insight you want to edit.
- Edit your prompt as needed.
- (Optional) If the AI suggestions toggle is turned off in your Account settings, click Validate to receive feedback and tips on how to improve your prompt without changing it.
- (Optional) If the AI suggestions toggle is turned on in your Account settings, click Enhance to refine the core intent of your prompt.
- Test your prompt.
- Click Save changes.
Activating a spotlight
A spotlight marked as inactive is not surfacing newly synced closed conversations. To allow it to automatically analyze conversations, it must be marked as active.
To mark a spotlight as active
- In Quality assurance, click your profile icon in the top-right corner.
- Click Settings.
- In the sidebar under Account, click AI.
- Under Usage, select Spotlight to display a list of all your spotlights.
- Next to the spotlight you want to activate, click the options menu (
 ) and select Mark as active.
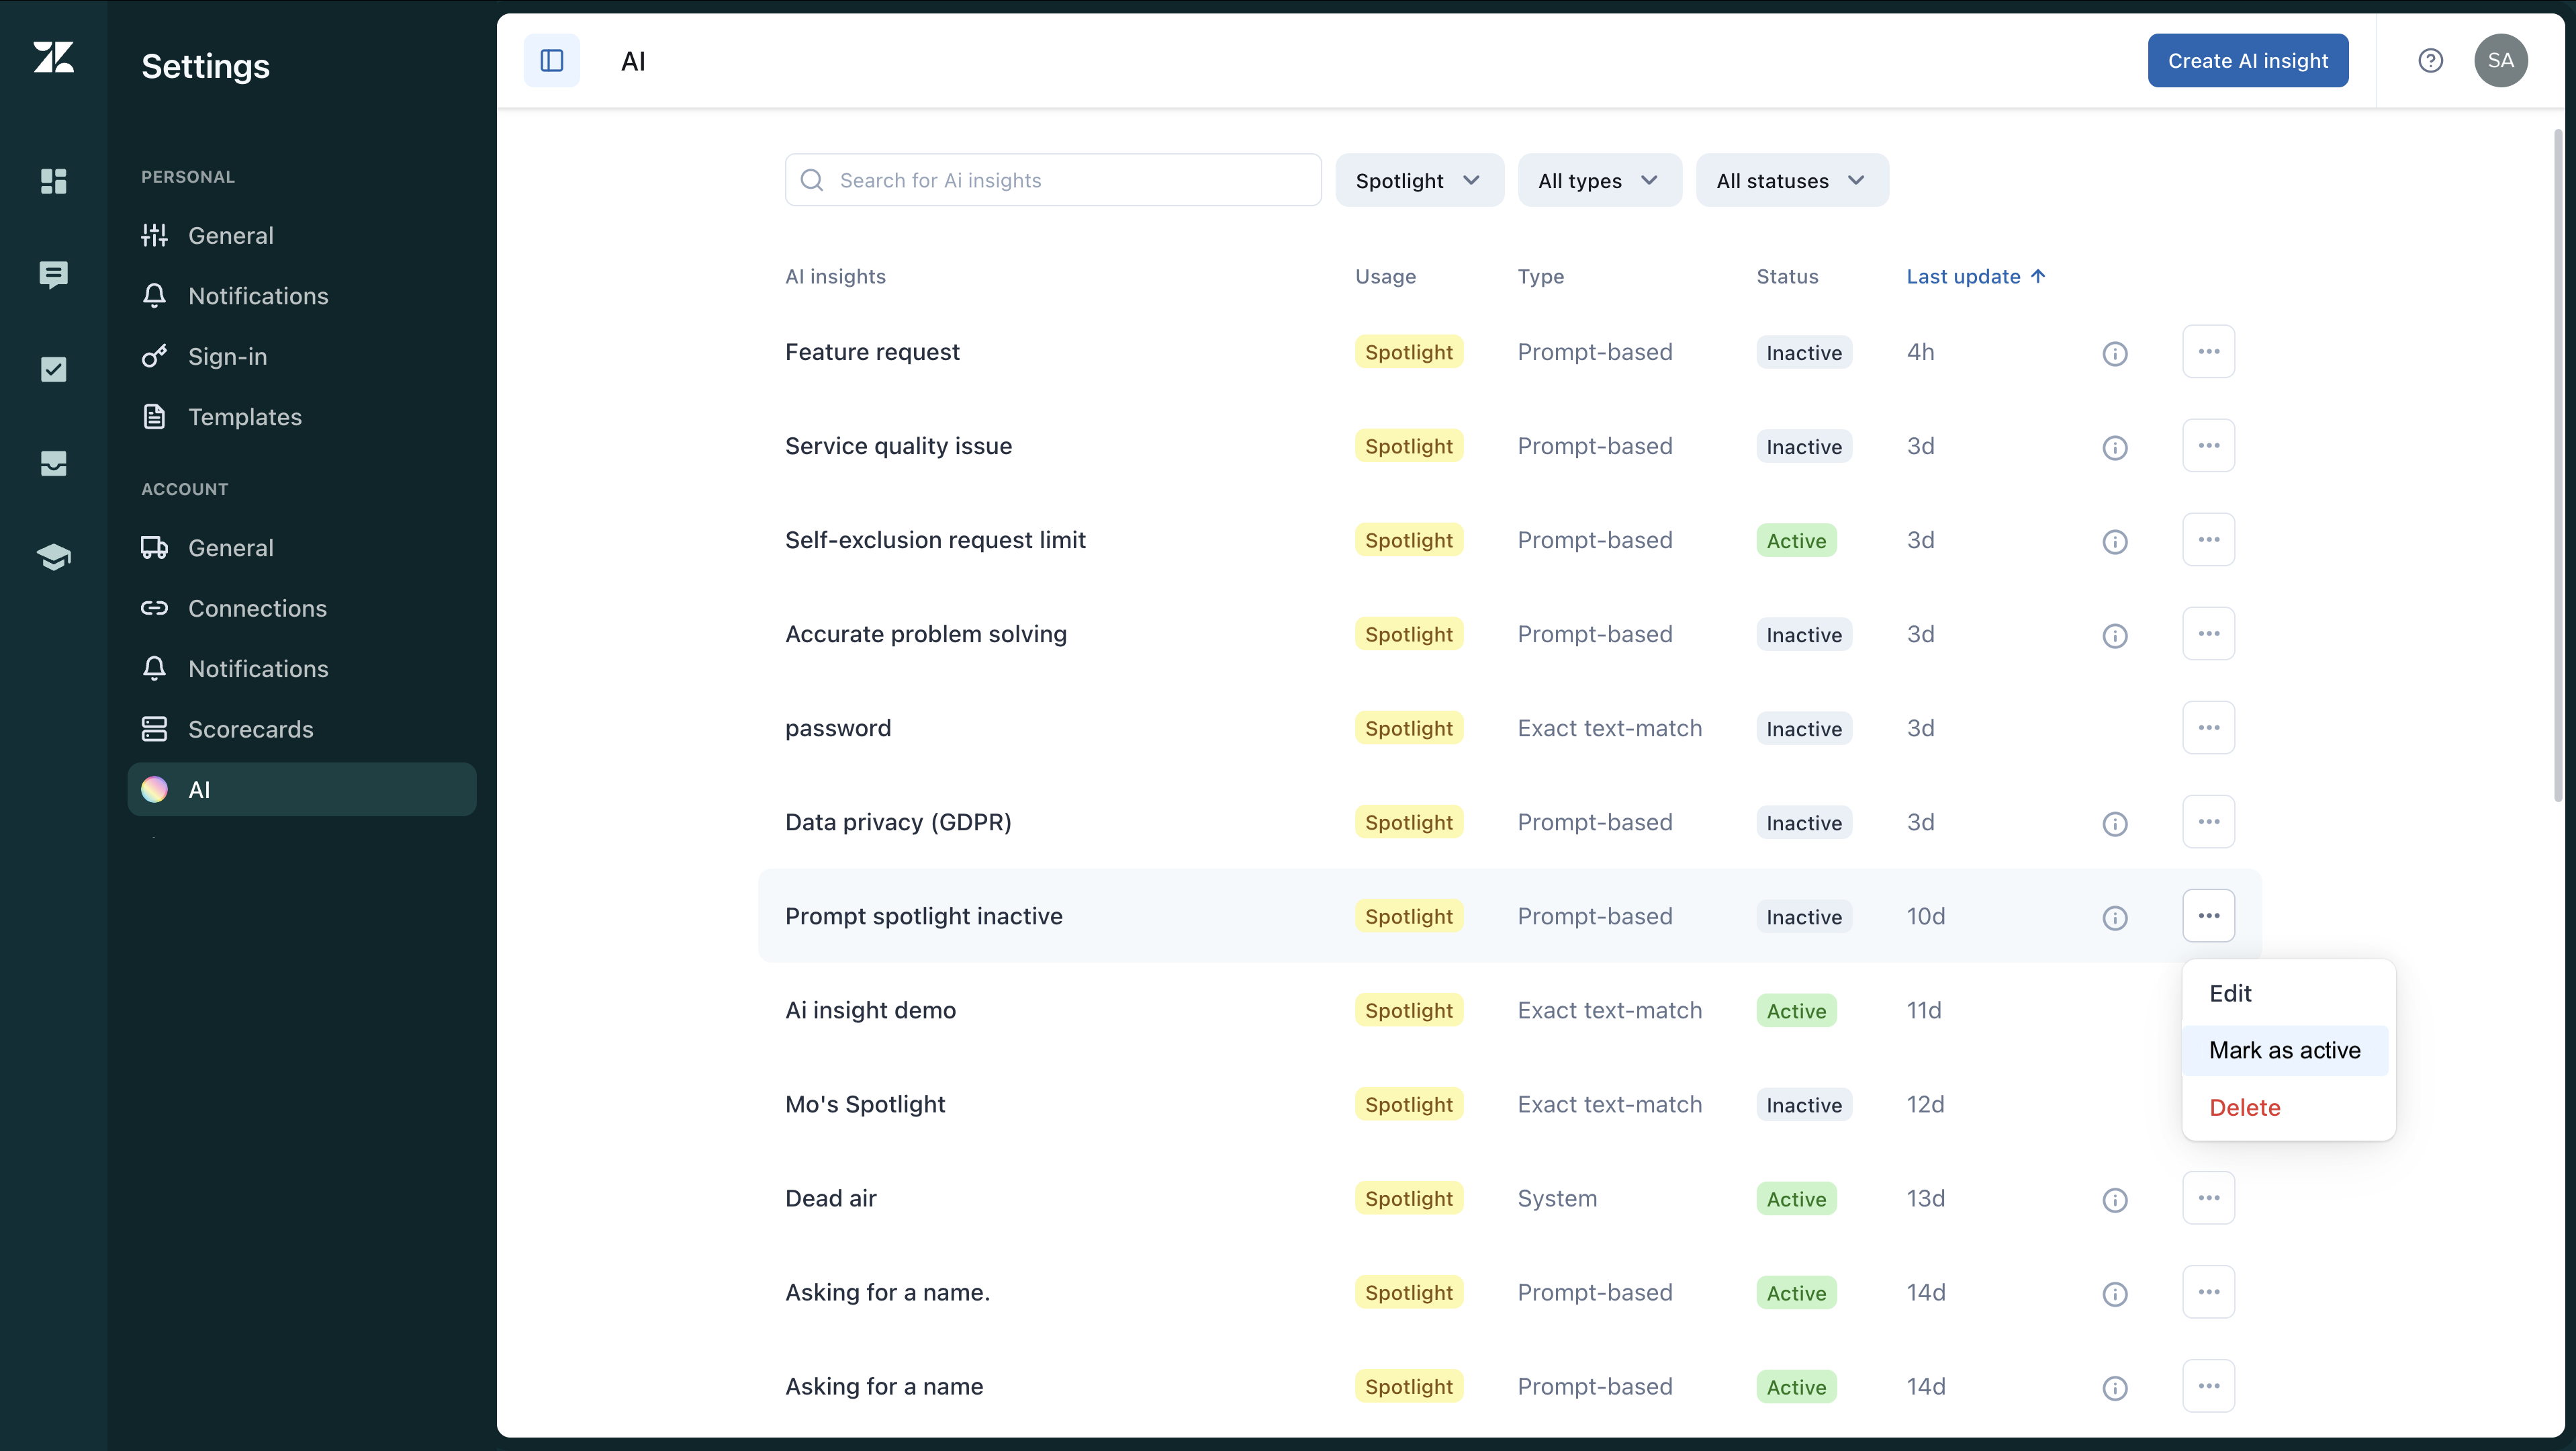
Deactivating a spotlight
A spotlight marked as active currently surfaces newly synced closed conversations. Marking a spotlight as inactive stops it from automatically analyzing conversations. However, inactive spotlights remain available for reporting and filtering.
To mark a spotlight as inactive
- In Quality assurance, click your profile icon in the top-right corner.
- Click Settings.
- In the sidebar under Account, click AI.
- Under Usage, select Spotlight to display a list of all your spotlights.
- Next to the spotlight you want to deactivate, click the options menu () and select Mark as inactive.
Deleting a spotlight
Deleting spotlights is permanent and erases all spotlight data from reporting. Once deleted you can't restore the spotlight or its data.
To delete a spotlight
- In Quality assurance, click your profile icon in the top-right corner.
- Click Settings.
- In the sidebar under Account, click AI.
- Under Usage, select Spotlight to display a list of all your spotlights.
- Next to the spotlight you want to delete, click the options menu () and select Delete.