Articles in the series
Live channels (voice and messaging) are directly routed to the pool of agents who have been assigned to provide support to those channels. If no agents are available or during off hours, requests from those live channels can be followed up on.
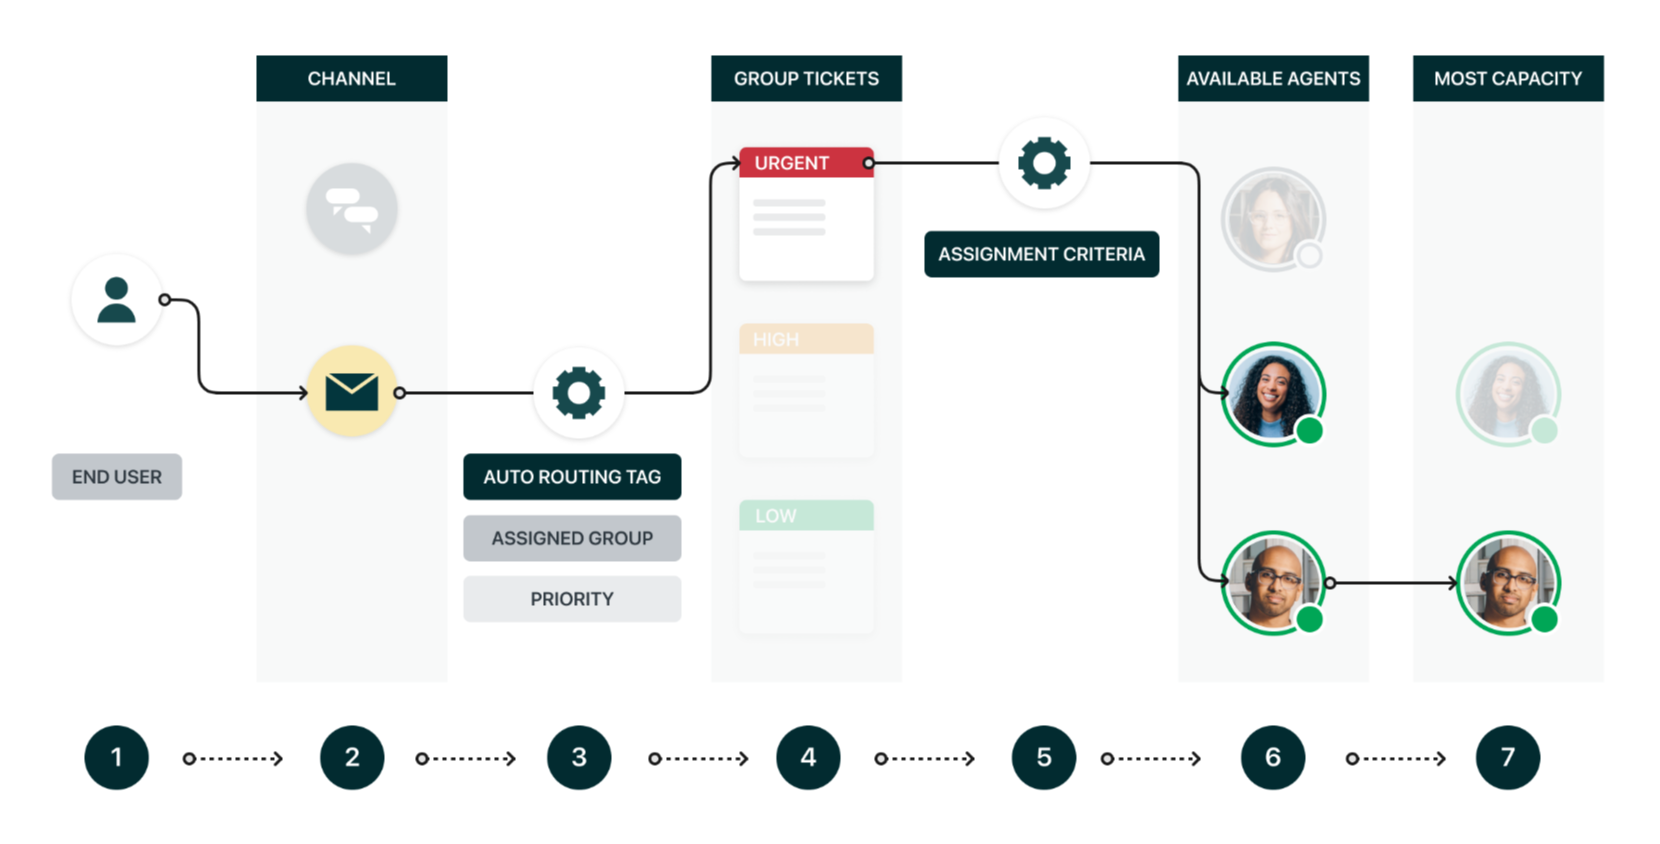
Incoming support requests from most channels can be routed directly to agents by omnichannel routing, or you can use business rules such as ticket triggers and automations to direct tickets from any channel to specific agents or groups and organized into views.
Omnichannel routing is the default routing experience and sends work directly to the agents most available and suited to handle them. Calls are always offered to agents, messaging conversations can be offered or auto-accepted, and email tickets are always assigned to agents. Within omnichannel routing, you can prioritize tickets based on ticket priority or time to SLA breach, uses queues to route tickets to multiple groups of agents to increase the odds of a quick response, and use many other settings to tailor your routing configuration to your needs. All other business rules involved in routing tickets provide a pull routing model, where tickets are assigned to groups and then agents manually assign tickets to themselves from the pool of tickets assigned to the groups they are members of.
If you turn off omnichannel routing, you can use ticket triggers and automations to assign incoming tickets to groups. After a group is assigned, calls and messaging conversations are offered to agents within the group, and tickets created through email channels are visible in views and agents can self-assign tickets. Some examples of how you might use standalone business rules to route tickets include assigning voice calls to specific groups so that only agents in those groups can see and respond to the calls, automatically assigning tickets sent to a specific email address to a specific group, and using skills-based routing to send email tickets or live chats to agents with the matching skills. All of these examples can also be accomplished with omnichannel routing.
You set up and manage ticket routing in Admin Center.
To automatically route your tickets with omnichannel routing, you either need to create custom queues (recommended) or configure ticket triggers that assign groups to all incoming tickets and add the auto-routing tag to email tickets. Queue-based routing provides the most sophisticated routing features, while group-based routing within omnichannel routing works automatically for calls and messaging conversations and provides a routing experience similar to the standalone business rule routing options.

Business rules, such as ticket triggers and automations, can be used with omnichannel routing or on their own. They evaluate ticket data and then take action on tickets that meet the specified criteria. For example, incoming support requests from a specific channel are assigned to a specific group, as in the example above. You can also modify the other ticket data, such as setting the ticket’s priority based on who sent you the support request. Whether you use omnichannel routing or not, ticket triggers and automations are still the primary mechanism that sends notifications to end users.

It is also possible to handle ticket routing manually. As an example, if you want to triage all incoming tickets before assigning them to agents, you can assign someone the role of triage agent who evaluates the incoming tickets in a view that’s been created for that task and then manually assigns the tickets to the appropriate agent or group. However, this approach is only viable with relatively low ticket volumes.
For a detailed explanation of ticket routing and links to articles that provide setup instructions, read Routing options for incoming tickets.
Continue to Part 7: Managing support requests during non-business hours.