Zendesk offers a set of standard ticket statuses to help you manage your ticket workflows. When custom ticket statuses are activated, you can create additional ticket statuses that are more meaningful to your business and end users.
With form ticket statuses, you can define which ticket statuses should appear in certain ticket forms. Associating ticket statuses to forms allows you to only show ticket statuses that are relevant to the ticket an agent is working on. This results in a shorter list of ticket statuses in the status picker for agents to choose from and can help them select the appropriate status more quickly.
Understanding form ticket statuses
Form ticket statuses are the standard and custom statuses you associate with your ticket forms.
Associating ticket statuses to forms allows you to only show ticket statuses that are relevant to the ticket an agent is working on. For example, say you have a ticket form for Customer Returns and an internal ticket form for Agent Onboarding. You can create custom ticket statuses that are relevant to each form, such as Refund issued or Training in process. By associating statuses to relevant forms, agents can quickly find the appropriate status.
About the agent experience with form ticket statuses
Agents can select the appropriate status from the status picker in the Zendesk Agent Workspace. When agents switch the form applied to a ticket, the status picker updates the statuses associated with the form. Agents benefit from form ticket statuses because they can quickly find the status relevant to a ticket and don’t have to scroll through a long list of statuses.

Associating ticket statuses to forms
Your default ticket statuses – initially, New, Open, Pending, On-hold (if activated), and Solved – are automatically associated with every form. If you’ve changed your default ticket status names, then those statuses appear on your forms.
Define which custom ticket statuses should appear on ticket forms so that only relevant statuses are displayed. You can also associate ticket statuses to one or more forms when you create a new ticket status.
To associate ticket statuses to a form
-
In Admin Center, click
 Objects and rules in the sidebar, then select Tickets > Ticket
statuses.
Objects and rules in the sidebar, then select Tickets > Ticket
statuses.A list of your active ticket statuses appears on the All Ticket Statuses tab. If you haven’t created any custom ticket statuses yet, see Creating custom ticket statuses.
Tip: To view your default statuses, click the options menu icon ( ) at the top of the table and select
Default.
) at the top of the table and select
Default. - Click the Ticket statuses by form tab.
A list of your forms displays.

- Click the name of the form you want to associate ticket statuses with.
- Click the arrow next to each status category and select the
statuses you want to associate with the form.Note: Both active and inactive statuses appear. You can select only active statuses. See Activating and deactivating a ticket status.
As you add statuses to the form, the status picker Preview updates.

- Continue to add or remove statuses, then click
Save.
The number of statuses associated with the form update on the Ticket statuses by form tab and in the status picker in the agent interface. Learn more about the agent experience with form ticket statuses.
Managing form ticket statuses
On the Ticket statuses by form tab, you can edit which ticket statuses appear on your forms, view the number of standard and custom ticket statuses associated with each form, view which brands are assigned to the forms, search for forms, and filter forms by active status and brands.
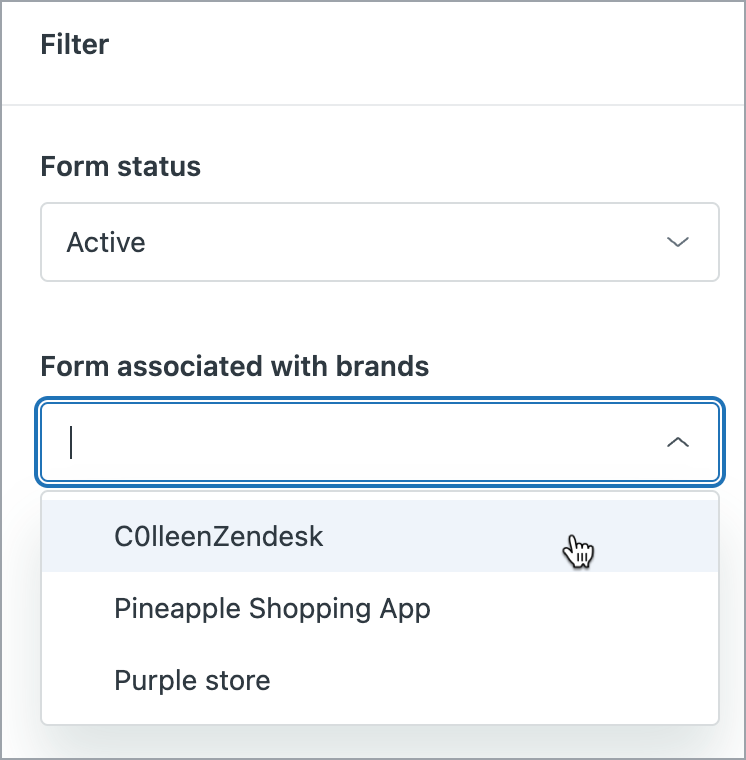
Searching and filtering forms
Search for and filter forms on the Ticket statuses by form tab to help quickly find the form whose statuses you want to manage.
To search and filter your forms
- In Admin Center, click
Objects and rules in the sidebar, then select Tickets > Ticket
statuses.
- Click the Ticket statuses by form tab.
- Take one of the following actions:
- To search for a specific form, enter a term in the search box.
- To filter forms by active status or brands,
click Filter.
Select Active or Inactive in the Form status menu, or click the Forms associated with brands menu and select the brands you want to filter by.
See Activating and deactivating ticket forms and Assigning brands to a ticket form to make changes to your forms.
Click Apply filters.